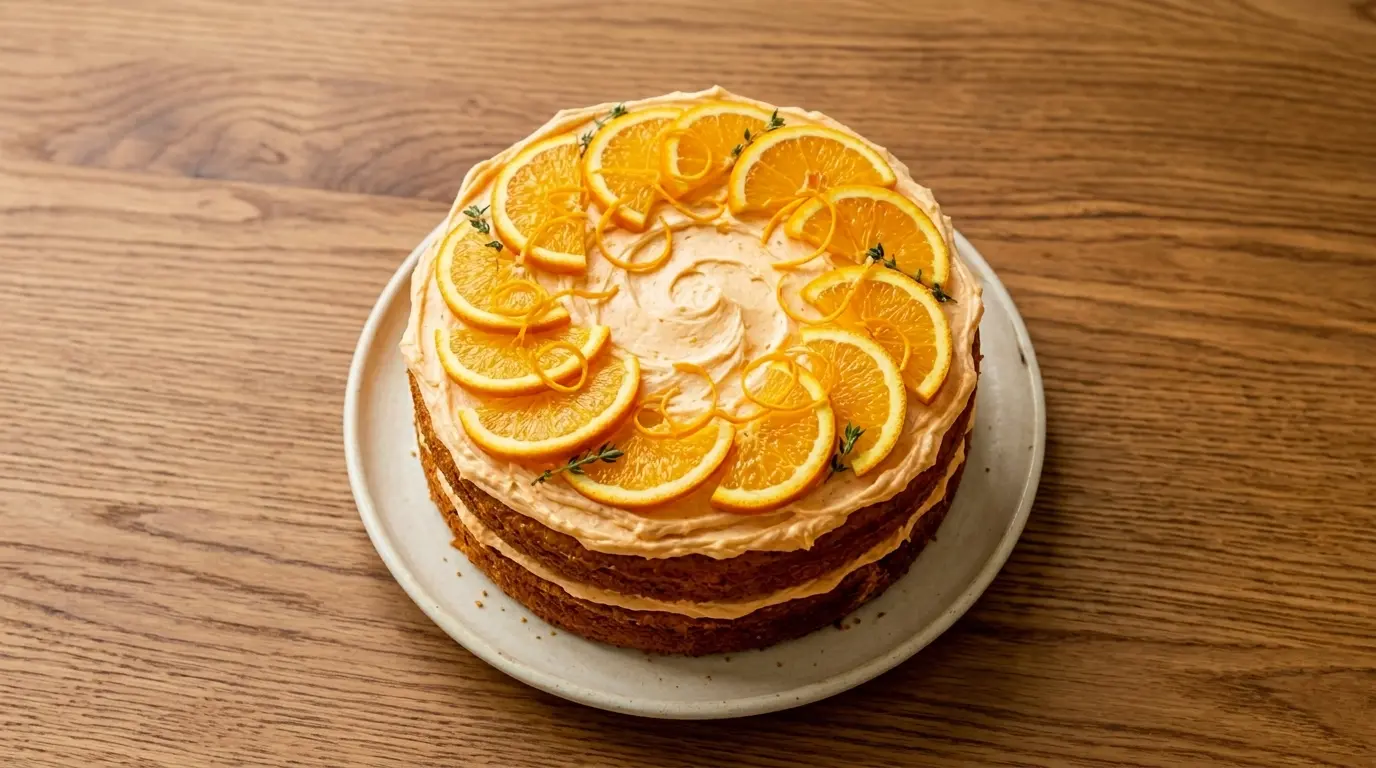
If you love a cake that looks as beautiful as it tastes, this orange velvet cake recipe is exactly what you need to try next. It delivers the same signature velvety, tender crumb that made red velvet cake a classic, but swaps the cocoa-and-red-food-coloring drama for a bright, sunny citrus twist. Fresh orange zest and orange juice woven through a buttermilk batter create layers so soft and moist they practically melt on your tongue.
The secret behind that irresistible velvety texture? Buttermilk and a small splash of white vinegar react together to break down the gluten just enough, creating a fine, cloud-like crumb you simply cannot get from a standard sponge. Top it all off with a tangy orange cream cheese frosting, and you have a showstopper dessert that works just as beautifully at a summer birthday party as it does on a holiday dessert table.
Whether you’re a confident baker or just getting started, this recipe guides you through every step with clear, detailed instructions. The ingredient list is simple and relies on pantry staples, so nothing here requires a specialty store run.
If you love soft, tender cake layers with bold flavor, the red velvet cake recipe is the classic cousin to this one and worth bookmarking too.
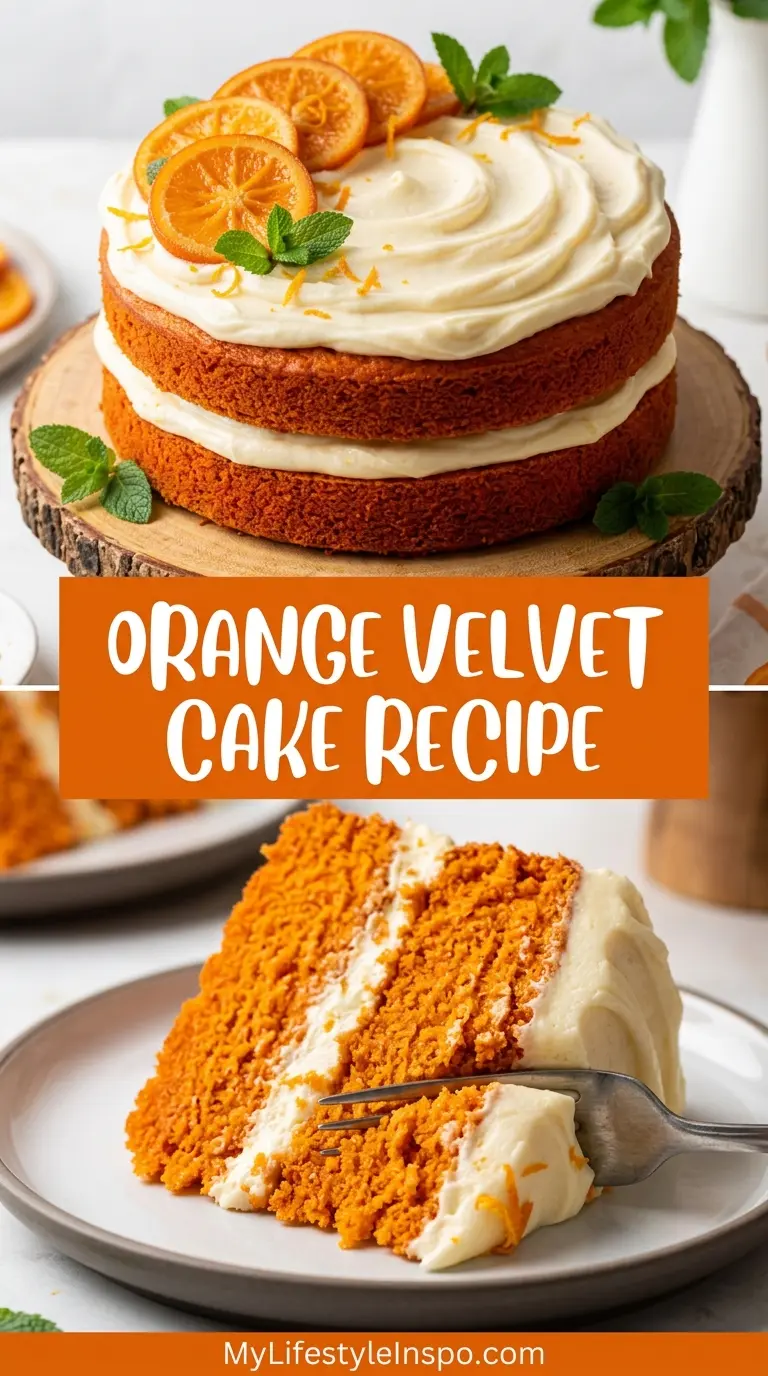
Why You’ll Love This Orange Velvet Cake Recipe
This cake checks every box: stunning looks, incredible texture, and a bold citrus flavor that feels fresh and unique without being complicated to make.
The combination of buttermilk and white vinegar is the real star of the show. These two ingredients work together to tenderize the crumb and give the cake that signature melt-in-your-mouth softness that velvet cakes are famous for.
Fresh orange zest and orange juice add layers of flavor that bottled extract just can’t match. The zest carries the bright, aromatic top notes while the juice brings a subtle tang that balances the sweetness of the cake.
The orange cream cheese frosting is a perfect partner for the cake layers. It’s tangy, silky, and just sweet enough, pulling the whole dessert together into something that genuinely tastes like sunshine on a plate.
- A show-stopping appearance with its warm golden-orange hue that makes it an instant centerpiece at any gathering
- Incredibly moist layers thanks to the buttermilk and vinegar technique used in classic velvet cakes
- Balanced, vibrant citrus flavor from fresh orange zest and juice throughout both the cake and frosting
- Beginner-friendly steps with clear instructions that make it easy to nail on your first attempt
- Versatile for any occasion from birthday cakes and baby showers to holiday dinners and weekend baking projects
The same tangy cream cheese frosting used here works beautifully in the carrot cake with cream cheese frosting recipe if you’re building a dessert table.
Ingredients
This orange velvet cake uses straightforward ingredients that are easy to find, but each one plays a specific role in building flavor and texture. Using full-fat buttermilk is important here since its acidity is what activates the baking soda and creates that soft crumb. Room-temperature eggs and buttermilk incorporate into the batter far more smoothly than cold ones, so plan to pull them from the fridge about 30 minutes ahead.
For the Cake:
- 2 1/2 cups (315g) all-purpose flour
- 1 teaspoon baking soda
- 1/2 teaspoon baking powder
- 1/2 teaspoon salt
- 1 1/2 cups (300g) granulated sugar
- 2 large eggs, room temperature
- 1 cup (240ml) vegetable oil
- 1 cup (240ml) full-fat buttermilk, room temperature
- 3 tablespoons fresh orange juice (about 1 large orange)
- 2 tablespoons fresh orange zest (about 2 medium oranges)
- 2 teaspoons pure vanilla extract
- 1 teaspoon white vinegar
- Orange gel food coloring (optional, for a deeper color)
For the Orange Cream Cheese Frosting:
- 16 oz (450g) full-fat cream cheese, softened to room temperature
- 1/2 cup (115g) unsalted butter, softened to room temperature
- 4 cups (480g) powdered sugar, sifted
- 2 tablespoons fresh orange juice
- 1 tablespoon fresh orange zest
- 1 teaspoon pure vanilla extract
- Pinch of salt
The lemon cake recipe on this site uses a similar buttermilk batter technique if you’d like to explore another citrus cake.
Kitchen Equipment Needed
Having the right tools makes this recipe significantly easier and ensures more consistent results. Two 9-inch round cake pans are the standard size for this recipe. Using parchment paper circles in the bottom of each pan guarantees the cakes release cleanly every time, saving you the frustration of a stuck layer.
- Two 9-inch round cake pans
- Parchment paper
- Stand mixer or hand mixer
- Large mixing bowl
- Medium mixing bowl
- Rubber spatula
- Kitchen scale (recommended for accuracy)
- Citrus zester or microplane
- Citrus juicer
- Measuring cups and spoons
- Wire cooling rack
- Offset spatula for frosting
- Cake turntable (optional, makes frosting much easier)
- Toothpick or cake tester
Read Also: Cream Cheese Frosting Recipe
Recommended Products for This Recipe
These are a few products that genuinely make a difference when baking this orange velvet cake. Each recommendation is based on quality and how directly it impacts your results.
1. Wilton Aluminum Round Cake Pans (9-inch, Set of 2)
Aluminum pans conduct heat evenly, which means your cake layers bake at a consistent temperature from edge to center. This prevents the dreaded dome effect and gives you flat, even layers that stack beautifully. They also release cakes cleanly when lined with parchment, making them a smart long-term investment for any baker.
2. Microplane Premium Classic Zester
Zesting oranges is one of the most important steps in this recipe, and a proper microplane makes it effortless. It produces fine, fluffy zest full of flavorful oils rather than the thick, bitter strips a box grater creates. The difference in flavor output between a microplane and a standard grater is genuinely significant.
3. KitchenAid Tilt-Head Stand Mixer
Creaming butter and cream cheese for the frosting requires sustained mixing that is much harder to achieve with a hand mixer. A stand mixer handles this effortlessly and frees up your hands for other tasks. The paddle attachment also creates a silky, lump-free frosting every time.
4. Ateco Offset Spatula
A good offset spatula is the single most important tool for getting smooth, professional-looking frosting on a layer cake. The angled blade lets you spread frosting evenly across the top and sides without your hand dragging through the frosted surface.
5. Sugarflair Orange Gel Food Coloring
If you want that gorgeous, deep orange color in your cake layers, a high-quality gel food coloring is essential. Gel colors are far more concentrated than liquid drops, so you use less and get a more vibrant, consistent result without thinning your batter.
Another favorite for citrus dessert inspiration: Lemon Chiffon Cake Recipe

Step-by-Step Instructions
1. Prepare Your Pans and Preheat the Oven
- Preheat your oven to 350°F (175°C) and position the rack in the center of the oven.
- Grease the inside of both 9-inch round cake pans thoroughly with butter or non-stick baking spray, making sure to coat the sides as well as the bottom.
- Cut two circles of parchment paper to fit the bottom of each pan, press them in, and then lightly grease the top of the parchment paper as well. This double-grease method ensures the cakes release perfectly every time.
- Set the prepared pans aside.
2. Mix the Dry Ingredients
- In a large mixing bowl, add 2 1/2 cups (315g) of all-purpose flour, 1 teaspoon of baking soda, 1/2 teaspoon of baking powder, and 1/2 teaspoon of salt.
- Whisk these dry ingredients together for about 30 seconds until they are evenly combined.
- Set the dry ingredient bowl aside. Do not add anything else to this bowl yet.
3. Combine the Wet Ingredients
- In a separate medium mixing bowl, whisk together 1 1/2 cups (300g) of granulated sugar and 2 large room-temperature eggs until the mixture looks pale and slightly thickened, about 1 minute.
- Add 1 cup (240ml) of vegetable oil and whisk again until the oil is fully incorporated and the mixture looks smooth and uniform.
- Pour in 1 cup (240ml) of room-temperature buttermilk, 3 tablespoons of fresh orange juice, 2 tablespoons of orange zest, 2 teaspoons of pure vanilla extract, and 1 teaspoon of white vinegar.
- Whisk everything together until the wet mixture is smooth and well combined. If you’re using orange gel food coloring, add a small amount now (start with the tip of a toothpick dipped in gel coloring) and stir it in, adding more gradually until you reach your desired orange shade.
4. Combine Wet and Dry Ingredients
- Pour the wet ingredient mixture into the bowl with the dry ingredients.
- Using a rubber spatula or a hand mixer on low speed, gently fold the two mixtures together until just combined. Stop mixing as soon as you no longer see streaks of flour.
- Do not overmix the batter. Overmixing develops too much gluten, which will make your cake layers dense and chewy rather than soft and velvety. A few small lumps in the batter are completely fine.
5. Divide and Bake the Cake Layers
- Divide the batter evenly between the two prepared 9-inch cake pans. You can use a kitchen scale to weigh each pan for perfectly even layers, or simply pour until they look equal.
- Use your rubber spatula to smooth the tops of each batter-filled pan so the surface is level.
- Place both pans on the center rack of the preheated oven. If your oven is too small to fit them side by side, place them on separate racks but swap their positions halfway through baking for even heat distribution.
- Bake for 28 to 33 minutes, checking at the 28-minute mark. The cakes are done when a toothpick inserted into the center comes out clean or with just a few moist crumbs, the tops spring back when lightly touched, and the edges have pulled slightly away from the sides of the pan.
- Remove the pans from the oven and place them on a wire cooling rack.
6. Cool the Cake Layers Completely
- Allow the cakes to cool in their pans on the wire rack for exactly 10 minutes. Do not skip this step; removing them too early risks breaking the layers.
- After 10 minutes, run a thin knife or offset spatula around the edges of each pan to loosen the cakes, then invert them onto the cooling rack.
- Carefully peel off the parchment paper from the bottom of each layer and discard it.
- Allow the cake layers to cool completely to room temperature before frosting. This usually takes 1 to 2 hours. Frosting warm cake layers will cause the frosting to melt and slide off. If you’re in a hurry, you can place the layers (uncovered) in the freezer for about 30 minutes to speed up cooling.
7. Make the Orange Cream Cheese Frosting
- In the bowl of your stand mixer fitted with the paddle attachment, or in a large bowl using a hand mixer, beat 16 oz (450g) of softened full-fat cream cheese on medium speed for about 2 minutes until it is completely smooth, fluffy, and free of any lumps.
- Add 1/2 cup (115g) of softened unsalted butter to the cream cheese and beat on medium speed for another 2 minutes, scraping down the sides of the bowl with a rubber spatula, until the butter and cream cheese are fully combined and very light.
- Reduce the mixer speed to low and gradually add 4 cups (480g) of sifted powdered sugar, adding it in about four additions and allowing each addition to incorporate before adding more. Adding the sugar slowly prevents it from puffing out of the bowl in a cloud.
- Once all the powdered sugar is incorporated, add 2 tablespoons of fresh orange juice, 1 tablespoon of orange zest, 1 teaspoon of vanilla extract, and a pinch of salt.
- Increase the mixer speed to medium-high and beat the frosting for 2 to 3 minutes until it is light, fluffy, and silky. Taste the frosting and adjust by adding more orange juice for a stronger citrus flavor or more powdered sugar if you prefer it sweeter.
8. Assemble and Frost the Cake
- Place one cooled cake layer on your serving plate or cake board, flat side down.
- Scoop about one-third of the frosting onto the top of the first layer and use your offset spatula to spread it evenly all the way to the edges, creating a flat, even layer of frosting about 1/4 inch thick.
- Carefully place the second cake layer on top, flat side up (this gives you a clean, flat top surface for frosting).
- Apply a thin “crumb coat” of frosting over the top and sides of the entire cake. This first thin layer traps any loose crumbs so they don’t show up in your final frosting layer. Use your offset spatula to spread it as evenly as possible.
- Place the crumb-coated cake in the freezer for 10 to 15 minutes to firm up.
- Remove the cake from the freezer and apply the remaining frosting to the top and sides, working in smooth strokes with your offset spatula. Use a cake turntable if you have one for easier, more even coverage.
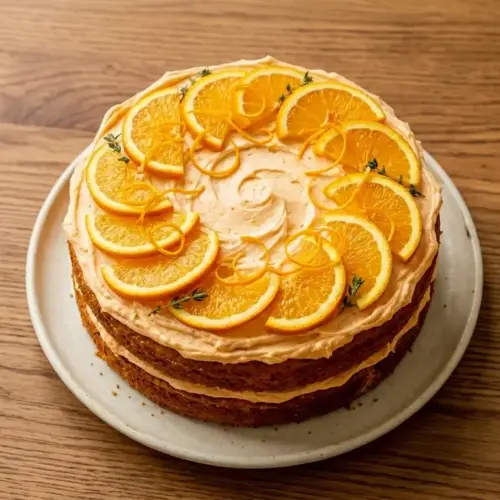
- Decorate the finished cake with fresh orange slices, extra orange zest, or small curls of orange peel as desired.
This recipe pairs wonderfully with a glass of fresh orange smoothie for a complete citrus-themed dessert experience.
Tips for Success
These practical tips will help you get the best possible results from this orange velvet cake recipe, even on your very first attempt. The most common mistakes in velvet cakes come down to temperature and mixing, so keeping these two things in check is the key to perfect layers.
- Use room-temperature ingredients. Cold eggs and cold buttermilk do not emulsify into the batter as smoothly, which can lead to a dense or uneven crumb. Pull your refrigerated ingredients out at least 30 minutes before baking.
- Measure flour correctly. Scooping your measuring cup directly into the flour bag packs it down and adds too much flour. Instead, spoon the flour into the measuring cup and level it off with a straight edge, or use a kitchen scale for the most accurate results.
- Do not overmix the batter. Once you combine the wet and dry ingredients, mix only until the streaks of flour disappear. Overmixing develops gluten and makes the cake tough.
- Test your oven temperature. Many home ovens run hot or cold. An inexpensive oven thermometer can tell you whether your oven is accurately calibrated, which makes a big difference in baking results.
- Cool the layers completely before frosting. This is non-negotiable. Even slightly warm cake will cause the cream cheese frosting to become runny and difficult to control.
- Sift the powdered sugar for the frosting. Sifting removes lumps and results in a much smoother, silkier frosting.
- Chill the crumb coat before the final frosting layer. This 10 to 15-minute freeze step makes it much easier to get a clean, professional-looking finish on the outside of the cake.
Read Also: Vanilla Buttercream Frosting Recipe
Serving Suggestions
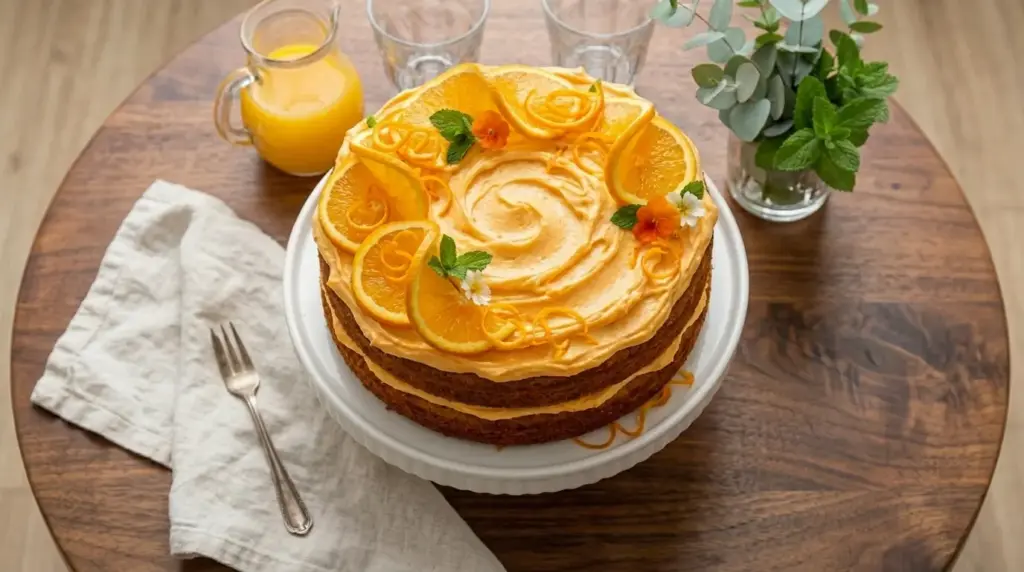
This orange velvet cake is a complete showstopper on its own, but a few thoughtful serving ideas can take it to the next level. It pairs beautifully with simple, fresh accompaniments that complement rather than compete with the citrus flavor.
Serve thin slices of this cake alongside a scoop of vanilla bean ice cream for a dessert combination that never fails to impress. The cold creaminess of the ice cream alongside the soft, tangy cake is an outstanding contrast.
- Garnish each slice with a thin twist of fresh orange peel and a light dusting of powdered sugar for an elegant presentation at dinner parties.
- Serve with a small spoonful of fresh strawberry sauce drizzled alongside the slice for a gorgeous color contrast and a berry-citrus flavor combination.
- Pair with a cup of hot tea or a latte for an indulgent afternoon treat.
- Serve at room temperature for the best texture; straight from the fridge, the frosting can be quite firm, so let refrigerated slices sit for 15 to 20 minutes before serving.
- Decorate the serving platter with fresh orange slices, edible flowers, or a scattering of toasted coconut for a beautiful presentation.
Another favorite for an easy and elegant dessert pairing: Fruit Tart Recipe
Variations to Try
The base recipe for this orange velvet cake is incredibly versatile, and it lends itself well to a handful of creative variations. Once you’ve mastered the original, experimenting with different flavors and formats is a lot of fun.
- Chocolate orange velvet cake: Add 1 tablespoon of unsweetened cocoa powder to the dry ingredients for a subtle chocolatey depth that plays beautifully with the orange flavor.
- Orange dreamsicle cupcakes: Pour the batter into a lined muffin tin, filling each cup about two-thirds full, and bake at 350°F (175°C) for 18 to 22 minutes. Top with the orange cream cheese frosting for individual servings.
- Layered citrus cake: Replace half the orange juice and zest with lemon juice and lemon zest for a mixed citrus cake with a bright, complex flavor.
- Orange bundt cake: Pour all the batter into a greased and floured bundt pan and bake for 45 to 55 minutes. Finish with a simple orange glaze (powdered sugar whisked with fresh orange juice) instead of the cream cheese frosting.
- Lemon cream cheese frosting swap: Use lemon juice and lemon zest in the frosting instead of orange for a tart lemon-orange flavor combination.
- Toasted coconut decoration: Press lightly toasted shredded coconut onto the sides of the frosted cake for an added textural crunch and a tropical flavor note.
For another gorgeous layer cake to add to your baking rotation, the Italian cream cake recipe is a fantastic option.
Storage and Reheating
Because this cake is frosted with cream cheese frosting, proper storage is important to maintain both food safety and the best possible texture. Cream cheese frosting should always be refrigerated, unlike some other frostings that are stable at room temperature.
- Refrigerator: Store the frosted cake covered in the refrigerator for up to 5 days. Use a large cake dome or press a sheet of plastic wrap gently against the cut surfaces to prevent the exposed cake from drying out.
- Room temperature before serving: Remove the cake from the refrigerator 20 to 30 minutes before serving so the frosting softens and the cake layers return to their best texture and flavor.
- Freezing unfrosted layers: The baked cake layers (without frosting) can be wrapped tightly in two layers of plastic wrap and frozen for up to 3 months. Thaw overnight in the refrigerator before frosting.
- Freezing frosted slices: Individual frosted slices can be frozen. Place them on a baking sheet, freeze until solid (about 2 hours), then wrap each slice in plastic wrap and store in a zip-lock freezer bag for up to 2 months. Thaw in the refrigerator overnight.
- Do not microwave to reheat: Cream cheese frosting does not reheat well. Simply allow the cake to come to room temperature naturally before serving.
Read Also: Strawberry Cake Recipe
Nutritional Facts
The following values are approximate and based on one slice of a 12-slice orange velvet cake with cream cheese frosting. Actual values will vary based on specific brands and portion sizes used.
| Nutrient | Per Slice (1/12 of cake) |
|---|---|
| Calories | ~480 kcal |
| Total Fat | 26g |
| Saturated Fat | 9g |
| Cholesterol | 65mg |
| Sodium | 290mg |
| Total Carbohydrates | 58g |
| Dietary Fiber | 0.5g |
| Total Sugars | 42g |
| Protein | 5g |
| Vitamin C | ~5% DV |
| Calcium | ~6% DV |
| Iron | ~6% DV |
This cake is an indulgent treat and is best enjoyed as part of a balanced diet. Smaller serving sizes will reduce the calorie and sugar content proportionally.
Another beautiful cake for special occasions: Checkerboard Cake Recipe
Health Benefits of Key Ingredients
While this orange velvet cake is absolutely a dessert, a few of its key ingredients do bring some meaningful nutritional contributions worth knowing about. This doesn’t make it a health food, but it’s a nice reminder that good ingredients do more than just taste great.
Oranges (juice and zest) are one of the most nutrient-dense ingredients in this recipe. They are rich in vitamin C, a powerful antioxidant that supports immune function and collagen production. Orange zest in particular contains concentrated amounts of flavonoids, which are plant compounds linked to anti-inflammatory effects.
Eggs are a complete protein source, meaning they contain all nine essential amino acids. They also provide vitamins B12 and D, choline (important for brain health), and lutein, which supports eye health.
Buttermilk is a fermented dairy product that contains active cultures and is generally easier to digest than regular milk for some people. It’s also a good source of calcium and B vitamins.
- Fresh orange zest and juice provide vitamin C, flavonoids, and antioxidants that support immune health and reduce oxidative stress.
- Eggs contribute complete protein, B vitamins, and choline, which supports brain and nervous system health.
- Buttermilk supplies calcium, potassium, and probiotics from the culturing process.
- Vanilla extract contains small amounts of antioxidants and has been linked to anti-inflammatory properties in traditional uses.
For more citrus-forward inspiration, the lemon curd recipe on this site is a wonderful accompaniment to this cake.
Frequently Asked Questions
1. Can I make this orange velvet cake without a stand mixer?
Yes, you absolutely can. A hand mixer works perfectly well for both the cake batter and the cream cheese frosting. For the frosting especially, make sure your cream cheese and butter are very well softened to room temperature before you start, as this makes it significantly easier to beat them smooth with a hand mixer. You can also mix the cake batter by hand with a whisk, as long as you are careful not to overmix once the flour goes in.
2. Can I use bottled orange juice instead of fresh?
Fresh orange juice is strongly recommended here because bottled juice has a different flavor profile, often more muted and sometimes slightly bitter from processing. The fresh juice and especially the zest are what give this cake its bright, vibrant citrus flavor. If you absolutely must use bottled, choose a 100% pure orange juice with no added sugar, but expect a milder result.
3. Why did my cake layers come out dense instead of velvety?
Dense cake layers in a velvet cake recipe almost always come down to one of three causes. The most common is overmixing the batter after adding the flour, which develops too much gluten. The second is using cold buttermilk or eggs straight from the fridge, which prevents proper emulsification. The third is measuring the flour incorrectly by scooping it directly with the measuring cup, which packs in too much flour. Review those three steps and you should get perfect results.
4. Can I make this cake ahead of time?
Yes, this cake is actually a great make-ahead dessert. You can bake the cake layers up to 2 days in advance and store them tightly wrapped at room temperature, or freeze them for up to 3 months. The frosting can be made up to 3 days ahead and stored in an airtight container in the refrigerator. Re-whip it briefly before using to restore its fluffy texture. The fully assembled and frosted cake keeps well in the refrigerator for up to 5 days.
5. Can I substitute the cream cheese frosting with something else?
Yes, the orange cream cheese frosting is classic here, but there are other frosting options that work beautifully with this cake. A simple orange buttercream made with butter, powdered sugar, and orange juice is a lighter alternative. You could also use the chocolate buttercream frosting recipe as a creative contrast, as chocolate and orange is a classic flavor pairing. A whipped cream frosting with orange flavor works well for a lighter result, though it is less stable and should be served the same day.
For a beautiful no-bake dessert pairing, the no-bake cheesecake recipe makes a lovely companion to serve alongside this cake at parties.
Orange Velvet Cake

Equipment
- 9-inch round cake pans - 2 pans needed
- Parchment paper
- Stand mixer or hand mixer
- Large mixing bowl
- Medium mixing bowl
- Rubber spatula
- Kitchen scale - recommended for accuracy
- Citrus zester or microplane
- Citrus juicer
- Measuring cups and spoons
- Wire cooling rack
- Offset spatula - for frosting
- cake turntable - optional, makes frosting much easier
- Toothpick or cake tester
Ingredients
- 2 1/2 cups all-purpose flour - 315g
- 1 teaspoon baking soda
- 1/2 teaspoon baking powder
- 1/2 teaspoon salt
- 1 1/2 cups granulated sugar - 300g
- 2 large eggs - room temperature
- 1 cup vegetable oil - 240ml
- 1 cup full-fat buttermilk - 240ml, room temperature
- 3 tablespoons fresh orange juice - about 1 large orange
- 2 tablespoons fresh orange zest - about 2 medium oranges
- 2 teaspoons pure vanilla extract
- 1 teaspoon white vinegar
- Orange gel food coloring - optional, for a deeper color
For the Orange Cream Cheese Frosting
- 16 oz full-fat cream cheese - 450g, softened to room temperature
- 1/2 cup unsalted butter - 115g, softened to room temperature
- 4 cups powdered sugar - 480g, sifted
- 2 tablespoons fresh orange juice
- 1 tablespoon fresh orange zest
- 1 teaspoon pure vanilla extract
- salt - a pinch
Instructions
- Preheat oven to 350°F (175°C) and position rack in center. Grease two 9-inch round cake pans thoroughly with butter or non-stick spray, line bottoms with parchment paper circles, and grease the parchment as well.
- In a large bowl, whisk together flour, baking soda, baking powder, and salt until evenly combined. Set aside.
- In a separate medium bowl, whisk sugar and eggs until pale and thickened, about 1 minute. Add oil and whisk until smooth. Stir in buttermilk, orange juice, orange zest, vanilla, and vinegar until well combined. Add orange gel coloring if using.
- Pour wet mixture into dry ingredients and fold with a rubber spatula or mix on low speed until just combined. Do not overmix; a few small lumps are fine.
- Divide batter evenly between prepared pans and smooth tops. Bake on center rack for 28-33 minutes, until toothpick inserted in center comes out clean and edges pull away from sides.
- Cool cakes in pans on wire rack for 10 minutes. Run a thin knife around edges to loosen, then invert onto cooling rack and peel off parchment. Cool completely to room temperature before frosting.
- In stand mixer with paddle attachment, beat cream cheese on medium speed for 2 minutes until smooth. Add butter and beat for another 2 minutes until fully combined and light.
- Reduce speed to low and gradually add sifted powdered sugar in four additions, mixing after each. Add orange juice, orange zest, vanilla, and salt. Increase speed to medium-high and beat 2-3 minutes until fluffy and silky.
- Place one cooled cake layer on serving plate. Spread about one-third of frosting evenly over top. Place second layer on top, flat side up. Apply a thin crumb coat over entire cake and chill for 10-15 minutes.
- Remove cake from freezer and apply remaining frosting to top and sides in smooth strokes. Decorate with fresh orange slices, extra zest, or orange peel curls as desired.
Notes
- Room temperature ingredients: Pull eggs and buttermilk from the fridge at least 30 minutes before baking for proper emulsification and a tender crumb.
- Measure flour correctly: Spoon flour into measuring cup and level off with a straight edge, or use a kitchen scale for the most accurate results (315g).
- Don’t overmix: Mix just until streaks of flour disappear to prevent developing too much gluten, which makes the cake tough.
- Cool completely before frosting: Even slightly warm cake will cause cream cheese frosting to become runny and difficult to control.
- Sift powdered sugar: Sifting removes lumps and ensures a smooth, silky cream cheese frosting.
- Chill the crumb coat: Freezing the crumb-coated cake for 10-15 minutes makes the final frosting layer much easier and cleaner.
- Storage: Store frosted cake covered in the refrigerator for up to 5 days. Remove 20-30 minutes before serving for best texture.
- Make ahead: Unfrosted cake layers can be wrapped tightly in plastic wrap and frozen for up to 3 months. Thaw overnight in the refrigerator before frosting.
- Variation: Add 1 tablespoon of unsweetened cocoa powder to the dry ingredients for a chocolate orange velvet cake.
- Variation: Bake batter in a lined muffin tin at 350°F (175°C) for 18-22 minutes to make orange dreamsicle cupcakes.
Final Thoughts
This orange velvet cake recipe is one of those bakes that genuinely surprises people the first time they try it. The soft, velvety layers, the fresh citrus flavor running through every bite, and that tangy orange cream cheese frosting come together into something that feels both familiar and completely new at the same time.
It’s a cake that earns compliments every single time it hits the table. Whether you’re baking it for a birthday, a special dinner, or just because you want something beautiful and delicious on a weekend, this recipe will not let you down.
Give it a try, and when you do, drop a comment below to let me know how it turned out. Sharing photos of your finished cake always makes my day, and I’d love to hear if you tried any of the variations!
Recommended:
- White Cake Recipe
- Coconut Cake Recipe
- Marble Cake Recipe
- Funfetti Cake Recipe
- Classic Yellow Cake Recipe
- Angel Food Cake Recipe
- Best Carrot Cake Recipe
- Sour Cream Coffee Cake Recipe
- Chocolate Cake Recipe
- Pound Cake Recipe



