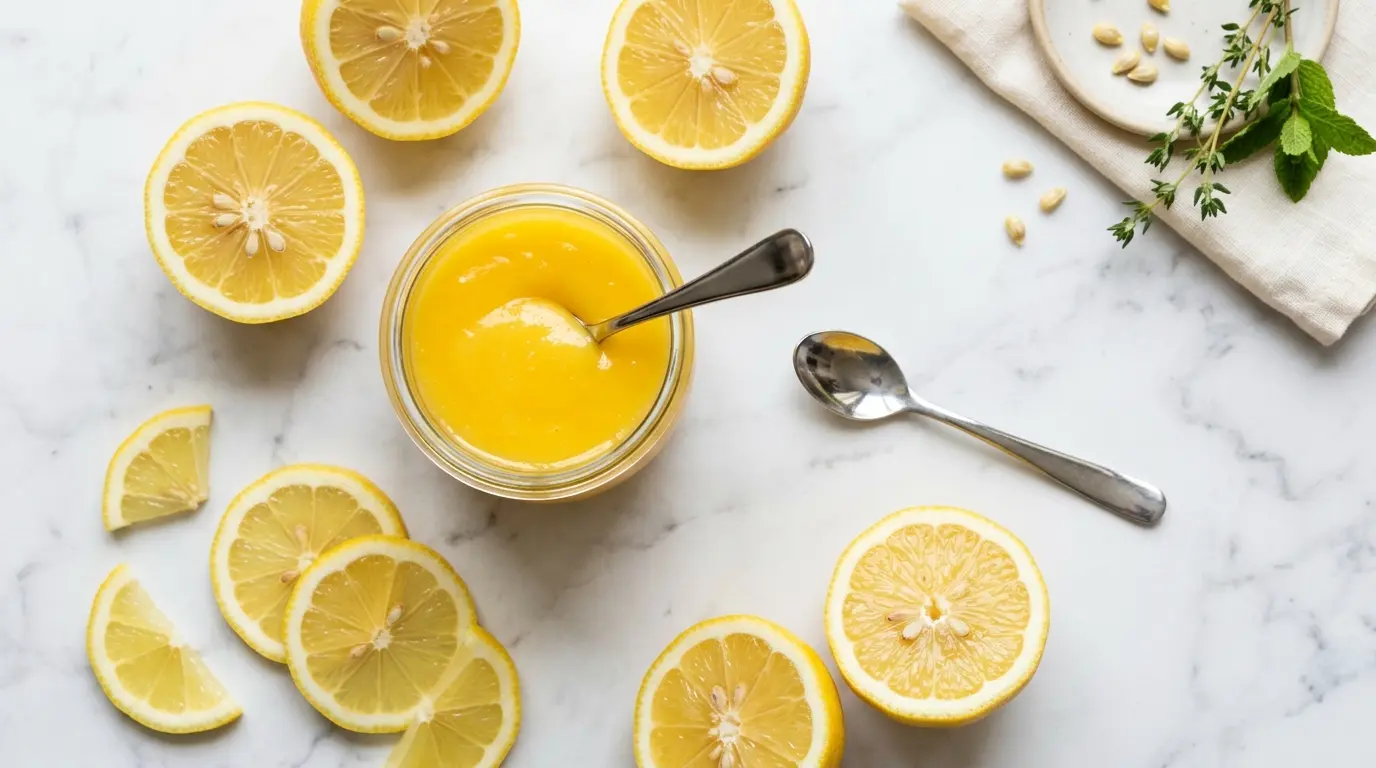
If you’ve never made a lemon curd recipe from scratch, you’re in for a serious treat. This classic spread is everything you want in a homemade condiment: tangy, buttery, smooth, and completely addictive.
It’s made with just five simple ingredients and takes about 15 minutes on the stove. No fancy techniques required.
The magic of lemon curd lies in how those ingredients transform under gentle heat. The egg yolks thicken the mixture into a velvety, spoonable consistency, while the butter adds a richness that makes it taste almost impossibly luxurious.
Once you make it homemade, you’ll never reach for the store-bought version again. Jarred curd can’t compete with the brightness of fresh lemon juice and zest working together.
This recipe follows the classic double boiler method, which gives you the most control over the cooking process and virtually eliminates the risk of scrambled eggs in your curd.
You might also love using this lemon curd as a filling for our Lemon Cheesecake — the two pair together beautifully for a show-stopping dessert.
Why You’ll Love This Lemon Curd Recipe
This lemon curd recipe is one of those kitchen projects that feels fancy but is genuinely stress-free.
It comes together in under 20 minutes and requires almost no special skills.
The flavor is far superior to anything you’ll find in a jar at the grocery store. Commercially produced curds are often too sweet and lack the punchy citrus character that makes homemade so special.
You only need five ingredients, most of which you probably already have in your kitchen.
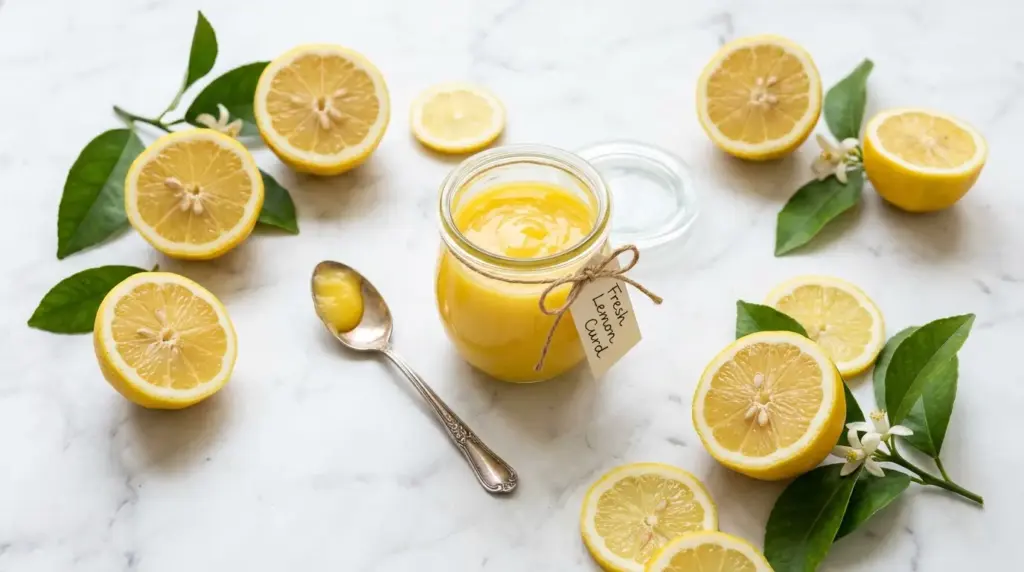
It’s also endlessly versatile. Think of it as a jar of sunshine you can use for breakfast, dessert, or gifting.
Here’s why readers keep coming back to this recipe:
- It’s practically foolproof. The double boiler method ensures gentle, even heat so your eggs cook slowly and smoothly.
- The flavor is intensely lemony. Using both fresh lemon juice and zest gives the curd a complex citrus depth.
- It stores beautifully. A jar in the refrigerator lasts up to two weeks, and it freezes well for up to three months.
- It makes a thoughtful homemade gift. Poured into a pretty jar, it’s the kind of present people remember.
- It works with so many recipes. From scones to cheesecakes to pavlova, lemon curd elevates everything it touches.
- You can scale it up easily. Double or triple the batch and stock your fridge for weeks.
For another bright and tangy dessert that pairs wonderfully with lemon curd, check out this Lemon Meringue Pie.
Ingredients
The ingredient list is short and simple, but quality matters here. Fresh lemons are non-negotiable — bottled juice lacks the aromatic oils that make this curd sing. Use unsalted butter so you control the salt level exactly.
Here’s what you’ll need (yields approximately 1 1/2 cups):
- 4 large egg yolks (or 3 large whole eggs for a slightly lighter curd)
- 3/4 cup (150g) granulated sugar
- 1/3 cup (80ml) fresh lemon juice (about 2–3 lemons)
- 1 tablespoon finely grated lemon zest (from about 2 lemons)
- 1/4 teaspoon fine sea salt
- 6 tablespoons (85g) unsalted butter, cold and cut into cubes
Recommended: Double boiler or heatproof glass bowl
This curd also makes a dreamy topping for our Lemon Shortbread Cookies for a full lemon lover’s experience.
Kitchen Equipment Needed
You don’t need much equipment for this recipe, but a few items make the process smoother. A double boiler (or a heatproof bowl set over a saucepan) is the most important tool here because it protects the eggs from direct high heat.
- Double boiler or large heatproof glass bowl
- Medium saucepan (to hold about 1–2 inches of simmering water)
- Silicone whisk
- Citrus juicer or reamer
- Zester or microplane grater
- Fine mesh sieve (optional, for straining)
- Candy thermometer or instant-read thermometer (helpful but not required)
- Glass mason jars or airtight glass containers (for storage)
- Rubber spatula
- Measuring cups and spoons
Read Also: Angel Food Cake Recipe
Recommended Products for This Recipe
These are products I genuinely recommend based on quality and how much they improve the lemon curd making process. Each one solves a common pain point or takes your result to the next level.
1. OXO Good Grips Double Boiler
A proper double boiler gives you the most consistent, gentle heat possible for cooking delicate egg-based mixtures like lemon curd. This one fits snugly over a standard saucepan and is made from durable, food-safe materials that clean up easily. It eliminates the guesswork of improvising with a glass bowl.
2. Microplane Premium Zester Grater
Fresh lemon zest is one of the most important flavor components in this recipe, and a Microplane zester makes getting fine, fluffy zest effortless. It pulls the fragrant oils from the lemon peel without digging into the bitter white pith. No other tool does this as efficiently.
3. Weck Tulip Jar Set
Lemon curd is one of those recipes you’ll want to make in batches and gift to friends. These wide-mouth glass jars seal beautifully, look gorgeous on a counter, and work perfectly for both storage and gifting. The classic design is airtight enough to keep your curd fresh for the full two weeks.
4. GIR Silicone Whisk
A silicone whisk is ideal for lemon curd because it won’t scratch a glass bowl or stainless steel pot, and it stays flexible enough to reach every corner of the bowl while you whisk constantly. The heat-resistant material is also safe for the temperatures you’ll be working with. It makes whisking for 10 minutes much more comfortable on your wrist.
5. Zulay Professional Citrus Juicer
Fresh lemon juice is the heart of this recipe, and a quality juicer extracts significantly more juice per lemon than squeezing by hand. This handheld press works for lemons, limes, and oranges, and the strainer basket catches seeds automatically. It’s a small investment that makes a real difference.
This lemon curd is wonderful spooned over our Fruit Tart for an elegant and easy dessert.
Step-by-Step Instructions
1. Zest and Juice Your Lemons
- Before juicing, roll each lemon firmly on the countertop using the palm of your hand. This breaks down the internal membranes and helps the lemon release significantly more juice.
- Use a microplane zester or the fine side of a box grater to zest your lemons first, before cutting them. It’s much easier to zest a whole lemon than a cut one.
- Zest only the bright yellow outer skin of the lemon. The white pith just beneath it is bitter and will affect the flavor of your curd.
- You need 1 tablespoon (about the zest from 2 medium lemons). Set the zest aside.
- Cut the zested lemons in half and juice them using a citrus reamer or juicer. Strain out any seeds.
- Measure out exactly 1/3 cup (80ml) of fresh lemon juice. Set aside.
2. Set Up Your Double Boiler
- Fill the bottom saucepan of your double boiler with 1 to 2 inches (2.5 to 5cm) of water. You want enough water to create steam, but not so much that the bottom of the top pot or bowl touches the water.
- If you don’t have a double boiler, simply select a heatproof glass bowl (like a Pyrex mixing bowl) that fits snugly over a medium saucepan without the bowl touching the water inside.
- Place the saucepan over medium-high heat and bring the water to a boil. Once boiling, reduce the heat to low so the water maintains a gentle, steady simmer. You should see small bubbles and gentle steam rising.
- This indirect heat setup is critical. Cooking the curd directly in a saucepan over a burner risks overheating, which causes the eggs to curdle and the curd to turn grainy.
3. Combine the Base Ingredients
- Place the egg yolks and granulated sugar into the top pot or heatproof bowl (do not place it over the hot water yet).
- Using your silicone whisk, whisk the egg yolks and sugar together vigorously for about 1 to 2 minutes. You want the mixture to become pale, creamy, and slightly thickened. This step helps the sugar begin to dissolve and prevents the sugar from “burning” the yolks if they sit together undisturbed.
- Add the lemon zest and the measured lemon juice to the bowl.
- Add the 1/4 teaspoon of fine sea salt.
- Whisk everything together until fully combined and smooth.
4. Cook the Curd Over the Double Boiler
- Set the bowl or top pot of your double boiler over the simmering water. Make sure the bottom of your bowl is not touching the water.
- Begin whisking the mixture constantly using steady, circular strokes. Constant motion is essential. Stopping even briefly allows the egg yolks near the edges of the bowl to cook too fast and scramble.
- Continue cooking and whisking for approximately 10 to 12 minutes. The mixture will start out looking thin and foamy, and will gradually become smoother, thicker, and more opaque.
- You’ll know the curd is ready when it visibly thickens and coats the back of a spoon. If you draw your finger across the back of the spoon, the line should hold cleanly.
- For precision, use an instant-read or candy thermometer: the curd is done when it registers between 160°F and 170°F (71°C to 77°C). Do not let it go above 180°F (82°C), as it may begin to curdle.
- If the curd is still thin after 12 minutes, gently turn up the heat slightly and keep whisking. Low and slow is the goal, but it does need to cook through.
5. Remove from Heat and Add the Cold Butter
- Once the curd has thickened and reached the right temperature, immediately remove the bowl from the heat and set it on a stable surface.
- Begin adding the cold, cubed butter a few pieces at a time, whisking vigorously after each addition.
- The cold butter serves two purposes: it stops the cooking process by rapidly cooling the mixture, and it creates the silky, glossy, rich texture that makes lemon curd so irresistible.
- Keep adding and whisking until all the butter has been fully incorporated and the curd looks smooth and shiny. This takes about 1 to 2 minutes.
6. Optional — Strain the Curd
- For an ultra-smooth, professional-looking curd, pour it through a fine mesh sieve into a clean bowl or measuring cup. This removes any small pieces of cooked egg or large bits of zest.
- Use a rubber spatula to press the curd through the sieve if needed.
- This step is optional. If your curd cooked gently and consistently, it should already be quite smooth. Many home bakers skip straining and love the result.
7. Transfer and Cool the Curd
- Pour or spoon the hot lemon curd into clean, dry glass jars or airtight containers.
- To prevent a skin from forming on the surface of the curd as it cools, press a sheet of plastic wrap directly onto the surface of the curd, making full contact with no air pockets.
- Allow the curd to cool at room temperature for about 30 minutes.
- Transfer to the refrigerator and chill for at least 1 to 2 hours before using. The curd will thicken further as it cools — this is completely normal and expected.
- Once fully chilled, it should have a thick, spreadable, jam-like consistency.
For a beautiful way to use your finished curd, try it as a filling in our classic Easy Crepe Recipe.
Tips for Success
Getting lemon curd right the first time is easy when you know a few key techniques. The biggest mistakes people make are using too much heat, stopping whisking, or skipping the cold butter step.
- Always use fresh lemon juice. Bottled juice contains preservatives that interfere with the flavor and can affect how well the curd sets. Fresh is the only way to go.
- Keep the heat low and steady. The double boiler is specifically designed to protect the eggs. If you rush with high heat, the eggs will scramble before the curd thickens properly.
- Whisk without stopping. Even 20 seconds of rest can cause the egg proteins near the edge of the bowl to overcook. Keep moving.
- Use cold butter. Adding cold, cubed butter at the end cools the curd quickly and emulsifies it into that signature silky texture. Room temperature butter works, but cold gives better results.
- Don’t skip chilling time. The curd thickens significantly as it cools in the refrigerator. If it seems too thin right off the stove, don’t panic — give it an hour in the fridge.
- Zest before juicing. It’s much easier to zest an intact lemon than a squeezed-out one. Always zest first.
- Avoid metal bowls. Aluminum or copper can react with the acidic lemon juice and give your curd a metallic taste. Use glass or stainless steel.
Read Also: Easy French Toast Recipe
Serving Suggestions
Lemon curd is one of the most versatile condiments in a home baker’s repertoire. Its sweet-tart, buttery flavor pairs beautifully with a wide variety of foods, from simple morning toast to elaborate layered desserts.
It can be used as a spread, a filling, a topping, or even stirred into yogurt or whipped cream for an instant lemon-flavored dessert sauce.
Here are some of the best ways to enjoy it:
- On toast or English muffins for a bright, elegant breakfast spread instead of jam
- With scones — lemon curd and a flaky Buttermilk Biscuit is a combination that never gets old
- Swirled into Greek yogurt or whipped cream for a fast, light dessert
- As a filling for cupcakes or layer cakes — pipe or spoon it between layers for a tangy contrast to buttercream frosting
- Spooned over Vanilla Pudding for a simple but stunning parfait
- As a tart filling — pour into pre-baked tart shells and top with fresh berries
- Dolloped onto crepes or pancakes as a luxurious alternative to maple syrup
- Mixed into frosting or whipped cream to create a lemon-flavored topping for cakes
Variations to Try
Once you’ve mastered the classic lemon curd, it’s easy to riff on the base recipe. The core technique stays the same — it’s mostly a matter of swapping citrus or layering in complementary flavors.
Here are some popular and delicious variations:
- Lime Curd: Substitute fresh lime juice and zest for the lemon. It’s tangy and tropical, perfect for topping key lime-flavored desserts.
- Orange Curd: Use fresh-squeezed orange juice and zest. Since orange is sweeter, you may want to reduce the sugar slightly to balance the flavor.
- Meyer Lemon Curd: Meyer lemons are sweeter and more floral than regular lemons. The curd will be noticeably milder in tartness.
- Lavender Lemon Curd: Steep 1 teaspoon of dried culinary lavender in the lemon juice for 10 minutes, then strain it out before adding the juice to the recipe. The floral note is subtle and sophisticated.
- Lemon Curd with Whole Eggs: Using 3 large whole eggs instead of 4 yolks gives a slightly lighter, less rich curd. Both versions are delicious — it’s a matter of personal preference.
- Ginger Lemon Curd: Whisk in 1 teaspoon of freshly grated ginger along with the lemon juice. The warmth of ginger pairs surprisingly well with the bright citrus.
Another great way to use citrus flavors is in this Lemon Chicken Recipe for a savory dinner that carries that same bright tang.
Storage and Reheating
Lemon curd stores exceptionally well, which makes it a great recipe for batch cooking. Proper storage keeps it fresh and prevents any off-flavors from developing.
Here are the key storage guidelines to follow:
- Refrigerator: Store in a clean, airtight glass jar or container for up to 2 weeks. Always use a clean spoon when scooping to avoid introducing bacteria.
- Freezer: Lemon curd freezes beautifully for up to 3 months. Leave a little headspace in the jar as it expands when frozen. Thaw overnight in the refrigerator before using.
- Avoid plastic containers for long storage: The acidity of lemon curd can interact with plastic over time. Glass jars are always the best choice.
- Do not reheat: Lemon curd does not need to be reheated before using. If it has been chilled and seems very thick, simply let it sit at room temperature for 15 to 20 minutes before serving and it will loosen up slightly.
- Signs it has gone bad: If you notice any mold, an off smell, or a change in color or texture, discard the curd. It should always smell fresh, citrusy, and buttery.
Read Also: Banana Pudding Recipe
Nutritional Facts
The following nutritional information is estimated per 2-tablespoon serving (based on approximately 12 servings per batch). Actual values will vary depending on ingredient brands and portion sizes.
| Nutrient | Per Serving (2 tbsp) |
|---|---|
| Calories | 110 kcal |
| Total Fat | 7g |
| Saturated Fat | 4g |
| Cholesterol | 80mg |
| Sodium | 55mg |
| Total Carbohydrates | 12g |
| Sugars | 12g |
| Protein | 1g |
| Vitamin C | 6mg (7% DV) |
Note: Lemon curd is a rich, indulgent spread intended to be enjoyed in small quantities. These numbers reflect a typical serving size of two tablespoons.
Another nutrient-rich dessert worth exploring is this Chia Seed Pudding Recipe — a lighter, protein-packed treat with a similarly creamy texture.
Health Benefits of Key Ingredients
While lemon curd is definitely a treat rather than a health food, its key ingredients do bring some genuine nutritional value to the table. Here’s what’s working in your favor:
The primary benefits come from the lemon juice and zest, which are the nutritional stars of this recipe.
- Lemons are an excellent source of vitamin C, an antioxidant that supports immune function, collagen production, and skin health. Just one lemon provides roughly 30–40mg of vitamin C.
- Lemon zest contains concentrated amounts of flavonoids and limonene, compounds that research has linked to anti-inflammatory and antioxidant activity.
- Egg yolks are rich in fat-soluble vitamins including vitamin A, vitamin D, and vitamin E. They also provide choline, a nutrient that supports brain and liver health.
- Butter provides small amounts of fat-soluble vitamins, including vitamin K2, which plays a role in calcium metabolism and bone health when consumed as part of a balanced diet.
- Lemon juice also supports iron absorption when consumed alongside plant-based iron sources, thanks to its vitamin C content.
Another bright and vitamin-rich recipe to try is this Easy Lemonade Recipe, which celebrates fresh lemons in the simplest possible way.
Frequently Asked Questions
1. Why did my lemon curd not thicken?
The most common reason is that the heat was not quite high enough, or the curd didn’t cook long enough.
Egg proteins need to reach at least 160°F (71°C) to fully set. If your curd looks thin after 10 minutes, gently increase the heat slightly while continuing to whisk constantly.
2. Can I make lemon curd without a double boiler?
Yes, you can. You have two options: use a heatproof glass bowl set over a saucepan of simmering water (a DIY double boiler), or cook the curd directly in a heavy-bottomed saucepan over the lowest possible heat.
If using a saucepan directly, you must whisk without stopping and keep the heat truly low. The direct method requires more attention but works well when done carefully.
3. How do I know when the lemon curd is done cooking?
The curd is ready when it visibly thickens and coats the back of a spoon.
If you draw your finger through the curd on the back of the spoon, the line should hold cleanly without the curd running back together. A thermometer reading of 160°F to 170°F (71°C to 77°C) is the most reliable indicator.
4. Why did my lemon curd turn grainy or curdle?
This happens when the eggs cook too quickly at too high a temperature, causing them to scramble rather than thicken smoothly.
To fix it, try blending the curd briefly with an immersion blender, then strain it through a fine mesh sieve. Prevention is always better: keep the heat gentle, whisk constantly, and don’t walk away from the stove.
5. Can I use bottled lemon juice instead of fresh?
Technically yes, but the result will be noticeably inferior.
Fresh lemon juice contains volatile aromatic compounds that give curd its vibrant, zesty flavor. Bottled juice often has a flat or slightly chemical taste and may contain preservatives that affect the curd’s texture and shelf life. Fresh lemons are always worth the extra step.
For another classic recipe that highlights fresh citrus beautifully, try this Fruit Salad Recipe as a refreshing side dish.
Final Thoughts
Making lemon curd at home is one of those kitchen experiences that feels rewarding every single time.
The ingredients are humble, the process is simple, and the result is something you’ll genuinely be proud to pull out of your refrigerator and serve to guests.
Whether you spread it on a warm scone, spoon it into a tart shell, or sneak a spoonful straight from the jar (no judgment), this lemon curd recipe delivers that perfect balance of sweet, tart, and buttery in every bite.
Give it a try this weekend and see for yourself why homemade always wins.
If you make this recipe, leave a comment below and let me know how it turned out! And if you shared a jar as a gift, I’d love to hear how it was received.
Recommended:
- Lemon Cheesecake Recipe
- Lemon Shortbread Cookies
- Angel Food Cake
- Fruit Tart
- Lemon Meringue Pie
- Easy Crepe Recipe
- Buttermilk Biscuit
- Vanilla Pudding
- Classic Yellow Cake
- Homemade Lemonade


