If you’ve ever bitten into a Wendy’s Spicy Chicken Sandwich and thought, “I need to make this at home,” you’re not alone.
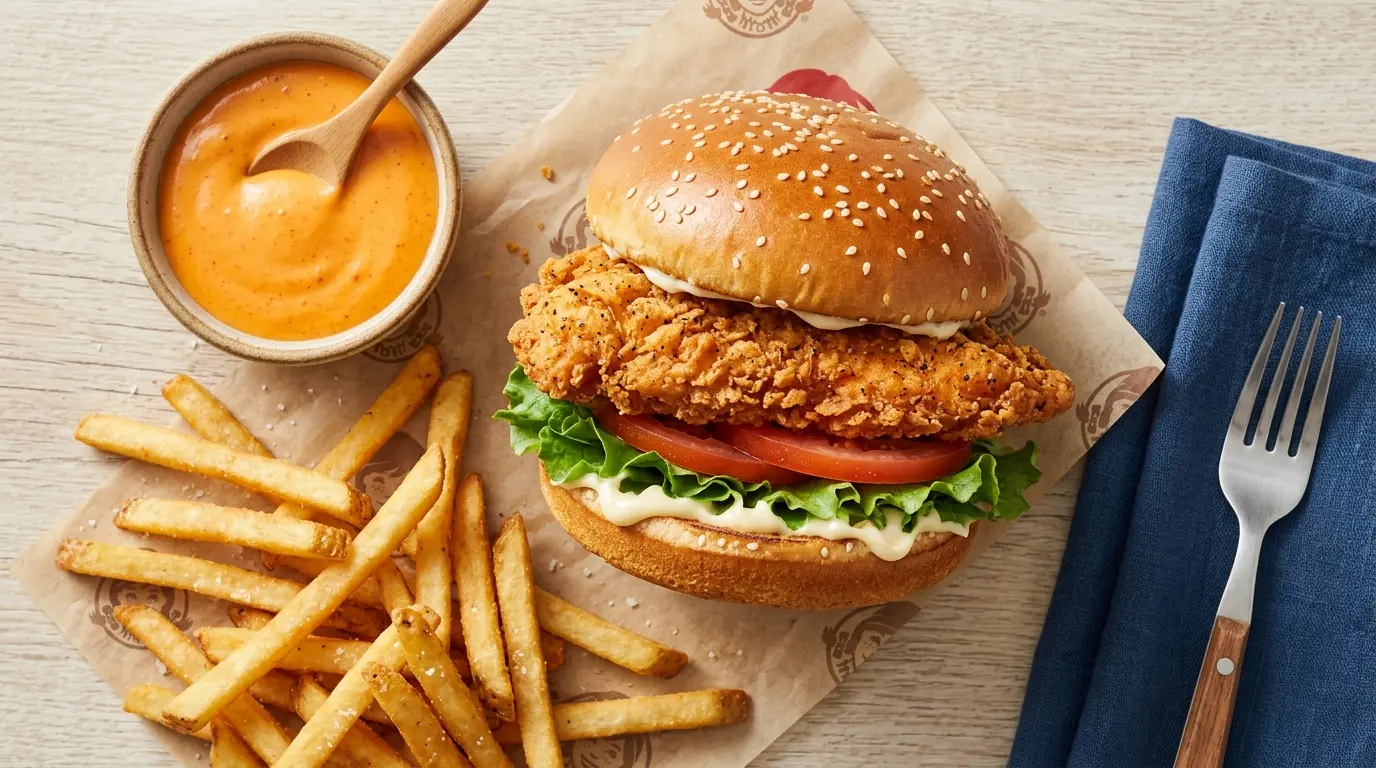
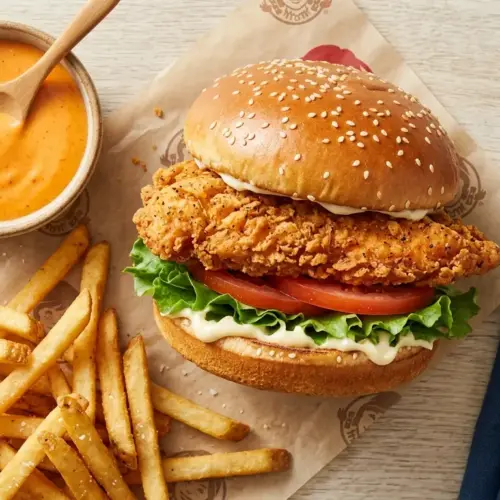
This copycat Wendy’s Spicy Chicken Sandwich recipe nails the crispy, golden crust and that signature slow-building heat that made Wendy’s version a fast food legend.
The secret is a double-dredge technique. You coat the chicken in seasoned flour, dip it in a diluted hot sauce mixture, then coat it in flour again. That second coating is what creates the thick, shatteringly crispy exterior you know from the original.
The spice blend uses cayenne pepper, paprika, black pepper, onion powder, and garlic powder, which builds real heat without overwhelming the chicken’s flavor. And when it all gets stacked on a toasted bun with cool mayo, crisp lettuce, and a juicy tomato slice, it’s the kind of sandwich you’ll put on regular rotation.
If you love spicy chicken recipes, you’ll also want to check out the Spicy Chicken Sandwich Recipe on this site for another great take on this classic.

Why You’ll Love This Wendy’s Spicy Chicken Sandwich Recipe
Making this sandwich at home puts you completely in control of the heat level and the quality of ingredients.
You can use fresh, thick chicken breasts instead of the thin, processed patties you get at the counter. That alone makes a massive difference in texture and juiciness.
The double-dredge coating method creates an incredibly craggy, crispy crust that holds up well and doesn’t go soggy quickly. It fries up beautifully and has far more texture than a single-coat method.
You can dial the cayenne up or down to match your personal heat preference. Want it nuclear? Double the cayenne. Want it milder? Cut it back by half.
This recipe feeds four people for less than the cost of two sandwiches at the restaurant. And you can customize the toppings however you like.
- Full control over spice level and heat
- Restaurant-quality crispy crust from a double-dredge method
- Juicy, fresh chicken breast for superior texture
- Budget-friendly compared to the drive-thru
- Ready in under 45 minutes from start to finish
- Easily customizable with your favorite toppings and sauces
Another fan favorite for spicy chicken lovers is the Popeyes Spicy Chicken Sandwich Recipe, which takes a slightly different approach to the coating.
Ingredients
You’ll need straightforward pantry staples for this recipe. The hot sauce and cayenne are the two flavor heavyweights, so don’t skip or substitute them.
- 4 boneless, skinless chicken breast fillets (about 6 oz / 170g each), pounded to 3/8 inch (1 cm) thick
- 6 to 8 cups (1.4 to 1.9 liters) vegetable oil, for frying
- 1/3 cup (80ml) Frank’s RedHot original sauce
- 2/3 cup (160ml) water
- 1 cup (125g) all-purpose flour
- 2 1/2 teaspoons salt
- 4 teaspoons cayenne pepper (reduce to 2 teaspoons for medium heat)
- 1 teaspoon coarsely ground black pepper
- 1 teaspoon onion powder
- 1/2 teaspoon paprika
- 1/8 teaspoon garlic powder
- 4 plain hamburger buns, preferably brioche-style burger buns for a richer flavor
- 8 teaspoons mayonnaise
- 4 leaves of green leaf lettuce
- 4 thick slices of tomato
For maximum spice coverage, you’ll want a high-quality hot sauce like Frank’s RedHot specifically. It has the right vinegar-to-heat ratio for this recipe and won’t make the coating soggy the way thicker hot sauces can.
If you enjoy spicy chicken in other forms, the Spicy Chicken Tenders Recipe uses a very similar spice mix and is equally satisfying.
Kitchen Equipment Needed
You don’t need any fancy equipment for this recipe. The deep fryer or heavy pot is the most important tool since it maintains stable oil temperature, which is critical for a crispy, non-greasy crust.
- Deep fryer or large heavy-bottomed pot (Dutch oven works perfectly)
- Instant-read thermometer for checking oil temperature and chicken doneness
- Meat mallet or rolling pin for pounding chicken to even thickness
- Two wide, shallow bowls or pie plates for the dredging stations
- Wire rack set over a baking sheet (for draining fried chicken without steaming the crust)
- Cast iron or stainless steel skillet (for toasting the buns)
- Tongs for safely lowering chicken into hot oil
- Paper towels
Read Also: Spicy Chicken Nuggets Recipe
Recommended Products for This Recipe
These are products that genuinely improve the results of this recipe based on their quality and performance.
1. Lodge 6-Quart Enameled Cast Iron Dutch Oven
A heavy-bottomed Dutch oven maintains oil temperature far more consistently than a thin pot, which means you get an even, golden crust rather than a pale or dark, uneven one. The high sides keep splatter to a minimum, and cast iron holds heat through each batch of chicken. This is a workhorse kitchen tool that will last decades.
2. ThermoPro TP-19 Instant Read Thermometer
Oil temperature is the single biggest variable in frying. Too cool and the chicken absorbs oil and turns greasy. Too hot and the crust burns before the center cooks through. A fast, accurate instant-read thermometer removes the guesswork for both the oil and for checking the chicken’s internal temperature (165°F/74°C). It’s inexpensive and indispensable.
3. OXO Good Grips Cooling Rack
Resting fried chicken on a wire rack instead of paper towels makes a real difference. Paper towels trap steam under the crust and soften it within minutes. A cooling rack lets hot air circulate under the chicken and keeps that shatteringly crispy crust intact all the way to the table.
4. Frank’s RedHot Original Cayenne Pepper Sauce (2-Pack)
The hot sauce in the wet dip station is the primary source of tangy, vinegar-forward heat in this recipe. Frank’s RedHot has exactly the right viscosity to create a thin, well-seasoned coating that doesn’t weigh down the flour dredge. Other hot sauces can be too thick or too sweet for this purpose.
5. Nordic Ware Commercial Baker’s Half Sheet with Cooling Grid
Having a sheet pan with a built-in cooling rack simplifies the whole setup. You can place the breaded chicken on it before frying, drain the fried fillets on it afterward, and even use it to keep finished sandwiches warm in a low oven while you fry remaining batches. The heavy aluminum construction prevents warping.
You might also enjoy: Spicy Chicken Chipotle Pasta Recipe

Step-by-Step Instructions
Step 1: Prepare the Chicken Fillets
- Place one chicken breast between two sheets of plastic wrap or inside a gallon zip-lock bag.
- Using a meat mallet, rolling pin, or heavy skillet, pound the chicken to an even 3/8-inch (about 1 cm) thickness. Work from the center outward so you don’t tear the meat.
- If the fillet is very wide after pounding, trim any irregular edges so it will fit comfortably on your bun.
- Repeat with all four chicken breasts.
- Pat the fillets dry with paper towels. Moisture on the surface will interfere with the flour coating sticking properly.
- Set the prepped fillets aside on a clean plate.
Step 2: Set Up the Dredging Stations
- In a wide, shallow bowl or pie plate, combine the Frank’s RedHot sauce and water. Whisk them together until fully combined. This is your wet dip station. The water dilutes the sauce so it creates a thin, even coating rather than a thick, heavy one.
- In a second wide, shallow bowl, combine the all-purpose flour, salt, cayenne pepper, black pepper, onion powder, paprika, and garlic powder. Whisk everything together thoroughly until the spices are evenly distributed throughout the flour. Uneven mixing means some bites will be spicier than others.
- Arrange your dredging stations in order: chicken, flour mixture, wet dip, flour mixture again. This assembly-line setup prevents cross-contamination and keeps the process clean and efficient.
Step 3: Double-Dredge the Chicken
- Working with one fillet at a time, lay a chicken breast in the seasoned flour and press it firmly. Make sure every part of the surface is coated, including the edges. Shake off any excess, but leave a good base coat.
- Lift the floured chicken and transfer it to the hot sauce and water mixture. Turn it to coat both sides completely. Let the excess liquid drip off for a few seconds, but you want the fillet to be well moistened, not just skimmed.
- Return the wet chicken immediately to the flour mixture. Press it in firmly again, pressing the flour into the surface so it adheres well. The wet coating from step two acts as a glue for this second flour layer, creating that thick, craggy crust that’s the hallmark of the Wendy’s original.
- Set the double-coated fillet on a clean plate or wire rack. Repeat with remaining fillets.
- Let the coated fillets rest for 5 minutes. This resting time allows the coating to dry slightly and adhere more firmly, which prevents it from sliding off during frying.
Step 4: Heat the Oil
- Pour 6 to 8 cups (1.4 to 1.9 liters) of vegetable oil into your deep fryer, Dutch oven, or large heavy-bottomed pot. The oil should be at least 3 inches (7.5 cm) deep to fully submerge the fillets.
- Heat the oil over medium-high heat until it reaches 350°F (175°C). Use your instant-read thermometer to check. This temperature is critical. Below 325°F (160°C) and the coating absorbs oil before it crisps, making the sandwich greasy. Above 375°F (190°C) and the crust burns before the chicken is cooked through.
- Line a baking sheet with a wire rack and place it next to the stove. This is where your finished fillets will drain and rest.
Step 5: Fry the Chicken
- Once the oil reaches 350°F (175°C), carefully lower one or two chicken fillets into the hot oil using tongs. Lay them away from you to avoid oil splatter.
- Do not overcrowd the pot. Frying more than two fillets at a time drops the oil temperature too quickly, resulting in greasy, soft-crusted chicken. Work in batches if needed.
- Fry each fillet for 8 to 12 minutes, turning once halfway through, until they are deep golden brown and cooked through. The internal temperature of the chicken should reach 165°F (74°C) on your instant-read thermometer.
- Using tongs, remove the cooked fillets from the oil and set them on the wire rack. Do not place them on paper towels, as steam will soften the crust.
- Allow the oil to return to 350°F (175°C) between batches before frying the next round.
Step 6: Toast the Buns
- While the final batch of chicken is frying, heat a large skillet or griddle over medium heat. No oil is needed.
- Place the hamburger buns cut-side down on the dry skillet.
- Toast for 1 to 2 minutes until the cut faces are lightly golden and warm. A toasted bun prevents the bread from going soggy when it contacts the mayo and tomato.
- Remove from the skillet and set aside.
Step 7: Assemble the Sandwiches
- Spread 2 teaspoons of mayonnaise onto the cut face of each top bun. The mayonnaise goes on the top bun, not the bottom, which is how Wendy’s does it.
- Place one tomato slice on top of the mayonnaise on the top bun.
- Layer one lettuce leaf on top of the tomato.
- Place one crispy fried chicken fillet on each bottom bun.
- Flip the top half of each sandwich onto the bottom half, so the lettuce and tomato rest on the chicken.
- Serve immediately while the chicken is hot and crispy.
Read Also: Spicy Chicken Ramen Recipe
Tips for Success
Getting the crust right is the biggest challenge for home cooks. These tips address the most common problems and give you the best possible results every single time.
- Dry the chicken thoroughly. Pat fillets dry with paper towels before dredging. Surface moisture prevents the flour from sticking properly and leads to a thin, patchy crust.
- Don’t skip the rest time. After the double-dredge, letting the coated fillets rest for 5 minutes before frying makes the coating more durable and dramatically reduces falloff in the oil.
- Maintain oil temperature between batches. Always let the oil return to 350°F (175°C) before adding the next batch. A thermometer is non-negotiable here.
- Press firmly in the flour. The second flour coating needs physical pressure to adhere to the wet surface. Press down firmly and hold for a few seconds to help it grip.
- Fry in small batches. Overcrowding is the single most common reason for greasy, soft chicken. Two fillets per batch is the maximum for a standard home pot.
- Use a wire rack, not paper towels. Resting fried chicken on paper towels traps steam beneath and softens the crust within minutes. A wire rack lets it stay crispy.
- Toast the buns every time. A toasted bun is a structural upgrade, not just a flavor one. It holds up to the hot chicken and juicy toppings without falling apart.
Another crowd-pleasing spicy recipe is the Wendy’s Chili Recipe, which pairs wonderfully with this sandwich for a full Wendy’s-inspired meal at home.
Serving Suggestions

This sandwich is filling on its own, but a few simple sides turn it into a proper meal.
Pair it with classic fast-food-style sides for the full drive-thru experience at home, or keep it lighter with a simple salad or slaw.
- Air Fryer French Fries for the ultimate fast-food pairing
- Creamy Coleslaw to balance the heat with something cool and creamy
- Fried Pickles for extra crunch and tang alongside the sandwich
- Onion Rings as a classic fast food side that never disappoints
- Bang Bang Sauce served on the side for dipping extra bites of chicken
- A simple green salad with a light vinaigrette to cut through the richness
- Corn on the cob for a casual, summery backyard-cookout feel
This pairs beautifully with Comeback Sauce as an alternative to plain mayo if you want to add another layer of tangy, spiced flavor to the sandwich.
Variations to Try
Once you have the base recipe down, it’s easy to put your own spin on it. These are the most popular and delicious variations that work well with this double-dredge method.
- Extra spicy version: Double the cayenne to 8 teaspoons and add 1 teaspoon of chili powder to the flour mixture. Finish with a drizzle of Buffalo Sauce inside the assembled sandwich.
- Honey sriracha glaze: Brush the fried chicken with a mixture of 2 tablespoons honey and 1 tablespoon sriracha right before assembling. It caramelizes slightly on the hot crust and adds an addictive sweet heat.
- Deluxe version: Add a slice of American or pepper jack cheese, a few dill pickle slices, and a thin slice of sweet onion to the assembly for a loaded version that rivals fast-food premium options.
- Air fryer version: Instead of deep frying, spray the double-coated fillets generously with cooking spray and air fry at 400°F (200°C) for 18 to 20 minutes, flipping once at the halfway point. It won’t be quite as crispy as the fried version but it’s a lighter option.
- Spicy chicken tenders version: Slice the pounded chicken into strips before dredging and fry for 4 to 5 minutes per batch. Serve as tenders with dipping sauces instead of building full sandwiches.
- Buttermilk marinade: For extra juicy chicken, soak the raw fillets in buttermilk for 1 to 4 hours before dredging. The buttermilk tenderizes the meat and adds a subtle tang to the finished sandwich.
Read Also: Crack Burger Recipe
Storage and Reheating
These sandwiches are best enjoyed fresh, straight from the fryer. That said, the fried chicken component stores reasonably well and reheats much better than most fried foods.
- Refrigerating: Store leftover fried chicken fillets in an airtight container in the refrigerator for up to 3 days. Keep the bun components (lettuce, tomato, mayo) separate and only assemble when ready to eat.
- Freezing: Cooled fried chicken fillets can be frozen in a single layer on a baking sheet, then transferred to a zip-lock freezer bag for up to 2 months. Thaw overnight in the refrigerator before reheating.
- Reheating in the oven (best method): Place the cold chicken fillet on a wire rack set over a baking sheet. Bake at 400°F (200°C) for 10 to 15 minutes until heated through and recrisped. This is by far the best reheating method for maintaining a crispy crust.
- Reheating in an air fryer: Air fry at 375°F (190°C) for 5 to 7 minutes. The circulating hot air re-crisps the coating beautifully and heats the chicken evenly.
- Avoid the microwave: Microwaving fried chicken makes the coating soft and chewy. Use the oven or air fryer methods above instead.
This recipe also works great as a prep-ahead meal. You might also enjoy the BBQ Sauce Recipe to make a smoky variation of the sauce for batch-made fillets throughout the week.
Nutritional Facts
The following values are approximate per sandwich (one fried chicken fillet, one bun, 2 tsp mayo, lettuce, tomato):
| Nutrient | Amount Per Serving |
|---|---|
| Calories | 520 kcal |
| Total Fat | 22g |
| Saturated Fat | 4g |
| Cholesterol | 95mg |
| Sodium | 1,080mg |
| Total Carbohydrates | 44g |
| Dietary Fiber | 2g |
| Total Sugars | 5g |
| Protein | 38g |
These values will vary depending on exact ingredients, oil absorption during frying, and bun size. Using the air fryer variation reduces total fat to approximately 12g per serving.
You might also enjoy: Easy Fried Chicken Recipe
Health Benefits of Key Ingredients
While this is a fried fast-food-style sandwich, several of the key ingredients do offer genuine nutritional value.
Chicken breast is one of the leanest, highest-protein animal proteins available. Each serving provides approximately 38g of protein with relatively low saturated fat, making it a strong muscle-building and satiety food.
- Chicken breast: High in protein, B vitamins (especially B3 and B6), and selenium. Supports muscle maintenance and immune function.
- Cayenne pepper: Contains capsaicin, a compound linked to increased metabolism, reduced inflammation, and improved circulation. It may also have mild appetite-suppressing properties.
- Paprika: A source of antioxidants including vitamin A and carotenoids. Regular consumption is linked to eye health and reduced oxidative stress.
- Garlic powder: Derived from garlic, which is well-documented for its cardiovascular benefits, antimicrobial properties, and immune-supporting compounds.
- Tomato: Rich in lycopene, vitamin C, potassium, and vitamin K. Lycopene in particular is associated with reduced risk of certain chronic diseases.
- Lettuce: Low in calories but provides folate, vitamin A, and vitamin K. Adds crunch and hydration with minimal caloric impact.
Read Also: Southern Fried Chicken Recipe
Frequently Asked Questions
1. Can I use chicken thighs instead of chicken breasts?
Yes, and many home cooks actually prefer boneless, skinless chicken thighs for this recipe. Thighs have a higher fat content, which keeps them juicier and more forgiving during frying than lean breast meat.
Pound them to an even thickness just as you would a breast, and fry for the same 8 to 12 minutes, checking that the internal temperature reaches 165°F (74°C).
2. How do I make the sandwich less spicy?
The heat in this recipe primarily comes from the cayenne pepper in the flour dredge. Reduce the cayenne from 4 teaspoons to 1 or 2 teaspoons for a noticeably milder result.
You can also swap the Frank’s RedHot in the wet dip for plain water, which removes most of the background heat while keeping the savory flavor of the flour coating.
3. Why is my crust falling off during frying?
The most common reasons are skipping the resting period after dredging, or not pressing firmly enough during the second flour coat. Let the double-coated fillets rest for a full 5 minutes before they go into the oil.
Also make sure your oil is fully up to temperature (350°F/175°C) before adding chicken. Oil that’s too cool causes the crust to absorb oil and detach from the surface before it sets.
4. Can I make this recipe gluten-free?
Yes. Substitute the all-purpose flour with a 1:1 gluten-free baking flour blend. Rice flour alone also works well for a lighter, crispier crust.
Everything else in the recipe is naturally gluten-free, including the hot sauce and the other seasonings. Just make sure to check your bun label as well if you need the whole sandwich to be gluten-free.
5. What’s the best oil for frying this chicken?
Vegetable oil, canola oil, and peanut oil are all excellent choices. They all have high smoke points (400°F/205°C or higher) which means they can maintain stable frying temperatures without breaking down.
Peanut oil is the most flavorful of the three and is often considered the gold standard for fried chicken. Avoid olive oil or coconut oil, which have lower smoke points and will smoke or burn at frying temperatures.
Read Also: Chicken Tenders Recipe
Copycat Wendy’s Spicy Chicken Sandwich
Equipment
- Meat mallet or rolling pin - For pounding chicken to even thickness
- Deep fryer or large heavy-bottomed pot - Dutch oven works perfectly for maintaining oil temperature
- Instant-read thermometer - For checking oil temperature and chicken doneness
- Two wide, shallow bowls or pie plates - For the dredging stations
- Wire rack set over a baking sheet - For draining fried chicken without steaming the crust
- Cast iron or stainless steel skillet - For toasting the buns
- Tongs - For safely lowering chicken into hot oil
- Paper towels - For patting chicken dry
Ingredients
- 4 boneless, skinless chicken breast fillets - about 6 oz or 170g each, pounded to 3/8 inch or 1 cm thick
- 6 cups vegetable oil - 1.4 to 1.9 liters, for frying
- 1/3 cup Frank’s RedHot original sauce - 80ml
- 2/3 cup water - 160ml
For the Seasoned Flour
- 1 cup all-purpose flour - 125g
- 2 1/2 teaspoons salt
- 4 teaspoons cayenne pepper - reduce to 2 teaspoons for medium heat
- 1 teaspoon coarsely ground black pepper
- 1 teaspoon onion powder
- 1/2 teaspoon paprika
- 1/8 teaspoon garlic powder
For Serving
- 4 plain hamburger buns - preferably brioche-style for a richer flavor
- 8 teaspoons mayonnaise
- 4 leaves green leaf lettuce
- 4 thick slices tomato
Instructions
- Place each chicken breast between plastic wrap and pound to an even 3/8-inch thickness using a meat mallet. Pat fillets dry with paper towels.
- In a shallow bowl, whisk together Frank’s RedHot sauce and water. In a second bowl, combine flour, salt, cayenne, black pepper, onion powder, paprika, and garlic powder.
- Coat each fillet in seasoned flour, shake off excess, then dip in hot sauce mixture. Return to flour mixture and press firmly to create a thick, craggy crust. Let coated fillets rest for 5 minutes.
- Heat oil in a deep fryer or Dutch oven to 350°F (175°C). Carefully lower 1-2 fillets at a time into the hot oil.
- Fry for 8-12 minutes, turning once, until deep golden brown and internal temperature reaches 165°F (74°C). Drain on a wire rack, not paper towels.
- Toast hamburger buns cut-side down in a dry skillet over medium heat for 1-2 minutes until lightly golden.
- Spread 2 teaspoons mayonnaise on each top bun. Top with a tomato slice and lettuce leaf. Place the fried chicken on the bottom bun and assemble the sandwich.
Notes
- Double-dredge is key: Don’t skip the second coating or the 5-minute rest time. Both are essential for that signature crispy, craggy crust.
- Oil temperature matters: Maintain 350°F (175°C) between batches. Below 325°F makes greasy chicken, above 375°F burns the crust before the inside cooks.
- Use a wire rack: Resting fried chicken on paper towels traps steam and softens the crust. A wire rack keeps it crispy.
- Pat chicken completely dry: Surface moisture prevents the flour from sticking properly and leads to a thin, patchy crust.
- Dial the heat up or down: Reduce cayenne to 1-2 teaspoons for milder heat, or double it for an extra spicy version.
- Chicken thighs work great: Boneless, skinless chicken thighs are more forgiving and stay juicier than breasts. Pound them to even thickness as directed.
- Make it gluten-free: Substitute all-purpose flour with a 1:1 gluten-free baking flour blend or rice flour.
- Best reheating method: Reheat in the oven at 400°F (200°C) for 10-15 minutes on a wire rack, or air fry at 375°F (190°C) for 5-7 minutes. Never microwave.
- Store components separately: Keep leftover fried chicken in an airtight container in the fridge for up to 3 days. Store bun toppings separately and assemble only when ready to eat.
- Add pickles for a deluxe version: Include dill pickle slices, a slice of pepper jack cheese, and sweet onion for a loaded sandwich.
Final Thoughts
This Wendy’s Spicy Chicken Sandwich recipe delivers everything you love about the original, crispy crust, steady heat, juicy chicken, and that satisfying combination of cool mayo and fresh vegetables, all from your own kitchen.
The double-dredge technique is the key, and once you’ve done it once, it becomes second nature.
Give this recipe a try the next time a fast-food craving hits, and let us know in the comments how it turned out. Did you go extra spicy? Add pickles? Try the air fryer version? We’d love to hear your take on it.
Recommended:
- Popeyes Spicy Chicken Sandwich Recipe
- Spicy Chicken Nuggets Recipe
- Spicy Chicken Ramen Recipe
- Spicy Chicken Chipotle Pasta Recipe
- Baked Chicken Breast Recipe
- Air Fryer Chicken Breast Recipe
- Southern Fried Chicken Recipe
- Crispy Buffalo Chicken Sandwich Recipe
- Fried Buffalo Chicken Sandwich Recipe
- Chicken Tenders Recipe


