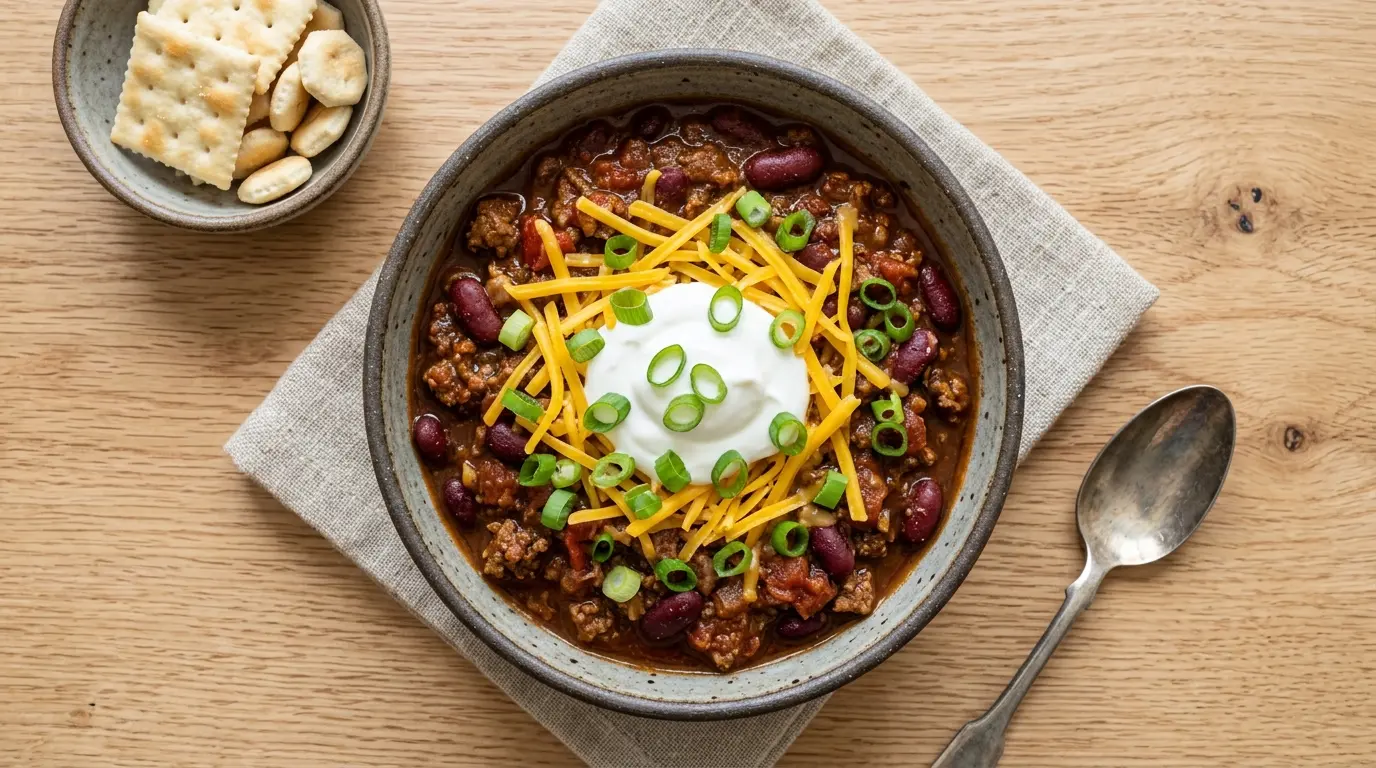
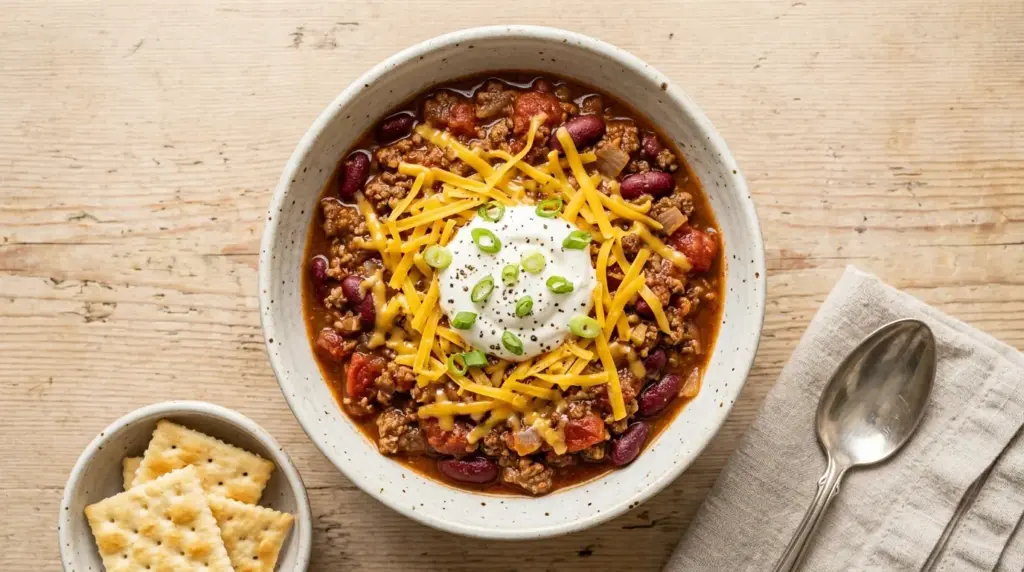
If you’ve ever pulled into a Wendy’s drive-thru just for a cup of their chili, you already know how good it is. This Wendy’s Chili Recipe is a copycat version that captures everything you love about the original: a rich, tomato-forward base, tender ground beef, two kinds of beans, and a seasoning blend that’s savory and warming without being overly spicy. The whole thing comes together in one pot in about an hour, and the flavors only get better the next day.
What makes Wendy’s chili stand out from other fast food menu items is how surprisingly homemade it tastes. The combination of kidney beans and pinto beans gives it a hearty, full-bodied texture. The mix of diced tomatoes, tomato sauce, and tomato juice creates a base that’s deep and complex without requiring hours of effort.
This copycat is made with simple, pantry-friendly ingredients. No secret shortcuts, no mystery packets required. Just honest, good chili that you can customize to your heat preference and serve any way you like.
You might also enjoy: Chicken Chili Recipe

Why You’ll Love This Wendy’s Chili Recipe
This chili is endlessly satisfying, whether you’re feeding a hungry family or prepping meals for the week ahead.
It comes together with everyday ingredients that are almost always already in your pantry or freezer. That alone makes it a weeknight lifesaver.
The two-bean combination of kidney and pinto beans gives the chili a thick, stew-like consistency that feels genuinely filling. You won’t miss a heavy side dish at all.
It’s mild enough for kids but easy to kick up the heat for adults with just a pinch of cayenne or a diced jalapeño.
Leftovers are arguably better than the first bowl. The flavors meld overnight in the fridge and turn this into something truly special.
It scales beautifully. Double the batch, freeze half, and you’ve got dinner handled for another night with zero extra effort.
Here’s a quick look at what makes this recipe a keeper:
- Budget-friendly: Ground beef, canned beans, and canned tomatoes are some of the most affordable ingredients at any grocery store.
- One-pot meal: Less cleanup, more couch time.
- Freezer-friendly: This chili freezes beautifully for up to 3 months.
- Customizable toppings: Shredded cheddar, sour cream, crackers, or green onions all work perfectly.
- Great for a crowd: The recipe makes a big pot that serves 8 to 10 generously.
Read Also: White Chili Recipe
Ingredients
The ingredient list here is approachable and forgiving. Ground beef at 80/20 or 85/15 fat content is ideal because the extra fat carries flavor through the chili. Leaner beef can make the final result a bit dry and less rich-tasting. The Worcestershire sauce is a small addition that adds a subtle umami depth you’ll notice if you leave it out.
- 2 lbs (910g) ground beef (80/20 or 85/15 fat content recommended)
- 1 medium white onion, diced
- 3 stalks celery, diced
- 1 medium green bell pepper, diced
- 4 cloves garlic, minced
- 1 can (15 oz / 425g) red kidney beans, drained and rinsed
- 1 can (15 oz / 425g) pinto beans, drained and rinsed
- 2 cans (15 oz / 425g each) tomato sauce
- 2 cans (15 oz / 425g each) diced tomatoes, with juice
- 1 can (10 oz / 283g) diced tomatoes with green chiles (such as Rotel)
- 1 cup (240ml) tomato juice
- 1 tablespoon Worcestershire sauce
- 1/4 cup (25g) chili powder
- 1 tablespoon ground cumin
- 1 teaspoon garlic powder
- 1 teaspoon onion powder
- 1/2 teaspoon cayenne pepper (adjust to taste)
- 2 teaspoons salt
- 2 teaspoons black pepper
- 1 teaspoon sugar (balances the acidity of the tomatoes)
- 1 tablespoon olive oil
This recipe pairs wonderfully with a side of Baked Beans for a full Southern-style spread.
Kitchen Equipment Needed
You don’t need anything specialized to pull this recipe off. A large, heavy-bottomed pot is the single most important tool here because it distributes heat evenly and prevents the bottom of the chili from scorching during the simmering stage. A Dutch oven is ideal, but a large stockpot works just as well.
- Large Dutch oven or heavy-bottomed stockpot (6-quart or larger)
- Wooden spoon or heat-safe spatula
- Chef’s knife and cutting board
- Measuring cups and spoons
- Can opener
- Ladle for serving
- Colander or strainer (for draining the beans)
Read Also: Slow Cooker Chili Recipe
Recommended Products for This Recipe
These are products genuinely worth having in your kitchen for making this chili and similar hearty meals. Each one either improves the final result or makes the process significantly easier.
1. Le Creuset Enameled Cast Iron Dutch Oven
A quality Dutch oven is the single best investment for chili-making. Cast iron holds and distributes heat evenly, which means your chili simmers gently and consistently without hot spots that can scorch the bottom. The enameled surface also makes cleanup easy even after a long simmer.
2. Rotel Diced Tomatoes and Green Chiles
The combination of diced tomatoes and green chiles in a single can gives Wendy’s chili that signature mild kick without adding raw jalapeños. Rotel is the most recognized brand for this product and is widely available in standard grocery stores.
3. Chili Seasoning Blend
If you want to shortcut the individual spices, a quality chili seasoning blend gives you a consistent, well-balanced flavor base. Look for one without MSG or artificial additives. You can still add extra cumin and cayenne on top to personalize the heat level.
4. Immersion Blender (Optional, for Texture)
If you prefer a thicker chili with a more uniform texture, an immersion blender lets you quickly blend a small portion of the beans directly in the pot. This creates a naturally thick, creamy base without adding any starch or thickeners.
This chili is rich enough to stand on its own, but if you love hearty beef-based comfort food, you’ll also want to try this Crockpot Beef Stew.

Step-by-Step Instructions
Step 1: Dice and Prep Your Vegetables
- Peel and dice the white onion into small, even pieces (about 1/4 inch / 6mm). Smaller pieces will cook down more fully into the chili and won’t feel chunky in the final bowl.
- Wash and dice the celery stalks into similarly small pieces, removing any leafy tops.
- Slice off the top and bottom of the green bell pepper, remove the seeds and white membrane, and dice into small pieces.
- Mince the garlic cloves finely. If you prefer, you can press them with a garlic press instead of chopping.
- Open all your cans of beans, tomatoes, tomato sauce, diced tomatoes with green chiles, and have the tomato juice measured and ready. Drain and rinse the kidney beans and pinto beans in a colander.
Step 2: Brown the Ground Beef
- Heat 1 tablespoon of olive oil in your large Dutch oven or stockpot over medium-high heat. Wait until the oil is shimmering before adding the beef.
- Add the 2 lbs (910g) of ground beef to the pot. Press it down slightly with a wooden spoon to create a wide, flat layer across the bottom of the pot. This increases surface contact and promotes better browning.
- Let the beef cook undisturbed for about 3 to 4 minutes until the underside develops a brown crust. Then break it up with your spoon and continue cooking.
- Halfway through browning, add the diced onion, celery, and green bell pepper directly into the beef. Stir everything together and continue cooking until the vegetables have softened, about 5 to 7 more minutes.
- Add the minced garlic and cook for 1 additional minute, stirring constantly so the garlic doesn’t burn.
- Drain off excess fat by tilting the pot and carefully spooning out the liquid, or by transferring the mixture to a colander and returning it to the pot.
Step 3: Add the Tomato Base
- With the beef and vegetables back in the pot over medium heat, pour in both cans of tomato sauce. Stir to coat everything evenly.
- Add the 2 cans of diced tomatoes (with all their juice) and the 1 can of diced tomatoes with green chiles. Stir well.
- Pour in the 1 cup (240ml) of tomato juice. This adds liquid volume and deepens the tomato flavor without thinning the chili too much.
Step 4: Add the Beans and Seasonings
- Add the drained and rinsed kidney beans and pinto beans directly to the pot. Stir to distribute them evenly throughout the mixture.
- Add the Worcestershire sauce and stir it in thoroughly.
- Sprinkle in the chili powder, cumin, garlic powder, onion powder, cayenne pepper, salt, and black pepper. Add the sugar as well to balance the acidity from the tomatoes.
- Stir everything together until all the spices are fully incorporated and evenly distributed. The mixture should look uniformly dark and fragrant at this point.
Step 5: Simmer the Chili
- Increase the heat to medium-high and bring the chili to a full boil, stirring occasionally to prevent sticking.
- Once boiling, reduce the heat to low, cover the pot with a lid slightly ajar (to let steam escape and the chili thicken), and let it simmer for at least 30 minutes. For deeper, more developed flavor, simmer for 1 to 2 hours, stirring every 15 to 20 minutes.
- Taste the chili at the 30-minute mark and adjust seasoning as needed. Add more salt, cayenne, or chili powder based on your preference.
- The chili is ready when it has thickened to a stew-like consistency and the flavors have come together into a rich, cohesive bowl.
Step 6: Serve and Top
- Ladle the hot chili into bowls using a large soup ladle.
- Top with your choice of shredded cheddar cheese, a dollop of sour cream, sliced green onions, crushed crackers, or diced white onion.
- Serve immediately alongside cornbread, a baked potato, or tortilla chips for scooping.
For another crowd-pleasing hearty bowl, check out this Stuffed Pepper Soup.
Tips for Success
A few small adjustments can take this chili from good to genuinely great. The most important one is patience: don’t rush the simmer. The longer the chili sits on low heat, the more the flavors develop and the better the texture becomes.
- Brown the beef properly: Don’t stir constantly at the start. Let it sit undisturbed for a few minutes to develop a crust. This Maillard browning adds savory depth that you simply can’t get by steaming the meat.
- Don’t skip the Worcestershire sauce: It adds a subtle savory layer that brings all the other flavors into focus.
- Simmer low and slow: A 1 to 2 hour simmer on low heat creates a completely different chili than a 30-minute version. Both are good, but the longer simmer is where the magic happens.
- Taste and adjust before serving: Chili seasoning levels vary by brand and personal preference. Always taste 15 to 20 minutes before serving and tweak accordingly.
- Make it the day before: Wendy’s chili, like all great chilis, tastes noticeably better after a night in the fridge. The flavors meld and deepen significantly overnight.
- Control the heat level: Add cayenne a little at a time. You can always add more, but you can’t take it back.
You might also love the same slow-simmered depth in this Hamburger Soup.
Serving Suggestions
This chili is incredibly versatile. It works as a standalone bowl, a loaded baked potato topping, a base for chili mac, and so much more.
The classic Wendy’s-style presentation is a bowl topped with finely shredded cheddar cheese, a swirl of sour cream, and diced raw white onion. Crackers on the side for scooping are a must for the full drive-thru experience.
Here are some other ways to serve this chili:
- Spoon it over a split Baked Potato with cheddar and sour cream for a loaded baked potato dinner.
- Serve alongside a slice of Skillet Cornbread for the most comforting combination imaginable.
- Use it as a nacho topping over tortilla chips with shredded cheese melted on top.
- Spoon over cooked macaroni for a quick and satisfying chili mac.
- Use as a hot dog topping at your next backyard cookout.
- Pair with a simple Creamy Coleslaw for a well-rounded meal.
Variations to Try
Once you’ve mastered the base recipe, there are plenty of fun ways to put your own spin on it. The core method stays the same, but a few swaps can take it in a completely different direction.
- Turkey chili: Swap the ground beef for ground turkey for a lighter version. Use 93/7 lean turkey and add a small drizzle of olive oil to compensate for the lower fat content.
- Vegetarian version: Omit the ground beef entirely and add an extra can of beans (black beans work beautifully) plus 1 cup of frozen corn. The texture is still hearty and satisfying.
- Slow cooker version: Brown the beef and vegetables on the stove first, then transfer everything to a slow cooker and cook on LOW for 6 to 8 hours or HIGH for 3 to 4 hours.
- Spicier chili: Add a diced jalapeño with the bell peppers, or stir in a tablespoon of hot sauce at the end of cooking.
- Smoky chili: Add 1 teaspoon of smoked paprika and a tiny pinch of chipotle powder for a deeper, smokier flavor.
- Chili with corn: Stir in 1 cup of canned or frozen corn during the last 15 minutes of simmering for a touch of sweetness and color.
For a completely different chili experience, try this Texas Chili Recipe for a bold, bean-free version.
Storage and Reheating
This chili is a meal prep dream. It stores well, reheats easily, and actually improves with time, making it one of the most practical dishes to cook in a big batch.
- Refrigerator: Store cooled chili in an airtight container for up to 4 to 5 days. The flavor will continue to deepen over the first 24 hours.
- Freezer: Portion the chili into individual freezer-safe containers or zip-top bags. Freeze for up to 3 months. Thaw overnight in the fridge before reheating.
- Stovetop reheating: Reheat gently in a saucepan over medium-low heat, adding a splash of water or tomato juice if the chili has thickened too much. Stir occasionally.
- Microwave reheating: Transfer a single serving to a microwave-safe bowl, cover loosely, and heat in 1-minute intervals, stirring between each, until hot throughout.
- Do not boil when reheating: A hard boil can break down the beans and alter the texture. A gentle simmer or microwave reheat keeps everything intact.
For another great freezer-friendly dish, have a look at this Turkey Chili Recipe.
Nutritional Facts
The following values are approximate, based on 1 serving (1/8 of the full recipe, roughly 1.5 cups):
| Nutrient | Amount |
|---|---|
| Calories | 420 kcal |
| Protein | 29g |
| Total Fat | 21g |
| Saturated Fat | 7g |
| Carbohydrates | 30g |
| Fiber | 9g |
| Sugar | 9g |
| Sodium | 1,150mg |
| Potassium | 1,200mg |
| Vitamin C | 24mg |
| Calcium | 110mg |
| Iron | 6mg |
Note: Nutritional values will vary depending on the specific brands of canned goods used, the fat content of your ground beef, and any toppings added.
Read Also: White Chicken Chili Recipe
Health Benefits of Key Ingredients
This chili is more nutritious than it might look at first glance. The combination of lean protein, fiber-rich beans, and antioxidant-loaded tomatoes makes it a well-rounded meal with genuine nutritional benefits.
The beans alone are nutrition powerhouses. Both kidney and pinto beans are excellent sources of plant-based protein, complex carbohydrates, and soluble fiber, which supports healthy digestion and helps keep blood sugar levels stable.
Here’s a closer look at the nutritional highlights of the key ingredients:
- Ground beef: A complete source of protein containing all essential amino acids. It also provides iron, zinc, and B vitamins, particularly B12, which supports energy production and nerve function.
- Kidney beans: Rich in iron and folate. Their high fiber content slows digestion, which promotes lasting satiety and helps manage cholesterol levels.
- Pinto beans: One of the best dietary sources of soluble fiber. Pinto beans also contain significant amounts of magnesium and phosphorus, which support bone health.
- Tomatoes: Loaded with lycopene, a powerful antioxidant linked to reduced risk of certain cancers and heart disease. Cooking tomatoes actually increases lycopene availability compared to eating them raw.
- Garlic: Contains allicin, a compound with well-documented anti-inflammatory and antimicrobial properties. Regular garlic consumption is associated with improved heart health.
- Green bell pepper: An underrated source of vitamin C, providing more per gram than oranges. Vitamin C supports immune function and iron absorption.
- Celery: Low in calories and a good source of vitamin K and antioxidants. It adds bulk and a mild savory note without significantly impacting the calorie count.
- Cumin: Beyond its warm, earthy flavor, cumin has antioxidant properties and may support healthy digestion.
Another great recipe that packs in lean protein and veggies is this Vegetable Soup.
Frequently Asked Questions
1. What kind of beans does Wendy’s use in their chili?
Wendy’s uses two types of beans: red kidney beans and pinto beans. This two-bean combination is one of the signature characteristics of the original recipe. The kidney beans are firm and hold their shape well during a long simmer, while the pinto beans are slightly creamier and break down just enough to help thicken the chili. This copycat recipe uses both for the most authentic result.
2. Can I make this chili in a slow cooker?
Yes, and it’s a great hands-off option. Brown the ground beef and sauté the vegetables on the stovetop first, which is an important step because it builds flavor you can’t get from raw meat in a slow cooker. Then transfer everything to a 6-quart or larger slow cooker, add all remaining ingredients, and cook on LOW for 6 to 8 hours or HIGH for 3 to 4 hours. The result is a deeply flavorful chili with very little active cooking time.
3. How spicy is this Wendy’s chili recipe?
This recipe is intentionally mild, just like the original. The 1/4 cup of chili powder gives warmth and flavor without significant heat. The 1/2 teaspoon of cayenne adds a very gentle kick in the background. If you prefer more heat, simply add an extra 1/4 teaspoon of cayenne, a diced jalapeño during step 2, or a splash of your favorite hot sauce at the end. For a kid-friendly version, reduce the cayenne to a pinch or omit it entirely.
4. Why does Wendy’s chili taste better the next day?
This is a well-known phenomenon in chili cooking and the science behind it is straightforward. As chili sits and cools, the spices continue to bloom in the fat and liquid even off the heat. The beans absorb more of the surrounding flavors, and the tomatoes mellow and sweeten slightly. The result is a more unified, cohesive taste profile where no single ingredient stands out too sharply. Always make this chili the night before if you have time.
5. Can I freeze this chili?
Absolutely. This chili freezes exceptionally well and is a fantastic candidate for batch cooking. Let the chili cool completely before portioning it into freezer-safe containers or heavy-duty zip-top bags. Freeze for up to 3 months. Thaw overnight in the refrigerator, then reheat gently on the stovetop over medium-low heat, adding a small splash of water or broth to loosen if needed. Avoid freezing with toppings like sour cream or shredded cheese, as those should always be added fresh.
For more chili inspiration, browse the classic Chili Recipe for a traditional homemade version.

Wendy’s Chili Recipe
Equipment
- Large Dutch oven or heavy-bottomed stockpot - 6-quart or larger
- Wooden spoon or heat-safe spatula
- Chef’s knife
- Cutting board
- Measuring cups and spoons
- Can opener
- Ladle
- Colander or strainer
- Immersion Blender - Optional, for thickening texture
Ingredients
- 2 lbs ground beef - 910g, 80/20 or 85/15 fat content recommended
- 1 white onion - medium, about 1 cup or 150g, diced
- 3 celery stalks - diced
- 1 green bell pepper - medium, diced
- 4 garlic cloves - minced
- 15 oz red kidney beans - 425g can, drained and rinsed
- 15 oz pinto beans - 425g can, drained and rinsed
- 15 oz tomato sauce - 425g can
- 15 oz diced tomatoes - 425g can, with juice
- 10 oz diced tomatoes with green chiles - 283g can, such as Rotel
- 1 cup tomato juice - 240ml
- 1 tbsp Worcestershire sauce - 15ml
- 1/4 cup chili powder - 25g
- 1 tbsp ground cumin
- 1 tsp garlic powder
- 1 tsp onion powder
- 1/2 tsp cayenne pepper - adjust to taste
- 2 tsp salt
- 2 tsp black pepper
- 1 tsp sugar - balances the acidity of the tomatoes
- 1 tbsp olive oil - 15ml
For Serving
- shredded cheddar cheese - optional, for topping
- sour cream - optional, for topping
- green onions - sliced, optional for topping
- crackers - crushed, optional for serving
- white onion - diced, optional for topping
Instructions
- Dice the onion, celery, and green bell pepper into small, even pieces (about 1/4 inch). Mince the garlic cloves finely and drain the canned beans in a colander, rinsing well.
- Heat olive oil in a large Dutch oven over medium-high heat until shimmering. Add ground beef in a flat layer and cook undisturbed for 3-4 minutes to brown. Break up the meat, then add the onion, celery, and bell pepper. Cook until vegetables are softened, about 5-7 minutes. Stir in minced garlic and cook for 1 minute until fragrant. Drain off excess fat.
- Pour in both cans of tomato sauce, the diced tomatoes with their juice, and the diced tomatoes with green chiles. Stir in the tomato juice and combine thoroughly.
- Stir in the drained kidney beans and pinto beans. Add Worcestershire sauce, chili powder, cumin, garlic powder, onion powder, cayenne pepper, salt, black pepper, and sugar. Mix until all spices are evenly incorporated.
- Bring the chili to a full boil over medium-high heat, stirring occasionally. Reduce heat to low, cover with the lid slightly ajar, and simmer for at least 30 minutes, or up to 1-2 hours for deeper flavor. Stir every 15-20 minutes. Taste and adjust seasoning at the 30-minute mark.
- Ladle the hot chili into bowls and top with shredded cheddar cheese, sour cream, sliced green onions, crushed crackers, or diced white onion. Serve immediately with cornbread or tortilla chips.
Notes
- For the best flavor, let the chili simmer for 1-2 hours instead of just 30 minutes. The longer it cooks, the deeper the flavor develops.
- Make this chili a day ahead – like Wendy’s, it tastes even better the next day after the flavors meld overnight in the refrigerator.
- Control the heat level by adjusting the cayenne pepper. Start with 1/2 teaspoon for a mild kick, add more for extra spice, or omit entirely for a kid-friendly version.
- If the chili becomes too thick upon reheating, stir in a splash of water, beef broth, or tomato juice to loosen it to your desired consistency.
- To make a slow cooker version, brown the beef and vegetables on the stovetop first, then transfer to a slow cooker and cook on LOW for 6-8 hours or HIGH for 3-4 hours.
- For a lighter version, substitute the ground beef with ground turkey (93/7) and add an extra tablespoon of olive oil to compensate for the lower fat content.
- For a vegetarian version, omit the ground beef and add an extra can of black beans and 1 cup of frozen corn for a hearty, satisfying texture.
- Freeze individual portions in airtight containers for up to 3 months. Thaw overnight in the refrigerator before reheating gently on the stovetop or in the microwave.
- Brown the beef properly by letting it sit undisturbed for a few minutes before stirring. This creates a savory crust that adds depth to the chili.
- This chili is perfect for meal prep – it stores well in the refrigerator for 4-5 days and the flavors continue to deepen over time.
Final Thoughts
Making this Wendy’s Chili Recipe at home is one of those satisfying cooking projects where the result genuinely rivals, and often beats, the original. You control the quality of the beef, the salt level, and the spice blend. You can make a double batch and freeze half for a future busy weeknight.
Give it a try on your next lazy Sunday afternoon. Let it simmer low and slow, fill up your kitchen with that incredible chili aroma, and see for yourself why so many home cooks keep coming back to this recipe again and again.
If you make this, drop a comment below and let us know how it turned out! Tag us on social media or share your favorite topping combinations, because honestly, hearing how you make it your own is the best part.
Recommended:
- Chili Recipe
- White Chicken Chili
- Texas Chili
- Bush’s White Chicken Chili
- Chicken Tortilla Soup
- Loaded Potato Soup
- Sweet Cornbread
- Corn on the Cob
- Green Beans
- Lentil Soup


