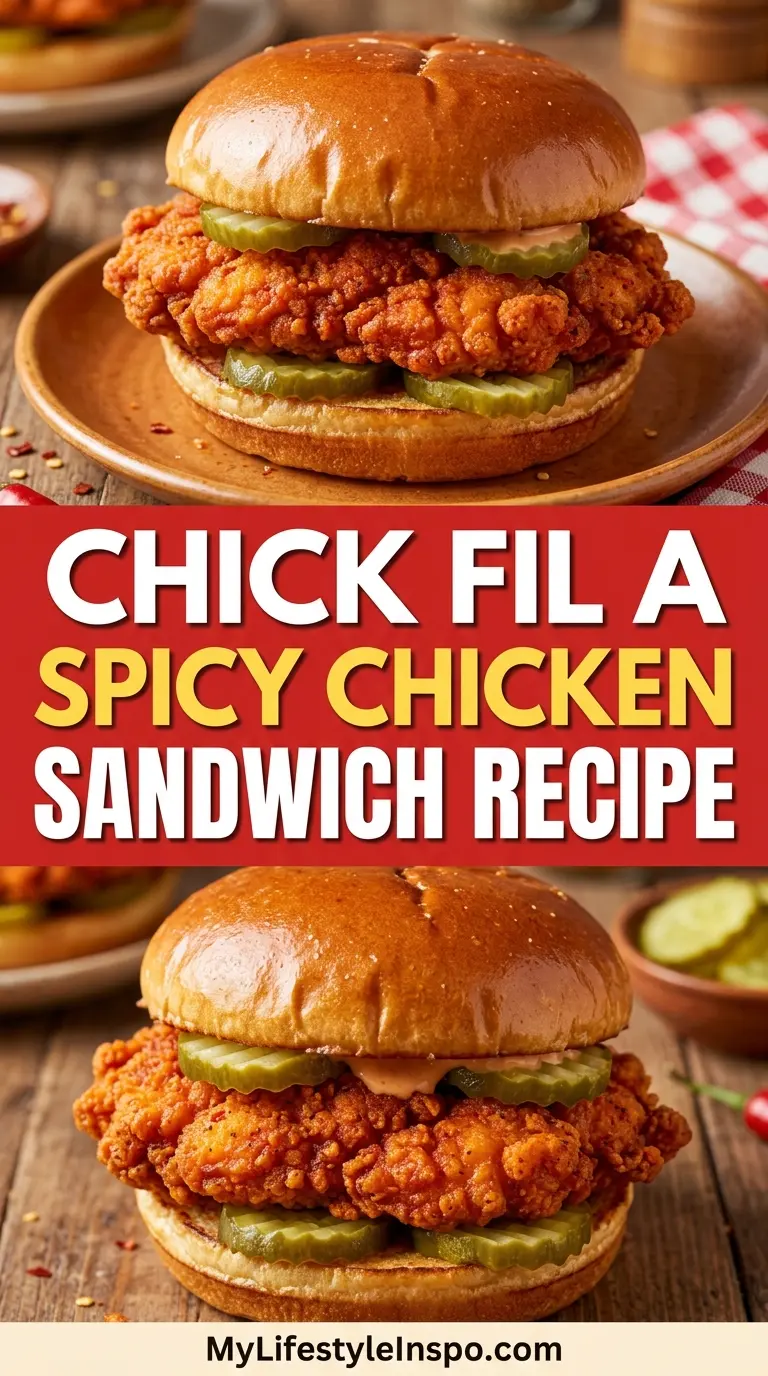
If you have been craving a Chick Fil A Spicy Chicken Sandwich Recipe you can make right at home, you are in the right place.
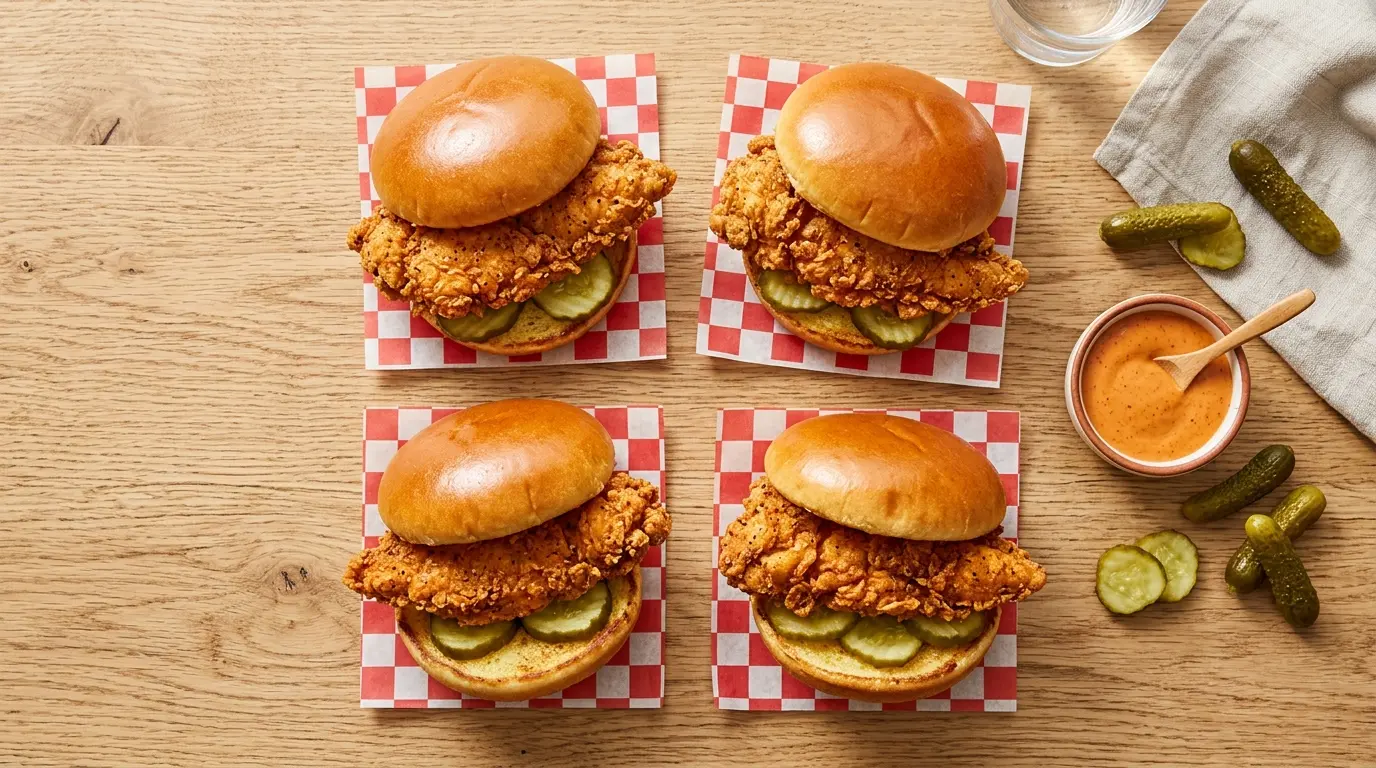
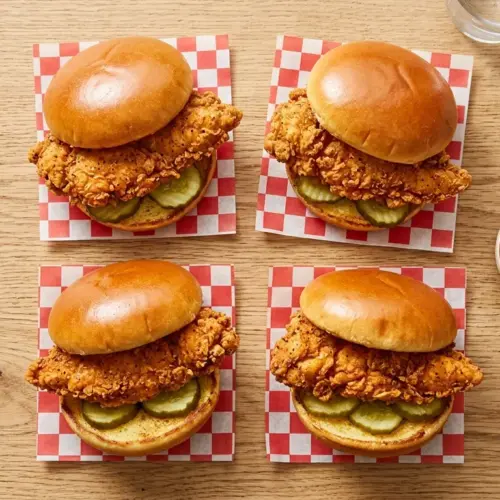
This copycat version nails everything you love about the original: a juicy, well-seasoned chicken breast with a craggy, golden crust, the right amount of fiery heat, and those tangy dill pickles sandwiched between a buttery toasted bun.
The secret to getting it exactly right comes down to a few non-negotiable techniques: marinating the chicken in pickle juice (which both tenderizes the meat and builds that signature briny flavor), using a spiced flour coating with powdered sugar for color and caramelization, and frying in peanut oil at the correct temperature.
Most copycat recipes skip at least one of these steps. This one does not.
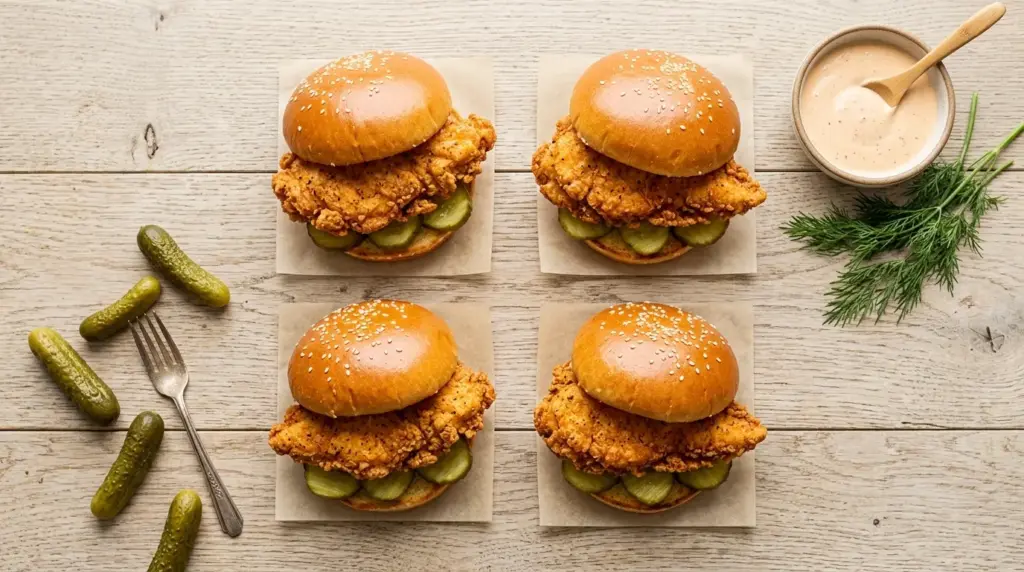
Once you make this at home, heading to the drive-thru starts to feel a little unnecessary. The flavor is spot-on, the process is simpler than you might expect, and you can have four full sandwiches on the table for less than the cost of two from the restaurant.
Ready to make the best spicy chicken sandwich of your life? Here is everything you need to know.
[Try this classic Spicy Chicken Sandwich if you want a lighter version before you go full copycat mode.]
Why You’ll Love This Chick Fil A Spicy Chicken Sandwich Recipe
This recipe consistently earns rave reviews from first-time makers, and once you taste it, you will understand why.
The pickle juice marinade is doing real work here. It tenderizes the chicken at the muscle fiber level, so the inside stays incredibly moist even after a full fry.
The spiced breading uses a three-ingredient heat combination: cayenne for the sharp burn, paprika for warmth and color, and chili powder for depth. Together they build a layered spiciness that lingers without being overwhelming.
Powdered sugar in the coating sounds unusual, but it is the reason this chicken gets that deep golden-brown crust. The sugar caramelizes quickly in hot oil, giving you the color and slight sweetness that balances all that heat.
Peanut oil has a high smoke point and a clean, neutral flavor that lets the chicken and spices do all the talking. It is the same oil Chick-fil-A uses in their restaurants for a reason.
Here is a quick list of things that make this recipe special:
- Pickle juice brine tenderizes and flavors the chicken from the inside out
- The three-pepper spice blend delivers the exact heat profile of the original
- Powdered sugar in the breading creates that signature golden crust
- Double-dipping in the egg wash and flour builds a thicker, crunchier coating
- Toasting the buns in butter adds richness and prevents sogginess
- Comes together in under an hour from start to finish
You might also enjoy: Wendy’s Spicy Chicken Sandwich
Ingredients
The ingredient list for this recipe is refreshingly simple. Most of what you need is already in your kitchen.
Here is what to gather before you start:
For the Chicken and Marinade:
- 2 large boneless, skinless chicken breasts (about 1.5 lbs / 680g total)
- 1 cup (240ml) dill pickle juice (from a jar of dill pickles)
- 1/2 cup (120ml) whole milk
- 1 large egg
- 1 tablespoon hot sauce (such as Frank’s RedHot or Texas Pete)
For the Spiced Breading:
- 1 cup (125g) all-purpose flour
- 2 tablespoons powdered sugar
- 1 teaspoon cayenne pepper (add up to 2 teaspoons for extra heat)
- 1 teaspoon paprika
- 1 teaspoon chili powder
- 1 teaspoon garlic powder
- 1/2 teaspoon onion powder
- 1/2 teaspoon mustard powder
- 1 teaspoon kosher salt
- 1/2 teaspoon black pepper
- 1/2 teaspoon baking powder
For Assembly:
- Peanut oil for frying (about 2 inches / 5cm deep in the pot)
- 4 brioche buns
- 2 tablespoons unsalted butter (for toasting the buns)
- 8 to 12 dill pickle chips
Read Also: Popeyes Spicy Chicken Sandwich Recipe
Kitchen Equipment Needed
You do not need anything fancy to pull this recipe off, but a few key tools make the process much smoother.
Here is what to have ready:
- Dutch oven or deep heavy-bottomed pot (for frying)
- Deep-fry thermometer (non-negotiable for consistent results)
- Two large shallow bowls or baking dishes (for the dredging station)
- Wire cooling rack set over a baking sheet (for resting the fried chicken)
- Tongs or a spider strainer (for safely lowering chicken into hot oil)
- Meat mallet or heavy rolling pin (for pounding chicken to even thickness)
- Cutting board and sharp knife
- Paper towels (for draining)
- Cast iron or nonstick skillet (for toasting the buns)
Another favorite: Spicy Chicken Tenders Recipe
Recommended Products for This Recipe
These are a few products I stand behind for getting the best possible results with this recipe, based on quality and performance.
1. Lodge 6-Quart Enameled Cast Iron Dutch Oven
A heavy-bottomed Dutch oven is the single most important piece of equipment for frying chicken at home. It holds heat incredibly well and prevents the oil temperature from dropping when you add the chicken, which means crispier, less greasy results every single time.
2. ThermoPro Instant-Read Deep Fry Thermometer
Keeping your oil between 325°F and 360°F (163°C and 182°C) is what separates perfectly golden chicken from pale or burnt chicken. This thermometer clips onto the side of your pot and gives you a constant, accurate temperature readout with no guessing required.
3. Planters Peanut Oil (48 oz)
Peanut oil’s high smoke point (around 450°F / 232°C) makes it ideal for frying chicken. It stays stable at high temperatures without breaking down or creating off flavors, and it gives the coating a clean, beautifully golden finish that other oils simply cannot match.
4. OXO Good Grips 3-Piece Tongs Set
Good tongs give you control when you are working with hot oil. These have a strong grip, comfortable handles, and are long enough to keep your hands safely away from splatters. They are also great for flipping the buns when you toast them.
For a lighter take on the same flavor profile, check out: Spicy Chicken Nuggets Recipe
Step-by-Step Instructions
Step 1: Prep the Chicken
- Place the chicken breasts on a cutting board and slice each one in half horizontally to create 4 thinner cutlets. Each piece should be roughly 1/2 inch (1.25cm) thick.
- If any pieces are uneven, place them between two sheets of plastic wrap and gently pound with a meat mallet until they are a uniform thickness.
- Uniform thickness means every part cooks at the same rate, so you get juicy centers and a fully cooked exterior at the same time.
Step 2: Marinate in Pickle Juice
- Place all 4 chicken cutlets in a zip-top bag or a medium bowl.
- Pour the dill pickle juice over the chicken, making sure all pieces are submerged or well-coated.
- Cover and refrigerate for at least 1 hour. For best results, marinate for 2 to 4 hours. Do not marinate longer than 6 hours, as the acid can start to break down the texture of the meat too much.
- The pickle juice is not just for flavor: the salt and acid work together to denature the proteins slightly, which is what keeps the chicken so tender and juicy after frying.
Step 3: Make the Spiced Breading
- In a large shallow bowl, whisk together the flour, powdered sugar, cayenne pepper, paprika, chili powder, garlic powder, onion powder, mustard powder, salt, black pepper, and baking powder.
- Whisk thoroughly until everything is evenly combined and there are no clumps.
- The baking powder adds a very slight lift to the coating, making it a little lighter and more delicate rather than dense and heavy.
- Set the bowl aside.
Step 4: Make the Egg Wash
- In a separate shallow bowl, whisk together the egg, milk, and hot sauce until fully combined and smooth.
- The hot sauce in the egg wash adds another layer of heat that works from within the breading, not just on the surface.
- Set the bowl next to the flour mixture so you have a clear dredging station: egg wash first, flour second.
Step 5: Remove and Dry the Chicken
- Remove the marinated chicken from the refrigerator and drain off all the pickle juice.
- Pat each cutlet thoroughly dry with paper towels. Both sides, all edges.
- This step is critical: wet chicken will steam in the oil instead of crisping up, and it also causes more dangerous splattering. Dry chicken fries much better.
Step 6: Bread the Chicken
- Working one piece at a time, dip a chicken cutlet into the egg wash, making sure every surface is fully coated.
- Lift it out and let the excess drip off for a few seconds.
- Immediately transfer it to the flour mixture and press it in firmly. Turn it over and press again. Make sure the breading is packed into every corner and crevice.
- For extra crunch (and extra authenticity), dip it back into the egg wash briefly and then back into the flour one more time. This double dredge creates the craggy, thick crust that Chick-fil-A is known for.
- Place the breaded cutlets on a wire rack while you heat the oil.
Step 7: Heat the Oil
- Pour enough peanut oil into your Dutch oven or deep pot to reach about 2 inches (5cm) deep.
- Clip a deep-fry thermometer to the side of the pot and heat the oil over medium-high heat.
- Wait until the oil reaches 350°F (175°C) before adding any chicken. Do not rush this step.
- If the oil is too cool, the chicken will absorb it and turn greasy. If it is too hot, the outside will burn before the inside cooks through.
Step 8: Fry the Chicken
- Carefully lower one or two cutlets into the hot oil using tongs. Do not overcrowd the pot: adding too many pieces at once drops the oil temperature drastically.
- Fry for 3 to 4 minutes on the first side without moving the chicken. You want it to form a crust before you flip.
- Flip carefully and fry for another 3 to 4 minutes on the second side, until the coating is deep golden-brown and the internal temperature of the chicken reads 165°F (74°C) on an instant-read thermometer.
- Transfer the cooked chicken to a wire rack set over a paper towel-lined baking sheet. Do not place it directly on paper towels, as that will trap steam underneath and make the bottom soggy.
- Repeat with the remaining cutlets, letting the oil return to temperature between batches.
Step 9: Toast the Buns
- While the last batch of chicken fries, place a skillet over medium heat and add the butter.
- Once the butter melts and starts to foam, place the brioche buns cut-side down in the skillet.
- Toast for 1 to 2 minutes until golden and slightly crispy on the cut surface.
- Toasted buns not only add flavor: they create a barrier that slows down moisture absorption, so your sandwich stays intact and does not get soggy as you eat it.
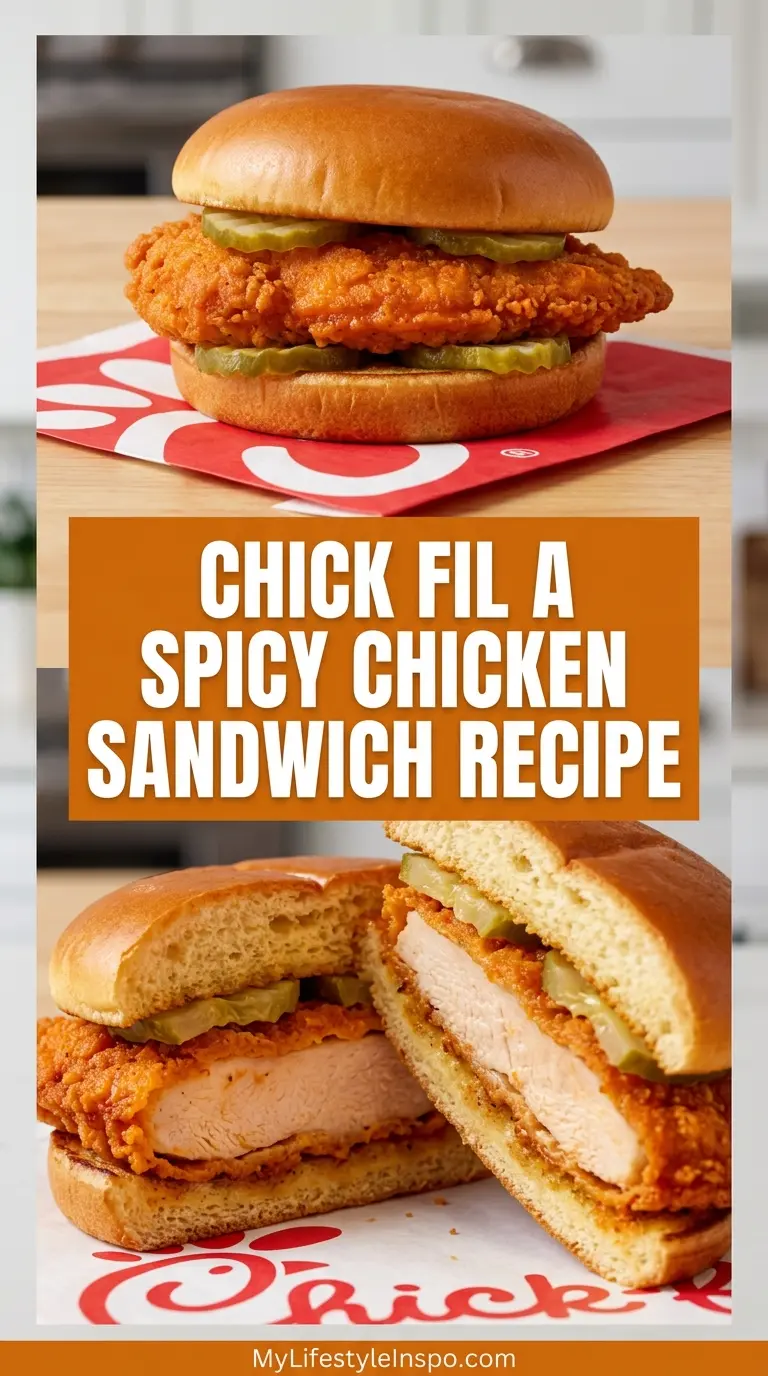
Step 10: Assemble and Serve
- Place one piece of fried spicy chicken on each toasted bottom bun.
- Lay 2 to 3 dill pickle chips on top of the chicken.
- Place the top bun on and press down gently to set everything together.
- Serve immediately while the chicken is hot and the crust is at its crispiest.
This technique also works beautifully if you love air fryer chicken tenders and want a lighter spin on the same spiced coating.
Tips for Success
A few details separate good fried chicken from truly great fried chicken. Keep these in mind before you start.
Here are the tips that make the biggest difference:
- Do not skip the marinade. Even a one-hour soak in pickle juice makes a significant difference in the tenderness and flavor of the final chicken. Two to four hours is even better.
- Pat the chicken completely dry before breading. Moisture is the enemy of a crispy crust. Take an extra 30 seconds to really dry each cutlet.
- Keep the oil temperature steady. Use a thermometer the entire time. Fry in small batches and let the oil recover between each one.
- Use a wire rack, not paper towels, to rest the chicken. Resting on a rack keeps the bottom crust crispy instead of steaming it soft.
- Press the flour into the chicken firmly. Do not just sprinkle it on. Press, pack, and repeat to build a thick crust.
- Assemble right before eating. The crust starts absorbing moisture from the pickles almost immediately, so put the sandwiches together only when you are ready to serve.
- Taste and adjust the heat. If you want it milder, reduce the cayenne to 1/2 teaspoon. For serious heat, go up to 2 teaspoons and add a pinch of white pepper to the breading as well.
Homemade fried pickles make a fantastic side dish to serve alongside these sandwiches.
Serving Suggestions
This sandwich stands on its own, but the right sides and toppings take the full meal to another level.
On the sandwich itself, you can go beyond the classic two-pickle-chips-and-done approach. Try adding shredded lettuce and a slice of ripe tomato for a Spicy Deluxe version. Pepper jack cheese melted onto the hot chicken right off the fryer is phenomenal. A smear of spicy mayo (just mayo and sriracha mixed together) on the top bun adds creaminess that balances the heat beautifully.
Great sides and serving ideas:
- Creamy Coleslaw is the classic partner. The cool, creamy slaw cuts right through the heat of the chicken.
- Air Fryer French Fries (served on the side) make this feel like a full fast-food experience at home
- Waffle fries dusted with seasoned salt, which is the true Chick-fil-A pairing
- A simple green salad dressed with lemon vinaigrette keeps things light and fresh
- Dipping sauces: Chick-fil-A sauce (a mix of honey mustard, barbecue, and mayo), ranch, or honey butter all work incredibly well
Variations to Try
Once you have the base recipe down, there are so many fun ways to take it in a new direction.
The core technique stays the same; you just swap out a few elements:
- Spicy Deluxe Version: Add pepper jack cheese, shredded lettuce, and a slice of tomato. Spread the top bun with spicy mayo before assembling. This is how the restaurant serves the Spicy Deluxe.
- Nashville Hot Variation: After frying, brush the chicken with a mixture of 2 tablespoons cayenne, 1 tablespoon brown sugar, 1 teaspoon garlic powder, and 3 tablespoons of the hot frying oil. It is fiery, glossy, and absolutely addictive.
- Air Fryer Version: Spray the breaded chicken with avocado oil spray and air fry at 400°F (200°C) for 14 to 16 minutes, flipping halfway through. The crust will not be quite as craggy as deep-fried, but it is still very good and much less messy.
- Buttermilk Swap: Replace the egg and milk wash with 1/2 cup of buttermilk. Buttermilk adds a slightly tangy richness to the coating and tenderizes the chicken even further during the soak.
- Chicken Thigh Version: Use boneless, skinless chicken thighs instead of breasts. Thighs have more fat and stay even juicier through the frying process. Many food writers actually prefer this approach for a more indulgent result.
- Biscuit Sandwich: Skip the brioche bun entirely and serve the spicy chicken on a warm buttermilk biscuit with a drizzle of honey butter. This is one of the best things you can put in your mouth on a Sunday morning.
For a completely different take using similar flavors, the Spicy Chicken Chipotle Pasta is a great next recipe to try.
Storage and Reheating
The fried chicken is definitely best eaten fresh, but leftovers can be brought back to life very successfully with the right approach.
Here is how to store and reheat properly:
- Refrigerator: Store leftover fried chicken in an airtight container, separated from the buns and toppings, for up to 3 days.
- Freezer: Fried chicken can be frozen on a baking sheet until solid, then transferred to a zip-top bag for up to 2 months. Thaw overnight in the refrigerator before reheating.
- Best reheating method: Place the chicken on a wire rack set over a baking sheet and reheat in a 375°F (190°C) oven for 10 to 12 minutes. This method re-crisps the coating instead of steaming it soggy.
- Air fryer reheating: Reheat at 375°F (190°C) for 5 to 7 minutes, flipping halfway. This is the fastest way to get a truly crispy result.
- Avoid the microwave: Microwaving fried chicken makes the coating soft and rubbery. It is the one method to skip.
- Do not store assembled sandwiches: The pickles and moisture from the chicken quickly soften the bun and coating. Store the components separately and assemble fresh.
If you love reheating chicken in the air fryer, the Air Fryer Chicken Breast Recipe has great tips for getting perfectly juicy results every time.
Nutritional Facts
The following nutritional information is an estimate for one assembled spicy chicken sandwich (one fried cutlet on a brioche bun with pickles), based on standard ingredient quantities.
| Nutrient | Per Sandwich |
|---|---|
| Calories | 580 kcal |
| Total Fat | 27g |
| Saturated Fat | 6g |
| Cholesterol | 125mg |
| Sodium | 1,280mg |
| Total Carbohydrates | 52g |
| Dietary Fiber | 2g |
| Total Sugars | 8g |
| Protein | 34g |
| Vitamin A | 520 IU |
| Calcium | 110mg |
| Iron | 3.5mg |
Nutritional values are estimates and will vary based on specific brands, ingredient substitutions, and serving sizes.
For a broader look at classic fried chicken cooking techniques, the Southern Fried Chicken Recipe is a beautiful deep dive into the tradition.
Health Benefits of Key Ingredients
This is a fried sandwich, and there is no pretending otherwise. But several of the ingredients bring more to the table than just flavor.
Chicken breast is one of the leanest sources of complete protein available. A single serving provides around 34 grams of protein, which supports muscle repair, satiety, and sustained energy throughout the day. Even with the breading and oil, chicken breast remains a lower-fat protein source compared to most red meats.
Here is a look at what the key ingredients contribute:
- Chicken breast: High-quality protein with all essential amino acids, plus B vitamins (especially B3 and B6) that support energy metabolism and brain function
- Cayenne pepper: Contains capsaicin, a compound studied for its potential to boost metabolism, reduce appetite, and support circulation
- Paprika: A good source of vitamin A and antioxidant compounds including beta-carotene, which supports eye and skin health
- Garlic powder: Derived from real garlic, which has well-documented antimicrobial and anti-inflammatory properties
- Dill pickles: Very low in calories and provide a small amount of vitamin K and gut-friendly fermentation (in naturally fermented pickles)
- Peanut oil: Contains vitamin E and monounsaturated fats, which are considered heart-healthy in moderate amounts
- Mustard powder: Provides selenium and small amounts of omega-3 fatty acids alongside its distinctive flavor
For a lighter everyday chicken option with similar seasonings, the Chick-Fil-A Grilled Chicken Nuggets Recipe is worth bookmarking.
Frequently Asked Questions
1. Does Chick-fil-A really use pickle juice to marinate their chicken?
The most widely tested and researched copycat recipes use pickle juice because it produces a flavor very close to the original. However, food writers who have investigated Chick-fil-A’s actual process note that the restaurant uses a salt-and-spice brine rather than straight pickle juice for their fried sandwiches. Pickle juice is used for their grilled chicken.
That said, the pickle juice marinade produces excellent results at home. It tenderizes the chicken and adds just enough briny, tangy flavor to the meat. It works well and you should absolutely use it in this recipe.
2. Can I use chicken thighs instead of chicken breasts?
Yes, and many home cooks actually prefer thighs for this recipe. Boneless, skinless chicken thighs have more fat than breasts, which means they stay juicier through the frying process and are more forgiving if you overcook them slightly.
The flavor is richer and the texture is often described as more satisfying. Adjust the frying time slightly, as thighs may take an extra 1 to 2 minutes depending on their size.
3. What is the best oil for frying this chicken?
Peanut oil is the ideal choice for this recipe for two reasons. First, it has a very high smoke point (around 450°F / 232°C), which means it stays stable at frying temperatures without breaking down or producing off flavors. Second, it has a very clean, neutral flavor that lets the spiced chicken coating take center stage.
If you have a peanut allergy, refined avocado oil or refined coconut oil are the best alternatives. Regular vegetable oil or canola oil also work, though they have lower smoke points and may produce slightly less crispy results.
4. Why is my fried chicken coating falling off?
This is almost always caused by one of three things. The chicken was not dried properly before breading, so the moisture prevented the coating from adhering. The oil was not hot enough, so the chicken absorbed oil before a crust could form. Or the chicken was moved too soon after being placed in the oil before the crust had time to set.
Make sure to pat the chicken completely dry, let your oil reach 350°F before adding chicken, and resist the urge to move it for the first 2 to 3 minutes of frying.
5. Can I make this recipe in an air fryer instead of deep frying?
Yes. Spray the breaded chicken generously with avocado oil spray and air fry at 400°F (200°C) for 14 to 16 minutes, flipping halfway through. The result will have a slightly different texture than deep-fried chicken. It will still be good, but the crust will not be as thick and craggy as the original.
If you want the most authentic Chick-fil-A experience, deep frying in peanut oil is the method to use. The air fryer version is a great weeknight shortcut when you want less mess and less oil.
Read Also: Buffalo Chicken Sandwich Recipe
Chick Fil A Spicy Chicken Sandwich
Equipment
- Dutch oven or deep heavy-bottomed pot
- Deep fry thermometer - non-negotiable for consistent results
- Two large shallow bowls or baking dishes - for the dredging station
- Wire cooling rack set over a baking sheet - for resting the fried chicken
- Tongs or a spider strainer - for safely lowering chicken into hot oil
- Meat mallet or heavy rolling pin - for pounding chicken to even thickness
- Cutting board
- Sharp knife
- Paper towels - for draining
- Cast iron or nonstick skillet - for toasting the buns
- Instant-read thermometer - for checking internal temperature
- Zip-top bag or medium bowl - for marinating
Ingredients
For the Chicken and Marinade
- 2 boneless, skinless chicken breasts - large, about 1.5 lbs / 680g total
- 1 cup dill pickle juice - 240ml, from a jar of dill pickles
- 1/2 cup whole milk - 120ml
- 1 large egg
- 1 tablespoon hot sauce - such as Frank’s RedHot or Texas Pete
For the Spiced Breading
- 1 cup all-purpose flour - 125g
- 2 tablespoons powdered sugar
- 1 teaspoon cayenne pepper - add up to 2 teaspoons for extra heat
- 1 teaspoon paprika
- 1 teaspoon chili powder
- 1 teaspoon garlic powder
- 1/2 teaspoon onion powder
- 1/2 teaspoon mustard powder
- 1 teaspoon kosher salt
- 1/2 teaspoon black pepper
- 1/2 teaspoon baking powder
For Assembly
- peanut oil - for frying, about 2 inches / 5cm deep in the pot
- 4 brioche buns
- 2 tablespoons unsalted butter - for toasting the buns
- 8 dill pickle chips - to 12, for topping
Instructions
- Slice each chicken breast in half horizontally to create 4 thinner cutlets about 1/2 inch thick. Pound any uneven pieces between plastic wrap until uniform thickness.
- Place chicken cutlets in a zip-top bag or bowl and pour pickle juice over them, ensuring all pieces are submerged. Cover and refrigerate for at least 1 hour, up to 4 hours.
- In a large shallow bowl, whisk together flour, powdered sugar, cayenne, paprika, chili powder, garlic powder, onion powder, mustard powder, salt, black pepper, and baking powder until thoroughly combined.
- In a separate shallow bowl, whisk together the egg, milk, and hot sauce until smooth and fully combined.
- Remove chicken from marinade, drain off pickle juice, and pat each cutlet thoroughly dry with paper towels on both sides and all edges.
- Working one piece at a time, dip chicken into egg wash, letting excess drip off. Transfer to flour mixture and press firmly, coating all surfaces. For extra crunch, repeat the egg wash and flour dredge one more time.
- Pour peanut oil into a Dutch oven to a depth of 2 inches and heat to 350°F (175°C), using a deep-fry thermometer to monitor the temperature.
- Carefully lower one or two breaded cutlets into the hot oil, frying for 3-4 minutes per side until deep golden-brown and internal temperature reaches 165°F (74°C). Drain on a wire rack.
- Melt butter in a skillet over medium heat and toast the brioche buns cut-side down for 1-2 minutes until golden and slightly crispy.
- Place one fried chicken cutlet on each toasted bottom bun, top with 2-3 dill pickle chips, and cover with the top bun. Serve immediately while hot and crispy.
Notes
- Don’t skip the marinade: Even a one-hour soak in pickle juice makes a significant difference in tenderness and flavor. 2-4 hours is even better, but don’t exceed 6 hours or the acid will break down the meat texture.
- Pat chicken completely dry: Moisture is the enemy of a crispy crust. Take extra time to thoroughly dry each cutlet before breading.
- Maintain oil temperature: Use a thermometer throughout frying. Fry in small batches and let oil recover between each batch to prevent greasy chicken.
- Use a wire rack for resting: Resting fried chicken on paper towels traps steam and makes the bottom soggy. A wire rack keeps the crust crispy on all sides.
- Press flour into the chicken: Don’t just sprinkle it on. Press firmly, pack it in, and repeat the dredging process for a thick, craggy crust.
- Assemble right before serving: The crust starts absorbing moisture from the pickles immediately, so put sandwiches together only when you’re ready to eat.
- Adjust the heat level: For milder chicken, reduce cayenne to 1/2 teaspoon. For serious heat, increase to 2 teaspoons and add a pinch of white pepper.
- Storage: Store leftover fried chicken in an airtight container for up to 3 days. Reheat in a 375°F oven for 10-12 minutes to restore crispiness. Avoid microwaving.
Final Thoughts
Making the Chick Fil A Spicy Chicken Sandwich Recipe at home is one of those deeply satisfying cooking experiences.
You start with a few simple ingredients and end up with something that competes with your favorite drive-thru. The technique is easy to follow once you understand why each step matters, and the results speak for themselves.
The pickle juice marinade, the spiced craggy coating, the buttery toasted bun, those tangy little pickle chips. It all comes together into something you will want to make on repeat.
Give this recipe a try and let me know how it goes in the comments below. Did you go for extra heat? Try the Nashville Hot variation? Share your version, I love hearing what people do with it.
Recommended:
- Spicy Chicken Ramen Recipe
- Crispy Buffalo Chicken Sandwich
- Chicken Tenders Recipe
- Bang Bang Sauce
- Comeback Sauce
- Buttermilk Biscuit Recipe
- Onion Rings Recipe
- Baked Beans Recipe
- Cilantro Lime Rice Recipe
- Vinegar Coleslaw Recipe


