If you’ve been searching for the perfect air fryer chicken tenders recipe, your search ends right here. These tenders are everything you want them to be: golden and crunchy on the outside, impossibly juicy on the inside, and loaded with flavor from a well-seasoned breadcrumb coating.
The secret to that signature crunch? A combination of regular breadcrumbs and panko. Regular breadcrumbs create a fine, even coating that clings to every inch of the chicken, while panko adds those big, airy, restaurant-style crispy bits on top. Together, they give you that perfect texture in every single bite.
And unlike deep-frying, the air fryer does all the heavy lifting without the mess of a pot of bubbling oil. You get the same golden, satisfying crust with a fraction of the oil, and the whole thing comes together in about 25 minutes from start to finish.
Whether you’re feeding picky kids, meal prepping for the week, or just craving something crispy and satisfying, this recipe truly delivers. Once you try homemade air fryer chicken tenders, you’ll never go back to the frozen bag variety again.
For more air fryer chicken inspiration, the Air Fryer Chicken Breast Recipe is another weeknight staple worth bookmarking.
Why You’ll Love This Air Fryer Chicken Tenders Recipe
This recipe hits every mark you could want in a weeknight dinner. It’s fast, fuss-free, and genuinely delicious.
Here’s why readers keep coming back to this one:
- Crispy without deep frying – The air fryer circulates hot air all around the tenders, giving you that deep-fried crunch with just a light spray of oil.
- Ready in under 30 minutes – From prepping the chicken to pulling it out of the air fryer, you’re looking at about 25 minutes total.
- Kid-friendly and crowd-pleasing – Chicken tenders are universally loved, and homemade ones taste so much better than anything from a freezer bag.
- Pantry-friendly ingredients – You likely already have everything you need: eggs, breadcrumbs, and basic spices.
- Versatile for any meal – Serve them as a main dish with sides, slice them over a salad, or tuck them into wraps and sandwiches.
- Perfectly seasoned every time – The spice blend in the breadcrumb coating adds depth without being overpowering, so even the pickiest eaters will enjoy them.
- Easy to scale up or down – Making dinner for two or feeding a crowd? This recipe adjusts easily for any portion size.
Another favorite to try alongside this one is the Air Fryer Chicken Nuggets Recipe for a fun, bite-sized alternative.
Ingredients
These simple, everyday ingredients come together to create something genuinely crave-worthy. The combination of panko and regular breadcrumbs is key to achieving that crispy, even coating that stays put during air frying.
- 1.5 lbs (680g) chicken tenderloins (or chicken breasts sliced into strips)
- 1/2 cup (60g) all-purpose flour
- 2 large eggs, beaten
- 1/2 cup (55g) regular breadcrumbs
- 1/2 cup (30g) panko breadcrumbs
- 1 teaspoon garlic powder
- 1 teaspoon onion powder
- 1 teaspoon smoked paprika
- 1 teaspoon Italian seasoning
- 1/2 teaspoon salt (plus extra for the chicken)
- 1/2 teaspoon black pepper (plus extra for the chicken)
- 1/4 teaspoon cayenne pepper (optional, for a subtle kick)
- Olive oil spray or avocado oil spray
Also try this classic Chicken Tenders Recipe if you prefer the traditional stovetop or oven-baked version.
Kitchen Equipment Needed
You don’t need much to pull this recipe off, but having the right setup makes the whole process smoother and faster. A three-bowl breading station is the real key to keeping things organized and efficient.
- Air fryer (basket-style or oven-style both work)
- 3 shallow bowls or shallow baking dishes (for the dredging station)
- Tongs or your hands for breading
- Cutting board
- Sharp knife (if slicing chicken breasts)
- Meat thermometer (for checking doneness)
- Large plate or sheet pan (for resting the breaded tenders before air frying)
Read Also: Air Fryer Chicken Wings Recipe
Recommended Products for This Recipe
These are products I genuinely recommend based on quality and performance. Each one makes the process easier and the final results even better.
1. COSORI Air Fryer 5.8 QT
A spacious basket lets you cook more tenders in fewer batches, which means dinner is on the table faster. The non-stick basket also makes cleanup a breeze after all that breading. This model is consistently rated highly for even heat circulation and reliable temperature control.
2. Panko Breadcrumbs by Kikkoman
Kikkoman’s panko is consistently larger and crispier than generic store-brand versions, which makes a noticeable difference in the final texture of your chicken tenders. The light, airy flakes puff up beautifully in the air fryer without becoming dense or soggy.
3. ThermoPop 2 Instant Read Thermometer by ThermoWorks
Guessing whether chicken is done is a recipe for disappointment. This thermometer gives you an accurate reading in about two seconds, so you’ll always know the moment your tenders hit that safe 165°F (74°C) internal temperature without overcooking them.
4. OXO Good Grips 3-Piece Mixing Bowl Set
Having three bowls for your flour, egg, and breadcrumb stations keeps the process tidy and organized. OXO’s non-slip base and pour spouts make these especially practical when you’re working with sticky eggs and loose breadcrumbs.
You might also enjoy: Air Fryer Chicken Drumsticks Recipe
Step-by-Step Instructions
1. Prep the Chicken
- If you’re using pre-cut chicken tenderloins, simply remove them from the packaging and pat them dry thoroughly with paper towels. Removing excess moisture is essential because it helps the flour coating stick properly and prevents the breading from becoming soggy.
- If you’re working with whole boneless, skinless chicken breasts, place each breast on a cutting board and slice it lengthwise into strips about 1 to 1.5 inches (2.5 to 4cm) wide. Try to keep them a similar thickness so they all cook evenly.
- Once the chicken is dry and cut, season it lightly on both sides with a pinch of salt and black pepper. This base seasoning ensures the chicken itself is flavorful, not just the coating.
2. Set Up Your Breading Station
- Place the all-purpose flour in the first shallow bowl. The flour is your base layer, and it helps the egg adhere to the chicken. Without it, the egg would slide right off.
- In the second shallow bowl, beat the two large eggs together with a fork until the yolks and whites are fully combined. A smooth, uniform egg wash coats the chicken more evenly than a partially mixed one.
- In the third shallow bowl, combine the regular breadcrumbs, panko breadcrumbs, garlic powder, onion powder, smoked paprika, Italian seasoning, 1/2 teaspoon of salt, 1/2 teaspoon of black pepper, and the optional cayenne pepper. Stir everything together until the spices are evenly distributed throughout the breadcrumb mixture.
3. Bread the Chicken Tenders
- Working one piece at a time, pick up a seasoned chicken tender and place it into the flour. Toss or press it gently so both sides are completely covered in a thin, even layer of flour. Shake off any excess because too much flour can create a thick, dense coating.
- Next, transfer the floured tender directly into the beaten egg wash. Let any excess egg drip off for a second before moving to the next bowl.
- Lay the egg-coated tender into the seasoned breadcrumb mixture. Press down gently on each side and use your fingers to pack the breadcrumbs on firmly. This pressing step is what prevents the coating from falling off in the air fryer. Make sure there are no bare or damp spots.
- Place the breaded tender on a large plate or sheet pan while you repeat the process with the remaining pieces.
4. Preheat the Air Fryer
- Preheat your air fryer to 400°F (200°C) for 3 to 5 minutes. Preheating is important because it ensures the tenders start cooking immediately when they go in, which is what creates that initial sear and locks in the crispy coating. If you skip preheating, you can end up with a softer, less evenly browned result.
- Once preheated, lightly spray the inside of the air fryer basket with olive oil spray or avocado oil spray to prevent sticking.
5. Spray and Arrange the Tenders
- Before placing the tenders in the basket, spray both sides of each breaded piece generously with oil spray. This is the step that transforms the breadcrumbs from dry and pale to golden and crispy. Don’t be shy with the spray, but you don’t need to drench them either. A solid, even coat on both sides is all it takes.
- Arrange the tenders in a single layer in the air fryer basket. Make sure the pieces are not overlapping or touching each other. Overcrowding prevents the hot air from circulating around each tender, which means the sides facing each other won’t crisp up properly. Cook in batches if needed.
6. Air Fry the Tenders
- Slide the basket into the air fryer and cook at 400°F (200°C) for 5 to 6 minutes on the first side. Resist the urge to open the drawer repeatedly, as this lets heat escape and can affect browning.
- After 5 to 6 minutes, carefully open the air fryer and flip each tender using tongs. You should see a nice golden crust forming on the bottom side.
- Close the air fryer and cook for another 4 to 6 minutes on the second side, until the tenders are deep golden brown on the outside and fully cooked through.
- To confirm doneness, use a meat thermometer to check the thickest part of a tender. It should read 165°F (74°C). If any pieces are smaller and hit temperature early, you can remove them and let the larger ones continue cooking.
7. Rest and Serve
- Transfer the finished tenders to a plate and let them rest for 2 to 3 minutes before serving. This brief resting period allows the juices inside the chicken to redistribute, so you get a more moist and flavorful bite rather than having all the juices pour out the moment you cut in.
- Serve immediately with your favorite dipping sauces.
This recipe is also a great way to use chicken if you’ve made the Air Fryer Bacon Wrapped Chicken Breast Recipe and want to try something different for your next batch.
Tips for Success
A few smart techniques make all the difference between good chicken tenders and truly great ones. These are the tips that take this recipe from ordinary to crave-worthy.
- Pat the chicken completely dry before breading. Any moisture on the surface of the chicken will create steam during cooking, which softens the coating. Dry chicken = crispier tenders.
- Press the breadcrumbs on firmly. Don’t just dip the chicken and move on. Use your fingers to really press the breadcrumb coating into the surface of each tender. This mechanical adhesion is what keeps the crust from falling off.
- Don’t skip the oil spray. The oil is what activates the browning of the breadcrumbs. Without it, the tenders will cook through but look pale and feel dry rather than crispy.
- Cook in a single layer only. Even if it means two batches, never stack or overlap the tenders. Overlapping results in steamed, soggy coating where the pieces touch.
- Preheat every time. Dropping cold chicken into a cold air fryer gives you uneven cooking. Those few minutes of preheating are worth it.
- Use a thermometer to confirm doneness. Color is not a reliable indicator on its own. An instant-read thermometer takes the guesswork out and prevents both undercooking and overcooking.
- Season the chicken directly, not just the coating. Adding salt and pepper directly to the chicken before breading gives you deep, layered flavor rather than just surface seasoning.
Read Also: Air Fryer Chicken Thighs Recipe
Serving Suggestions

Air fryer chicken tenders are one of the most versatile things you can make. They work beautifully as a main course, a salad topper, or a crowd-pleasing appetizer.
Here are some great ways to serve them:
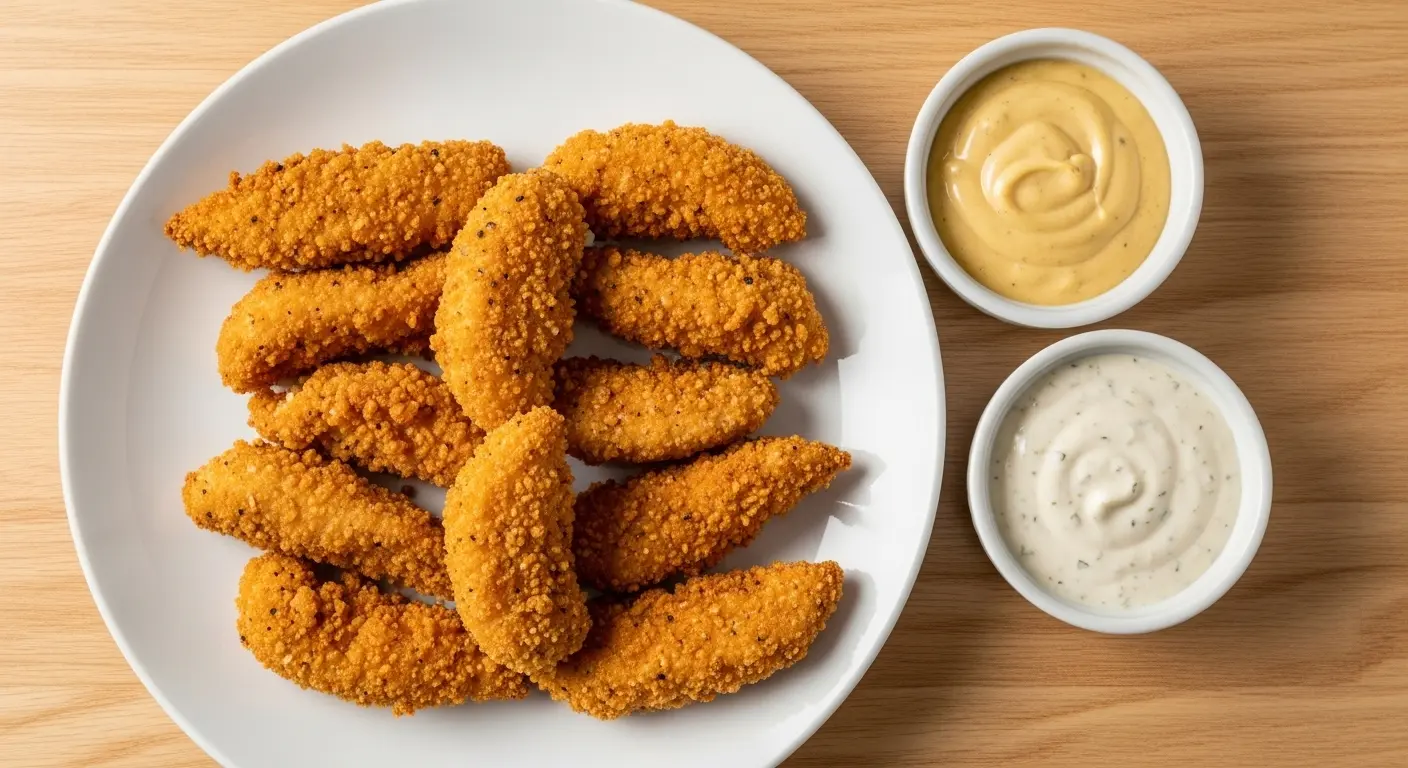
- Dipping sauces – Honey mustard, BBQ sauce, ranch dressing, bang bang sauce, and buffalo sauce are all fantastic pairings.
- Over a salad – Slice the tenders and lay them over a crisp romaine salad or a Buffalo Chicken Salad for a hearty meal.
- In a wrap or sandwich – Tuck the tenders into a flour tortilla with slaw and sauce, or stack them on a toasted bun for a quick chicken sandwich.
- With classic sides – Serve alongside Air Fryer French Fries and Creamy Coleslaw for a fully loaded comfort meal.
- As a party appetizer – Arrange them on a platter with several dipping sauces for game day or casual entertaining.
- With roasted vegetables – Pair with Roasted Broccoli for a balanced and satisfying dinner.
Variations to Try
Once you’ve got the base recipe down, this is a great one to play with. The same cooking method works beautifully with different flavor profiles.
- Spicy Buffalo Tenders – Add 1 teaspoon of cayenne, reduce the Italian seasoning, and toss the cooked tenders in warm buffalo sauce right out of the air fryer.
- Parmesan Herb Tenders – Replace half the panko with finely grated Parmesan cheese and add extra Italian seasoning and dried basil for a rich, savory crust.
- Honey Sriracha Glazed – Cook the tenders as directed, then brush on a quick glaze made from 2 tablespoons of honey and 1 tablespoon of sriracha in the last minute of cooking.
- Lemon Pepper Tenders – Swap the Italian seasoning for 1 teaspoon of lemon zest and 1/2 teaspoon of cracked black pepper. Serve with a wedge of fresh lemon.
- Buttermilk Brined – Soak the chicken in buttermilk for 30 minutes to 2 hours before breading. This tenderizes the chicken and adds a subtle tangy depth to the flavor.
- Gluten-Free Version – Use a gluten-free flour blend and gluten-free panko breadcrumbs. The rest of the recipe stays exactly the same, and the results are just as crispy.
- Air Fryer Chicken Parmesan Style – After the first batch is done, top each tender with a spoonful of marinara sauce and a pinch of mozzarella and return to the air fryer for 2 minutes. Think of it as a mini version of Air Fryer Chicken Parmesan.
Storage and Reheating
Leftover chicken tenders store beautifully, and with the right reheating method, they come back crispy and hot just like fresh.
- Refrigerator – Store cooled tenders in an airtight container in the fridge for up to 4 days. Let them cool fully before storing to prevent condensation, which makes the coating soggy.
- Freezer – Place cooked and cooled tenders in a single layer on a sheet pan and freeze for 1 to 2 hours, then transfer to a freezer-safe zip-top bag or airtight container. They keep well for up to 3 months.
- Reheat in the air fryer (best method) – Place the tenders in the air fryer basket at 375°F (190°C) for 3 to 5 minutes, flipping halfway through. This restores the crispy coating almost perfectly.
- Reheat in the oven – Arrange on a wire rack set over a baking sheet and bake at 400°F (200°C) for 8 to 10 minutes. The wire rack prevents the bottoms from going soft.
- Avoid the microwave if possible – Microwaving is the quickest method, but it steams the coating and makes it soft. If you must use the microwave, reheat in 30-second intervals and place the tenders on a paper towel to absorb moisture.
Another great make-ahead option to try is the Air Fryer Chicken Cutlets Recipe.
Nutritional Facts
The values below are based on approximately 4 servings (about 3 tenders each) using the full recipe as written. These are estimates and will vary depending on the exact size of your chicken pieces and how much oil spray you use.
| Nutrient | Per Serving (approx.) |
|---|---|
| Calories | ~280 kcal |
| Protein | ~30g |
| Carbohydrates | ~18g |
| Fat | ~7g |
| Saturated Fat | ~1.5g |
| Fiber | ~1g |
| Sodium | ~580mg |
These air fryer chicken tenders are significantly lower in fat and calories compared to traditionally deep-fried versions, which can easily double the fat content.
Read Also: Air Fryer Chicken Parmesan Recipe
Health Benefits of Key Ingredients
This recipe isn’t just delicious. The key ingredients bring some meaningful nutritional value to the table too.
Here’s a closer look at what you’re working with:
- Chicken tenderloins are a lean, high-quality protein source. A single serving provides a substantial amount of protein, which supports muscle repair, satiety, and overall energy levels throughout the day. Tenderloins in particular are naturally lower in fat than thighs or drumsticks.
- Garlic powder contains allicin and other compounds that have been studied for their potential to support immune function and heart health. Even in small amounts as a seasoning, it contributes more than just flavor.
- Smoked paprika provides antioxidants from the capsaicin and carotenoid compounds found in red peppers. It adds a warm, slightly smoky flavor along with those beneficial plant compounds.
- Eggs are a complete protein and a source of vitamins B12, D, and choline, all of which play important roles in brain function and energy metabolism. In this recipe, they serve as the binding agent for the breadcrumb coating.
- Cooking in the air fryer dramatically reduces oil use compared to deep frying. Deep-fried chicken tenders can absorb a significant amount of cooking oil, while air frying uses a light spray that adds minimal fat to the final dish.
- Italian seasoning is a blend of oregano, thyme, basil, and rosemary, all of which contain polyphenols and anti-inflammatory compounds. They’re a simple way to add both flavor and plant-based nutrients to any dish.
For a lighter chicken salad option, the Healthy Chicken Salad Recipe is a great companion recipe using similar proteins.
Frequently Asked Questions
1. Can I use chicken breasts instead of tenderloins?
Absolutely. Simply slice boneless, skinless chicken breasts lengthwise into strips about 1 to 1.5 inches wide. Try to keep them a similar thickness so they cook evenly. You may need to add 1 to 2 extra minutes of cook time if the strips are particularly thick, so always check with a thermometer.
2. Do I need to preheat my air fryer?
Yes, preheating is strongly recommended for this recipe. Placing the tenders into a cold air fryer means the outer coating doesn’t get that immediate burst of heat that creates the crispiness. Just 3 to 5 minutes of preheating at 400°F (200°C) makes a real difference in the final texture.
3. Why is my breading falling off in the air fryer?
There are a few common reasons this happens. First, make sure the chicken is fully dry before dredging. Moisture on the surface prevents the flour from sticking. Second, press the breadcrumbs on firmly rather than just dipping. Third, let the breaded tenders rest for 5 minutes before air frying, which gives the coating time to adhere. Finally, make sure you’re not skipping the oil spray, as the oil helps the coating set.
4. Can I make these ahead of time and freeze them before cooking?
Yes. Bread the tenders as directed, then place them on a sheet pan in a single layer and freeze until solid (about 2 hours). Transfer to a freezer-safe bag and store for up to 2 months. Cook from frozen at 380°F (193°C) for 12 to 15 minutes, flipping halfway through. They come out beautifully crispy straight from the freezer.
5. What dipping sauces work best with these tenders?
Classic options like honey mustard, ranch, and ketchup are always crowd-pleasers. For something with a little more excitement, try the Comeback Sauce Recipe, which is a tangy, mayo-based sauce that pairs incredibly well with crispy chicken. Bang Bang Sauce is another fantastic option if you like a creamy, slightly spicy kick.
Final Thoughts
This air fryer chicken tenders recipe is one of those recipes that earns a permanent spot in your weekly rotation.
It’s fast enough for a Tuesday night, impressive enough to serve at a casual get-together, and reliable enough to make you look like you really know your way around a kitchen.
Give this recipe a try the next time you want something satisfying and homemade without spending hours in the kitchen. Your whole family is going to love it.
If you make these, leave a comment below and tell me how they turned out! Did you try a fun variation or a new dipping sauce? Share your experience, and if you loved the recipe, pass it along to someone who could use a great weeknight dinner idea.
Recommended:
- Air Fryer Chicken Wings Recipe
- Air Fryer Bacon Wrapped Chicken Breast Recipe
- Air Fryer Turkey Burgers Recipe
- Air Fryer French Bread Pizza Recipe
- Air Fryer Egg Rolls Recipe
- Air Fryer Zucchini Fries Recipe
- Chicken Casserole Recipe
- Classic Chicken Parmesan Recipe
- Chicken Fajita Recipe
- BBQ Chicken Wrap Recipe


