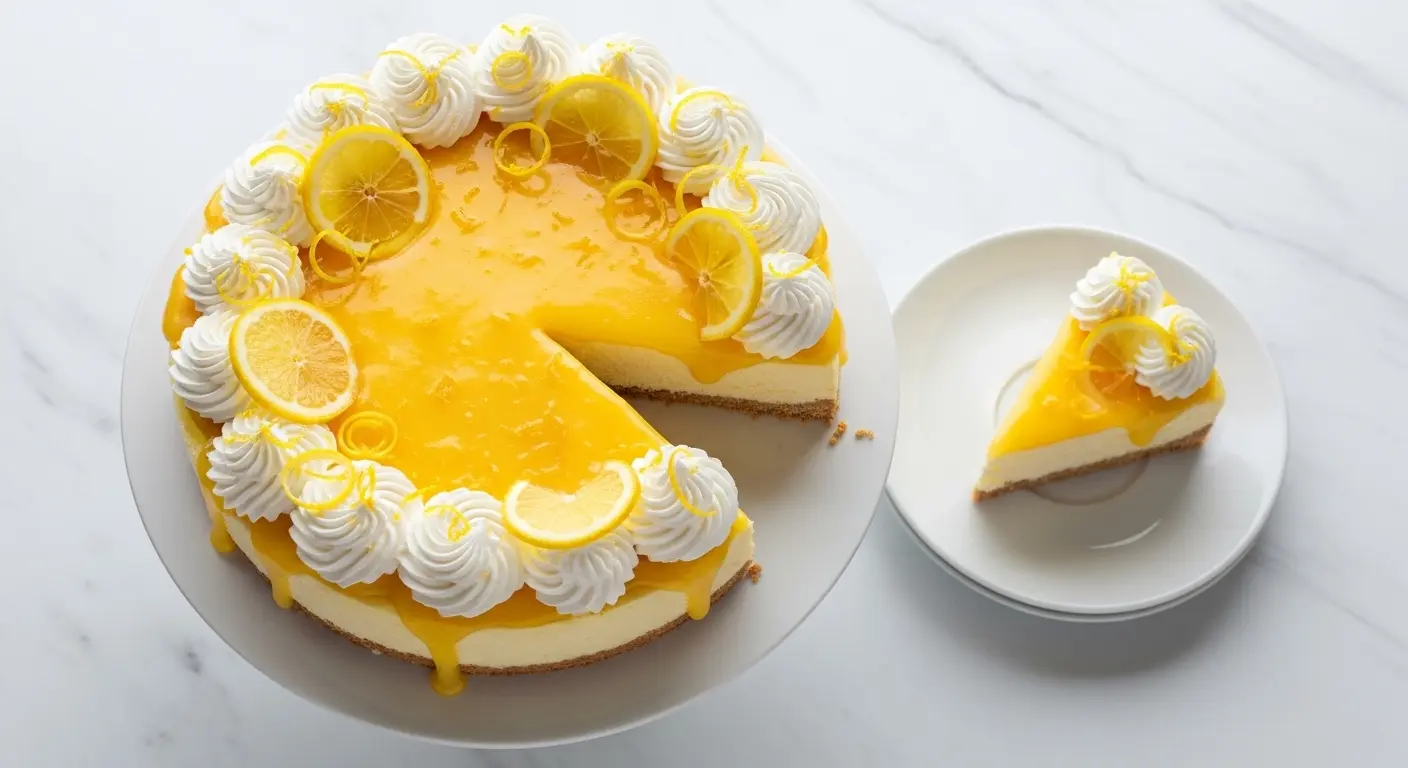
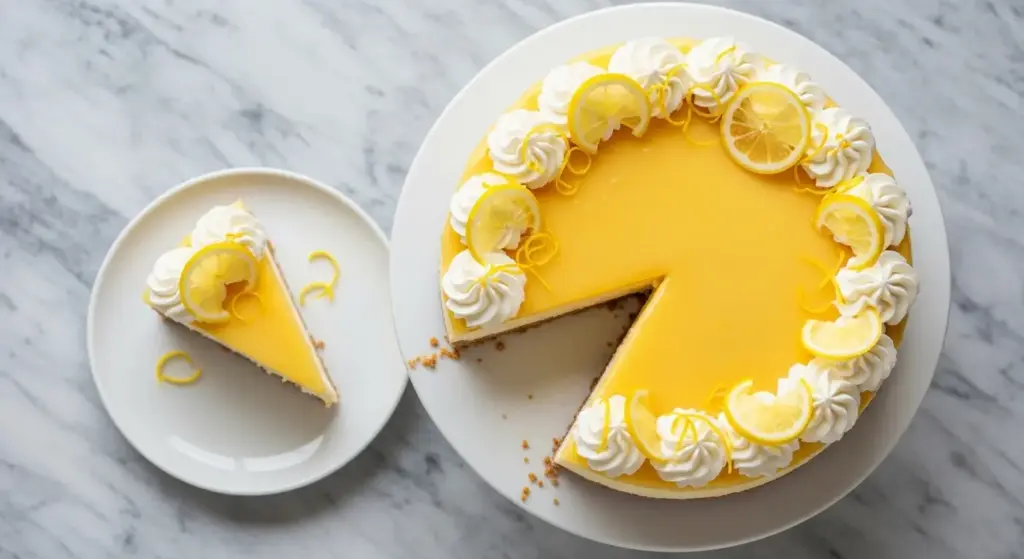
If you’ve been searching for the perfect lemon cheesecake recipe, your search ends right here. This showstopper dessert combines a buttery graham cracker crust with a silky, lemon-kissed cream cheese filling, all crowned with a glossy homemade lemon curd that makes every single slice look like it came straight from a fancy bakery.
Lemon cheesecake strikes that rare balance between rich and refreshing. The cream cheese base brings the indulgence, but the fresh lemon zest and juice cut right through any heaviness, leaving you with something that feels bright and light even though it’s decadently creamy.
This isn’t a complicated recipe, but it does reward patience. Take your time, follow the steps, and you’ll have a dessert that earns rave reviews every single time.
Why You’ll Love This Lemon Cheesecake Recipe
This recipe is the kind of dessert people remember. It’s the one guests ask for the recipe card afterward.
What makes it special is the layered lemon flavor. Fresh zest infused into the sugar before it hits the batter releases the essential oils in a way that plain juice simply can’t match, giving the whole filling a perfumed citrus depth.
The texture is incredibly smooth. Beating the cream cheese at room temperature and adding eggs one at a time prevents overworking the batter, which keeps the filling velvety and crack-resistant.
The lemon curd topping is not optional, in my opinion. It adds a glossy, tangy crown that doubles down on the citrus flavor and makes the cheesecake look absolutely stunning.
It’s a make-ahead dream. This cheesecake actually tastes better after a night in the fridge, making it perfect for entertaining without any last-minute stress.
- Perfectly balanced sweet and tangy flavor
- Silky smooth filling with no grainy texture
- Buttery, crunchy graham cracker crust
- Gorgeous homemade lemon curd topping
- Great for holidays, birthdays, and dinner parties
- Make-ahead friendly for stress-free entertaining
This pairs beautifully with a tall glass of Homemade Lemonade when you want to lean fully into that citrus theme.
Ingredients
Getting the ingredients right is half the battle with cheesecake. Use full-fat, block-style cream cheese (not spreadable or whipped), freshly squeezed lemon juice, and real butter for the crust. These details make a real difference in the final texture and flavor.
For the Graham Cracker Crust:
- 1 ¾ cups (175g) graham cracker crumbs
- 3 tablespoons (38g) granulated sugar
- 6 tablespoons (85g) unsalted butter, melted
- Pinch of salt
For the Lemon Cheesecake Filling:
- 24 oz (680g) full-fat block cream cheese, softened to room temperature
- 1 ¼ cups (250g) granulated sugar, divided
- Zest of 2 large lemons (about 2 tablespoons)
- ¼ cup (60ml) fresh lemon juice (about 2-3 lemons)
- 1 teaspoon pure vanilla extract
- ½ cup (120g) full-fat sour cream, at room temperature
- 4 large eggs, at room temperature
- 1 tablespoon all-purpose flour
- Pinch of salt
For the Lemon Curd Topping:
- 3 large eggs plus 2 egg yolks
- ¾ cup (150g) granulated sugar
- ½ cup (120ml) fresh lemon juice (about 4-5 lemons)
- Zest of 1 lemon
- 6 tablespoons (85g) unsalted butter, cut into cubes
- Pinch of salt
For the Whipped Cream (Optional but Recommended):
- 1 cup (240ml) cold heavy cream
- 2 tablespoons powdered sugar
- 1 teaspoon pure vanilla extract
You might also enjoy: Strawberry Cheesecake Recipe
Kitchen Equipment Needed
Having the right tools makes this recipe far less intimidating. The springform pan is non-negotiable for cheesecake since it allows you to unmold the cake without flipping it, which would destroy the delicate filling.
- 9-inch springform pan
- Stand mixer or hand mixer
- Food processor (for crumbs and zest-sugar blend)
- Large roasting pan (for the water bath)
- Medium saucepan (for the lemon curd)
- Fine mesh sieve (for straining lemon curd if desired)
- Citrus juicer or reamer
- Microplane zester or fine grater
- Rubber spatula
- Measuring cups and spoons
- Aluminum foil (heavy-duty, for wrapping the springform pan)
- Wire cooling rack
Read Also: Blueberry Cheesecake Recipe
Recommended Products for This Recipe
These are products I genuinely recommend based on quality and performance for making this lemon cheesecake.
1. Philadelphia Full-Fat Cream Cheese Bricks
The brand and form of cream cheese genuinely matters in this recipe. Block-style cream cheese has the right fat content and density to create a smooth, stable filling that slices cleanly. Spreadable versions contain more water and stabilizers that can affect the texture. Philadelphia brick cream cheese is the gold standard for baked cheesecakes.
2. Springform Pan with Leakproof Base
A high-quality leakproof springform pan prevents the water bath from seeping into your crust. Look for one with a tight latch and a silicone-sealed base. This single upgrade eliminates the soggy crust problem that frustrates so many home bakers.
3. Microplane Premium Zester
A good zester is essential for lemon cheesecake because the zest carries most of the flavor. A Microplane zester removes only the fragrant yellow outer layer without digging into the bitter white pith. It’s one of those kitchen tools that changes how you cook citrus desserts entirely.
4. Heavy-Duty Aluminum Foil
Standard foil often tears when wrapping the springform pan, letting water seep in during the water bath. Heavy-duty foil wraps tighter and holds up to a 90-minute bake without any leaks, keeping your graham cracker crust perfectly crisp.
5. Electric Citrus Juicer
Fresh lemon juice is essential here. An electric citrus juicer extracts more juice per lemon than a handheld reamer and strains out seeds automatically, saving you significant prep time especially when you need juice for both the filling and the curd.
For another stunning citrus dessert, you might also enjoy the Key Lime Pie Recipe.
Step-by-Step Instructions
1. Prepare Your Pan and Oven
- Preheat your oven to 350°F (175°C) and position a rack in the center.
- Tear off two large sheets of heavy-duty aluminum foil, each at least 18 inches long.
- Place your 9-inch springform pan in the center of one sheet of foil. Bring the foil up and tightly press it against the sides of the pan, making sure there are no gaps or tears. Repeat with the second sheet going in the opposite direction.
- This double layer of foil prevents water from the water bath seeping into the crust during baking. Set the wrapped pan aside on a flat surface.
2. Make the Graham Cracker Crust
- In a food processor, pulse 1 ¾ cups (175g) of graham cracker crumbs with 3 tablespoons (38g) of granulated sugar and a pinch of salt until well combined.
- If you don’t have a food processor, place the graham crackers in a zip-lock bag and crush with a rolling pin until they become fine crumbs, then stir in the sugar and salt in a bowl.
- Drizzle in 6 tablespoons (85g) of melted unsalted butter and pulse (or stir) until the mixture looks and feels like damp sand. It should hold together when you press a small amount between your fingers.
- Pour the crumb mixture into the foil-wrapped springform pan. Using the flat bottom of a measuring cup or glass, firmly press the crumbs evenly across the bottom of the pan and about 1 inch up the sides. Press firmly so the crust holds its shape.
- Bake the crust for 10 minutes at 350°F (175°C) until it smells toasty and feels slightly firm. Remove it from the oven and set it on a wire rack to cool slightly.
- Reduce the oven temperature to 325°F (165°C) after removing the crust.
3. Infuse the Sugar with Lemon Zest
- Add 1 cup of your measured granulated sugar (from the 1 ¼ cups total) to the bowl of your food processor.
- Add the zest from 2 large lemons directly onto the sugar.
- Pulse the sugar and zest together for about 30-45 seconds until the zest is completely broken down into the sugar and the mixture looks slightly yellow-green and fragrant.
- This technique is key: it releases the essential oils from the lemon peel directly into the sugar crystals, infusing every bit of the filling with citrus flavor rather than having little flecks of zest dispersed unevenly.
- Transfer the lemon-sugar mixture to a small bowl and whisk in the remaining ¼ cup (50g) of granulated sugar and 1 tablespoon of flour. Set aside.
4. Make the Cheesecake Filling
- Make sure your cream cheese, eggs, and sour cream are all fully at room temperature before you begin. Cold cream cheese will leave lumps that don’t smooth out during baking. To quickly bring cream cheese to room temperature, slice the blocks and spread them on a plate for 30-45 minutes.
- In the bowl of a stand mixer fitted with the paddle attachment (or using a hand mixer), beat the 24 oz (680g) of softened cream cheese on medium speed for about 2 minutes until completely smooth and fluffy. Stop and scrape down the sides with a rubber spatula.
- Add the lemon-sugar-flour mixture you prepared in Step 3. Beat on medium speed until fully combined, about 1 minute. Scrape down the sides again.
- Add ½ cup (120g) of sour cream and 1 teaspoon of vanilla extract. Beat on low-medium speed until just incorporated, about 30 seconds.
- Pour in ¼ cup (60ml) of fresh lemon juice. Beat on low speed until combined. The batter may look slightly curdled at this point but it will smooth out.
- Now add the 4 eggs one at a time, beating on the lowest speed setting after each addition just until the yolk disappears. Do not overmix after the eggs go in. Overbeating eggs incorporates too much air into the batter, which causes the cheesecake to puff up in the oven, then collapse and crack as it cools.
- Add a pinch of salt and give the batter a final gentle fold with the rubber spatula, making sure everything at the bottom of the bowl is incorporated.
5. Bake Using a Water Bath
- Place your foil-wrapped springform pan (with the pre-baked crust) into a large roasting pan.
- Pour the cheesecake batter into the crust. It should come close to the top of the pan.
- Smooth the surface gently with a spatula.
- Place the roasting pan on the center oven rack (oven should now be at 325°F/165°C).
- Carefully pour very hot tap water (or boiling water) into the roasting pan around the springform pan, filling it to about 1 inch deep. Be careful not to splash any water into the cheesecake batter.
- The water bath creates a gentle, humid baking environment that prevents the surface of the cheesecake from drying out too fast and cracking.
- Bake for 55-70 minutes. The cheesecake is done when the edges are set and lightly puffed, but the center 2-3 inches still has a gentle jiggle when you nudge the pan. It should look like Jell-O in the center, not sloshy liquid.
- Do not overbake. The cheesecake will continue to set from the residual heat.
6. Cool the Cheesecake Properly
- When the cheesecake is done baking, turn off the oven and crack the oven door open about 1 inch. Leave the cheesecake in the oven with the door cracked for 1 hour. This gradual cooling prevents the sudden temperature drop that causes cracking.
- After 1 hour, remove the cheesecake from the water bath. Carefully peel away the outer foil.
- Run a thin knife or offset spatula around the inner edge of the springform pan to loosen the cheesecake from the sides. This prevents the filling from pulling away from the sides and cracking as it cools further.
- Let the cheesecake cool completely at room temperature on a wire rack, about 2 more hours.
- Once fully cooled, cover the pan loosely with plastic wrap and refrigerate for at least 4 hours, but ideally overnight. A fully chilled cheesecake has the best texture and slices cleanly.
7. Make the Lemon Curd Topping
- In a medium saucepan, whisk together 3 large eggs plus 2 egg yolks, ¾ cup (150g) granulated sugar, ½ cup (120ml) fresh lemon juice, the zest of 1 lemon, and a pinch of salt.
- Place the saucepan over medium-low heat. Cook, whisking constantly, for 8-10 minutes until the curd thickens enough to coat the back of a spoon. Run your finger through the curd on the back of the spoon; it should hold a clear line.
- Remove the pan from the heat. Add 6 tablespoons (85g) of cold cubed butter, a few pieces at a time, whisking until each addition is fully melted and incorporated before adding the next.
- If you’d like a silky-smooth curd with no visible zest pieces, pour it through a fine-mesh sieve into a clean bowl, pressing it through with the back of a spoon.
- Press a piece of plastic wrap directly onto the surface of the curd to prevent a skin from forming and refrigerate until cool, at least 1 hour.
8. Top and Serve the Cheesecake
- Once the cheesecake is fully chilled and the lemon curd has cooled and thickened, remove the springform pan sides by unlatching and gently lifting them off.
- Spoon the cooled lemon curd over the top of the cheesecake, spreading it to within about ½ inch of the edge. The curd will be thick and glossy.
- Return the cheesecake to the fridge for at least 30 minutes to let the curd set firmly on top.
- If adding whipped cream: In a cold bowl, beat 1 cup (240ml) of cold heavy cream with 2 tablespoons of powdered sugar and 1 teaspoon of vanilla extract until stiff peaks form. Transfer to a piping bag fitted with a star tip and pipe decorative swirls or dollops around the border of the cheesecake.
- To slice cleanly, dip a sharp knife in a tall glass of hot water, wipe dry, and cut. Repeat between each slice for perfectly clean pieces.
- Serve chilled and enjoy immediately.
The same approach to achieving a silky smooth filling works beautifully in the Basque Cheesecake Recipe as well.
Tips for Success
Cheesecake has a reputation for being finicky, but most problems come down to a handful of avoidable mistakes. These tips address the most common pitfalls.
- Room temperature ingredients are not optional. Cold cream cheese creates lumps that don’t smooth out during baking. Pull everything out of the fridge 1-2 hours before you start.
- Don’t skip or rush the water bath. It’s the most reliable method for a smooth, crack-free cheesecake. If you truly don’t want to use one, place a separate pan of hot water on the rack below the cheesecake.
- Add eggs on low speed, one at a time. Beating eggs on high speed adds too much air and leads to cracking and a soufflé-like texture.
- Look for the jiggle, not a timer. Ovens vary. Start checking at the 55-minute mark. The center should wobble gently but not slosh.
- Cool slowly and in stages. Oven door open for 1 hour, then room temperature for 2 hours, then fridge for 4 hours minimum. Rushing this causes cracks and dense texture.
- Zest the lemons before juicing them. You cannot effectively zest a lemon that has already been squeezed.
- Use freshly squeezed lemon juice. Bottled juice has a flat, slightly artificial flavor. Fresh juice gives the filling that bright, alive lemon taste.
Read Also: Churro Cheesecake Recipe
Serving Suggestions
This cheesecake is stunning enough to stand alone, but a few additions can make it feel even more special for parties or holidays.
Serve each slice with a small spoonful of extra lemon curd alongside for guests who want even more citrus punch. A light dusting of powdered sugar over the top just before serving adds a pretty finish without adding much sweetness.
Fresh berries are a classic pairing with lemon cheesecake. Raspberries, blueberries, and sliced strawberries all complement the tangy lemon flavor without competing with it.
- A hot cup of coffee or Earl Grey tea
- Fresh raspberries or blueberries scattered over each slice
- A drizzle of Caramel Sauce for a sweet and tart contrast
- A few thin lemon slices and mint sprigs for garnish
- A scoop of vanilla ice cream alongside each slice for a warm-weather dessert plate
- Lightly sweetened whipped cream piped in rosettes around the border
Variations to Try
Once you’ve mastered the base recipe, there are so many delicious ways to make it your own. These variations work well without changing the core technique.
- No-Bake Lemon Cheesecake: Skip the eggs and baking entirely. Whip heavy cream to stiff peaks and fold it into a mixture of cream cheese, powdered sugar, lemon juice, and zest. Set in the fridge for 6+ hours. A wonderful option when you want something cooler and quicker.
- Lemon Blueberry Cheesecake: Fold 1 cup of fresh blueberries into the batter before pouring it into the crust. The blueberries burst during baking and create beautiful purple swirls throughout the yellow filling.
- Mini Lemon Cheesecakes: Divide the crust and filling among a lined 12-cup muffin pan. Reduce baking time to 18-22 minutes. Top each with a small dollop of lemon curd.
- Lemon Raspberry Swirl Cheesecake: Swirl 3-4 tablespoons of raspberry jam into the top of the batter before baking for a gorgeous marbled effect.
- Gluten-Free Version: Swap the graham crackers for gluten-free graham-style crackers or almond flour mixed with melted butter and a little sugar. The filling is naturally gluten-free; just omit the tablespoon of flour or use cornstarch instead.
For another vibrant fruit-forward dessert, try the Fruit Tart Recipe.
Storage and Reheating
Cheesecake stores beautifully, making it one of the most practical make-ahead desserts in your repertoire. Proper storage keeps the texture and flavor at their best.
- Refrigerator: Store leftover cheesecake covered in the fridge for up to 5 days. Tent plastic wrap loosely over the top so it doesn’t press against the lemon curd and disturb the surface.
- Freezer: Cheesecake freezes well for up to 2 months. For best results, freeze it without the whipped cream topping. Wrap individual slices (or the whole cheesecake) tightly in plastic wrap, then in aluminum foil. Thaw overnight in the refrigerator before serving.
- Lemon Curd: Store any leftover lemon curd separately in a sealed jar in the fridge for up to 2 weeks.
- Do not reheat: Cheesecake is best served cold or at cool room temperature. Heating it changes the texture dramatically and can cause the filling to separate.
- Serving from frozen: Never thaw cheesecake at room temperature. Always thaw it slowly in the refrigerator for the best texture.
Another excellent make-ahead dessert that stores just as well: Classic Tiramisu.
Nutritional Facts
The following is an approximate nutritional breakdown per slice, based on 12 servings and including the lemon curd topping but not the optional whipped cream.
| Nutrient | Per Serving (1 slice) |
|---|---|
| Calories | 490 kcal |
| Total Fat | 31g |
| Saturated Fat | 18g |
| Cholesterol | 175mg |
| Sodium | 290mg |
| Total Carbohydrates | 47g |
| Dietary Fiber | 0.5g |
| Total Sugars | 36g |
| Protein | 8g |
| Vitamin C | 12mg |
| Calcium | 90mg |
Nutritional values are estimates and may vary depending on specific brands and portion sizes.
Read Also: Lemon Meringue Pie Recipe
Health Benefits of Key Ingredients
While lemon cheesecake is absolutely a treat to be enjoyed in moderation, some of its key ingredients do bring real nutritional value to the table.
Lemons are one of the most nutritious fruits you can use in baking. Fresh lemon juice and zest are excellent sources of vitamin C, a powerful antioxidant that supports immune function and skin health.
Lemons also contain flavonoids, plant compounds that have been studied for their anti-inflammatory properties. The zest in particular is rich in these compounds since they concentrate in the peel.
Eggs are a complete protein source, providing all nine essential amino acids. They are also rich in choline, which supports brain health, and contain fat-soluble vitamins A, D, and E.
Cream cheese contributes calcium and phosphorus, both of which are important for bone density and strength.
- Lemons: High in vitamin C and citric acid, which supports collagen production and iron absorption
- Eggs: Excellent source of protein, choline, and vitamins A, D, B12, and selenium
- Cream cheese: Provides calcium, phosphorus, and fat-soluble vitamins for bone health
- Butter: Contains vitamins A and K2, which are important for bone, eye, and immune health
- Sour cream: Supplies beneficial probiotic cultures that support digestive health
For more ways to enjoy citrus in your baking, check out the Easy Lemonade Recipe.
Frequently Asked Questions
1. Why did my lemon cheesecake crack on top?
Cracking usually comes from one of three causes: overbaking, cooling too quickly, or overbeating the eggs.
Make sure the center still jiggles when you take the cheesecake out of the oven, cool it gradually with the oven door cracked open for an hour, and beat the eggs on the lowest mixer speed. The good news is that the lemon curd topping will cover any cracks beautifully.
2. Can I make this cheesecake without a water bath?
Yes, but you risk more cracking and a slightly denser texture.
If skipping the water bath, place a separate oven-safe pan filled with boiling water on the bottom oven rack to create steam. Bake at 325°F (165°C) and check for the jiggle at 55 minutes. The steam method is not as reliable as a true water bath, but it helps significantly.
3. Can I use bottled lemon juice instead of fresh?
Fresh lemon juice is strongly recommended for this recipe. Bottled lemon juice tends to taste flat and slightly off, and it lacks the aromatic volatile compounds that give fresh lemons their brightness.
For the lemon curd in particular, fresh juice makes a very noticeable difference in both flavor and color. You need about 5-6 medium lemons total for the full recipe.
4. How far in advance can I make this cheesecake?
This cheesecake can be made up to 2 days in advance and actually improves with time as the flavors meld and the texture becomes even silkier.
Make and store the cheesecake covered in the fridge, then add the lemon curd topping and whipped cream no more than a few hours before serving. This keeps the curd glossy and the cream fresh.
5. My lemon curd is too runny. What went wrong?
Lemon curd that hasn’t thickened usually means it wasn’t cooked long enough or the heat was too low.
The curd needs to reach around 170°F (77°C) to thicken properly. Whisk constantly over medium-low heat and be patient. It can take up to 12 minutes. If your curd is already made and still runny, you can return it to the saucepan and cook it again over low heat, whisking constantly, until it thickens.
Read Also: No Bake Cheesecake Recipe
Final Thoughts
This lemon cheesecake recipe is truly one of those recipes that becomes a signature dessert. It has everything: a crisp butter crust, a filling that’s unbelievably creamy and bright, and a glossy lemon curd topping that makes it look like you spent far more effort than you actually did.
The steps may look lengthy, but each one is straightforward and completely approachable for home bakers at any level. The biggest investment is time, not technique.
I hope you give this recipe a try the next time you need a dessert that makes people pause mid-bite. If you make it, I’d love to hear how it turned out! Drop a comment below with your experience, or share a photo of your beautiful cheesecake. Did you make any tweaks or add your own twist? Tell me all about it.
Recommended:
- Blueberry Cheesecake Recipe
- Oreo Cheesecake Recipe
- New York Cheesecake Recipe
- Mini Cheesecake Recipe
- Pumpkin Cheesecake Recipe
- Japanese Cheesecake Recipe
- Best Cheesecake Recipe
- Cheesecake Ice Cream Cake Recipe
- Lemon Shortbread Cookies Recipe
- Fruit Tart Recipe


