If you have ever come across a slice of Japanese cheesecake recipe online and immediately wanted to make one yourself, you are not alone.
This iconic dessert, also called cotton cheesecake or soufflé cheesecake, has taken the baking world by storm for good reason. It is impossibly light, cloud-soft, and has a gentle tang from cream cheese without the richness of a traditional New York-style slice.
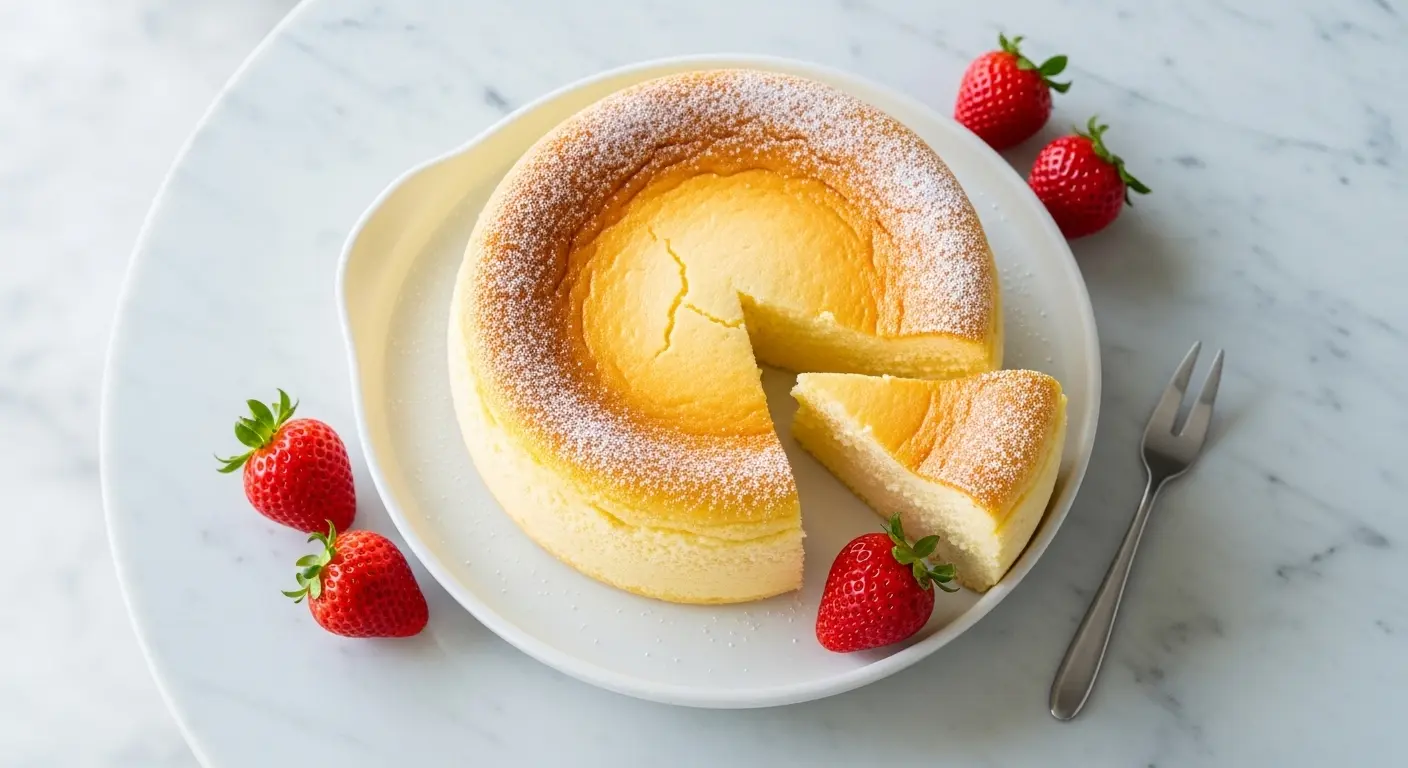
Unlike dense, heavy cheesecakes, the Japanese version sits somewhere between a sponge cake and a classic baked cheesecake. It wobbles satisfyingly when you tap the pan, and the crumb practically melts on your tongue.
The secret is in the technique: a silky cream cheese batter is folded into stiffly whipped meringue, then baked in a water bath (bain-marie) to ensure gentle, even heat throughout. The result is a tall, pillowy cake with a smooth golden top and an interior so airy it barely seems real.
This recipe walks you through every step clearly, including why certain techniques matter and what to watch out for so your first attempt is a success.
For another show-stopping cheesecake experience, you might also love this Basque Cheesecake with its gorgeous caramelized top.
Why You’ll Love This Japanese Cheesecake Recipe
This dessert is genuinely unlike anything most people have baked before, and that is exactly what makes it so exciting.
It is lighter than any cheesecake you have ever eaten. The whipped meringue creates a texture that is fluffy and airy rather than dense and heavy.
It is not overly sweet. Japanese baking favors subtlety, and this cake reflects that beautifully. You can taste every element without one flavor overpowering the others.
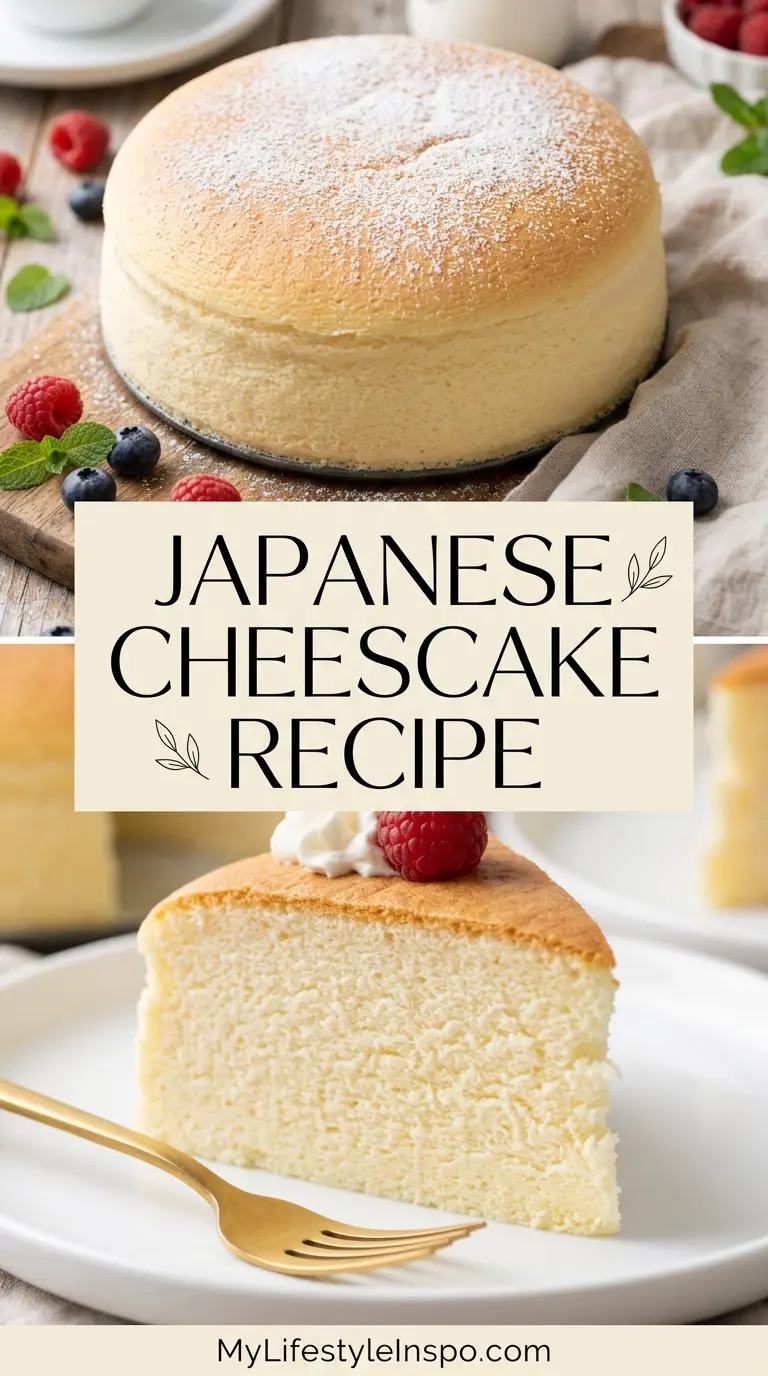
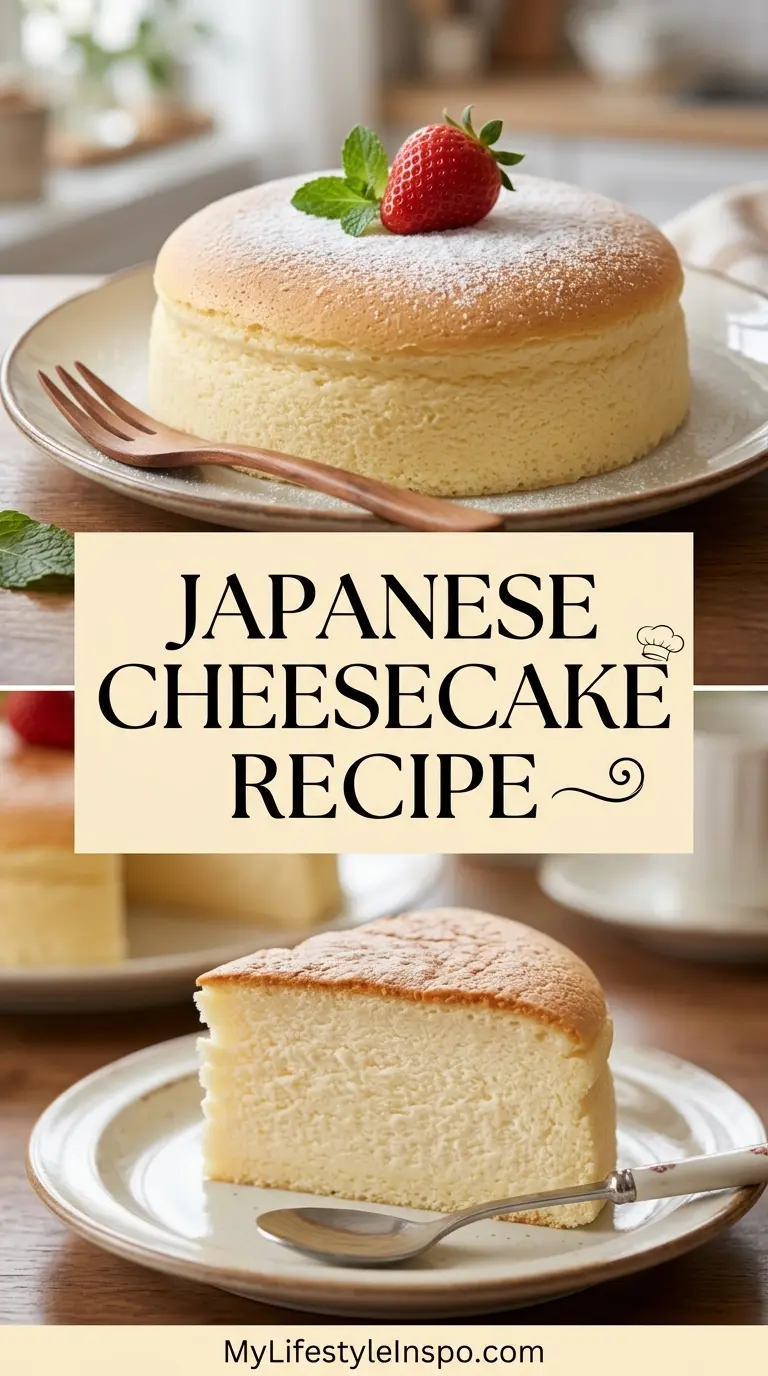
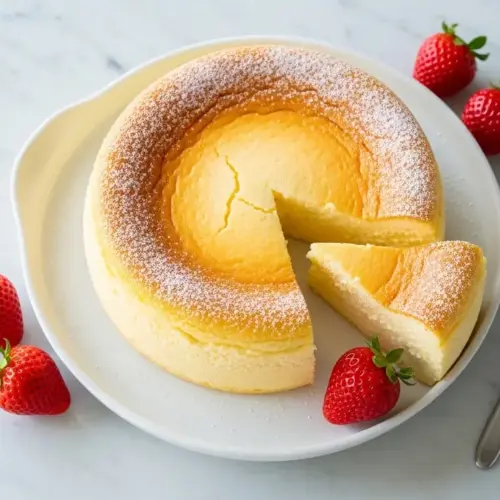
It looks absolutely stunning. That smooth, golden-brown dome is the kind of thing that gets gasps when you bring it out.
The bain-marie method does most of the heavy lifting. It keeps the oven environment moist and prevents cracks, meaning you get a beautiful cake without needing to babysit it.
Here is a quick summary of what makes this recipe special:
- Impossibly light, cloud-like texture thanks to whipped meringue
- A delicate, slightly tangy flavor from cream cheese and lemon
- No heavy crust needed, so the flavor stays clean and elegant
- Baked low and slow in a water bath for consistent results
- Works beautifully as a dinner party showstopper or a weekend baking project
Another crowd-pleaser you might enjoy is the New York Cheesecake if you ever want to switch up the style.
Ingredients
This recipe uses simple, pantry-friendly ingredients. The magic is entirely in the technique, so quality matters more than quantity here. Use full-fat cream cheese for the richest flavor, and always use fresh large eggs.
- 8 oz (225g) full-fat cream cheese, softened to room temperature
- 4 tablespoons (57g) unsalted butter, softened to room temperature
- ½ cup (120ml) whole milk
- 6 large eggs, separated (yolks and whites in separate bowls)
- ¾ cup (150g) caster sugar, divided (¼ cup for batter, ½ cup for meringue)
- ⅔ cup (80g) cake flour, sifted
- 2 tablespoons (15g) cornstarch
- 1 tablespoon fresh lemon juice
- 1 teaspoon lemon zest
- ¼ teaspoon cream of tartar (optional, helps stabilize egg whites)
- ¼ teaspoon fine salt
- Powdered sugar for dusting (optional)
Read Also: Best Cheesecake Recipe
Kitchen Equipment Needed
Having the right tools before you start makes this recipe so much smoother. The most critical piece is a deep baking pan large enough to hold your cake pan inside, since you will need to create a water bath for baking.
- 9-inch springform pan (3-4 inches deep; a taller pan is ideal)
- Stand mixer or electric hand mixer
- Large roasting pan or deep baking dish for the water bath
- Kitchen scale (strongly recommended for accuracy)
- Medium saucepan or double boiler
- Rubber spatula and large metal spoon (for folding)
- Sieve or fine mesh strainer for sifting flour
- Parchment paper and kitchen foil
- Instant-read thermometer (optional but helpful)
- Cooling rack
You might also enjoy: Mini Cheesecake Recipe
Recommended Products for This Recipe
These products are recommended based on quality, performance, and how much of a difference they actually make in the final result.
1. Philadelphia Full-Fat Cream Cheese
Philadelphia cream cheese is consistently the preferred brand for this recipe across dozens of professional bakers and testers. It has the right fat content, a clean tangy flavor, and melts smoothly into the batter without lumps. Using a lower-fat or alternative brand can affect texture significantly.
2. Nordic Ware Naturals Springform Pan
A quality springform pan with tight seals prevents water from seeping in during the bain-marie bake, which is one of the most common causes of a soggy Japanese cheesecake. The Nordic Ware pan is leakproof, conducts heat evenly, and releases the cake cleanly every time.
3. OXO Good Grips Digital Kitchen Scale
Measuring by weight rather than volume is essential for Japanese cheesecake because small differences in flour, sugar, or cream cheese can affect the rise and texture. The OXO scale is accurate, easy to read, and has a pull-out display so you can see it even with a large bowl on top.
4. Bob’s Red Mill Unbleached Cake Flour
Cake flour has a lower protein content than all-purpose flour, which keeps the Japanese cheesecake tender and prevents a tough crumb. Bob’s Red Mill is a reliable, widely available brand that delivers consistent results for delicate bakes like this one.
This technique is also used in the famously delicate Chocolate Soufflé if you love airy, egg-white-lifted desserts.
Step-by-Step Instructions
1. Prepare Your Pans and Preheat the Oven
- Preheat your oven to 325°F (163°C). You want the oven fully up to temperature before the batter goes in.
- Line the bottom of your 9-inch springform pan with a round of parchment paper. Cut a long strip of parchment paper to line the inside walls of the pan, extending about 2 inches above the rim. This extra height helps support the cake as it rises.
- Lightly grease the bottom and sides of the pan with a little softened butter, then press the parchment paper in so it sticks neatly.
- Wrap the outside of the springform pan tightly with two or three layers of heavy-duty aluminum foil. Wrap it all the way up the sides. This prevents water from the bath seeping into the cake during baking.
- Fill a large, deep roasting pan or baking dish with about 1 inch (2.5cm) of hot water. Set it on the lowest rack of your oven. This is your bain-marie (water bath).
2. Make the Cream Cheese Batter
- Combine the softened cream cheese, softened butter, and ¼ cup (50g) of the caster sugar in a medium saucepan or in a heatproof bowl set over a pot of barely simmering water (double boiler method).
- Stir constantly over low heat until the mixture is completely smooth, silky, and lump-free. Do not allow it to boil. This step is critical because any lumps now will remain in the finished cake.
- Remove the bowl from the heat. Pour in the whole milk and stir until fully incorporated and the batter is smooth.
- Add the egg yolks one at a time, stirring well after each addition. The mixture should look glossy and pale.
- Stir in the lemon juice and lemon zest.
- Sift together the cake flour, cornstarch, and fine salt directly into the cream cheese mixture. Whisk gently until no dry streaks remain and the batter is completely smooth. Avoid over-mixing at this stage.
- Set the batter aside at room temperature while you prepare the meringue.
3. Make the Meringue
- Make sure your mixing bowl and beaters are completely clean and completely dry. Even a tiny amount of grease or water will prevent the egg whites from whipping properly. A metal or glass bowl is best; avoid plastic.
- Place the 6 egg whites into your mixing bowl. If you have cream of tartar, add it now. It helps stabilize the meringue and is especially useful in humid kitchens.
- Begin beating the egg whites on medium speed until they become foamy and white, about 1-2 minutes.
- Gradually add the remaining ½ cup (100g) of caster sugar, one tablespoon at a time, while continuing to beat on medium-high speed. Adding it slowly gives the sugar time to dissolve into the whites.
- Continue beating until the meringue reaches stiff peaks. Stiff peaks mean when you lift the beater out, the peak stands straight up without curling over. Be careful not to over-beat; over-beaten meringue becomes dry and grainy and will not fold smoothly into the batter.
4. Fold the Meringue into the Batter
- This is the most important step in the entire recipe. Folding incorrectly is the most common reason Japanese cheesecake does not rise properly or has an uneven texture.
- Scoop about one-third of the meringue into the cream cheese batter. Using a rubber spatula or large metal spoon, gently stir it in using circular motions. This first addition loosens the batter and makes it easier to fold in the rest without deflating the egg whites.
- Add the remaining meringue in two additions. For each addition, use a gentle folding motion: slide the spatula down the center of the bowl, sweep along the bottom, and fold up and over. Rotate the bowl slightly with each fold.
- Continue folding just until no white meringue streaks remain. The batter should look smooth, creamy, and slightly airy. Do not stir in circles or you will knock out all the air you worked so hard to build.
- The batter should be pourable but still hold some body. It should look like a thick, creamy milkshake.
5. Bake the Cheesecake
- Pour the finished batter gently into the prepared springform pan. Tap the pan lightly on the counter two or three times to release any large air bubbles.
- Smooth the top with a spatula if needed.
- Carefully place the foil-wrapped springform pan into the roasting pan with the water bath in the oven.
- Bake at 325°F (163°C) for 25 minutes, then reduce the oven temperature to 300°F (150°C) and continue baking for another 50-55 minutes, or until the top is a deep golden brown and the center still has a very slight jiggle when gently shaken.
- Do not open the oven during the first 25 minutes of baking. Temperature fluctuations at this stage can cause the cake to crack or sink.
- When the baking time is complete, turn the oven off but leave the cake inside with the door slightly ajar for 30 minutes. This gradual cooling prevents the dramatic temperature change that causes collapsing and cracking.
6. Cool and Unmold the Cheesecake
- After the 30 minutes in the turned-off oven, remove the springform pan from the water bath. Set it on a wire cooling rack and allow it to cool completely at room temperature, which takes about 1-2 hours.
- Once fully cooled, run a thin knife or offset spatula gently around the inside edge of the pan before releasing the springform latch. This ensures the cake releases cleanly.
- Carefully peel away the parchment paper from the sides.
- Transfer the cheesecake to a serving plate, then refrigerate for at least 4-6 hours, or overnight. This chilling step is essential. It firms the texture and allows the flavors to develop fully.
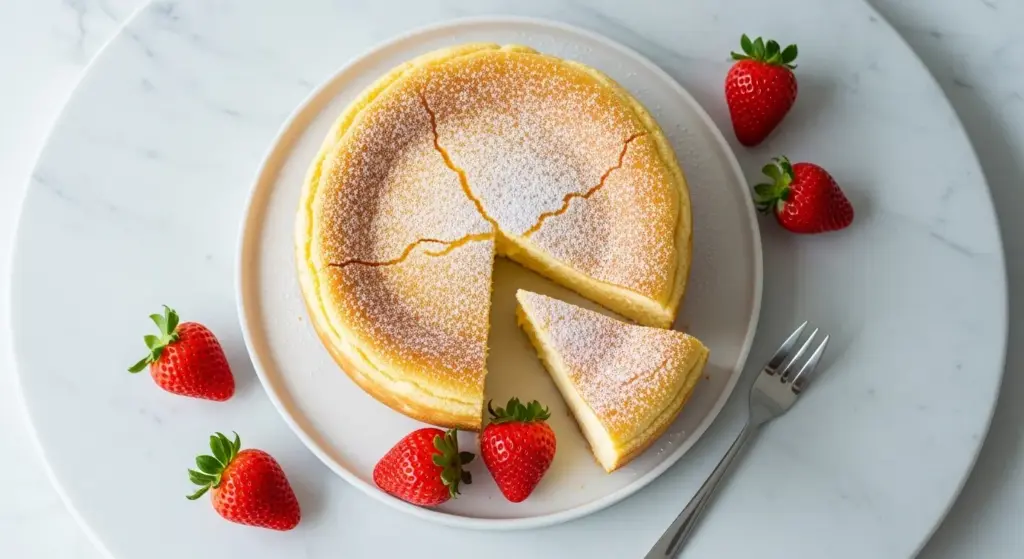
- Just before serving, dust lightly with powdered sugar for an elegant finish.
For another elegant dessert that uses a similar careful, low-and-slow method, check out this Easy Crème Brûlée.
Tips for Success
Getting a Japanese cheesecake right requires attention to technique rather than complicated ingredients. A few key principles will make the difference between a cake that wobbles perfectly and one that sinks or cracks.
- Bring dairy ingredients to room temperature. Cold cream cheese and butter will not blend smoothly into the batter. Take them out at least 2 hours before you start.
- Separate eggs while cold, then let whites come to room temperature. Eggs separate cleanly when chilled, but egg whites whip better when they have had a few minutes to warm up.
- Do not over-beat the meringue. Stiff peaks, not dry or crumbly peaks. If your meringue looks clumpy or grainy, it has gone too far.
- Fold gently and patiently. Rushing this step and deflating the meringue is the number one cause of a flat cheesecake.
- Use the water bath. It is not optional. The steam creates a moist oven environment that prevents cracking and ensures a smooth, evenly set interior.
- Cool gradually. Sudden temperature changes make the cake collapse. The slow oven cool-down is built into the timing for a reason.
- Chill before serving. Freshly baked Japanese cheesecake is fragile and warm. After chilling, it slices cleanly and has the best texture.
You might also enjoy: Easy Tiramisu
Serving Suggestions
Japanese cheesecake is elegant on its own, but a few simple accompaniments can elevate it into an unforgettable dessert experience. The delicate, lightly sweet flavor pairs best with fresh, bright, or lightly sweetened toppings rather than heavy, sugary ones.
Keep things simple and let the cake shine. A light dusting of powdered sugar is traditional and always beautiful. Fresh seasonal fruit adds color and a natural tartness that balances the cream cheese beautifully.
Here are some lovely ways to serve it:
- A spoonful of warm Strawberry Sauce drizzled over each slice
- A small pile of fresh strawberries, raspberries, or blueberries on top
- A drizzle of honey and a sprinkle of lightly toasted sesame seeds for a Japanese-inspired twist
- Sliced alongside a bowl of Fruit Salad for a light, bright dessert table spread
- A light dollop of barely sweetened whipped cream on the side
- Served with a cup of green tea, hojicha, or mild black coffee to complement the subtle flavors
Variations to Try
Once you have mastered the classic version of this Japanese cheesecake recipe, there are some delicious directions you can take it. These variations require only small adjustments to the base recipe.
- Matcha Japanese Cheesecake: Sift 2 tablespoons of high-quality matcha powder in with the cake flour and cornstarch. The earthy bitterness of matcha pairs beautifully with the tangy cream cheese.
- Chocolate Japanese Cheesecake: Reduce the cake flour by 2 tablespoons and add 2 tablespoons of unsweetened cocoa powder in its place. Skip the lemon juice and zest. The result is a deeply flavored, impossibly soft chocolate cake.
- Lemon Japanese Cheesecake: Double the lemon juice and add an extra teaspoon of lemon zest for a more citrus-forward flavor. This variation is especially refreshing in summer.
- Strawberry Japanese Cheesecake: Fold 3 tablespoons of strawberry puree (reduced to a thick paste) into the cream cheese batter before adding the meringue. This adds a subtle pink hue and a fruity note.
- Mini Japanese Cheesecakes: Divide the batter among 6-inch pans or ramekins and reduce the baking time. These make adorable individual servings for dinner parties.
Read Also: Churro Cheesecake Recipe
Storage and Reheating
Japanese cheesecake stores well and even improves in flavor after a night in the fridge. Proper storage keeps it fresh and prevents it from drying out or absorbing other flavors.
- Refrigerator: Cover the cheesecake loosely with plastic wrap or store it in an airtight container. It keeps well for up to 4 days in the fridge.
- Freezer: Slice the cake into individual portions and wrap each slice tightly in plastic wrap, then place in a zip-lock bag. Freeze for up to 1 month.
- Thawing: Thaw frozen slices overnight in the refrigerator. Do not thaw at room temperature, as the texture can become watery.
- Serving from cold: Japanese cheesecake is denser when fully chilled. For the best texture, remove it from the fridge 15-20 minutes before serving to take the edge off the cold.
- Reheating: This cake is best served at slightly below room temperature rather than warm. Avoid microwaving slices, as the delicate meringue structure breaks down quickly with direct heat.
The cheesecake pairs beautifully as part of a dessert spread alongside this Cheesecake Ice Cream Cake.
Nutritional Facts
The following nutrition information is based on one slice, assuming the cake is cut into 12 equal slices.
| Nutrient | Per Serving |
|---|---|
| Calories | ~210 kcal |
| Total Fat | 13g |
| Saturated Fat | 7g |
| Cholesterol | 115mg |
| Sodium | 140mg |
| Total Carbohydrates | 18g |
| Sugars | 14g |
| Protein | 6g |
Note: Nutritional values are estimates and may vary depending on exact ingredient brands and portion sizes used.
Read Also: Lemon Cheesecake Recipe
Health Benefits of Key Ingredients
Japanese cheesecake uses fewer heavy ingredients than traditional cheesecakes, making it one of the lighter dessert options in the cheesecake family.
It is naturally lower in sugar and fat per serving compared to New York-style cheesecake, largely because of its high proportion of egg whites, which contribute protein without adding significant calories.
Here is a closer look at what the key ingredients bring to the table:
- Eggs: A rich source of high-quality protein and essential amino acids. Egg yolks also provide vitamins A, D, and B12, as well as choline, which supports brain health.
- Cream cheese: Provides calcium and fat-soluble vitamins. Using full-fat cream cheese means the cake delivers genuine satiety in smaller portions.
- Lemon juice and zest: Both are good sources of vitamin C and provide antioxidant compounds. The acidity also helps balance the sweetness of the cake naturally.
- Cake flour: Lower in protein than all-purpose flour, which keeps the cake light and tender. Less protein means less gluten development, resulting in a more delicate crumb.
- Whole milk: Contributes calcium, phosphorus, and a small amount of iodine, all of which support bone health.
Another dessert where eggs do all the heavy lifting for texture and structure is this Chocolate Soufflé — a beautiful recipe if you love egg-white-based bakes.
Frequently Asked Questions
1. Why did my Japanese cheesecake crack on top?
Cracking usually happens because the oven temperature was too high, or the cake was cooled too quickly.
Make sure your oven is properly calibrated and that you follow the gradual cooling steps at the end of the recipe. Leaving the cake in the turned-off oven with the door slightly ajar is what prevents those dramatic surface cracks.
2. Why did my Japanese cheesecake collapse after baking?
Collapsing typically means the meringue was over-beaten, the batter was over-mixed after adding the meringue, or the oven temperature dropped suddenly.
All three of these deflate the air bubbles that hold the cake up. Stiff but not dry peaks, gentle folding, and a slow cool-down are the three keys to a cake that holds its height.
3. Can I make Japanese cheesecake without a water bath?
Technically yes, but the results will be noticeably different.
Without the bain-marie, the cake is more prone to cracking, uneven baking, and a drier texture on the outside. If you absolutely cannot use a water bath, place a separate pan of boiling water on the rack below the cheesecake as a partial substitute.
4. Can I use all-purpose flour instead of cake flour?
You can, but the texture will be slightly denser and less tender.
If you do not have cake flour on hand, make your own by replacing 2 tablespoons of each cup of all-purpose flour with cornstarch, then sifting the mixture several times to combine. This lowers the protein content and approximates cake flour reasonably well.
5. How do I know when the Japanese cheesecake is done baking?
The cake is done when the top is deep golden brown and the center has just a slight wobble when gently shaken.
The jiggle should be subtle, like a set jelly, not a liquid ripple. An instant-read thermometer inserted into the center should read around 150-155°F (65-68°C). If the top is browning too fast before the center sets, tent it loosely with foil.
Read Also: Blueberry Cheesecake Recipe
Japanese Cheesecake
Equipment
- 9-inch springform pan - 3-4 inches deep; a taller pan is ideal
- Stand mixer or electric hand mixer
- Large roasting pan or deep baking dish - For the water bath
- Kitchen scale - Strongly recommended for accuracy
- Medium saucepan or double boiler
- Rubber spatula
- Large metal spoon - For folding
- Sieve or Fine Mesh Strainer - For sifting flour
- Parchment paper
- Heavy-duty aluminum foil - For wrapping the pan
- Instant-read thermometer - Optional but helpful
- Cooling rack
Ingredients
- 8 oz full-fat cream cheese - 225g, softened to room temperature
- 4 tbsp unsalted butter - 57g, softened to room temperature
- 0.5 cup whole milk - 120ml
- 6 large eggs - Separated (yolks and whites in separate bowls)
- 0.75 cup caster sugar - 150g, divided (¼ cup for batter, ½ cup for meringue)
- 0.67 cup cake flour - 80g, sifted
- 2 tbsp cornstarch - 15g
- 1 tbsp fresh lemon juice
- 1 tsp lemon zest
- 0.25 tsp cream of tartar - Optional, helps stabilize egg whites
- 0.25 tsp fine salt
- powdered sugar - For dusting (optional)
Instructions
- Preheat oven to 325°F (163°C). Line bottom of 9-inch springform pan with parchment paper and cut a strip to line the inside walls, extending 2 inches above the rim. Lightly grease the pan, press parchment in place, wrap outside tightly with 2-3 layers of foil, and fill a large roasting pan with 1 inch of hot water set on the lowest oven rack.
- Combine softened cream cheese, butter, and ¼ cup sugar in a medium saucepan over barely simmering water. Stir constantly over low heat until completely smooth and lump-free. Remove from heat, pour in whole milk and stir until smooth, then add egg yolks one at a time, stirring well after each. Stir in lemon juice and zest.
- Sift together cake flour, cornstarch, and salt directly into the cream cheese mixture. Whisk gently until no dry streaks remain and batter is smooth. Set aside at room temperature while preparing meringue.
- Place 6 egg whites and cream of tartar (if using) in a clean, dry mixing bowl. Beat on medium speed until foamy. Gradually add remaining ½ cup sugar, one tablespoon at a time, beating on medium-high until stiff peaks form. Peaks should stand straight up without curling over.
- Scoop one-third of the meringue into the cream cheese batter and gently fold using a rubber spatula until combined. Add remaining meringue in two additions, folding with a gentle motion (down the center, along the bottom, and up and over) just until no white streaks remain. Batter should be smooth, creamy, and slightly airy.
- Pour batter gently into prepared springform pan and tap lightly on the counter to release air bubbles. Smooth the top with a spatula if needed. Carefully place foil-wrapped pan into the water bath in the oven.
- Bake at 325°F (163°C) for 25 minutes, then reduce temperature to 300°F (150°C) and continue baking for another 50-55 minutes. Do not open the oven during the first 25 minutes. Cake is done when top is deep golden brown and center still has a very slight jiggle when shaken.
- Turn the oven off but leave the cake inside with the door slightly ajar for 30 minutes. This gradual cooling prevents cracking and collapsing.
- Remove springform pan from water bath and cool completely on a wire rack at room temperature for 1-2 hours. Once cooled, run a thin knife around the inside edge before releasing the springform latch. Carefully peel away parchment paper.
- Transfer cheesecake to a serving plate and refrigerate for at least 4-6 hours, or overnight. This firms the texture and develops the flavors fully. Dust with powdered sugar just before serving.
Notes
- Bring dairy ingredients to room temperature at least 2 hours before starting. Cold cream cheese and butter will not blend smoothly.
- Separate eggs while cold, then let whites come to room temperature for better whipping volume.
- Do not over-beat the meringue. Stop at stiff peaks before it becomes dry and grainy.
- Fold gently and patiently. Rushing this step and deflating the meringue is the number one cause of a flat cheesecake.
- The water bath is essential and not optional. The steam prevents cracking and ensures an evenly set interior.
- Cool the cake gradually. Sudden temperature changes cause collapse. The slow oven cool-down is built into the timing.
- Chill before serving. Freshly baked Japanese cheesecake is fragile and warm; chilling allows clean slicing and the best texture.
- Store covered loosely with plastic wrap in the refrigerator for up to 4 days. Freeze individual slices wrapped tightly for up to 1 month.
- Remove from fridge 15-20 minutes before serving for best texture. Avoid microwaving as the delicate structure breaks down quickly.
- For matcha variation, sift 2 tablespoons of matcha powder in with the dry ingredients. For chocolate, replace 2 tablespoons of flour with cocoa powder and omit the lemon.
Final Thoughts
Japanese cheesecake is one of those recipes that feels genuinely special every single time you make it.
The technique takes a little practice and patience, but once you understand the why behind each step, it all clicks into place naturally.
This is a dessert that surprises people. It looks deceptively simple but delivers a cloud-soft, lightly tangy, melt-in-your-mouth experience that very few cakes can match.
Give this Japanese cheesecake recipe a try and see for yourself why it has become one of the most beloved baked goods in the world.
If you make it, leave a comment below to share how it turned out! And if you snapped a photo of your wobbly, golden masterpiece, share it on social media and tag us. We would genuinely love to see it.
Recommended:
- Strawberry Cheesecake Recipe
- Oreo Cheesecake Recipe
- Pumpkin Cheesecake Recipe
- No Bake Cheesecake Recipe
- Easy Crème Brûlée Recipe
- Classic Tiramisu Recipe
- Fruit Tart Recipe
- Moist Chocolate Cake Recipe
- Best Carrot Cake Recipe
- Easy Chocolate Cake Recipe


