
If you’ve been searching for the perfect no bake cheesecake recipe, your search stops here.
This is the kind of dessert that disappears at every party, wows guests at every dinner table, and gets requested by name at every holiday gathering. The filling is cool, silky, and tangy in all the right ways, balanced on top of a buttery graham cracker crust that holds together beautifully without ever seeing the inside of an oven.
What makes a truly great no-bake cheesecake? It comes down to a few key factors: full-fat cream cheese at room temperature, cold heavy whipping cream beaten to stiff peaks, and enough chill time to let everything set firmly.
Skip any one of these and you might end up with a filling that won’t hold its shape. Follow them, and you’ll have a cheesecake that looks bakery-worthy and tastes even better.
This recipe uses no gelatin, no sweetened condensed milk, and no water bath. Just simple pantry ingredients, a springform pan, and a few hours in the refrigerator.
You might also enjoy: Strawberry Cheesecake
Why You’ll Love This No Bake Cheesecake Recipe
This dessert checks every box a home baker could want, and then some.
It’s completely oven-free, which makes it a lifesaver during the warmer months when you’d rather not add any heat to the kitchen. It’s also the ideal make-ahead dessert since it needs to chill for several hours anyway, giving you plenty of time to focus on other things.
The texture is luxuriously smooth and creamy without being overly heavy or dense. Unlike a classic New York-style baked cheesecake, the no-bake version has a lighter, almost mousse-like quality that makes it incredibly easy to eat more than one slice.
You don’t need any special baking skills for this one. If you can use a hand mixer and press some crumbs into a pan, you can make this cheesecake successfully.
Here’s a quick summary of what makes it so special:
- No oven required: The crust and filling are completely no-bake, making it ideal for any season
- No gelatin or condensed milk: Just classic cheesecake ingredients for an authentic flavor
- Incredibly creamy texture: Full-fat cream cheese and heavy whipping cream create a filling that’s smooth and rich
- Perfect for make-ahead: It needs to chill overnight, which makes it a stress-free entertaining option
- Endlessly customizable: The vanilla base is a blank canvas for any topping you love
- Beginner-friendly: No water bath, no cracking, no eggs to worry about overcooking
Read Also: Lemon Cheesecake Recipe
Ingredients
The ingredient list here is short and straightforward, but the quality of each component really does matter for the final result. Full-fat cream cheese is non-negotiable, and the heavy whipping cream must be cold when you whip it so it reaches stiff peaks properly.
For the Graham Cracker Crust:
- 2 cups (200g) graham cracker crumbs (about 14-15 full graham cracker sheets)
- 1/3 cup (67g) granulated sugar
- 1/2 cup (113g) unsalted butter, melted and slightly cooled
For the Cheesecake Filling:
- 24 oz (680g) full-fat cream cheese (three 8 oz blocks), softened to room temperature
- 1 cup (120g) powdered sugar, sifted
- 1 teaspoon pure vanilla extract
- 2 tablespoons fresh lemon juice
- 1 cup (240ml) heavy whipping cream, cold
Optional Toppings:
- Fresh strawberries, blueberries, or raspberries
- Cherry pie filling
- Caramel sauce or hot fudge
- Whipped cream
For another delicious fruit-topped dessert, try this Blueberry Cheesecake Recipe which uses a similar base with a gorgeous blueberry topping.
Kitchen Equipment Needed
You don’t need a lot of specialty tools to pull this off, but a few key pieces of equipment will make the process much smoother.
A springform pan is really important here because it allows you to remove the sides cleanly once the cheesecake has set, giving you those beautiful, clean slices. A regular pie dish can work in a pinch, but you won’t get the same presentation.
- 9-inch springform pan
- Stand mixer or hand electric mixer
- Two large mixing bowls
- Food processor or zip-top bag and rolling pin (for crushing graham crackers)
- Rubber spatula
- Offset spatula (for smoothing the filling)
- Measuring cups and spoons
- Plastic wrap or aluminum foil (for covering the pan during chilling)
Read Also: Oreo Cheesecake Recipe
Recommended Products for This Recipe
These are products that can genuinely make a difference in how your no bake cheesecake turns out, selected based on quality, reliability, and how much they improve the process or final result.
1. KitchenAid 5.5-Quart Bowl-Lift Stand Mixer
Beating cream cheese to a perfectly smooth, lump-free consistency takes a bit of time and effort. A stand mixer does the heavy lifting for you and gives you far more consistent results than mixing by hand or with a basic hand mixer. It also frees up your hands while you prep other components.
2. Fat Daddio’s 9-Inch Springform Pan
A quality springform pan with a secure latch and a flat, even base is essential for a no-bake cheesecake that releases cleanly. Fat Daddio’s pans are professional-grade, non-reactive, and make it easy to press the crust evenly. The tight seal prevents any leaking while the cheesecake chills.
3. Nielsen-Massey Madagascar Bourbon Pure Vanilla Extract
The vanilla you use in a no-bake cheesecake really does come through in the flavor since there’s no baking to mellow it out. Nielsen-Massey’s Madagascar Bourbon vanilla has a rich, complex flavor that makes a noticeable difference in the finished filling compared to imitation vanilla.
4. OXO Good Grips Offset Icing Spatula
Spreading the cheesecake filling evenly and smoothly into the crust is one of those steps that makes the difference between a homemade-looking dessert and a bakery-worthy one. An offset spatula gives you much more control than a regular spatula, helping you achieve a flat, even surface.
Another favorite: New York Cheesecake Recipe
Step-by-Step Instructions
Step 1: Crush the Graham Crackers
- If starting with whole graham cracker sheets, break them into rough pieces first.
- Add the pieces to a food processor and pulse until you have fine, even crumbs with no large chunks remaining. If you don’t have a food processor, place the crackers in a zip-top bag, seal it tightly, and use a rolling pin to crush them until completely fine.
- You need about 2 cups (200g) of crumbs, which is roughly 14 to 15 full cracker sheets.
- Pour the crumbs into a large mixing bowl and set aside.
Step 2: Make the Graham Cracker Crust
- Melt 1/2 cup (113g) of unsalted butter in a small saucepan over low heat or in the microwave in 20-second intervals. Allow it to cool for 5 minutes. Adding hot butter can cause the crumbs to become greasy rather than forming a cohesive crust.
- Pour the melted butter over the graham cracker crumbs in the mixing bowl.
- Add 1/3 cup (67g) of granulated sugar to the bowl.
- Stir everything together with a fork or rubber spatula until the mixture looks like wet sand. Every crumb should be coated in butter. If you squeeze a small handful of the mixture in your hand and it holds together, the consistency is correct.
- Pour the crumb mixture into a 9-inch springform pan.
- Use the flat bottom of a glass or a measuring cup to press the crumbs firmly and evenly across the bottom of the pan. You can also press a small amount up the sides if you prefer a crust that goes all the way around.
- Place the pan in the refrigerator while you prepare the filling. This allows the butter to begin firming up so the crust holds together when you add the filling.
Step 3: Soften the Cream Cheese
- Remove three 8 oz (227g) blocks of full-fat cream cheese from the refrigerator at least 1 to 2 hours before you plan to start. Room temperature cream cheese is essential for a smooth, lump-free filling.
- If you forgot to take the cream cheese out ahead of time, remove all the packaging, cut each block into smaller cubes, and let them sit on a plate at room temperature for 30 to 45 minutes to speed up the process.
- Do not microwave the cream cheese. It can partially melt unevenly and create a runny filling that won’t set properly.
Step 4: Beat the Cream Cheese Filling
- Add the three softened blocks of cream cheese to the bowl of a stand mixer fitted with the paddle attachment, or to a large bowl if using a hand mixer.
- Beat the cream cheese on medium speed for 2 to 3 minutes, stopping once to scrape down the sides and bottom of the bowl with a rubber spatula. The cream cheese should look completely smooth, creamy, and slightly fluffy with no lumps whatsoever.
- Sift 1 cup (120g) of powdered sugar directly into the bowl. Sifting prevents clumps from forming in the filling.
- Add 1 teaspoon of pure vanilla extract and 2 tablespoons of fresh lemon juice.
- Beat again on medium speed for another 2 minutes until everything is fully incorporated and smooth. The lemon juice is subtle here. It’s not there to make the cheesecake taste lemony; it brightens the overall flavor and helps the filling set up with a pleasant, light tang.
- Scrape down the sides once more and mix briefly to ensure no streaks remain.
Step 5: Whip the Heavy Cream
- Pour 1 cup (240ml) of cold heavy whipping cream into a separate, clean mixing bowl. The cream must be cold to whip properly. Warm cream will not reach stiff peaks.
- If you have time, chill the mixing bowl in the freezer for 10 minutes before whipping. A cold bowl helps the cream whip faster and more effectively.
- Using a hand mixer or a stand mixer fitted with the whisk attachment, whip the cream on medium-high speed.
- Continue whipping until stiff peaks form, meaning the cream holds its shape firmly when you lift the beaters. This typically takes 3 to 4 minutes. Be careful not to overwhip, which can cause the cream to become grainy and butter-like.
Step 6: Combine the Filling
- Add the whipped cream to the bowl of cream cheese in two or three additions.
- Fold the whipped cream in gently using a rubber spatula with a slow, sweeping motion from the bottom of the bowl up and over the top. Do not stir vigorously or use the mixer at this stage.
- The goal is to keep as much air in the whipped cream as possible while combining it evenly with the cream cheese. This airy texture is what gives the no-bake cheesecake its light, mousse-like consistency.
- Continue folding until the mixture is fully combined with no white streaks remaining.
Step 7: Fill the Crust
- Remove the springform pan with the chilled crust from the refrigerator.
- Pour or spoon the cheesecake filling into the pan on top of the crust.
- Use an offset spatula or the back of a large spoon to spread the filling evenly across the pan. Work from the center outward, pressing gently to fill any gaps.
- Smooth the top as flat as possible for a clean, professional presentation.
- Give the pan a gentle tap on the counter a couple of times to release any large air bubbles.
Step 8: Chill the Cheesecake
- Cover the springform pan tightly with plastic wrap or a layer of aluminum foil.
- Place the pan in the refrigerator and allow it to chill for a minimum of 6 to 8 hours. Overnight is ideal and gives the filling the best chance to set up completely firm.
- Do not try to rush this step by placing the cheesecake in the freezer. Freezing causes the texture to become icy and dense rather than smooth and creamy.
- The cheesecake is ready when the filling feels firm and set to the touch in the center and no longer jiggles when the pan is gently moved.
Step 9: Remove from Pan and Serve
- Run a thin, sharp knife carefully along the inside edge of the springform pan before unlatching the sides. This releases the crust from the sides and ensures clean edges.
- Unlatch the springform ring and gently lift it away from the cheesecake.
- If transferring to a serving platter, slide a thin spatula between the crust and the pan bottom to release it, then carefully slide it onto the plate.
- Add your desired toppings just before serving for the freshest presentation.
- To slice cleanly, use a sharp knife dipped in warm water and wiped dry between each cut.
This technique works wonderfully for other creamy no-bake desserts like the Mini Cheesecake Recipe.
Tips for Success
A few simple adjustments can take your cheesecake from good to truly exceptional, and most of them are about temperature.
Getting the cream cheese to room temperature and keeping the heavy cream cold are the two most important things you can do to guarantee a smooth, properly set filling every single time.
- Use full-fat cream cheese: Light or reduced-fat versions have a higher water content and won’t set up as firmly. Always use full-fat blocks, not whipped cream cheese from a tub.
- Sift the powdered sugar: This prevents any clumps from creating lumps in the filling, which is harder to smooth out once the whipped cream is incorporated.
- Don’t skip the lemon juice: Even if you don’t want a lemon-flavored cheesecake, a small amount of fresh lemon juice adds brightness and helps the filling firm up with a subtle tang.
- Use cold heavy cream: Warm heavy cream will not whip to stiff peaks no matter how long you beat it. Keep it in the refrigerator until the moment you need it.
- Fold, don’t stir: Vigorous stirring will deflate the whipped cream and result in a denser filling. A slow, gentle folding motion preserves the light texture.
- Chill overnight: Six hours is the minimum, but overnight chilling produces the best, most sliceable result.
- Press the crust firmly: A loosely packed crust will crumble when you try to slice. Use the flat bottom of a measuring cup to really compact the crumbs.
Read Also: Churro Cheesecake Recipe
Serving Suggestions
No bake cheesecake is one of the most versatile desserts you can make because the creamy, lightly sweet vanilla base pairs beautifully with almost anything you put on top of it.
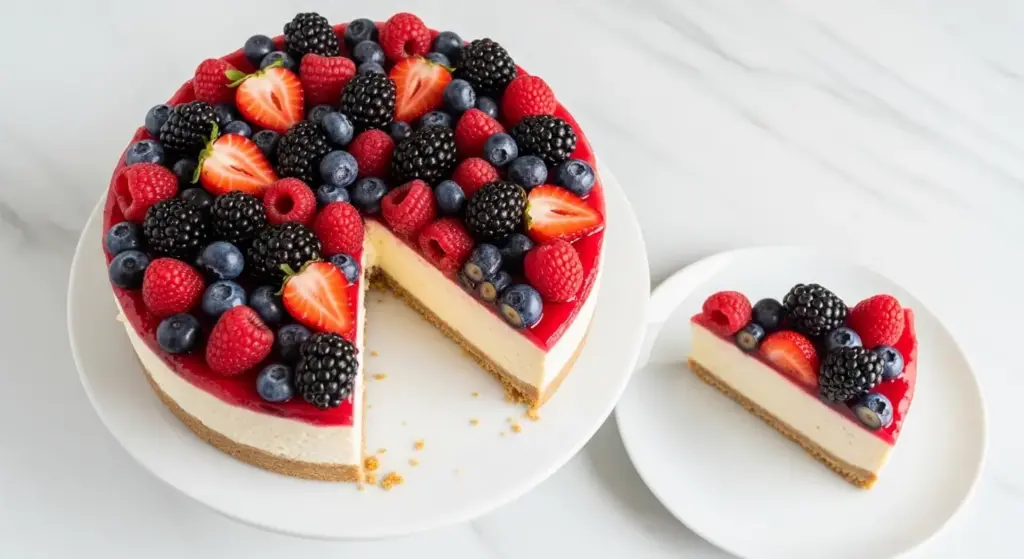
Fresh fruit is always a crowd-pleaser, and the natural tartness of berries cuts through the richness of the filling in the most satisfying way. That said, don’t hesitate to go in a completely different direction if you’re feeling adventurous.
Here are some delicious ways to serve and garnish your cheesecake:
- Fresh berry medley: A mix of strawberries, blueberries, and raspberries adds color, freshness, and natural sweetness
- Cherry pie filling: A classic topping that adds a pop of deep red color and a jammy, sweet-tart flavor
- Caramel drizzle: Warm caramel sauce poured over the top adds a rich, buttery contrast to the tangy filling
- Hot fudge sauce: A chocolate lover’s dream that transforms the cheesecake into something indulgent
- Whipped cream rosettes: Pipe whipped cream around the edges for a bakery-style finish
- Lemon curd: Spooned over the top for a bright, citrusy variation
- Strawberry Sauce: A quick homemade option that pairs perfectly with the creamy filling
Variations to Try
One of the best things about this no bake cheesecake recipe is how easy it is to customize. The base filling is essentially a blank canvas, ready to take on any flavor direction you choose.
Here are a few fun and delicious variations to consider:
- Oreo crust: Replace the graham crackers with crushed Oreo cookies (filling included) for a cookies-and-cream flavor profile. You can find detailed guidance in this Oreo Cheesecake Recipe
- Lemon cheesecake: Increase the lemon juice to 3 tablespoons and add 1 tablespoon of fresh lemon zest to the filling for a bright, citrus-forward version
- Strawberry swirl: Fold 3 tablespoons of strawberry jam into the top layer of the filling before chilling and swirl it with a toothpick for a marbled effect
- Pumpkin cheesecake: Replace 1/2 cup of the cream cheese with canned pumpkin puree and add 1 teaspoon of pumpkin pie spice for a seasonal fall variation
- Chocolate cheesecake: Melt 4 oz of dark chocolate and let it cool, then fold it into the cream cheese mixture before adding the whipped cream
- Mini cheesecakes: Divide the crust and filling between a standard 12-cup muffin tin lined with cupcake liners for individual servings
Read Also: Pumpkin Cheesecake Recipe
Storage and Reheating
No bake cheesecake must always be stored in the refrigerator because the filling contains cream cheese and heavy cream, both of which require cold temperatures to stay safe and maintain their texture.
Proper storage is quick and easy, and the cheesecake actually holds up remarkably well for several days.
- Refrigerator: Cover the cheesecake tightly with plastic wrap or store it in an airtight container. It will keep well for up to 5 days in the refrigerator.
- Freezer: Once fully set, wrap the entire cheesecake (springform sides removed or still on) in one layer of plastic wrap followed by one layer of aluminum foil. Store in the freezer for up to 3 months.
- Thawing: When ready to serve from frozen, transfer the cheesecake to the refrigerator and allow it to thaw overnight or for at least 8 hours before slicing.
- Add toppings fresh: If you plan to store the cheesecake for more than a day, wait to add fresh fruit or sauce toppings until just before serving to prevent sogginess.
- Individual slices: Pre-sliced portions can be wrapped individually in plastic wrap and frozen for easy grab-and-go servings.
This same storage approach works for the Cheesecake Ice Cream Cake Recipe too, if you’re looking for another frozen dessert option.
Nutritional Facts
The following nutritional information is based on one serving, assuming the cheesecake is cut into 12 equal slices with a plain filling and no additional toppings.
| Nutrient | Amount per Serving |
|---|---|
| Calories | 420 kcal |
| Total Fat | 32g |
| Saturated Fat | 19g |
| Cholesterol | 95mg |
| Sodium | 290mg |
| Total Carbohydrates | 29g |
| Dietary Fiber | 0.5g |
| Total Sugars | 21g |
| Protein | 6g |
| Calcium | 80mg |
Nutritional values are estimates only and will vary depending on the specific brands of ingredients used and the size of each slice.
Another favorite: Best Cheesecake Recipe
Health Benefits of Key Ingredients
While no bake cheesecake is absolutely a treat, a few of its core ingredients do offer some genuine nutritional value worth noting.
This doesn’t mean cheesecake is health food, but knowing what’s actually in what you’re eating is always a good thing.
Here’s a look at some of the nutritional highlights:
- Cream cheese: Provides a source of fat-soluble vitamins A and D, as well as small amounts of calcium and phosphorus that support bone health
- Heavy cream: Contains conjugated linoleic acid (CLA), a type of fatty acid that has been studied for potential anti-inflammatory properties
- Lemon juice: Fresh lemon juice is a good source of vitamin C, which supports immune function and helps with the absorption of iron
- Graham crackers: Contain small amounts of iron and B vitamins, and provide quick-digesting carbohydrates for immediate energy
- Butter: A source of fat-soluble vitamins K2 and A, both of which play important roles in cardiovascular and bone health
This pairs beautifully as a treat alongside lighter everyday dishes like this Fruit Salad Recipe for a balanced spread.
Frequently Asked Questions
1. Can I make no bake cheesecake without a springform pan?
You can, but a springform pan makes the job much easier. Without one, you can use a regular 9-inch pie dish and simply scoop the slices out rather than lifting them cleanly. A deep-dish pie plate works best if going this route. The cheesecake will taste exactly the same; the only difference is presentation.
2. Why didn’t my no bake cheesecake set properly?
The most common reasons a no-bake cheesecake doesn’t set are that the cream cheese was too cold when mixed (causing a lumpy, unstable base), the heavy cream wasn’t whipped to full stiff peaks, or the cheesecake wasn’t chilled long enough.
Make sure the cream cheese is fully at room temperature, the heavy cream is whipped until it holds firm peaks, and give the cheesecake a full 6 to 8 hours or overnight in the refrigerator before attempting to slice it.
3. Can I use light cream cheese or low-fat cream cheese?
It’s not recommended. Light or reduced-fat cream cheese has a higher water content, which means the filling is less stable and may not hold its shape properly after chilling.
Full-fat block cream cheese is essential for the right texture and firmness. Avoid whipped cream cheese from a tub as well, as the added air changes the structure of the filling.
4. How far in advance can I make a no bake cheesecake?
You can make it up to 2 days in advance if storing in the refrigerator. For even longer storage, freeze the fully set cheesecake for up to 3 months.
This makes it an excellent option for entertaining, since you can prepare it completely ahead of time and add toppings right before serving.
5. Can I use Cool Whip instead of heavy whipping cream?
Yes, you can substitute Cool Whip or another whipped topping for the heavy cream if needed. Use about 2 cups of Cool Whip in place of the 1 cup of heavy whipping cream, since it is already whipped and less dense.
The flavor will be slightly sweeter and less rich than the version made with real heavy cream, but it will still set up nicely and taste good.
Read Also: Basque Cheesecake Recipe
Final Thoughts
This no bake cheesecake recipe has earned its place as a go-to dessert for good reason.
It’s simple enough that even first-time bakers can pull it off, impressive enough to serve at any occasion, and delicious enough that everyone will ask for the recipe.
The beauty of it is in the combination of that cold, creamy, tangy filling and the rich, crumbly graham cracker crust. Together, they create something that somehow feels both light and indulgent at the same time.
Give this recipe a try the next time you need a showstopper dessert without the stress of baking. You might be surprised at just how easy and satisfying it is to make something this good from scratch.
Did you try this recipe? Drop a comment below and let us know how it turned out! Share a photo of your creation on social media and tag us. We love seeing your beautiful no bake cheesecakes!
Recommended:
- Japanese Cheesecake Recipe
- No Bake Cookie Recipe
- Dirt Pudding Recipe
- Banana Pudding Recipe
- Easy Creme Brulee Recipe
- Easy Tiramisu Recipe
- Classic Tiramisu Recipe
- Fruit Tart Recipe
- Vanilla Pudding Recipe
- Chocolate Pudding Recipe


