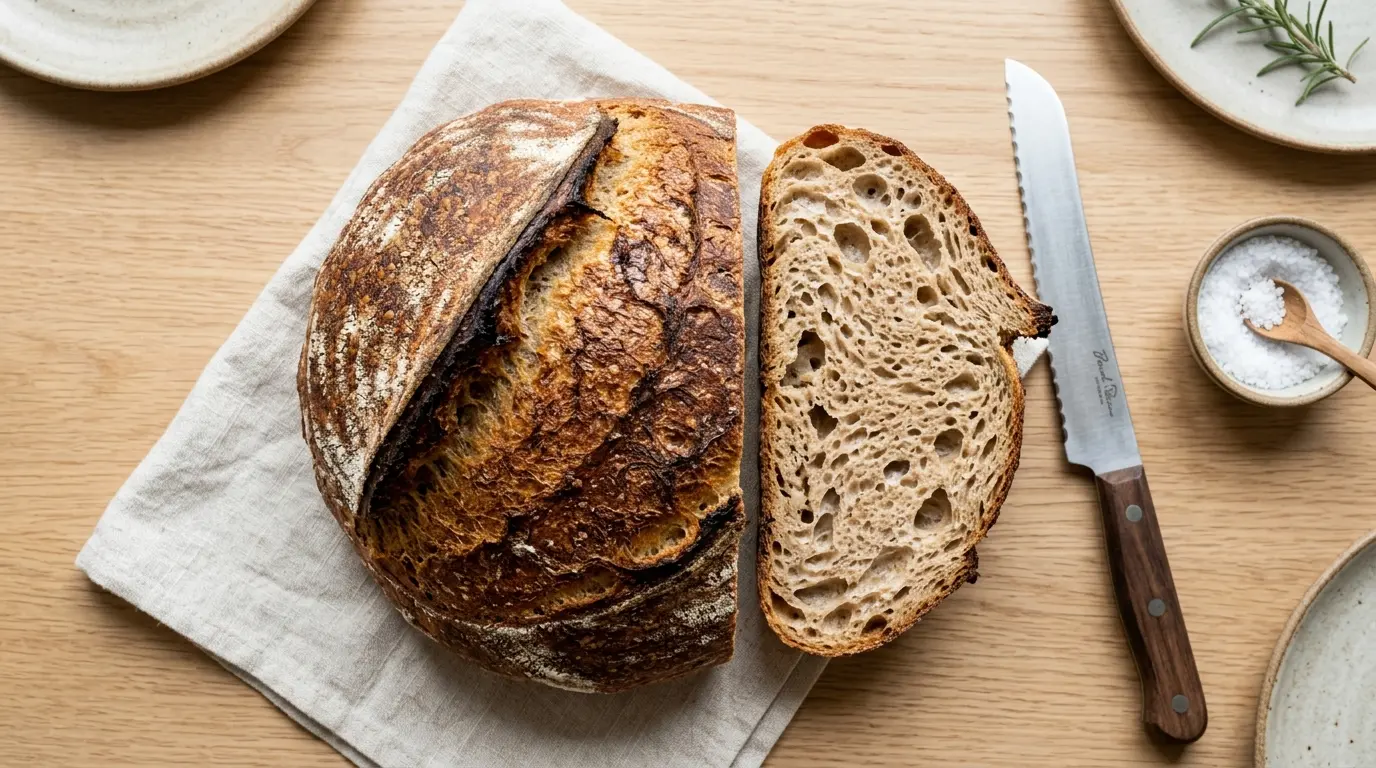
If you’ve been wanting to bake a loaf that’s both wholesome and bursting with flavor, this whole wheat sourdough bread recipe is exactly what you need. It combines the natural tang of a live sourdough starter with the nutty depth of whole wheat flour, producing a loaf with a crackly crust, chewy crumb, and complex flavor that you simply cannot replicate with commercial yeast.
Whole wheat sourdough isn’t just trendy, it’s genuinely better for you than most store-bought bread, and once you understand the process, it’s incredibly satisfying to make.
This recipe follows the classic, widely loved approach: an active sourdough starter, a blend of whole wheat and bread flour for structure, a long cold fermentation for flavor, and a Dutch oven bake for that coveted bakery-style crust.

Why You’ll Love This Whole Wheat Sourdough Bread Recipe
This isn’t just another bread recipe. It’s a loaf you’ll be proud to slice.
The long, slow fermentation does something magical to the wheat. It breaks down the phytic acid in the bran, making the bread easier to digest and allowing your body to absorb more of the nutrients.
The flavor is rich and complex in a way that store-bought whole wheat bread never achieves. You get earthy, nutty notes from the whole wheat flour layered with the gentle tang of naturally fermented dough.
The crust is stunning. Baking in a preheated Dutch oven traps steam around the loaf in the early stages, giving you that dramatically crackled, deep-golden crust that looks like it came from a professional bakery.
Here’s why this recipe stands out:
- Naturally leavened: No commercial yeast, just a well-fed sourdough starter doing all the work
- Deep, complex flavor: Long cold fermentation in the fridge develops incredible taste
- Better nutrition: Whole wheat flour adds fiber, vitamins, and minerals that white flour lacks
- Stunning crust: The Dutch oven method creates a crackly, crackling exterior
- Beginner-friendly process: Each step is clearly broken down so even first-time sourdough bakers can succeed
- Versatile: Delicious as a simple toast, sandwich bread, or paired with soups and stews
If you enjoy baking with sourdough, you’ll also love the Sourdough Sandwich Bread for a softer, everyday-style loaf.
Ingredients
This recipe uses a handful of simple, wholesome ingredients. The ratio of whole wheat to bread flour gives you plenty of nutty flavor while keeping the crumb open and chewy rather than dense.
- 350g (2¾ cups) bread flour, plus extra for dusting
- 150g (1¼ cups) whole wheat flour
- 350ml (1½ cups) warm water, divided (around 75-80°F / 24-27°C)
- 100g (½ cup) active sourdough starter, at peak activity (bubbly and doubled)
- 10g (2 tsp) fine sea salt
- 1 tbsp (15ml) olive oil (optional, adds tenderness and helps with oven spring)
Read Also: Easy Sourdough Bread Recipe
Kitchen Equipment Needed
Having the right tools makes a big difference in how your loaf turns out. A Dutch oven is the single most important piece of equipment here.
- Dutch oven (at least 4-5 quart capacity, with a lid)
- Large mixing bowl
- Digital kitchen scale (measuring by weight gives the most accurate results)
- Bench scraper
- Banneton proofing basket (or a bowl lined with a flour-dusted kitchen towel)
- Bread lame or sharp razor blade for scoring
- Plastic wrap or a shower cap for covering the dough
- Wire cooling rack
- Parchment paper
You might also enjoy: Same Day Sourdough Bread
Recommended Products for This Recipe
These are products I genuinely recommend based on quality and performance. They take this recipe from good to great.
1. Lodge Enameled Cast Iron Dutch Oven
A heavy-duty Dutch oven is non-negotiable for artisan sourdough. The Lodge Enameled Cast Iron Dutch Oven distributes heat evenly and holds steam incredibly well, giving you that explosive oven spring and crackly crust. It’s also easy to clean and will last a lifetime.
2. Cambro Round Dough Rising Container
A clear, graduated dough container lets you track exactly how much your dough has risen during bulk fermentation, taking out the guesswork entirely. The Cambro dough container is what professional bakers use and it makes home baking so much easier.
3. Bob’s Red Mill Whole Wheat Flour
The quality of your whole wheat flour matters enormously. Bob’s Red Mill Whole Wheat Flour is stone-ground and retains the wheat germ and bran for maximum flavor and nutrition. It performs beautifully in sourdough bread.
4. Oval Brotform Banneton Proofing Basket
A well-made banneton proofing basket shapes your loaf beautifully and creates those classic spiral flour patterns on the crust. The rattan material absorbs just enough moisture to keep the dough surface dry and prevent sticking.
5. Wire-Bound Bread Lame
Scoring your loaf before baking isn’t just decorative. A sharp bread lame controls where the loaf expands during baking, preventing blowouts and giving you that beautiful “ear” along the score line. Curved blade models give you the most control.
This technique works wonderfully in Sourdough Focaccia too, which is another great way to put your sourdough starter to use.

Step-by-Step Instructions
Step 1: Feed Your Sourdough Starter
- Take your sourdough starter out of the fridge the night before or at least 4-8 hours before you plan to mix the dough.
- Discard all but about 50g (3 tablespoons) of your starter.
- Feed it with 50g (¼ cup) of bread flour and 50g (3½ tablespoons) of warm water.
- Stir well until fully combined and no dry flour remains.
- Cover loosely and let it sit at room temperature until it has doubled in size and looks bubbly and active. This is your active starter, and using it at peak activity is critical for good rise.
- To test if it’s ready, drop a small spoonful into a glass of water. If it floats, it’s ready to use.
Step 2: Mix the Dough (Autolyse)
- In a large mixing bowl, combine 350g (2¾ cups) of bread flour and 150g (1¼ cups) of whole wheat flour.
- Add 300ml (1¼ cups) of the warm water (hold back the remaining 50ml / 3½ tablespoons for later).
- Mix with your hands or a stiff spatula until no dry flour remains and a shaggy dough forms.
- Cover the bowl with plastic wrap or a damp towel.
- Let it rest for 30-60 minutes. This autolyse period allows the flour to fully hydrate, making the dough easier to handle and improving the final crumb structure.
Step 3: Add the Starter and Salt
- After the autolyse, add the 100g (½ cup) of active sourdough starter to the dough.
- Pour the remaining 50ml (3½ tablespoons) of warm water over the dough as well, which helps incorporate the starter more evenly.
- If using, add 1 tablespoon (15ml) of olive oil at this stage.
- Squeeze and fold the dough repeatedly with your hands until the starter is fully incorporated and the dough no longer feels slippery or wet. This takes about 3-5 minutes of mixing.
- Add the 10g (2 tsp) of fine sea salt and continue squeezing and folding until the salt is fully dissolved into the dough.
- Cover the bowl and let the dough rest for 30 minutes.
Step 4: Stretch and Fold (Bulk Fermentation)
- Over the next 4-5 hours at room temperature (around 75-78°F / 24-26°C), perform stretch and folds to build gluten strength.
- For each stretch and fold set: grab one side of the dough, stretch it up as high as it will go without tearing, then fold it over the center. Rotate the bowl 90 degrees and repeat three more times until you’ve folded all four “sides.”
- Perform this stretch and fold set every 30 minutes for the first 2 hours. That’s 4 sets total.
- After the fourth set, let the dough rest undisturbed for the remaining bulk fermentation time (about 2-3 more hours), until it has grown by about 50-75% in size, feels airy when you move the bowl, and small bubbles are visible on the surface.
Step 5: Pre-Shape the Dough
- Lightly flour your work surface with bread flour.
- Gently tip the dough out of the bowl using a bench scraper. Try not to deflate it too much.
- Using the bench scraper and your free hand, pull the dough toward you in a circular motion, building tension in the surface. Do this 3-4 times until you have a rough, smooth ball.
- Let the pre-shaped round rest on the work surface uncovered for 20-30 minutes. This bench rest relaxes the gluten and makes the final shaping easier.
Step 6: Final Shape
- Lightly flour the top of the pre-shaped dough ball.
- Flip it over using the bench scraper so the floured side is now facing down.
- For a round loaf (boule): fold the left third of the dough over the center, then fold the right third over. Roll the dough toward you, applying gentle tension to the surface as you go.
- For an oval loaf (batard): stretch the dough gently into a rectangle, fold the sides in, roll it away from you, then rotate and use the bench scraper to drag it toward you to build tension on the bottom.
- The final shape should have a taut, smooth surface on top with a seam on the bottom.
Step 7: Cold Proof in the Fridge
- Generously dust your banneton or a bowl lined with a flour-dusted kitchen towel with rice flour or all-purpose flour.
- Place the shaped dough seam-side up in the banneton.
- Cover with plastic wrap or a shower cap.
- Refrigerate for 8-16 hours (overnight is perfect). The cold retards fermentation, develops complex flavor, and makes the dough firmer and easier to score.
Step 8: Preheat the Dutch Oven
- About 45-60 minutes before baking, place your Dutch oven with its lid inside the oven on a center rack.
- Preheat the oven to 500°F (260°C). The Dutch oven must be screaming hot before the dough goes in.
Step 9: Score and Bake
- Cut a sheet of parchment paper slightly larger than your loaf.
- Remove your dough from the fridge. Place the parchment paper over the banneton, then quickly flip it upside down so the dough lands seam-side down on the parchment.
- Quickly score the top of the dough with your bread lame or razor blade. A single, confident slash at a slight angle works well. Score quickly and decisively, about ½ inch (1.2 cm) deep.
- Carefully remove the hot Dutch oven from the oven. Use heavy oven mitts.
- Lift the dough using the parchment paper as a sling and lower it into the Dutch oven.
- Put the lid on and return it to the oven.
- Bake with the lid on for 20 minutes. The trapped steam helps the loaf rise dramatically.
- After 20 minutes, remove the lid and reduce the oven temperature to 460°F (238°C).
- Continue baking uncovered for 20-25 more minutes until the crust is deep brown and the internal temperature reads 205-210°F (96-99°C) on an instant-read thermometer.
- Remove the loaf from the Dutch oven and transfer to a wire cooling rack immediately.
Step 10: Cool Before Slicing
- This step is critical and often skipped. Let the loaf cool on a wire rack for at least 1-2 hours before slicing.
- The interior continues cooking as the loaf cools. Cutting too early results in a gummy, underset crumb.
- You’ll hear the crust crackle and sing as it cools. That sound is always deeply satisfying.
Read Also: Sweet Sourdough Bread Recipe
Tips for Success
Small adjustments can make a big difference with sourdough bread. Here are the most useful things to know before you start:
- Use a starter at peak activity. A starter that has doubled and is full of bubbles will give you the best rise. If your starter is sluggish, the dough will be too. Consider doing 2-3 feedings in the 24 hours before baking.
- Measure by weight, not volume. Sourdough baking is precise. A digital scale removes the inconsistency that comes with measuring cups.
- Watch the dough, not just the clock. Bulk fermentation times vary depending on your room temperature. In a warm kitchen (78°F/26°C), it may finish in 4 hours. In a cooler kitchen (68°F/20°C), it could take 6-7 hours.
- Don’t skip the cold proof. Baking straight from room temperature is possible, but the cold proof dramatically improves flavor and makes the dough much easier to score cleanly.
- Use rice flour in your banneton. Rice flour doesn’t absorb moisture the way wheat flour does, so it releases more easily and prevents sticking.
- Score confidently. A hesitant, shallow score will stick and tear. One decisive slash is better than multiple timid ones.
- Let it cool fully. Slicing into a warm loaf ruins the crumb. Waiting is hard, but worth it.
For a quicker alternative that skips the overnight proof, check out this Sourdough Starter Recipe to learn how to build and maintain a strong starter for any sourdough project.
Serving Suggestions
This whole wheat sourdough bread is deeply versatile. It makes extraordinary toast and holds up beautifully to hearty toppings.
Here are some favorite ways to serve it:
- Classic toast with butter and honey: Let good-quality salted butter melt into a warm slice and drizzle with raw honey. Simple perfection.
- Avocado toast: The nutty, tangy flavor of whole wheat sourdough is the ideal base for smashed avocado with flaky sea salt and red pepper flakes.
- Soup companion: Thick slices alongside a bowl of Wild Rice and Mushroom Soup is one of the most comforting meals you can make.
- Open-face sandwich: Top slices with good cheese, roasted vegetables, or smoked salmon for an elegant lunch.
- Grilled cheese: The structure and flavor of whole wheat sourdough makes the best grilled cheese. Use a good melting cheese and don’t rush it.
- Bread board: Slice and serve alongside olive oil for dipping, a variety of cheeses, cured meats, and pickles for a beautiful spread.
Variations to Try
Once you’re comfortable with the base recipe, these adaptations are all worth exploring:
- Seeded whole wheat sourdough: Add 2 tablespoons each of sesame seeds, flaxseeds, and sunflower seeds to the dough in Step 3. They add wonderful crunch and extra nutrition.
- Rosemary and sea salt: Mix 2 tablespoons of finely chopped fresh rosemary into the dough during Step 3. Before baking, press coarse sea salt and more rosemary onto the scored surface.
- Honey whole wheat sourdough: Replace the olive oil with 2 tablespoons of honey. It softens the crumb and adds a subtle sweetness that balances the tang beautifully.
- Einkorn whole wheat sourdough: Substitute the whole wheat flour with einkorn flour. Einkorn has a deeper, nuttier flavor and is often better tolerated by people sensitive to modern wheat.
- High hydration whole wheat: Increase the water to 380ml (1⅔ cups) for a more open, irregular crumb. This version is stickier to handle but produces a looser, more artisan-style interior.
- Cranberry walnut whole wheat sourdough: Fold in ½ cup (75g) of dried cranberries and ½ cup (60g) of roughly chopped walnuts during the final stretch and fold. It pairs beautifully with sharp cheese.
You might also enjoy: Sourdough Discard Bread
Storage and Reheating
Whole wheat sourdough stores better than most bread thanks to its natural acidity, which acts as a gentle preservative.
How to store and reheat:
- Room temperature (1-3 days): Store the loaf cut-side down on a wooden cutting board, or loosely wrapped in a clean kitchen towel. Avoid sealing it in plastic bags at room temperature, as that traps moisture and makes the crust soft.
- Longer storage (up to 5 days): Once the crust has softened naturally after the first day, you can store the loaf in a paper bag or beeswax wrap.
- Freezing (up to 3 months): Slice the entire loaf, lay the slices flat on a baking sheet, freeze until solid, then transfer to a freezer bag. This way you can pull out individual slices as needed.
- Reheating a whole loaf: If the bread has gone stale, run the outside under cold water and place the wet loaf (no wrap needed) in a 375°F (190°C) oven for 15 minutes. It comes out tasting almost freshly baked.
- Reheating slices: Toast directly from frozen, or warm in a 350°F (175°C) oven for 5 minutes.
Read Also: Sourdough Discard Focaccia
Nutritional Facts
Per serving (1 medium slice, approximately 60g / 2.1 oz), based on 16 slices per loaf:
| Nutrient | Amount |
|---|---|
| Calories | 145 kcal |
| Total Fat | 1.5g |
| Saturated Fat | 0.2g |
| Sodium | 195mg |
| Total Carbohydrates | 28g |
| Dietary Fiber | 3g |
| Total Sugars | 0.5g |
| Protein | 5.5g |
| Iron | 1.8mg |
| Magnesium | 22mg |
Nutritional values are estimates and may vary based on specific ingredients used.
Another favorite to try: Sourdough Discard Banana Bread
Health Benefits of Key Ingredients
This whole wheat sourdough bread recipe isn’t just delicious, it’s genuinely nourishing in ways that most commercially produced bread is not.
The combination of whole wheat flour and long fermentation makes this loaf one of the more nutritious forms of bread you can eat.
Here’s what the key ingredients bring to the table:
- Whole wheat flour: Retains the bran and wheat germ from the grain, providing dietary fiber, B vitamins (including folate), iron, magnesium, phosphorus, and zinc. The fiber supports digestive health, helps manage blood sugar, and contributes to feelings of fullness.
- Sourdough starter (wild fermentation): The bacteria in your starter produce lactic and acetic acids during fermentation. These acids partially break down phytates found in the bran, which would otherwise block mineral absorption. This makes the iron, zinc, and magnesium in whole wheat more bioavailable than in standard whole wheat bread.
- Lactic acid fermentation: Research suggests that sourdough fermentation lowers the glycemic index of bread compared to yeasted whole wheat bread. This means slower digestion and more stable blood sugar levels.
- Olive oil (optional): A source of heart-healthy monounsaturated fats, olive oil contributes to the softness of the crumb and adds a subtle richness without overwhelming the wheat flavor.
- Sea salt: Provides sodium and trace minerals. The small amount used here adds essential flavor without making the bread overly salty.
- Long cold fermentation: Beyond flavor, the extended cold proof allows the starter’s enzymes to continue breaking down complex carbohydrates, making the bread easier to digest even for those who are sensitive to standard whole wheat bread.
For another nutrient-dense baked good, check out this Healthy Banana Bread Recipe.
Frequently Asked Questions
1. Can I use 100% whole wheat flour instead of a blend?
You can, but the loaf will be significantly denser. Whole wheat flour has lower gluten development potential and heavier bran particles that cut through gluten strands. If you want to go full whole wheat, increase the hydration to about 380ml (1⅔ cups), expect a tighter crumb, and consider adding a tablespoon of vital wheat gluten to help with structure. A 70/30 or 60/40 blend of bread flour to whole wheat is the sweet spot for most home bakers.
2. My dough is really sticky. Is that normal?
Yes, whole wheat dough is stickier than white flour dough because the bran absorbs water more slowly. Resist the temptation to add more flour. Wet your hands instead of flouring them during stretch and folds, and use a bench scraper to help with pre-shaping. The dough will become more manageable as the gluten develops through the folding process.
3. How do I know when bulk fermentation is done?
Look for these signs: the dough has grown by 50-75% in volume, the surface has a slightly domed appearance with visible bubbles, the dough jiggles loosely when you shake the bowl, and a small piece pulled off feels airy rather than dense. If you have a clear container, you can mark the starting volume with a rubber band and track the growth visually.
4. Can I bake this without a Dutch oven?
Yes, though the results will differ. Place a baking stone or heavy sheet pan in the oven to preheat. Put the loaf on parchment paper and slide it onto the hot surface. To create steam (which replaces the Dutch oven lid), place a separate metal pan on the oven floor and pour 1 cup of boiling water into it immediately after putting the bread in. Remove the steam pan after the first 20 minutes. The crust won’t be quite as dramatic, but the bread will still taste wonderful.
5. Why is my sourdough bread gummy inside?
Gumminess is almost always caused by underbaking or cutting the loaf too soon. Make sure the internal temperature reaches 205-210°F (96-99°C) before removing from the oven. Then wait the full 1-2 hours before slicing. Cutting into a hot loaf allows steam to escape and causes the crumb to compress and become gluey. Patience is genuinely the most important ingredient in sourdough baking.
Read Also: Sourdough Discard Dinner Rolls
Final Thoughts
Baking whole wheat sourdough bread from scratch is one of the most rewarding things you can do in the kitchen. It takes time, but the actual hands-on work is minimal, and the result is a loaf that is genuinely extraordinary.
The smell of a sourdough loaf in the oven is something else entirely. And that first slice, still slightly warm, with a slick of good butter melting into the open crumb, is the kind of simple pleasure that makes all the waiting worthwhile.
If you try this whole wheat sourdough bread recipe, I’d love to hear how it goes! Drop a comment below with your results, any variations you tried, or questions you ran into along the way. And if it turned out beautifully, please share a photo!
Recommended:
- Sourdough English Muffin Recipe
- Sourdough Discard Bagels
- Sourdough Discard Cinnamon Rolls
- Sourdough Discard Crackers
- Sourdough Discard Pizza Dough
- Sourdough Discard Naan
- Sourdough Discard Pretzels
- Sourdough Discard Flatbread
- Sourdough Discard Breadsticks
- Sourdough Discard Pita Bread


