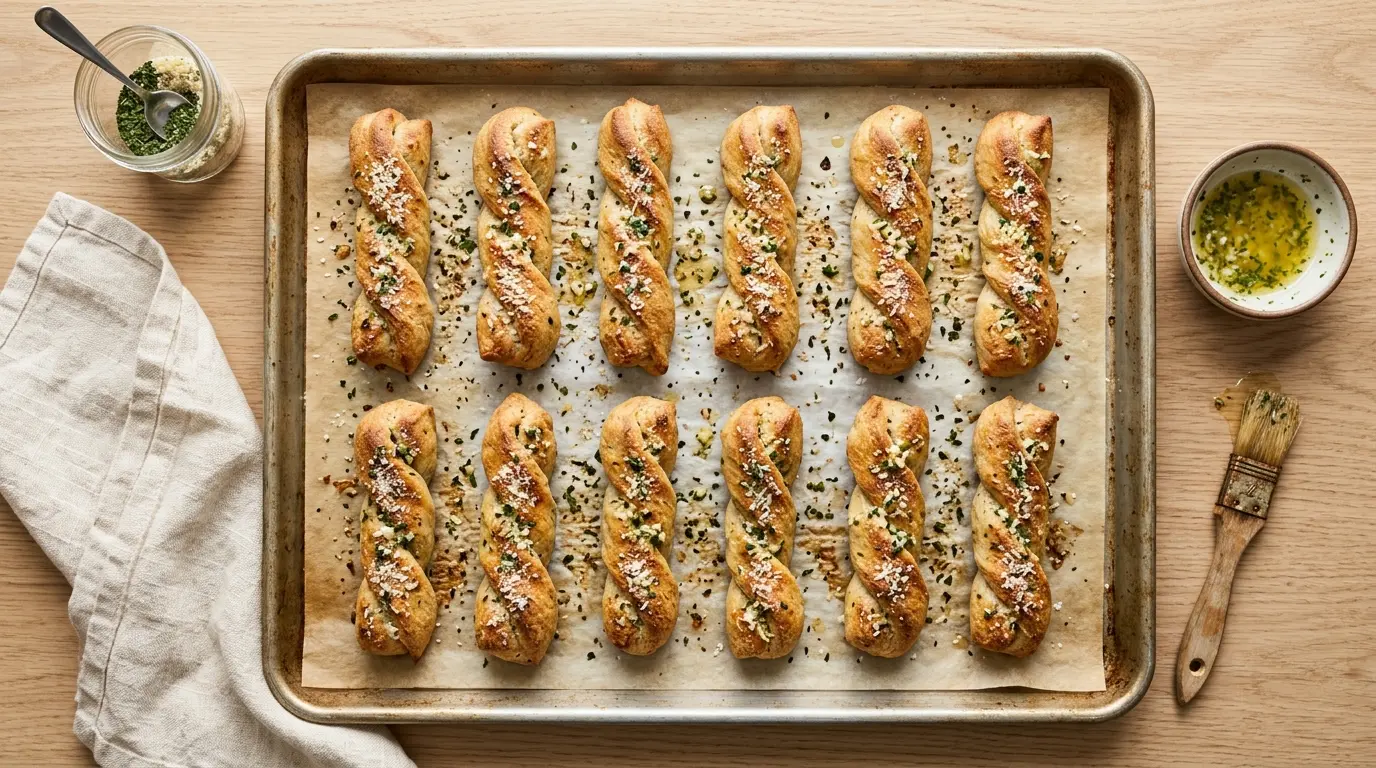
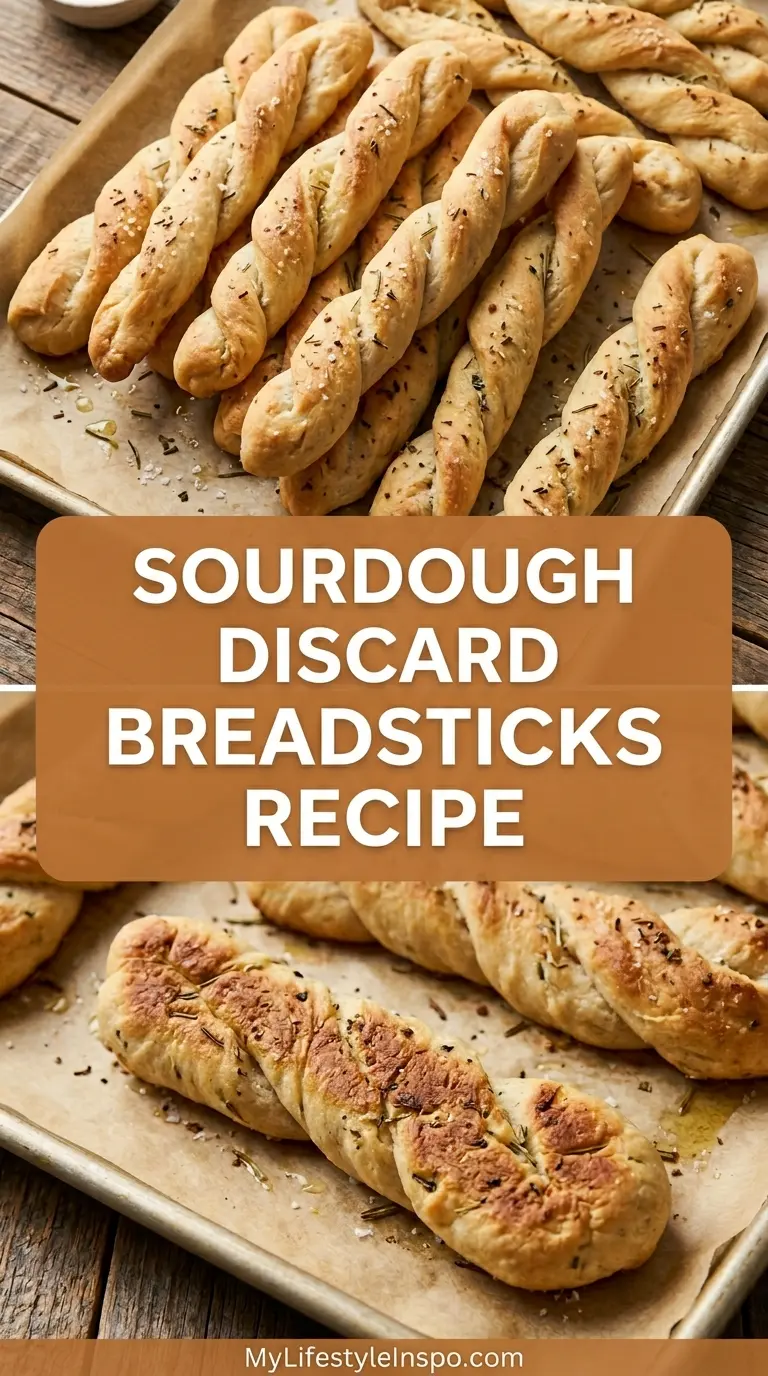
If you keep a sourdough starter, you already know the routine: feed it, discard the excess, repeat. But that discard doesn’t have to go to waste. This sourdough discard breadsticks recipe is one of the best ways to put it to work, turning your leftover starter into soft, golden, garlic-butter breadsticks that disappear fast.
These aren’t the dry, cracker-thin kind. They’re pillowy, chewy, and brushed with a savory garlic herb butter that makes every bite worth it.
The discard adds a subtle tang that plain breadsticks just don’t have. Combined with instant yeast for lift, bread flour for chew, and a finish of melted butter with garlic powder, these breadsticks hit every note.
They pair beautifully with a bowl of soup, a pasta dinner, or honestly just on their own. Once you try them, they’ll become a regular on your weekly rotation, and a great excuse to keep that sourdough starter going strong.
You might also love making Sourdough Discard Focaccia as another delicious way to use up your starter.

Why You’ll Love This Sourdough Discard Breadsticks Recipe
These breadsticks check every box when it comes to easy, flavorful baking.
The sourdough discard gives them a gentle tang that plain yeast breads can’t replicate, while the instant yeast does the heavy lifting on rise time.
Because you’re using discard (unfed starter), there’s no need to plan ahead or wait for an active starter.
The dough comes together quickly, the rise is predictable, and the bake is fast. This is one of those recipes you can start after dinner prep and have on the table alongside the meal.
- Uses up sourdough discard with zero waste
- Soft, chewy interior with a slightly crisp golden exterior
- Ready in about 1.5 hours from start to finish
- Customizable with herbs, cheese, or seeds
- Kid-friendly and crowd-pleasing every single time
- Works with discard straight from the fridge
Read Also: Sourdough Discard Dinner Rolls Recipe
Ingredients
For a standard batch of about 12 breadsticks, you’ll need a handful of pantry staples plus your sourdough discard. Bread flour is preferred here because the higher protein content creates a chewier, more satisfying texture, though all-purpose flour will also work if that’s what you have on hand.
- 1 cup (240g) sourdough discard, unfed and at room temperature
- 1/2 cup (120ml) warm water (around 110°F / 43°C)
- 2 1/4 tsp (7g) instant yeast (1 standard packet)
- 1 tsp (4g) granulated sugar
- 2 tbsp (30ml) olive oil
- 1 tsp (6g) salt
- 1/2 tsp garlic powder
- 2 1/4 cups (280g) bread flour, plus more for dusting
For the garlic butter topping:
- 3 tbsp (42g) unsalted butter, melted
- 1/2 tsp garlic powder
- 1/2 tsp dried parsley (or Italian seasoning)
- Pinch of salt
- Optional: 2 tbsp grated Parmesan cheese for topping
This recipe pairs wonderfully with Sourdough Discard Pizza Dough if you’re on a sourdough discard baking spree.
Kitchen Equipment Needed
You don’t need any specialty tools for this recipe. A stand mixer makes kneading easier, but the dough is smooth enough to knead by hand.
- Large mixing bowl or stand mixer with dough hook
- Measuring cups and spoons
- Kitchen scale (recommended for accuracy)
- Baking sheet (half sheet, 18×13 inches)
- Parchment paper
- Pastry brush or silicone brush for buttering
- Clean kitchen towel or plastic wrap for covering the dough
- Small saucepan or microwave-safe bowl for melting butter
- Bench scraper (optional, but helpful for dividing dough)
Read Also: Sourdough Discard Crackers Recipe
Recommended Products for This Recipe
These are products that genuinely make a difference when making sourdough discard breadsticks, chosen for quality and real-world usefulness.
1. King Arthur Bread Flour
Bread flour’s higher protein content (around 12-13%) gives these breadsticks their signature chew and structure. King Arthur is a consistently reliable brand that bakers of all skill levels trust for predictable results.
2. OXO Good Grips Kitchen Scale
Measuring by weight is the most accurate way to bake, especially when working with sourdough discard. An OXO scale gives you precise readings every time and takes the guesswork out of flour amounts.
3. Nordic Ware Half Sheet Baking Pan
A good, sturdy baking sheet makes a real difference for even browning. Nordic Ware’s commercial-grade aluminum pans resist warping and deliver consistent heat across the entire surface.
4. Silicone Pastry Brush
A silicone pastry brush applies garlic butter smoothly and evenly without dropping bristles. It’s heat-resistant, easy to clean, and lasts far longer than classic bristle brushes.
Another great sourdough discard recipe to try next is Sourdough Discard Pretzels, which uses many of the same techniques.
Step-by-Step Instructions
Step 1: Activate the Yeast
- Combine the warm water (110°F / 43°C) and granulated sugar in a large mixing bowl or the bowl of your stand mixer.
- Sprinkle the instant yeast over the top and stir gently to combine.
- Let it sit for 5 minutes. You should see it become foamy and fragrant, which confirms the yeast is active and ready to use.
- If the mixture doesn’t foam at all after 5-7 minutes, your yeast may be expired. Start again with fresh yeast before proceeding.
Step 2: Add the Wet Ingredients
- Add the sourdough discard to the activated yeast mixture.
- Pour in the olive oil.
- Stir or mix on low speed until the discard is roughly combined with the yeast mixture. It doesn’t need to be perfectly smooth at this stage.
- The discard can go in straight from the fridge as long as you used warm (not cold) water to help bring the dough temperature up.
Step 3: Add the Dry Ingredients and Mix
- Add the salt, garlic powder, and bread flour to the bowl.
- If using a stand mixer, attach the dough hook and mix on low speed for 2 minutes to bring the dough together.
- Increase to medium speed and knead for 6-8 minutes, until the dough is smooth, elastic, and slightly tacky but not sticky.
- If kneading by hand, turn the dough out onto a lightly floured surface and knead for 8-10 minutes, using the heel of your hand to push and fold.
- The dough is ready when it passes the “windowpane test”: stretch a small piece thin enough that you can almost see light through it without it tearing. If it tears, knead for another 2 minutes and test again.
Step 4: First Rise
- Shape the kneaded dough into a smooth ball and place it in a lightly oiled bowl.
- Turn the dough once to coat all sides with oil, which prevents the surface from drying out.
- Cover the bowl tightly with plastic wrap or a clean kitchen towel.
- Let the dough rise in a warm spot (around 75-80°F / 24-27°C) for 45-60 minutes, until it has roughly doubled in size.
- A good warm spot is an oven with just the light on, or near a warm stovetop.
Step 5: Preheat the Oven and Prep the Pan
- While the dough is in its final few minutes of rising, preheat your oven to 400°F (200°C).
- Line your baking sheet with parchment paper.
- No greasing is needed beyond the parchment.
Step 6: Shape the Breadsticks
- Turn the risen dough out onto a lightly floured surface and gently press out the large air bubbles. Do not punch it down hard, as you want to keep some of the rise.
- Using a bench scraper or sharp knife, divide the dough into 12 equal pieces. Each piece should weigh roughly 55-60g if you’re using a scale.
- Take one piece of dough and roll it between your palms or on the work surface into a rope about 8-10 inches (20-25cm) long.
- Place each rope on the prepared baking sheet, spacing them about 1 inch (2.5cm) apart.
- They will puff slightly during the second rise and baking, so don’t overcrowd the pan.
Step 7: Second Rise
- Once all the breadsticks are shaped and on the pan, cover them loosely with a clean kitchen towel.
- Let them rest for 15-20 minutes at room temperature. They won’t double dramatically, but they will puff noticeably and relax in shape.
- This short rest is important because it allows the gluten to relax and the yeast to give one last burst of activity before baking.
Step 8: Bake the Breadsticks
- Place the baking sheet in the preheated 400°F (200°C) oven on the center rack.
- Bake for 15-18 minutes, until the breadsticks are golden on the bottom and lightly golden on top.
- The tops won’t be deeply browned, which is intentional. Over-baking at this stage will make them dry instead of soft.
- Rotate the pan halfway through if your oven has any hot spots.
Step 9: Make the Garlic Butter Topping and Finish
- While the breadsticks bake, melt the unsalted butter in a small saucepan over low heat, or in a microwave-safe bowl in 20-second bursts.
- Stir in the garlic powder, dried parsley, and a pinch of salt.
- As soon as the breadsticks come out of the oven, brush the garlic butter generously over each one while they’re still hot.
- If using Parmesan cheese, sprinkle it immediately after buttering, while the butter is still hot enough for it to adhere.
- Serve warm for best texture and flavor.
For a fun variation to serve alongside these breadsticks, try making Sourdough Discard Flatbread.
Tips for Success
A few small adjustments can take these from good to genuinely great. These tips address the most common issues home bakers run into with breadstick recipes.
- Use room temperature discard. Cold discard straight from the fridge slows the yeast. If you forgot to pull it out, use slightly warmer water (around 115°F / 46°C) to compensate.
- Don’t skip the second rise. Even 15 minutes makes a noticeable difference in texture. Skipped second rises result in denser, tougher breadsticks.
- Check your flour measurement. Too much flour is the most common breadstick mistake. If measuring by volume, spoon the flour into the cup and level it off. Better yet, weigh it.
- Roll gently and evenly. Uneven thickness means uneven baking. Some parts will be done while others are still doughy.
- Brush butter immediately. The garlic butter soaks in much better when applied to hot breadsticks right out of the oven.
- Watch for color cues. The bottoms should be golden, and the tops a light golden color. The tops being pale is fine as long as the bottoms aren’t pale too.
Another great sourdough discard bake to try is Sourdough Discard Naan, which uses a similar soft dough method.
Serving Suggestions
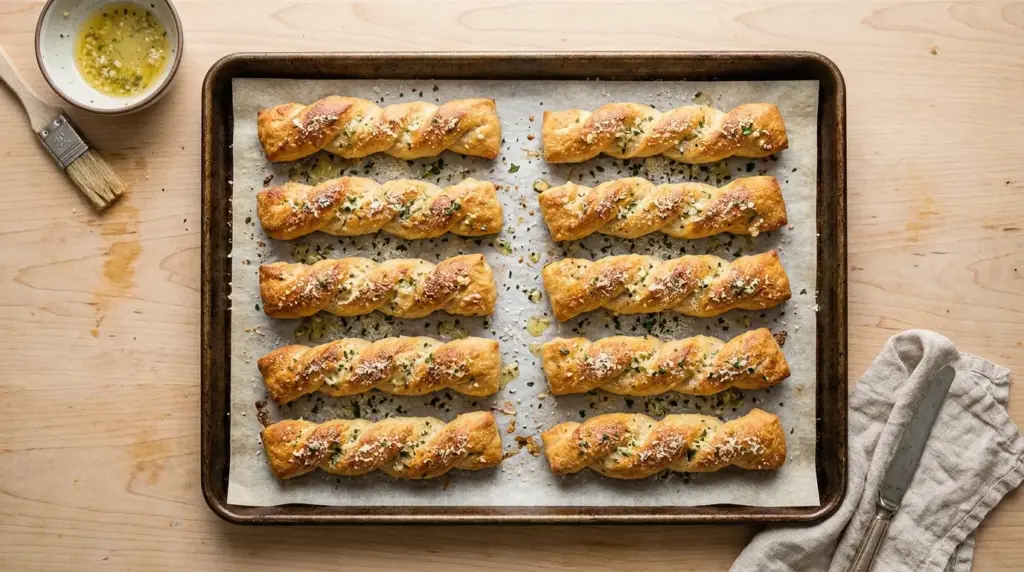
These sourdough discard breadsticks are incredibly versatile. They work as a side dish, an appetizer, or a snack.
Serve them warm for maximum enjoyment, ideally within the first hour of baking when the outside has a very subtle crisp and the inside is still soft.
- Alongside a bowl of Chicken Tortilla Soup for a hearty weeknight dinner
- Dipped in Marinara Sauce as a crowd-pleasing appetizer
- Served next to a plate of Classic Chicken Parmesan for a full Italian-style spread
- Paired with a simple Creamy Mac and Cheese for a comforting family meal
- Laid out on a cheese board with dips and sliced meats for entertaining
- Served with Easy Lasagna to soak up every drop of sauce
This recipe also pairs beautifully alongside Sourdough Discard Biscuits for a full sourdough-inspired bread basket.
Variations to Try
Once you’ve made the base recipe, it’s easy to customize. These variations use the same dough but add different toppings or flavors for a totally different result.
- Cheesy breadsticks: Before baking, press shredded mozzarella directly onto the shaped breadsticks. The cheese will melt and crisp beautifully.
- Everything bagel breadsticks: Brush with egg wash and sprinkle everything bagel seasoning before baking for a bold, savory topping.
- Rosemary and sea salt: Omit the garlic powder from the dough and top with fresh rosemary leaves and flaky sea salt before baking for a more rustic Italian vibe.
- Cinnamon sugar sweet breadsticks: Skip the savory toppings and brush with butter mixed with cinnamon sugar straight from the oven for a dessert-style variation.
- Sesame or poppy seed: Roll the shaped dough ropes in sesame seeds or poppy seeds before the second rise for a nutty, textured crust.
- Whole wheat version: Replace up to half the bread flour with whole wheat flour for a nuttier flavor and slightly denser texture.
Read Also: Pizza Hut Breadstick Recipe
Storage and Reheating
These breadsticks are best enjoyed fresh, but they store and reheat well if you have leftovers. The main goal is keeping them from drying out.
- Room temperature: Store in an airtight container or zip-top bag at room temperature for up to 2 days.
- Freezer: Place fully cooled, unbuttered breadsticks in a single layer on a baking sheet and freeze until solid, then transfer to a freezer-safe bag. They keep well for up to 2 months.
- Reheating: Wrap in foil and warm in a 325°F (165°C) oven for 8-10 minutes, then butter immediately after. Avoid microwaving if possible, as it makes them rubbery.
- From frozen: Thaw at room temperature for 30 minutes, then reheat in the oven as above.
- Make-ahead tip: You can shape the breadsticks the night before, place them on the pan, cover tightly with plastic wrap, and refrigerate. Pull them out 30 minutes before baking to take the chill off, then bake as directed.
For another great make-ahead sourdough discard option, try Sourdough Discard Banana Bread.
Nutritional Facts
The following values are approximate per breadstick based on a batch of 12, without the Parmesan topping. Actual values will vary depending on the exact ingredients used.
| Nutrient | Per Serving (1 breadstick) |
|---|---|
| Calories | 175 kcal |
| Total Fat | 6g |
| Saturated Fat | 2.5g |
| Cholesterol | 8mg |
| Sodium | 220mg |
| Total Carbohydrates | 26g |
| Dietary Fiber | 1g |
| Total Sugars | 1g |
| Protein | 5g |
These figures are estimates based on standard ingredient nutritional data. If you add Parmesan or additional toppings, the values will increase accordingly.
Another bread bake to explore with a different nutritional profile is Sourdough Discard Pita Bread.
Health Benefits of Key Ingredients
While these are a treat, the ingredients do bring some meaningful nutritional value to the table.
The sourdough fermentation process in the discard contributes to partial pre-digestion of starches and gluten, which some people find easier on digestion compared to conventional yeast breads.
- Sourdough discard: Contains naturally occurring bacteria from fermentation that may support gut health. Also lowers the glycemic index of baked goods compared to plain flour.
- Bread flour: Provides protein, iron, and B vitamins including niacin and thiamine. Higher protein than all-purpose flour, contributing to a more satisfying texture and slightly better amino acid profile.
- Olive oil: A source of monounsaturated fats and antioxidants, particularly oleocanthal which has anti-inflammatory properties. Small amounts go a long way.
- Garlic powder: Contains allicin compounds with potential antimicrobial and cardiovascular benefits. Even in small amounts it contributes flavor with minimal sodium.
- Parsley: Rich in vitamin K, vitamin C, and antioxidants. A small amount sprinkled over breadsticks adds more than just color.
Read Also: Sourdough Discard Waffles Recipe
Frequently Asked Questions
1. Can I make these breadsticks without instant yeast?
You can, but the process changes significantly. Without instant yeast, the breadsticks will rely entirely on the sourdough discard for leavening, which means they’ll need a much longer rise time (4-8 hours or even overnight) and will require active starter rather than discard for reliable results. The easiest path is to keep the instant yeast in the recipe and use true discard. If you’d prefer a no-commercial-yeast version, swap the discard for 200g of active, bubbly starter, omit the instant yeast, and allow a longer ferment.
2. How sour will these breadsticks taste?
The sour flavor depends largely on how old and fermented your discard is. Fresh discard (less than a week old) produces a very mild tang that most people don’t even notice. Older discard (2 weeks or more in the fridge) will give a more pronounced sour note. If you prefer less tang, use fresher discard.
3. Can I use all-purpose flour instead of bread flour?
Yes. All-purpose flour works perfectly well here. The breadsticks will be slightly less chewy and a little softer in structure, but the flavor will be essentially the same. If you prefer a softer, more pillowy breadstick, all-purpose flour is actually a great choice.
4. Why did my breadsticks turn out dense?
The most common causes are too much flour, under-kneading, or skipping the second rise. Make sure to measure flour accurately (spoon into the cup, don’t scoop), knead until the dough is smooth and passes the windowpane test, and give the shaped breadsticks their 15-20 minute rest before baking. Also confirm your yeast is active and the water was warm but not hot (above 120°F/49°C kills yeast).
5. Can I make these ahead of time?
Absolutely. The most practical approach is to shape the breadsticks, place them on the parchment-lined pan, cover tightly with plastic wrap, and refrigerate for up to 16 hours. When you’re ready to bake, let them sit at room temperature for 30 minutes to take the chill off, then bake as directed. You can also freeze fully baked and cooled breadsticks (without the butter topping) for up to 2 months, then reheat and butter just before serving.
This rounds out the recipe nicely alongside other sourdough staples like Sourdough Discard English Muffins.
Final Thoughts
This sourdough discard breadsticks recipe is the kind of bake you come back to again and again. It’s simple enough for a weeknight and impressive enough to bring to a dinner table.
Every batch is a satisfying way to reduce food waste while producing something genuinely delicious.
If you give these a try, leave a comment below and let me know how they turned out. Did you go classic garlic butter, or experiment with one of the variations? Share your experience and any tips you discovered along the way.
Recommended:
- Sourdough Discard Tortillas
- Sourdough Discard Blueberry Muffins
- Sourdough Discard Rolls
- Sourdough Discard Bagels
- Sourdough Discard Cinnamon Rolls
- Sourdough Discard Pancakes
- Easy Sourdough Bread
- Sourdough Starter
- Sourdough Focaccia
- Cheesy Garlic Bread
