If you have a jar of sourdough discard sitting in your fridge, this sourdough discard focaccia recipe is exactly what you need to make with it.
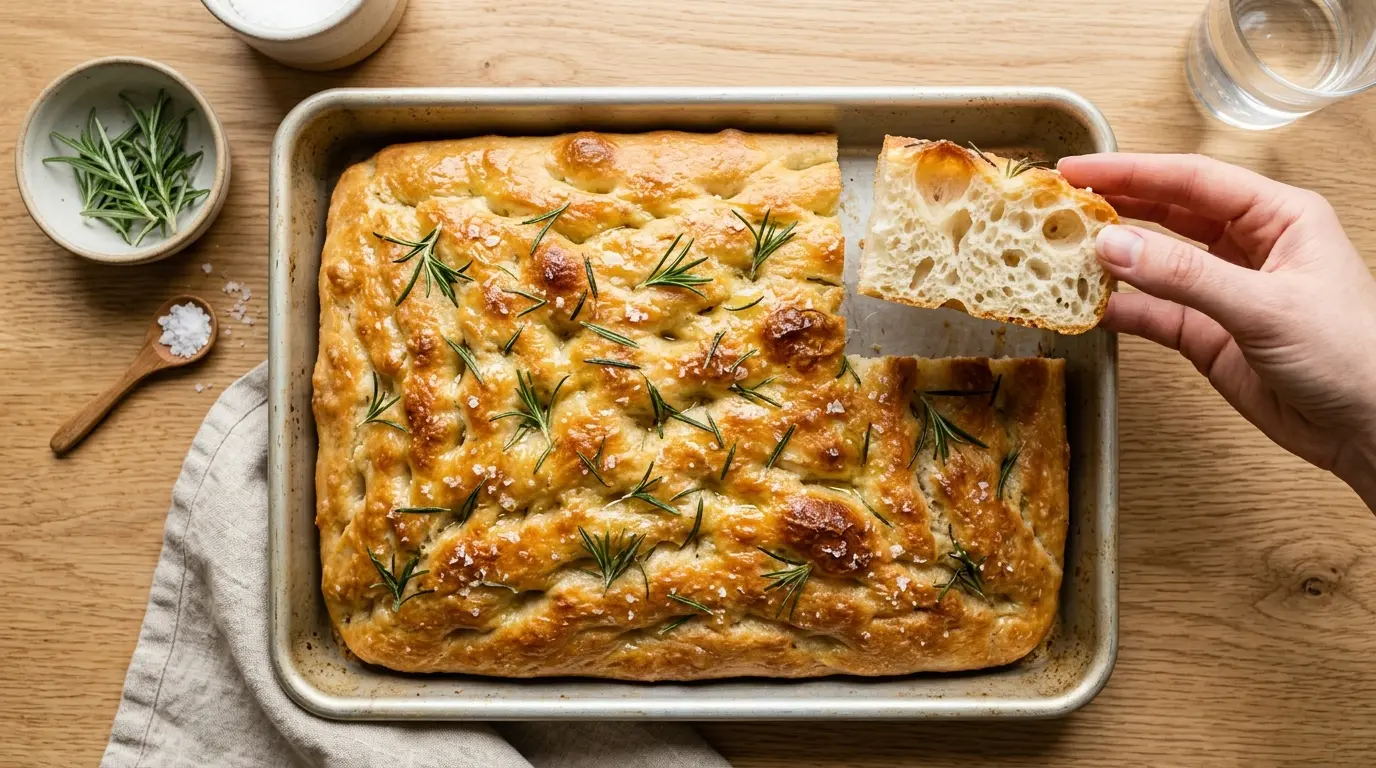
This bread hits every note you want: a golden, olive-oil-crisped bottom, an airy and pillowy crumb, and that subtle, gentle tang that only sourdough can bring.
Unlike traditional sourdough focaccia that requires an active, bubbly starter and up to 24 hours of fermentation, this discard version gets its rise from instant yeast, cutting your total time down to just a few hours.
The discard is not just filler. It contributes real flavor, a slight chewiness, and a depth that plain yeasted focaccia simply cannot match.
Topped with fruity extra virgin olive oil, fresh rosemary, and flaky sea salt, this focaccia is the kind of bread that disappears before it even cools down.
If you love baking with your sourdough discard, you will also want to check out this Sourdough Discard Bread for another pantry-clearing, crowd-pleasing bake.

Why You’ll Love This Sourdough Discard Focaccia Recipe
This recipe is one of the best ways to use up discard without any stress or guesswork.
You do not need an active, bubbly starter. The discard can come straight from the fridge, and the instant yeast does the heavy lifting for the rise.
The dough requires no kneading. A quick mix, a couple of stretch-and-folds, and you are done with the hands-on work.
The flavor is genuinely special. The sourdough discard adds a mild tang and complexity that makes this taste far more impressive than a same-day bread has any right to be.
It is endlessly versatile. Serve it as a side, slice it for sandwiches, pile it with toppings, or use it as a base for a sheet-pan pizza.
Here is a quick summary of what makes it so great:
- Uses sourdough discard that would otherwise be thrown away
- Ready in about 3 hours from start to finish
- No kneading required
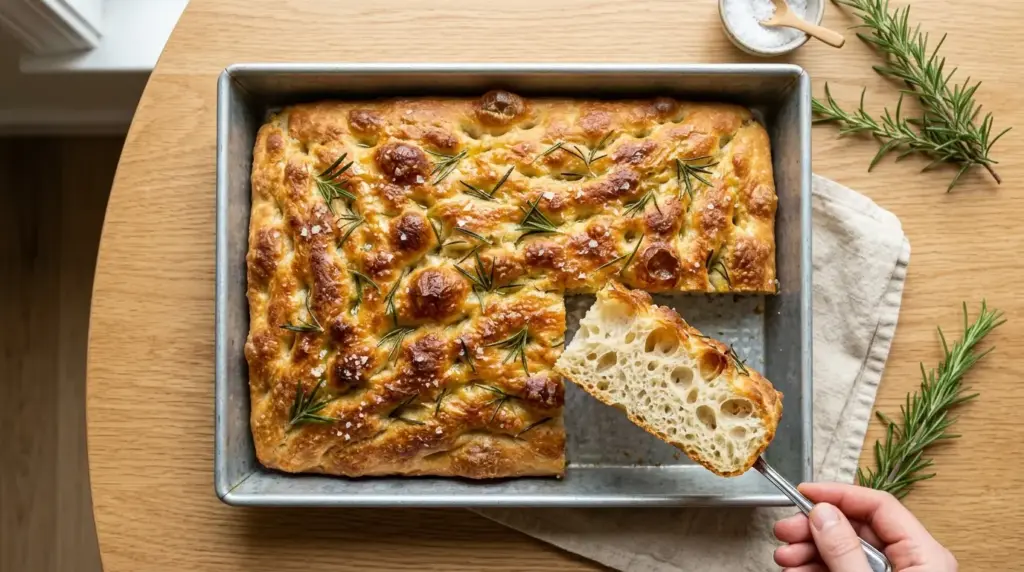
- Crispy golden bottom with a soft, airy interior
- Naturally tangy from the discard
- Easy enough for beginners, satisfying for experienced bakers
- Perfect as a side, appetizer, or sandwich base
- Customizable with any toppings you love
You might also enjoy: Sourdough Discard Pizza Dough
Ingredients
For this focaccia, you want to use ingredients that support a high-hydration dough. Bread flour is preferred over all-purpose because its higher protein content creates more gluten structure, which traps the air bubbles that give focaccia its signature open crumb. Good-quality olive oil is non-negotiable here since it flavors the crust from the inside out.
- 1 cup (100g) sourdough discard, unfed, straight from the fridge
- 1 3/4 cups (415ml) warm water, around 110°F (43°C)
- 2 1/4 tsp (7g) instant yeast (one standard packet)
- 1 tbsp (21g) honey
- 3 1/2 cups (420g) bread flour
- 1 1/2 tsp (9g) fine sea salt
- 1/4 cup (60ml) + 2 tbsp extra virgin olive oil, divided
- 1 tbsp fresh rosemary leaves, roughly chopped (or 1 tsp dried rosemary)
- 1 tsp flaky sea salt for topping (such as Maldon)
- Optional: 3-4 garlic cloves, thinly sliced, for topping
- Optional: 1/2 tsp garlic powder, added to the dough
Read Also: Sourdough Discard Cinnamon Rolls Recipe
Kitchen Equipment Needed
Having the right pan is important for focaccia. A rimmed 9×13-inch baking pan or a 9×13 inch metal baking pan gives you the classic thick-slab shape. If you want a thinner, crispier focaccia, you can spread it into a larger sheet pan.
- Large mixing bowl
- 9×13 inch metal baking pan
- Digital kitchen scale (highly recommended for accuracy)
- Instant-read thermometer (for checking water temperature)
- Danish dough whisk or sturdy wooden spoon
- Plastic wrap or damp kitchen towel
- Wire cooling rack
This technique works wonderfully for making Sourdough Discard English Muffins as well, if you enjoy baking with discard.
Recommended Products for This Recipe
These are a few products that genuinely make a difference when baking this focaccia. Each one was selected based on how it improves the final result.
1. Extra Virgin Olive Oil (High Quality)
A good-quality extra virgin olive oil is the single most important flavor element in focaccia. It goes into the dough, coats the pan, and gets poured generously over the top before baking, creating that irresistibly crispy, golden crust. A fruity, grassy oil will make your focaccia taste restaurant-quality.
2. Maldon Flaky Sea Salt
Maldon sea salt flakes are the finishing touch that takes focaccia from good to exceptional. The large, pyramid-shaped crystals sit on top of the bread and dissolve slowly as you eat, delivering little bursts of salinity with every bite. Fine salt just does not give you the same result.
3. Digital Kitchen Scale
Baking bread by weight rather than volume is always more accurate, and this recipe was developed with gram measurements for that reason. A digital kitchen scale ensures you use exactly the right amount of flour and discard, which directly impacts your crumb texture.
4. 9×13 Inch Metal Baking Pan
A light-colored metal 9×13 pan gives you even heat distribution and a beautifully crisp bottom crust. Dark pans can cause the bottom to brown too quickly before the inside is cooked through. Aluminum or aluminized steel pans are ideal for this recipe.
5. Danish Dough Whisk
A Danish dough whisk mixes wet, shaggy bread dough more efficiently than a wooden spoon and without the mess of using your hands. The open-coil design prevents dough from getting stuck inside the tool, making cleanup much easier.
Another favorite: Sourdough Discard Bagels Recipe

Step-by-Step Instructions
1. Activate the Yeast
- Pour the warm water (1 3/4 cups / 415ml) into a large mixing bowl. The water should feel warm to the touch but not hot. Aim for around 110°F (43°C). If it is too hot, it will kill the yeast.
- Sprinkle the instant yeast (2 1/4 tsp / 7g) over the surface of the warm water.
- Add the honey (1 tbsp / 21g) and stir gently to combine.
- Let the mixture sit for about 3-5 minutes. It should become slightly foamy and fragrant. This confirms your yeast is active.
2. Add the Sourdough Discard
- Add the sourdough discard (1 cup / 100g) to the yeast mixture. The discard can be cold and straight from the fridge. It does not need to be room temperature.
- Add 2 tablespoons (30ml) of the extra virgin olive oil.
- Using your Danish dough whisk or a sturdy wooden spoon, stir everything together until the discard is fully dissolved and no streaks remain. The liquid will look slightly cloudy and milky, which is completely normal.
3. Mix the Dough
- Add the bread flour (3 1/2 cups / 420g) to the bowl.
- Add the fine sea salt (1 1/2 tsp / 9g). Note that you want to add the salt after the yeast has been incorporated, as direct contact between salt and yeast can inhibit the yeast’s activity.
- If using garlic powder (1/2 tsp), add it now.
- Mix everything together with your whisk or a sturdy spoon until a shaggy, sticky dough forms and no dry flour remains. This dough will be quite wet and sticky. That is exactly what you want. Do not add more flour.
4. First Rest (Autolyse)
- Cover the bowl tightly with plastic wrap or a damp kitchen towel.
- Let the dough rest at room temperature for 30 minutes. This resting period, called autolyse, allows the flour to fully hydrate and begins gluten development without any effort from you. The dough will become noticeably smoother and more cohesive during this time.
5. Stretch and Fold
- With wet or lightly oiled hands, perform the first set of stretch and folds. Reach under one side of the dough, stretch it up as high as it will go without tearing, and fold it over the center.
- Rotate the bowl a quarter turn and repeat. Continue rotating and folding until you have gone all the way around the bowl (4 total folds equals one set).
- Cover the bowl again and let the dough rest for 20 minutes.
- Perform a second set of stretch and folds the same way. The dough should feel noticeably stronger and less sticky with each set.
- Cover the bowl once more.
6. Bulk Fermentation (First Rise)
- Leave the covered dough at room temperature to bulk ferment for 1 to 1.5 hours. The dough is ready when it has grown noticeably (at least 50% larger) and looks bubbly and airy on the surface and sides.
- The exact timing depends on how warm your kitchen is. In a warm kitchen (75°F / 24°C), it may be ready in 60 minutes. In a cooler kitchen, it might take up to 90 minutes.
7. Prepare the Baking Pan
- While the dough is finishing its bulk ferment, prepare your 9×13 inch baking pan.
- Pour the remaining 1/4 cup (60ml) of olive oil into the pan and use your fingers to spread it all over the bottom and up the sides. You want a generous, even coat of oil. This is what creates the crispy, golden crust, so do not skimp.
8. Shape and Transfer the Dough
- Once the dough has completed its bulk fermentation, gently turn it out of the bowl into the prepared oiled pan. Do not punch it down or degas it. You want to preserve all those air bubbles.
- Use your oiled fingers to gently coax the dough toward the edges and corners of the pan. If the dough is springing back and resisting, stop, cover it, and let it rest for 10 minutes before trying again. Forcing the dough will tear it.
- Do not worry if the dough does not reach all four corners at first. It will relax and fill in during the second rise.
9. Second Rise (Proof)
- Cover the pan loosely with plastic wrap or a clean, damp kitchen towel.
- Let the dough proof at room temperature for 30 to 45 minutes, until it is noticeably puffed, jiggly, and has filled out to the edges of the pan.
10. Dimple and Top the Focaccia
- While the dough is in its second rise, preheat your oven to 425°F (220°C). Allow at least 20-25 minutes for the oven to fully preheat.
- Once the dough has proofed, drizzle 1 additional tablespoon of olive oil directly over the top of the dough.
- With well-oiled fingers, press deeply into the dough to create the signature focaccia dimples. Press all the way down to the bottom of the pan. Do not be timid. Deeper dimples hold the olive oil and toppings better and create the classic bubbly, uneven texture.
- Scatter the fresh rosemary (1 tbsp) evenly over the surface.
- Add the thinly sliced garlic if using.
- Finish with a generous sprinkle of flaky sea salt (1 tsp).
11. Bake the Focaccia
- Transfer the pan to the center rack of your fully preheated oven.
- Bake for 22 to 28 minutes, or until the top is deep golden brown and the edges are crispy.
- Check the bottom of the focaccia by carefully lifting one edge with a spatula. The underside should also be golden and crispy.
- If the top is browning too quickly, you can loosely tent it with foil for the last 5 minutes of baking.
12. Cool and Serve
- Remove the focaccia from the oven and let it cool in the pan for 5 minutes.
- Use a spatula to transfer the focaccia to a wire cooling rack. Do not leave it sitting in the oil in the pan for too long or the bottom can become soggy.
- Let it rest for at least 10 minutes before slicing. This allows the interior crumb to set. Cutting too soon can cause the inside to become gummy.
- Slice and serve.
Read Also: Sourdough Focaccia Recipe
Tips for Success
These practical tips will help you get perfect focaccia every time, whether it is your first attempt or your tenth.
- Use a kitchen scale. Measuring by weight is far more accurate than cups, especially for flour. The difference between 420g and 450g of flour can mean the difference between an airy crumb and a dense one.
- Do not add more flour. The dough is supposed to be wet and sticky. Resist the temptation to add flour to make it easier to handle. Wet dough equals airy focaccia.
- Be generous with olive oil. Oil the pan heavily, drizzle generously over the top. The oil does not make focaccia greasy; it creates the crisp, flavorful crust that defines it.
- Dimple deeply. Those signature focaccia craters need to be pressed all the way to the bottom of the pan. Shallow dimples disappear during baking.
- Let the oven fully preheat. Putting focaccia into an oven that is still coming up to temperature produces a pale, soft crust instead of a golden, crispy one.
- Do not skip the second rise. The dough needs to be pillowy and jiggly before it goes in the oven. If you rush this step, the focaccia will be dense.
- Use fresh rosemary if you can. The aromatic oils in fresh rosemary are far more fragrant and flavorful than dried.
This same technique also works beautifully for making Sourdough Discard Crackers if you want a crunchier snack.
Serving Suggestions
Sourdough discard focaccia is one of those breads that shines in every setting, from casual weeknight dinners to weekend gatherings.
The most classic way to enjoy it is warm from the oven, torn into pieces and dipped into a bowl of high-quality olive oil with a splash of balsamic vinegar and a crack of black pepper.
Here are some other ways to serve it:
- Slice it horizontally and use it as the bread for a Classic Bruschetta spread
- Serve alongside a warm bowl of Zuppa Toscana for a hearty, comforting combination
- Use thick slices as the base for sandwiches loaded with cured meats, fresh mozzarella, and roasted vegetables
- Pair it with a simple salad and a bowl of Easy Tomato Soup for a satisfying lunch
- Cut into small squares and serve as an appetizer with Easy Hummus and olives
Variations to Try
Once you have mastered the base recipe, it is incredibly easy to make this focaccia your own. The high-hydration dough is a perfect canvas for all kinds of flavors and toppings.
- Sun-dried tomato and olive: Press halved olives and drained sun-dried tomatoes into the dimples before baking for a Mediterranean-inspired focaccia.
- Caramelized onion and gruyere: Top with sweet, slow-cooked caramelized onions and a handful of grated Gruyere for a rich, savory version.
- Lemon and herb: Scatter lemon zest, fresh thyme, and rosemary over the dough for a bright, aromatic loaf.
- Overnight cold ferment: After the bulk fermentation, transfer the dough to the oiled pan, cover, and refrigerate overnight. Bake the next day after a 1-hour room-temperature rest. This produces a tangier, more flavorful focaccia.
- Everything bagel topping: Skip the rosemary and salt and use everything bagel seasoning instead. It pairs beautifully with the sourdough tang.
- Sheet pan pizza: After dimpling the dough, top it with pizza sauce, shredded mozzarella, and your favorite toppings instead of rosemary and olive oil, and bake as directed.
Read Also: Sourdough Discard Biscuits Recipe
Storage and Reheating
Focaccia is at its absolute best on the day it is baked, but it stores reasonably well with the right method.
- Room temperature: Wrap leftover focaccia tightly in plastic wrap or store in an airtight container at room temperature for up to 2 days.
- Refrigerator: Focaccia can be refrigerated, but it will firm up significantly. Store in an airtight container for up to 5 days. Always reheat before serving.
- Freezer: Focaccia freezes very well. Slice it first, then wrap individual slices tightly in plastic wrap and place in a zip-top freezer bag. Freeze for up to 3 months.
- Reheating: To bring focaccia back to its best, place slices directly on the rack of a 375°F (190°C) oven for 5-8 minutes until warmed through and the crust re-crisps.
- Avoid the microwave: Microwaving focaccia makes it soft, chewy, and loses all the crispy crust. The oven is always the better choice.
You might also enjoy: Sourdough Discard Pancakes Recipe
Nutritional Facts
The following values are approximate and based on one serving, assuming the focaccia is cut into 12 equal pieces.
| Nutrient | Per Serving |
|---|---|
| Calories | 220 kcal |
| Carbohydrates | 32g |
| Protein | 5g |
| Fat | 8g |
| Saturated Fat | 1g |
| Sodium | 290mg |
| Fiber | 1g |
| Sugar | 2g |
Note: Nutritional values will vary based on the exact brands and quantities of ingredients used. Adding extra toppings such as cheese or olives will change these numbers.
Another favorite: Easy Sourdough Bread Recipe
Health Benefits of Key Ingredients
Sourdough discard focaccia is not just delicious. Several of its core ingredients contribute genuine nutritional value.
The sourdough discard, even unfed and inactive, contains beneficial organic acids and partially broken-down proteins from the fermentation process.
Here are some of the standout health benefits of the key ingredients:
- Sourdough discard: The fermentation process creates lactic and acetic acids, which may improve the bread’s digestibility and lower its glycemic impact compared to commercially yeasted bread.
- Extra virgin olive oil: Rich in monounsaturated fats and polyphenols, extra virgin olive oil is widely associated with cardiovascular health and anti-inflammatory effects in numerous large-scale studies.
- Bread flour: A good source of complex carbohydrates and plant-based protein, providing sustained energy compared to refined white bread.
- Rosemary: Contains rosmarinic acid and carnosic acid, which are potent antioxidants with anti-inflammatory properties. It also supports digestive health.
- Honey: Used in small amounts, honey provides trace minerals and antioxidants and acts as food for the yeast without significantly increasing sweetness.
- Sea salt: Provides essential electrolytes (sodium and trace minerals) needed for proper muscle and nerve function. Used in moderation, it is an important part of a balanced diet.
Read Also: Sourdough Starter Recipe
Frequently Asked Questions
1. Can I use active sourdough starter instead of discard?
Yes, absolutely. If you have an active, recently fed starter, you can use it in place of discard. The bread may have a slightly more pronounced sour flavor and tang. You can also reduce the amount of instant yeast slightly (to about 1 tsp) if your starter is very active and bubbly, though keeping the full amount will ensure a reliable rise.
2. Do I have to use instant yeast, or can I use active dry yeast?
You can use active dry yeast instead of instant yeast. The key difference is that active dry yeast needs to be proofed first in warm water for 5-10 minutes until foamy, while instant yeast can be added directly to the dry ingredients. Use the same quantity (2 1/4 tsp) and add it to the warm water and honey mixture at the start.
3. Why is my focaccia dense instead of airy?
Dense focaccia is almost always caused by one of three things. First, the dough may have been under-proofed, either during the bulk fermentation or the second rise in the pan. Make sure the dough is visibly puffy and jiggly before it goes into the oven. Second, too much flour may have been added, which tightens the dough and reduces air bubble formation. Third, the yeast may have been killed by water that was too hot (above 115°F / 46°C).
4. Can I make this focaccia ahead of time?
Yes, and the overnight method actually produces a more flavorful result. After the stretch and folds and bulk fermentation, transfer the dough to the oiled pan, cover it tightly, and refrigerate overnight. The next day, remove the pan from the fridge and let the dough come to room temperature and proof for about 1 hour before dimpling and baking.
5. What if my dough is too sticky to handle?
This dough is intentionally very wet and sticky, and that is correct. The best tool for handling it is oiled hands rather than floured hands. Keeping a small bowl of olive oil nearby and coating your fingertips frequently makes working with the dough much easier. If you try to add flour to reduce the stickiness, you will end up with a tighter crumb.
Sourdough Discard Chocolate Chip Cookies are another wonderful way to put your discard to good use in case you want to bake something sweet next.
Final Thoughts
This sourdough discard focaccia recipe is proof that some of the best baking comes from the simplest ingredients.
A little discard, some good olive oil, and a handful of pantry staples are all it takes to produce a bread that is golden, crispy, chewy, and deeply satisfying.
Whether you are an experienced sourdough baker looking for a quick, reliable use for your regular discard, or a beginner who has just started their first starter, this recipe is forgiving, flexible, and almost impossible to mess up.
Give it a try, make it your own with your favorite toppings, and share how it turned out in the comments below. I would love to hear what variations you tried and what you served it with!
Recommended:
- Sourdough Sandwich Bread Recipe
- Same Day Sourdough Bread Recipe
- Everything Bagel Recipe
- Dinner Rolls Recipe
- Homemade Bagel Recipe
- Garlic Naan Bread Recipe
- Cheesy Garlic Bread Recipe
- Easy Garlic Bread Recipe
- Avocado Toast Recipe
- Classic Bruschetta Recipe

