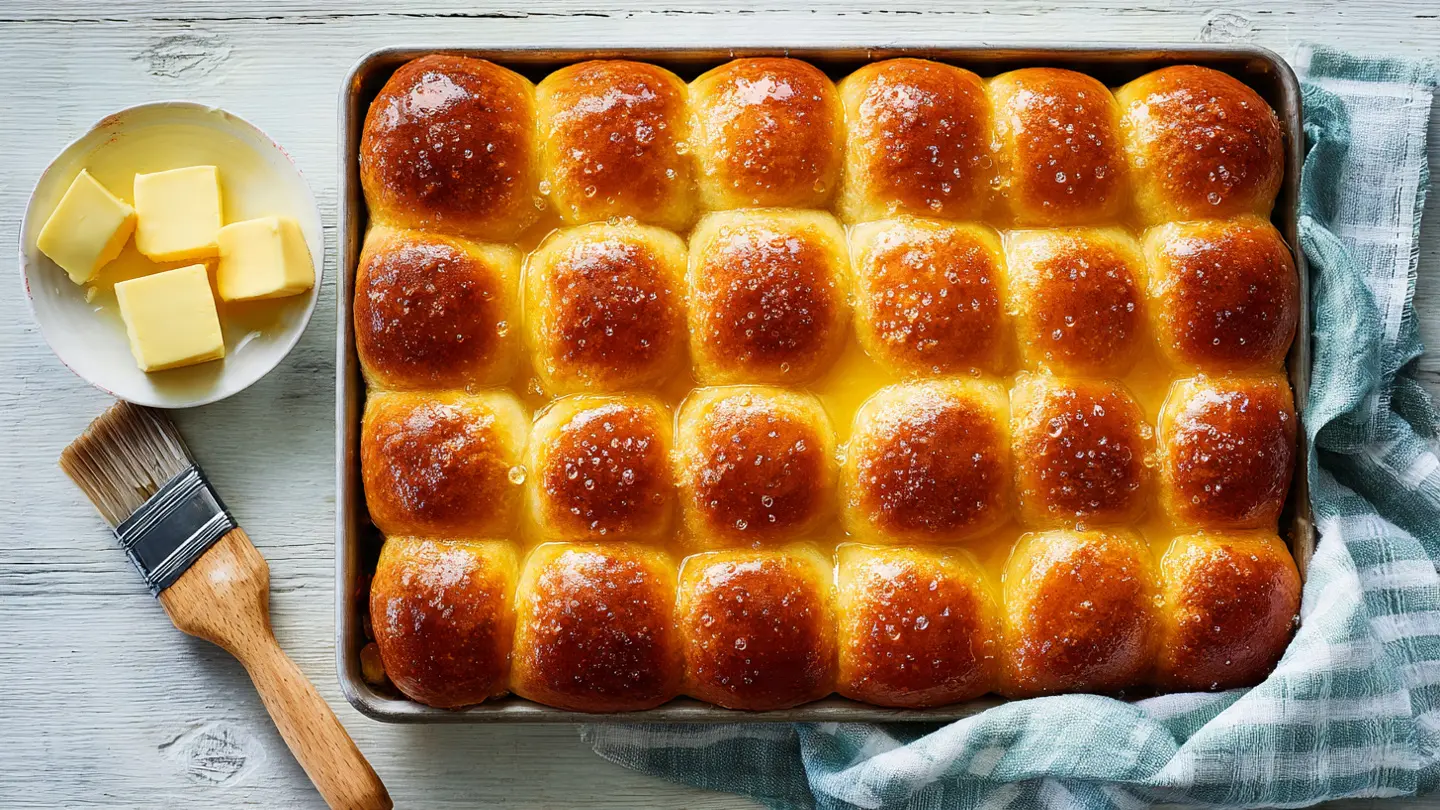
A warm, golden, pull-apart dinner rolls recipe fresh from the oven is one of those simple pleasures that makes any meal feel like a special occasion. The pillowy-soft texture, the faint sweetness, the irresistible buttery aroma filling your kitchen, it’s pure comfort in every bite.
What makes these rolls stand out is the enriched dough. Milk, butter, and egg work together to create a tender, soft crumb that stays fresh for days. The fat from the butter coats the gluten strands, keeping the rolls soft and bouncy rather than tough or chewy.
And before you talk yourself out of trying homemade rolls, here’s the truth: they’re not nearly as complicated as they look.
Once you understand the basics of working with yeast, the process is mostly hands-off. The dough does the hard work while you go about your day. Follow the steps below and you’ll have a pan of golden, bakery-worthy rolls that will genuinely impress everyone at the table.
For another cozy homemade bread to serve alongside your meals, try this Buttermilk Biscuit Recipe, which is just as easy and equally crowd-pleasing.
Why You’ll Love This Dinner Rolls Recipe
These rolls check every box for what a great dinner roll should be.
They come out soft and pillowy on the inside with the most delicate, lightly golden crust on the outside. Each bite practically melts in your mouth.
The ingredient list is short and pantry-friendly. You likely have everything you need at home right now.
They are incredibly versatile. Serve them at a weeknight family dinner, a holiday spread, or a casual get-together, and they always fit right in.
The dough can be made ahead of time and refrigerated overnight, which is a huge stress-saver for holiday cooking. You can even freeze the shaped, unbaked rolls and bake them fresh whenever you need them.
- Soft, fluffy texture with a beautiful golden top
- Made with 7 simple, everyday ingredients
- Perfect for Thanksgiving, Christmas, Easter, or weeknight dinners
- Make-ahead and freezer-friendly
- Beginner-friendly with clear, step-by-step instructions
- No fancy ingredients required, just basic pantry staples
- Pairs beautifully with everything from soups and stews to holiday roasts
You might also enjoy: Honey Butter Recipe, the perfect spread to go alongside these warm rolls.
Ingredients
These dinner rolls use just 7 ingredients, but each one plays an important role. Whole milk gives the rolls their rich flavor and tender crumb. Room-temperature butter ensures it incorporates smoothly into the dough without seizing up. The egg adds structure and a slight richness that elevates the rolls above a basic bread recipe.
- 3/4 cup (180 ml) warm water (between 100°F/38°C and 110°F/43°C)
- 2 1/4 teaspoons (one 7 g packet) active dry yeast
- 1/3 cup + 1/4 teaspoon (70 g) granulated sugar, divided
- 1 1/3 cups (315 ml) whole milk, warmed to about 110°F (43°C)
- 3/4 cup (170 g) unsalted butter, softened to room temperature (plus 2 to 3 tablespoons melted, for brushing)
- 1 large egg, at room temperature
- 1 1/2 teaspoons fine salt
- 4 1/2 cups (540 g) all-purpose flour, plus more as needed
Read Also: Sausage Stuffing Recipe
Kitchen Equipment Needed
Having the right tools makes this recipe much more approachable, especially for beginner bakers. A stand mixer with a dough hook saves considerable effort, though this dough can absolutely be kneaded by hand if you prefer. A reliable kitchen thermometer is your best friend when working with yeast, because guessing the milk temperature can easily lead to rolls that don’t rise properly.
- Stand mixer with dough hook attachment (or a large mixing bowl for hand-kneading)
- Instant-read kitchen thermometer
- Large mixing bowl
- 9×13-inch baking pan or two 9-inch round cake pans
- Plastic wrap or a clean kitchen towel (for covering the dough during rising)
- Pastry brush (for brushing melted butter on top)
- Measuring cups and spoons
- Bench scraper or sharp knife (for dividing dough)
- Parchment paper (optional, for lining the pan)
Another favorite: Homemade Biscuit Recipe
Recommended Products for This Recipe
These are products I genuinely recommend based on quality, performance, and how much they improve the bread-baking experience.
1. KitchenAid 7-Quart Stand Mixer with Dough Hook
A heavy-duty stand mixer takes all the effort out of kneading enriched doughs like this one. The dough hook mimics the folding and stretching of hand-kneading while you do other things. It’s a worthwhile investment that will be used for everything from bread to cookie dough.
2. Thermapen One Instant-Read Thermometer
Nailing the yeast activation step requires water and milk in the right temperature range. A fast, accurate thermometer removes all the guesswork and is one of the biggest upgrades any home baker can make.
3. Nordic Ware Natural Aluminum 9×13 Baking Pan
Even heat distribution is critical for uniform browning on these rolls. Nordic Ware’s commercial-grade aluminum pan produces consistent results batch after batch and is easy to clean.
4. OXO Good Grips Bench Scraper
Dividing the dough into evenly sized portions is much easier with a bench scraper than with a knife. It also keeps your work surface clean and prevents the dough from sticking.
This technique also works beautifully for shaping Croissant Recipe dough once you’re feeling more adventurous with baking.
Step-by-Step Instructions
Step 1: Proof the Yeast
- Pour the warm water (100°F to 110°F / 38°C to 43°C) into the bowl of your stand mixer or a large mixing bowl.
- Add the 2 1/4 teaspoons of active dry yeast and 1/4 teaspoon of sugar to the warm water.
- Stir briefly to combine, then let the mixture sit undisturbed for 5 to 10 minutes.
- After 5 to 10 minutes, the yeast mixture should look foamy and slightly bubbly on the surface, which tells you the yeast is alive and active.
- If the mixture does not foam at all after 10 minutes, the yeast may be expired or the water temperature may have been off. Discard and start fresh with new yeast.
Step 2: Build the Dough
- Once the yeast is proofed, add the warm milk (also about 110°F / 43°C), the remaining 1/3 cup (65 g) of granulated sugar, the softened unsalted butter (3/4 cup / 170 g), the room-temperature egg, and the salt to the yeast mixture.
- If using a stand mixer, attach the whisk attachment and mix on low speed for about 1 minute to combine the ingredients. The butter may remain in small pieces at this point, which is perfectly normal.
- Add 2 cups (240 g) of the all-purpose flour to the bowl and mix until a shaggy dough forms and no dry streaks of flour remain.
Step 3: Knead the Dough
- Switch to the dough hook attachment on your stand mixer.
- With the mixer running on low speed, slowly add the remaining flour (about 2 1/2 cups / 300 g) one cup at a time, waiting for each addition to be mostly incorporated before adding the next.
- Once all the flour has been added, increase the mixer speed to medium and knead for 5 to 6 minutes.
- The dough is ready when it is smooth, elastic, and just slightly tacky to the touch. It should pull away cleanly from the sides and bottom of the bowl. If the dough is still very wet and sticking significantly to the bowl, add an extra tablespoon of flour at a time until it comes together.
- If kneading by hand: Turn the dough out onto a lightly floured surface and knead for 8 to 10 minutes, stretching and folding the dough repeatedly until it is smooth, elastic, and springs back when you poke it gently.
Step 4: First Rise
- Transfer the kneaded dough to a large, lightly greased bowl (use a small amount of neutral oil or cooking spray).
- Turn the dough once so all sides are lightly coated in oil.
- Cover the bowl tightly with plastic wrap or a clean kitchen towel.
- Place the bowl in a warm, draft-free spot in your kitchen and let the dough rise for 1 hour to 1 1/2 hours, or until it has roughly doubled in size.
- A good warm spot is near (but not on top of) a preheated oven, or inside an oven with just the oven light turned on.
Step 5: Shape the Rolls
- Once the dough has doubled, gently punch it down with your fist to release the gas bubbles built up during the first rise.
- Turn the dough out onto a clean, lightly floured work surface.
- Using a bench scraper or sharp knife, divide the dough into 15 equal portions. For even rolls, you can weigh each portion on a kitchen scale, aiming for approximately 60 to 65 grams (about 2 oz) each.
- To shape each roll: Flatten a piece of dough into a rough circle, then fold the edges toward the center, pinching them together. Flip the dough ball over so the pinched side faces down. Cup your hand over the dough ball and roll it in a tight circular motion on the work surface, using gentle downward pressure, until the surface is smooth and taut.
- Place the shaped rolls into a greased 9×13-inch (23×33 cm) baking pan, spacing them slightly apart (about 1/2 inch between each roll). They will touch and grow together during the second rise, creating those pull-apart edges everyone loves.
Step 6: Second Rise
- Cover the pan loosely with greased plastic wrap or a clean kitchen towel.
- Let the rolls rise for another 45 minutes to 1 hour in a warm spot, until they are puffy and touching each other in the pan.
- While the rolls rise, preheat your oven to 375°F (190°C). Make sure the oven is fully preheated before the rolls go in.
Step 7: Bake the Rolls
- Once the rolls have puffed and the oven is fully preheated, remove the plastic wrap or towel from the pan.
- Place the pan on the center rack of the oven.
- Bake for 20 to 25 minutes, until the tops of the rolls are a deep golden brown and the rolls sound hollow when tapped on top.
- If the tops begin to brown too quickly before the rolls are done, tent the pan loosely with aluminum foil to prevent over-browning.
Step 8: Brush with Butter and Serve
- As soon as the rolls come out of the oven, immediately brush the tops generously with the 2 to 3 tablespoons of melted butter.
- The melted butter adds a beautiful sheen, deepens the flavor, and softens the top crust slightly for that irresistible bakery-style finish.
- Allow the rolls to cool for 5 to 10 minutes before serving. They are best enjoyed warm.
The same buttery technique works wonderfully with Garlic Naan Bread Recipe for another soft, pull-apart bread experience.
Tips for Success
Getting soft, fluffy dinner rolls is all about understanding the details that really matter. Yeast is a living organism, and treating it correctly is the single most important factor in a successful batch. Take the extra few minutes to temp your liquids and you will be rewarded every time.
- Check your yeast temperature carefully. Water and milk between 100°F and 110°F (38°C to 43°C) is ideal. Too cold and the yeast won’t activate. Too hot (above 120°F / 49°C) and you’ll kill it. An instant-read thermometer is the most reliable tool here.
- Weigh your flour. Measuring by volume can lead to adding too much flour, resulting in dense, heavy rolls. One cup of all-purpose flour should weigh about 120 to 125 grams (4.2 to 4.4 oz).
- Don’t over-flour the dough. The dough should feel slightly tacky but not sticky. Resist the urge to add too much extra flour, because a wetter dough produces softer rolls.
- Do not skip the second rise. The second rise is what gives the rolls their light, open crumb structure. Rushing it will result in dense rolls.
- Use room-temperature butter and egg. Cold ingredients slow down the yeast activity and affect how the dough comes together. Take them out of the fridge 30 to 60 minutes before you begin.
- Tent with foil if browning too fast. If the tops are golden before the baking time is up, loosely cover the pan with aluminum foil for the remaining bake time.
- Brush with butter immediately. Applying melted butter the moment the rolls come out of the oven makes a significant difference in the final texture and flavor of the top crust.
Read Also: Sweet Cornbread Recipe
Serving Suggestions
These dinner rolls are one of those universally beloved sides that belong on every table, from a weeknight family dinner to a full Thanksgiving spread. Their soft, slightly sweet flavor makes them the perfect vehicle for butter, honey, jam, or a swipe of something savory.
Warm dinner rolls are a natural companion to hearty, brothy dishes because the bread is perfect for soaking up every last drop of liquid from the bowl. They also shine beside classic holiday mains where a soft, pillowy roll rounds out the richness of the spread.
- Serve with Turkey Gravy for the ultimate holiday side combination
- Pair alongside Prime Rib for a showstopping holiday dinner
- Serve next to Crockpot Beef Stew for dipping and soaking up the rich broth
- Great with Chicken Soup, because nothing beats bread and soup together
- Perfect alongside a holiday spread that includes Sweet Potato Casserole and Green Bean Casserole
- Split and toast the next day for a delicious breakfast base with butter and jam
- Fill with leftover Thanksgiving Turkey and Cranberry Sauce for the best next-day sandwiches
For another cozy, crowd-pleasing holiday side, try this Corn Pudding Recipe.
Variations to Try
Once you have the base recipe down, it’s easy to customize these rolls in so many directions. The dough itself is very forgiving and adapts beautifully to added flavors and mix-ins. Whether you want something savory, sweet, or a little different, these variations are all worth trying.
- Garlic herb rolls: Add 2 teaspoons each of dried rosemary and dried parsley, plus 1 teaspoon of garlic powder to the dough when you add the flour. Brush with garlic butter (melted butter mixed with a pinch of garlic powder and fresh parsley) right out of the oven.
- Honey butter rolls: Substitute 2 tablespoons of the granulated sugar with honey for a slightly more pronounced sweetness and a more golden crust.
- Cheesy rolls: Fold 1 cup (100 g) of shredded sharp cheddar or Gruyere cheese into the dough after the first knead. The cheese melts into the dough, creating pockets of savory, melty flavor.
- Whole wheat rolls: Replace up to half of the all-purpose flour with whole wheat flour. The rolls will be slightly denser but have a wonderful nutty flavor. You may need to add an extra tablespoon or two of liquid.
- Overnight rolls (make-ahead): After shaping the rolls and placing them in the pan, cover tightly with plastic wrap and refrigerate overnight instead of doing the second rise at room temperature. The next day, remove from the refrigerator and allow them to rise at room temperature for 60 to 90 minutes before baking.
- Cinnamon sugar rolls: Roll each dough portion flat, spread with softened butter, and sprinkle with cinnamon and sugar before rolling into small spirals for a breakfast-style twist.
Read Also: Skillet Cornbread Recipe
Storage and Reheating
These dinner rolls stay remarkably fresh for longer than most homemade breads, thanks to the enriched dough (butter, egg, and milk all act as natural preservatives). Proper storage keeps them soft and pillowy for several days.
- Room temperature: Store fully cooled rolls in an airtight container or zip-top bag at room temperature for up to 3 days. Keep them away from direct heat or sunlight, which dries them out.
- Refrigerator: Rolls can be stored in the refrigerator for up to 1 week. Refrigeration does slightly dry them out, so always reheat before serving.
- Freezer (baked rolls): Place fully cooled rolls in a single layer in a freezer-safe zip-top bag, squeezing out excess air. Freeze for up to 3 months. Thaw at room temperature for 1 to 2 hours before reheating.
- Freezer (unbaked rolls): Shape the rolls and place them in the pan, then cover and freeze before the second rise. When ready to bake, remove from the freezer and let them thaw and complete their second rise at room temperature (about 3 to 4 hours depending on your kitchen temperature), then bake as directed.
- Reheating: Wrap rolls individually in a damp paper towel and microwave for 15 to 20 seconds for a quick reheat. For multiple rolls, place them on a baking sheet covered with aluminum foil and warm in a 325°F (165°C) oven for 10 to 12 minutes.
This Sourdough Focaccia Recipe is another excellent bread that freezes and reheats beautifully if you enjoy having homemade bread on hand.
Nutritional Facts
The following nutrition estimate is based on this recipe yielding 15 rolls.
| Nutrient | Per Roll (approx.) |
|---|---|
| Calories | 210 kcal |
| Total Fat | 9 g |
| Saturated Fat | 5 g |
| Cholesterol | 35 mg |
| Sodium | 250 mg |
| Total Carbohydrates | 28 g |
| Dietary Fiber | 1 g |
| Total Sugars | 5 g |
| Protein | 5 g |
| Calcium | 45 mg |
| Iron | 1.5 mg |
Nutrition values are approximate and will vary based on exact ingredient brands and specific amounts used.
For another comforting bread recipe worth bookmarking, check out this Easy Sourdough Bread Recipe.
Health Benefits of Key Ingredients
While dinner rolls are an indulgent treat rather than a health food, several of their key ingredients do contribute meaningful nutritional value. Enjoyed in reasonable portions as part of a balanced meal, they fit perfectly well into an everyday diet.
Understanding what each ingredient brings to the table helps you appreciate the recipe beyond just the delicious result.
- All-purpose flour: Provides complex carbohydrates for energy, as well as modest amounts of protein, iron, and B vitamins. Enriched flour (which most all-purpose flour is) is fortified with folic acid, niacin, and thiamine.
- Whole milk: A good source of calcium for bone health, as well as vitamin D, potassium, and high-quality protein. The fat in whole milk also helps with the absorption of fat-soluble vitamins A and D.
- Eggs: One of the most nutrient-dense whole foods available. Eggs provide complete protein with all essential amino acids, choline for brain function, and fat-soluble vitamins A, D, E, and K.
- Butter: Provides fat-soluble vitamins A, E, and K2. Butter fat also contributes to satiety, helping you feel satisfied after a smaller portion.
- Yeast: Active dry yeast is naturally rich in B vitamins, including riboflavin, niacin, and folic acid. It also provides trace minerals like selenium, zinc, and potassium.
Serve these rolls alongside a nutrient-rich side like Collard Greens Recipe for a well-rounded, satisfying meal.
Frequently Asked Questions
1. Can I use instant yeast instead of active dry yeast?
Yes, you can substitute instant yeast (also called rapid-rise yeast) in this recipe. Use the same amount, which is 2 1/4 teaspoons. With instant yeast, you can skip the proofing step and mix it directly into the dry ingredients before adding your liquids. Be aware that instant yeast tends to rise faster, so the first rise may only take 45 to 60 minutes rather than 90 minutes.
2. Why didn’t my rolls rise?
The most common culprit is yeast that was either expired, killed by liquid that was too hot, or not properly activated by liquid that was too cold. Always check the expiration date on your yeast and use a thermometer to ensure your water and milk are between 100°F and 110°F (38°C to 43°C). If your yeast mixture doesn’t foam within 10 minutes, start over with fresh yeast.
3. Can I make the dough ahead of time?
Absolutely. After shaping the rolls and placing them in the baking pan, cover tightly with plastic wrap and refrigerate overnight (up to 16 hours). The next day, remove the pan from the fridge and let the rolls sit at room temperature for 60 to 90 minutes until puffed and risen before baking. This make-ahead method actually tends to develop more flavor in the rolls.
4. Can I make these rolls without a stand mixer?
Yes, you can absolutely knead this dough by hand. After mixing the ingredients together into a rough dough, turn it out onto a lightly floured surface and knead by hand for 8 to 10 minutes. The dough is ready when it is smooth, elastic, and springs back when you poke it with a fingertip. Hand-kneading requires more effort but produces excellent results.
5. How do I know when the rolls are fully baked?
Look for a deep golden-brown color on the top of the rolls. You can also tap the top of a center roll, which should sound hollow when fully baked. If you have an instant-read thermometer, the internal temperature of a fully baked roll should read around 190°F to 200°F (88°C to 93°C).
Read Also: Meatloaf Recipe
Final Thoughts
Homemade dinner rolls are one of those recipes that truly transforms any meal. Once you see how simple the process is, you’ll wonder why it took so long to start making them from scratch.
The soft, buttery result is miles ahead of anything you’ll find in a bag at the store. The smell alone as they bake is worth every minute.
Give this dinner rolls recipe a try for your next family dinner, holiday celebration, or weekend meal. Drop a comment below or share a photo on social media and tag us!
Recommended:
- Yorkshire Pudding Recipe
- Cheesy Garlic Bread Recipe
- Easy Garlic Bread Recipe
- Homemade Bagel Recipe
- Sourdough Sandwich Bread Recipe
- Beef Bourguignon Recipe
- Pumpkin Roll Recipe
- Garlic Mashed Potatoes Recipe
- Creamy Mashed Potatoes Recipe
- Jiffy Spoon Bread Recipe


