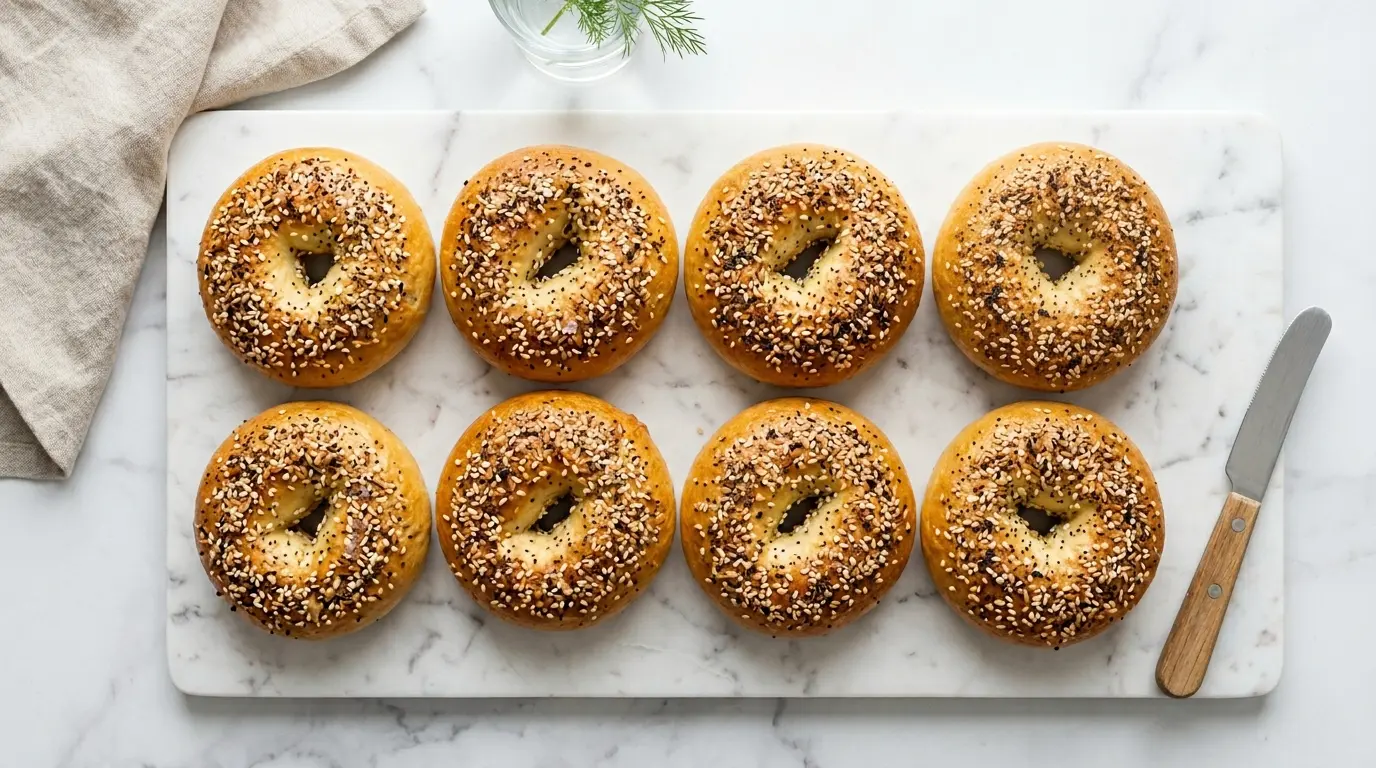
If you’ve ever bitten into a freshly baked everything bagel and thought, “I wish I could make this at home,” good news: you absolutely can. This everything bagel recipe delivers that thick, chewy crust and soft, airy interior you love from your favorite bagel shop, right from your own oven.
The secret is in two non-negotiable steps: using bread flour (not all-purpose) for maximum chew, and boiling the shaped bagels in honey water before baking. That water bath is what creates the signature shiny, slightly crisp exterior. Skip it, and you’ll have dinner rolls. Do it, and you’ll have real bagels.
The everything bagel seasoning blend, a combination of poppy seeds, sesame seeds, dried garlic, dried onion, and coarse salt, gets brushed onto each bagel right before baking. It toasts beautifully in the oven, creating that bold, savory flavor that makes everything bagels so uniquely addictive.
Once you make these, you’ll wonder why you ever bought the store-bought kind.
If you love homemade baked goods, also check out this New York Style Bagel Recipe for another classic variation.

Why You’ll Love This Everything Bagel Recipe
Making homemade bagels might sound intimidating, but this recipe proves it’s very approachable, even for beginner bakers.
The dough comes together with just five basic ingredients, and the steps are simple and logical once you understand the why behind each one.
These bagels are incredibly satisfying to make because you can watch the transformation happen at every stage: the dough rising, the bagels puffing in the boiling water, and the golden-brown crust forming in the oven.
The flavor is bold, savory, and deeply satisfying in a way that store-bought bagels just can’t match.
The texture is the real standout: genuinely chewy on the outside, soft and pillowy on the inside, with a slight crunch where the seasoning has toasted.
They freeze beautifully, so one batch gives you fresh, homemade bagels for weeks.
- Bakery-quality results at home with pantry staples
- No special equipment required (a stand mixer helps, but hands work great too)
- Perfectly chewy texture thanks to bread flour and the honey water bath
- Bold, savory flavor from homemade everything bagel seasoning
- Freezer-friendly for easy make-ahead breakfasts
- Customizable with endless topping and filling variations
You might also love this Homemade Bagel Recipe if you want a classic plain base to experiment with.
Ingredients
This recipe makes 8 large bagels. The dough is simple and uses bread flour, which has a higher protein content than all-purpose flour. That extra protein develops more gluten, giving the bagels their characteristic chew. Do not substitute all-purpose flour if you can avoid it.
For the Bagel Dough:
- 4 cups (480g) bread flour, plus more for dusting
- 1 tablespoon (12g) granulated sugar or brown sugar
- 2 teaspoons (6g) instant yeast (or active dry yeast, see tips)
- 1 1/2 teaspoons (9g) fine salt
- 1 1/4 cups (300ml) warm water (100–110°F / 38–43°C)
- 1 tablespoon (15ml) neutral oil (such as vegetable or avocado oil)
For the Honey Water Bath:
- 8 cups (2 liters) water
- 2 tablespoons (30ml) honey
For the Everything Bagel Seasoning:
- 1 tablespoon (9g) poppy seeds
- 1 tablespoon (9g) white sesame seeds
- 1 tablespoon (8g) dried minced onion
- 1 tablespoon (8g) dried garlic flakes
- 1 teaspoon (5g) coarse sea salt or flaky salt
For the Egg Wash:
- 1 large egg white
- 1 tablespoon (15ml) water
Read Also: Avocado Toast Recipe
Kitchen Equipment Needed
Having the right tools on hand makes the process much smoother. You don’t need much, but a few key pieces will make a real difference in the results.
- Stand mixer with dough hook attachment (optional but highly recommended)
- Large mixing bowl
- Measuring cups and spoons
- Kitchen scale (for accurate flour measurement)
- Large pot (for boiling)
- Baking sheet
- Parchment paper or silicone baking mat
- Spider strainer or slotted spoon
- Pastry brush
- Wire cooling rack
- Instant-read thermometer (to check water temperature)
- Sharp knife or bench scraper (to divide dough)
- Plastic wrap or damp kitchen towel (for covering dough)
For a delicious side dish to go with your bagel breakfast spread, try this Scrambled Eggs Recipe.
Recommended Products for This Recipe
These are hand-picked products that can genuinely improve your bagel-making experience, chosen for quality and performance.
1. KitchenAid Stand Mixer with Dough Hook
Kneading stiff bagel dough by hand for 8–10 minutes is doable, but a stand mixer with a dough hook does it effortlessly and consistently. This is especially valuable if you plan to bake bagels regularly. The KitchenAid is built to handle dense, heavy doughs without overheating the motor.
2. Everything Bagel Seasoning Blend
If you’d rather skip mixing your own, a quality pre-blended everything bagel seasoning ensures the right seed-to-salt ratio every time. Look for one where salt is listed lower on the ingredient list to avoid over-salting the bagels.
3. Large Rimmed Baking Sheet
A heavy-gauge rimmed baking sheet distributes heat more evenly than a thin, flimsy pan, which prevents uneven browning on the bottoms. Paired with a silicone baking mat, it’s the ideal surface for baking bagels.
4. Digital Kitchen Scale
Measuring bread flour by weight (rather than volume) is the single best thing you can do for consistent bagel dough. A cup of flour can vary by 20–30 grams depending on how it’s scooped. A good digital scale removes that variable entirely.
5. Spider Strainer
A wide, flat spider strainer makes it easy to lower bagels gently into the boiling water and lift them out without splashing or deforming the shape. It’s a simple tool that takes the stress out of the water bath step.
Another favorite morning recipe to try alongside your bagels: Egg Bites Recipe

Step-by-Step Instructions
Step 1: Proof the Yeast (Skip if Using Instant Yeast)
- If you’re using active dry yeast, combine the warm water (100–110°F / 38–43°C), sugar, and yeast in the bowl of your stand mixer or a large mixing bowl.
- Stir gently to combine and let sit for 5–10 minutes, until the mixture looks foamy and bubbly. This confirms the yeast is alive and active. If it doesn’t foam, your yeast may be old or the water was too hot or too cold. Start over with fresh yeast.
- If you’re using instant yeast, skip this step. You can add the instant yeast directly to the dry ingredients without proofing.
Step 2: Mix the Bagel Dough
- Add the bread flour and salt to the yeast mixture in the mixing bowl. If using instant yeast, add the flour, salt, sugar, and yeast all together first, then add the warm water and oil.
- Stir with a wooden spoon or spatula until a shaggy, rough dough comes together.
- The dough will look quite stiff and dry at this stage. That’s completely normal for bagel dough. Bagel dough is intentionally stiffer than pizza or bread dough, which is what gives bagels their dense, chewy texture.
- Add the tablespoon of neutral oil and stir again to incorporate.
Step 3: Knead the Dough
- If using a stand mixer: Attach the dough hook and knead on medium-low speed for 8–10 minutes. The dough is ready when it pulls away cleanly from the sides of the bowl and feels smooth and slightly tacky (not sticky) when you press your finger into it.
- If kneading by hand: Turn the dough out onto a lightly floured surface and knead for 10–12 minutes. Use the heel of your hand to push the dough forward, fold it back, turn it 90 degrees, and repeat. Add flour one teaspoon at a time if the dough sticks to your hands, but try to use as little extra flour as possible. Over-flouring will make the bagels tough.
- The finished dough should be smooth, firm, and elastic. It should spring back when you poke it with your finger.
Step 4: First Rise
- Lightly oil a large, clean bowl with a small amount of neutral oil.
- Shape the dough into a smooth ball, place it in the bowl, and turn it once to coat all sides with oil.
- Cover the bowl tightly with plastic wrap or a damp kitchen towel.
- Let the dough rise at room temperature for 60–90 minutes, or until it has doubled in size. The exact time will vary depending on the temperature in your kitchen. A warmer kitchen speeds things up; a cooler one slows things down.
Step 5: Mix the Everything Bagel Seasoning
- While the dough rises, combine the poppy seeds, white sesame seeds, dried minced onion, dried garlic flakes, and coarse sea salt in a small bowl.
- Stir well to combine and set aside. This can be mixed several days ahead and stored in an airtight jar.
- Taste it: you should get a balance of nutty, savory, garlicky, and salty. Adjust the ratios to your preference.
Step 6: Divide and Shape the Bagels
- Once the dough has doubled, punch it down firmly to release the gas.
- Turn it out onto a clean, unfloured work surface. (A lightly damp surface actually helps the dough grip and roll better than a floured one.)
- Use a bench scraper or sharp knife to divide the dough into 8 equal pieces. For perfectly even bagels, use a kitchen scale: weigh the total dough, then divide by 8 to find the target weight per piece.
- To shape each bagel: Roll each piece into a smooth ball by cupping your hand over the dough and rolling it in small circles on the counter until it’s tight and even. Then poke your thumb through the center of each ball to create a hole. Use both index fingers to gently stretch the hole to about 1.5–2 inches (4–5 cm) in diameter. The hole will shrink slightly during proofing and baking, so make it bigger than you think you need.
- Place shaped bagels on a parchment-lined baking sheet, spaced about 2 inches apart.
Step 7: Second Rest (Short Proof)
- Cover the shaped bagels loosely with a clean towel or lightly oiled plastic wrap.
- Let rest at room temperature for 15–20 minutes. This short rest relaxes the gluten and helps the bagels hold their shape during boiling.
- During this time, preheat your oven to 425°F (220°C) and bring 8 cups of water to a boil in a large pot.
Step 8: Prepare the Honey Water Bath
- Once the water is boiling, add 2 tablespoons of honey and stir to dissolve.
- Keep the water at a steady, rolling boil throughout the boiling process. A gentle boil is fine; you don’t need a violent, churning boil.
- The honey adds subtle caramelization to the crust and enhances the golden color after baking. This step is not optional; it is what makes bagels bagels.
Step 9: Boil the Bagels
- Gently lower 2–3 bagels at a time into the boiling honey water using a spider strainer or slotted spoon. Do not crowd the pot.
- Boil for 1 minute per side (2 minutes total per bagel). Use your spider strainer to flip them carefully after the first minute.
- As the bagels boil, they will puff up slightly. This is a good sign. The boiling process gelatinizes the starches on the outside of the dough, creating that signature shiny, dense crust.
- Remove the boiled bagels with the spider strainer, allowing any excess water to drip off, and return them to the parchment-lined baking sheet.
Step 10: Apply Egg Wash and Everything Seasoning
- Whisk together the egg white and 1 tablespoon of water in a small bowl until combined.
- Using a pastry brush, lightly brush the top and sides of each boiled bagel with the egg wash. You don’t need a thick coating; a thin, even layer is all you need for the seasoning to adhere.
- Immediately sprinkle the everything bagel seasoning generously over the top of each bagel, pressing it down gently so it sticks.
Step 11: Bake the Bagels
- Place the baking sheet in the preheated 425°F (220°C) oven.
- Bake for 20–25 minutes, rotating the pan halfway through, until the bagels are deep golden brown and the sesame seeds and garlic have toasted.
- The bagels should feel firm and sound hollow when you tap the bottom.
- Remove from the oven and let cool on the baking sheet for 5 minutes, then transfer to a wire rack to cool for at least 10 minutes before slicing. (Slicing too early can make the interior gummy.)
This technique also works wonderfully for Sourdough Sandwich Bread, if you’re in a bread-baking mood.
Tips for Success
A few key details will take your bagels from good to genuinely great. These are the tips that make the most difference.
- Use bread flour, not all-purpose. The higher protein content (around 12–13%) is essential for the chewy, dense bagel texture. All-purpose flour will give you a softer, bread-like result.
- Don’t skip the water bath. This step is what separates a real bagel from a round bread roll. The boiling water gelatinizes the surface starches, creating the signature crust.
- Don’t over-proof the dough. If the dough over-rises, the bagels can come out with large air bubbles and a less dense texture. When the dough has clearly doubled, it’s ready.
- Make the hole bigger than you think. Bagel holes shrink dramatically during boiling and baking. Aim for 1.5–2 inches (4 cm) when shaping.
- Use a kitchen scale. Measuring flour by weight ensures consistent dough hydration every time.
- Add seasoning right after the egg wash, while the surface is still wet and sticky, so the seeds adhere well.
- Check your water temperature. Water that’s too hot (above 115°F / 46°C) will kill the yeast. Water that’s too cold (below 95°F / 35°C) won’t activate it properly. Aim for 100–110°F (38–43°C).
Read Also: Homemade Biscuit Recipe
Serving Suggestions
Everything bagels are incredibly versatile and pair well with both savory and sweet toppings. Here are some of the best ways to enjoy them.
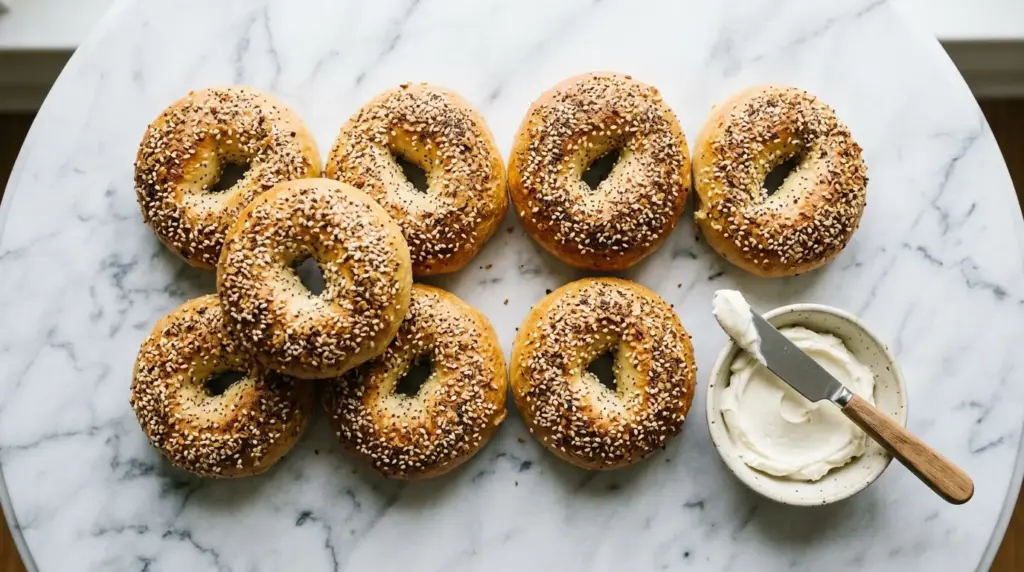
The most classic serving option is with a generous schmear of plain cream cheese, which softens slightly against the warm bagel and balances the bold, salty seasoning perfectly.
For a more elevated breakfast, try layering the bagel with cream cheese, smoked salmon (lox), thinly sliced red onion, capers, and a squeeze of fresh lemon juice. The combination of flavors is fresh, briny, and deeply satisfying.
A fried or poached egg with melted cheese makes for an incredible breakfast sandwich that will keep you full for hours.
- Classic cream cheese schmear with chives or everything bagel seasoning stirred in
- Lox bagel with smoked salmon, cream cheese, capers, and red onion
- Breakfast sandwich with fried egg, sharp cheddar, and crispy bacon
- Avocado toast style with mashed avocado, red pepper flakes, and a drizzle of olive oil
- Almond or peanut butter with a drizzle of honey for a sweet option
- Hummus with sliced cucumber and fresh herbs for a light, Mediterranean-inspired option
- With a side of Shakshuka and fresh fruit for a complete brunch spread
Pair your bagel breakfast with a side of Breakfast Potatoes to round out the meal.
Variations to Try
Once you’ve mastered the base recipe, these fun twists are easy to try and make great use of the same dough.
- Cinnamon Raisin Bagels: Knead 1/2 cup (75g) of raisins and 1 teaspoon of cinnamon into the dough before the first rise. Skip the everything seasoning and top with a sprinkle of cinnamon sugar before baking.
- Sesame Seed Bagels: Use only white sesame seeds as the topping for a cleaner, nutty flavor.
- Poppy Seed Bagels: Top with a generous coating of poppy seeds for a classic bakery-style bagel.
- Cheddar Jalapeño Bagels: Press small cubes of sharp cheddar and thin slices of jalapeño into the tops before baking. The cheese will melt and crisp up beautifully.
- Onion Bagels: Use only dried onion flakes as the topping for a milder, slightly sweeter flavor than the full everything seasoning.
- Garlic Parmesan Bagels: Mix grated Parmesan and dried garlic flakes and press onto the tops before baking.
- Whole Wheat Everything Bagels: Replace up to half of the bread flour with whole wheat flour for a nuttier, heartier flavor. Note that whole wheat flour absorbs more water, so you may need to add 1–2 tablespoons of additional water to achieve the right dough consistency.
- Overnight Bagels: After shaping, cover the bagels and refrigerate overnight. The slow, cold fermentation develops more complex flavor. In the morning, take the bagels out 20 minutes before boiling to let them come to room temperature slightly, then proceed from Step 8.
You might also enjoy this Easy Sourdough Bread Recipe for another rewarding homemade bread project.
Storage and Reheating
These bagels stay fresh longer than most store-bought varieties because they don’t contain preservatives. Proper storage is key to keeping them at their best.
Storage options:
- Room temperature: Store cooled bagels in an airtight zip-top bag or container at room temperature for up to 2–3 days.
- Refrigerator: Not recommended, as the refrigerator dries out bagels quickly and makes them stale faster.
- Freezer: The best option for longer storage. Once fully cooled, slice the bagels in half (so they’re easier to toast straight from frozen), wrap each one individually in plastic wrap, and place in a zip-top freezer bag. Freeze for up to 3 months.
Reheating:
- Toaster: Toast directly from frozen for 2–3 minutes for the best results.
- Oven: Wrap in foil and warm at 350°F (175°C) for 10–12 minutes to restore that fresh-from-the-oven texture.
- Microwave: Wrap in a damp paper towel and microwave for 30–45 seconds for a quick warm-up, though the texture won’t be as chewy as with the toaster or oven.
Read Also: Easy Granola Recipe
Nutritional Facts
The following nutrition information is an estimate per bagel (1 of 8), based on the standard recipe with everything bagel seasoning.
| Nutrient | Per Serving |
|---|---|
| Calories | ~290 kcal |
| Total Carbohydrates | 57g |
| Protein | 10g |
| Total Fat | 3g |
| Saturated Fat | 0.5g |
| Fiber | 2g |
| Sugar | 3g |
| Sodium | 620mg |
Note: Nutritional values will vary depending on exact ingredients used, toppings, and serving size. The values above do not include cream cheese, lox, or other toppings.
For a protein-packed morning, pair your bagel with these Starbucks Egg Bites for a satisfying, balanced breakfast.
Health Benefits of Key Ingredients
While everything bagels are an indulgent treat, several of their key ingredients do offer meaningful nutritional benefits.
The bread flour in this recipe provides more protein than all-purpose flour, which supports muscle repair and keeps you feeling full longer.
Sesame seeds are a surprisingly rich source of plant-based calcium, iron, and healthy fats, including linoleic acid, which supports heart health.
Poppy seeds contain calcium, phosphorus, and magnesium, and are a good source of dietary fiber.
- Sesame seeds are high in calcium, iron, and zinc, supporting bone health and immune function
- Poppy seeds provide dietary fiber and minerals including manganese, copper, and phosphorus
- Garlic (dried) contains allicin compounds linked to anti-inflammatory and antimicrobial properties
- Onion (dried) is a source of quercetin, an antioxidant that supports immune health
- Bread flour provides more protein per serving than all-purpose flour, contributing to satiety
- Honey (used in the water bath) contains trace antioxidants and provides a natural source of simple carbohydrates for quick energy
If you’re looking for more nutritious breakfast options, this Baked Oatmeal Recipe is a wholesome way to start the day.
Frequently Asked Questions
1. Can I make everything bagels without a stand mixer?
Yes, absolutely. The dough is stiff but very workable by hand. Knead it on a clean work surface for 10–12 minutes until smooth and elastic. It’s a good arm workout and completely achievable for any home baker. The key is consistency: knead continuously without taking long breaks so the gluten develops evenly.
2. Why do bagels need to be boiled before baking?
Boiling is what makes a bagel a bagel. When the shaped dough hits the boiling water, the exterior starches gelatinize and set into a firm, dense shell. This prevents the bagel from rising much further in the oven, resulting in a dense, chewy crumb rather than a light, airy bread. The honey in the boiling water also contributes to the characteristic golden-brown, slightly shiny crust.
3. Can I use active dry yeast instead of instant yeast?
Yes. If using active dry yeast, proof it first by combining the warm water, a pinch of sugar, and the yeast in a bowl. Let it sit for 5–10 minutes until foamy. Then proceed with the rest of the recipe. Active dry yeast and instant yeast are interchangeable in the same quantities, but active dry yeast requires that proofing step to activate properly.
4. Why did my bagels lose their holes during baking?
This is a very common issue and it usually comes down to not making the holes large enough when shaping. The holes should be stretched to about 1.5–2 inches (4–5 cm) when you shape them, because they shrink quite a bit during both the rest and the baking. If the dough is very elastic and the hole keeps springing back, let it rest for 2–3 minutes before stretching again, which allows the gluten to relax.
5. Can I make the dough the night before?
Yes, and many bakers prefer this method because the overnight cold fermentation develops a more complex, slightly tangy flavor. After shaping the bagels, place them on a parchment-lined baking sheet, cover tightly with plastic wrap, and refrigerate overnight (up to 16 hours). In the morning, remove from the refrigerator, let them sit at room temperature for 20 minutes, then boil and bake as directed.
For another great make-ahead breakfast, try these Easy Overnight Oats.
Everything Bagel
Equipment
- Stand mixer with dough hook - optional but highly recommended
- Large mixing bowl
- Measuring cups and spoons
- Kitchen scale - for accurate flour measurement
- Large pot - for boiling
- Baking sheet - large rimmed, heavy-gauge
- Parchment paper or silicone baking mat
- Spider strainer or slotted spoon
- Pastry brush
- Wire cooling rack
- Instant-read thermometer - to check water temperature
- Sharp knife or bench scraper - to divide dough
- Plastic wrap or damp kitchen towel - for covering dough
Ingredients
- 4 cups bread flour - 480g, plus more for dusting
- 1 tablespoon granulated sugar or brown sugar - 12g
- 2 teaspoons instant yeast - 6g (or active dry yeast, see tips)
- 1 1/2 teaspoons fine salt - 9g
- 1 1/4 cups warm water - 300ml, 100-110°F / 38-43°C
- 1 tablespoon neutral oil - 15ml, such as vegetable or avocado oil
For the Honey Water Bath
- 8 cups water - 2 liters
- 2 tablespoons honey - 30ml
For the Everything Bagel Seasoning
- 1 tablespoon poppy seeds - 9g
- 1 tablespoon white sesame seeds - 9g
- 1 tablespoon dried minced onion - 8g
- 1 tablespoon dried garlic flakes - 8g
- 1 teaspoon coarse sea salt or flaky salt - 5g
For the Egg Wash
- 1 large egg white
- 1 tablespoon water - 15ml
Instructions
- If using active dry yeast, combine warm water, sugar, and yeast in mixer bowl and let sit 5-10 minutes until foamy. If using instant yeast, skip this step.
- Add bread flour, salt, oil, and (if using instant yeast) the yeast, sugar, and warm water. Stir until a shaggy dough forms. Dough will be stiff and dry.
- Knead with dough hook on medium-low for 8-10 minutes, or by hand for 10-12 minutes, until dough is smooth, slightly tacky, and springs back when poked.
- Shape dough into a ball, place in lightly oiled bowl, cover, and let rise at room temperature for 60-90 minutes until doubled in size.
- Combine poppy seeds, sesame seeds, dried onion, dried garlic, and coarse salt in a small bowl. Set aside.
- Punch down dough and divide into 8 equal pieces. Roll each into a ball, then poke a hole through the center and stretch to 1.5-2 inches (4-5 cm) in diameter.
- Place shaped bagels on parchment-lined baking sheet, cover loosely, and rest for 15-20 minutes. Meanwhile, preheat oven to 425°F (220°C) and bring water to a boil.
- Once water is boiling, add honey and stir. Boil 2-3 bagels at a time for 1 minute per side (2 minutes total), then remove with spider strainer.
- Whisk egg white and water. Brush onto each boiled bagel, then generously sprinkle with everything seasoning, pressing gently to adhere.
- Bake for 20-25 minutes at 425°F (220°C), rotating pan halfway, until deep golden brown and bagels sound hollow when tapped on the bottom. Cool 5 minutes on pan, then transfer to wire rack.
Notes
- Use bread flour – The higher protein content (12-13%) is essential for the chewy, dense texture. All-purpose flour yields a softer, bread-like result.
- Don’t skip the water bath – This step gelatinizes the surface starches, creating the signature crust that separates a real bagel from a round bread roll.
- Make the hole bigger – Bagel holes shrink dramatically during boiling and baking. Aim for 1.5-2 inches (4-5 cm) when shaping.
- Use a kitchen scale – Measuring flour by weight ensures consistent dough hydration and reliable results every time.
- Add seasoning while wet – Apply the everything seasoning immediately after the egg wash while the surface is still sticky so the seeds adhere well.
- Don’t over-proof – Over-proofed dough can create large air bubbles and a less dense texture. The dough is ready when it has clearly doubled.
- Overnight option – After shaping, refrigerate bagels overnight for a more complex, slightly tangy flavor. Let sit at room temperature 20 minutes before boiling.
- Freezing instructions – Once fully cooled, slice bagels in half, wrap individually, and freeze for up to 3 months. Toast directly from frozen.
- Temperature matters – Water that’s too hot (above 115°F / 46°C) will kill the yeast. Water that’s too cold (below 95°F / 35°C) won’t activate it properly.
- Adjust seasoning to taste – The everything bagel seasoning should be balanced between nutty, savory, garlicky, and salty. Adjust ratios to your preference.
Final Thoughts
Making an everything bagel recipe at home is one of those kitchen projects that feels genuinely rewarding from start to finish.
There’s something deeply satisfying about pulling a tray of golden, perfectly chewy bagels out of your own oven.
Once you understand the key steps, especially the importance of bread flour and the boiling water bath, the rest falls into place naturally.
Whether you keep them simple with just cream cheese or go all out with lox and all the trimmings, these bagels are going to become a regular in your kitchen.
Give them a try this weekend and let us know how they turned out in the comments below! We’d love to hear your favorite toppings and any variations you tried.
Recommended:
- Sourdough Starter Recipe
- Breakfast Casserole Recipe
- Breakfast Burrito Recipe
- Easy Belgian Waffle Recipe
- Classic French Toast Recipe
- Buttermilk Pancake Recipe
- Egg Bake Recipe
- Classic Scone Recipe
- Loaded Breakfast Skillet Recipe
- Air Fryer French Toast Recipe


