
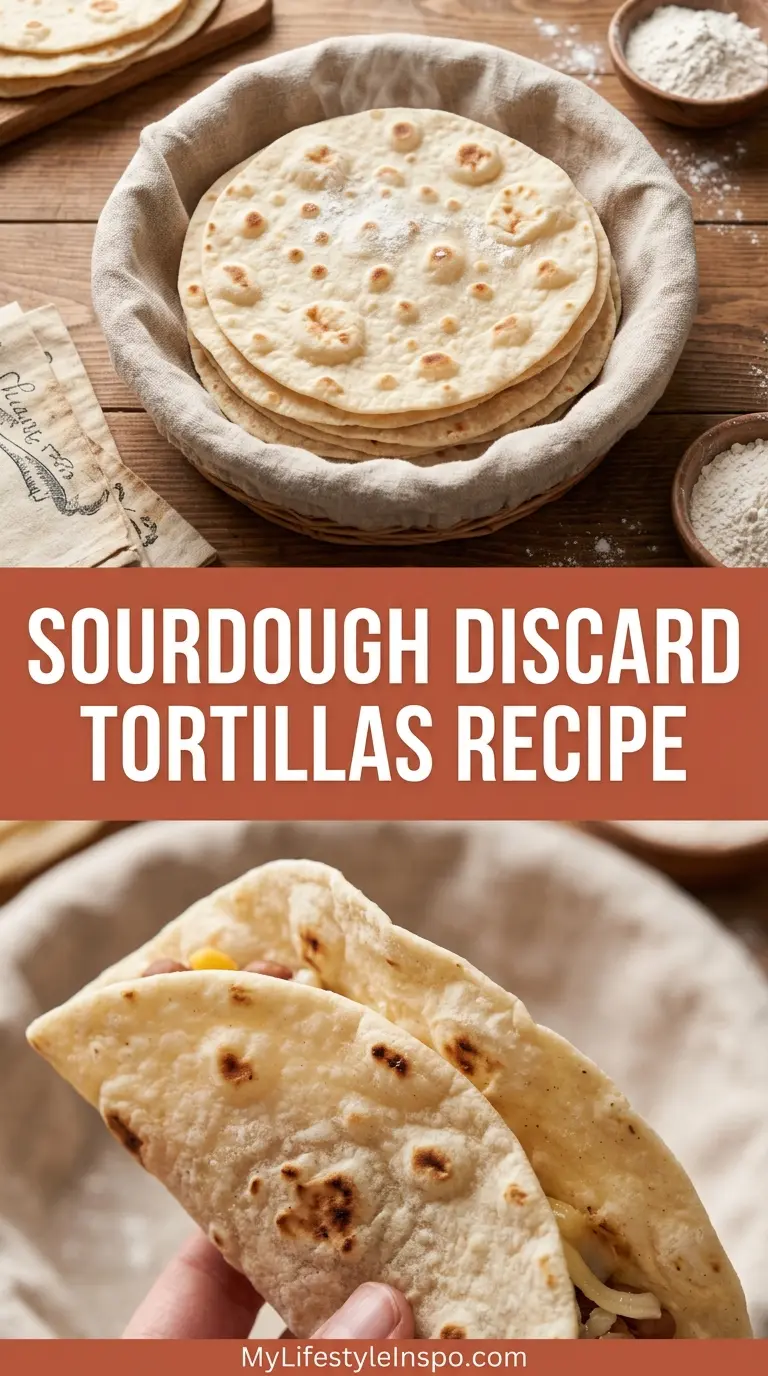
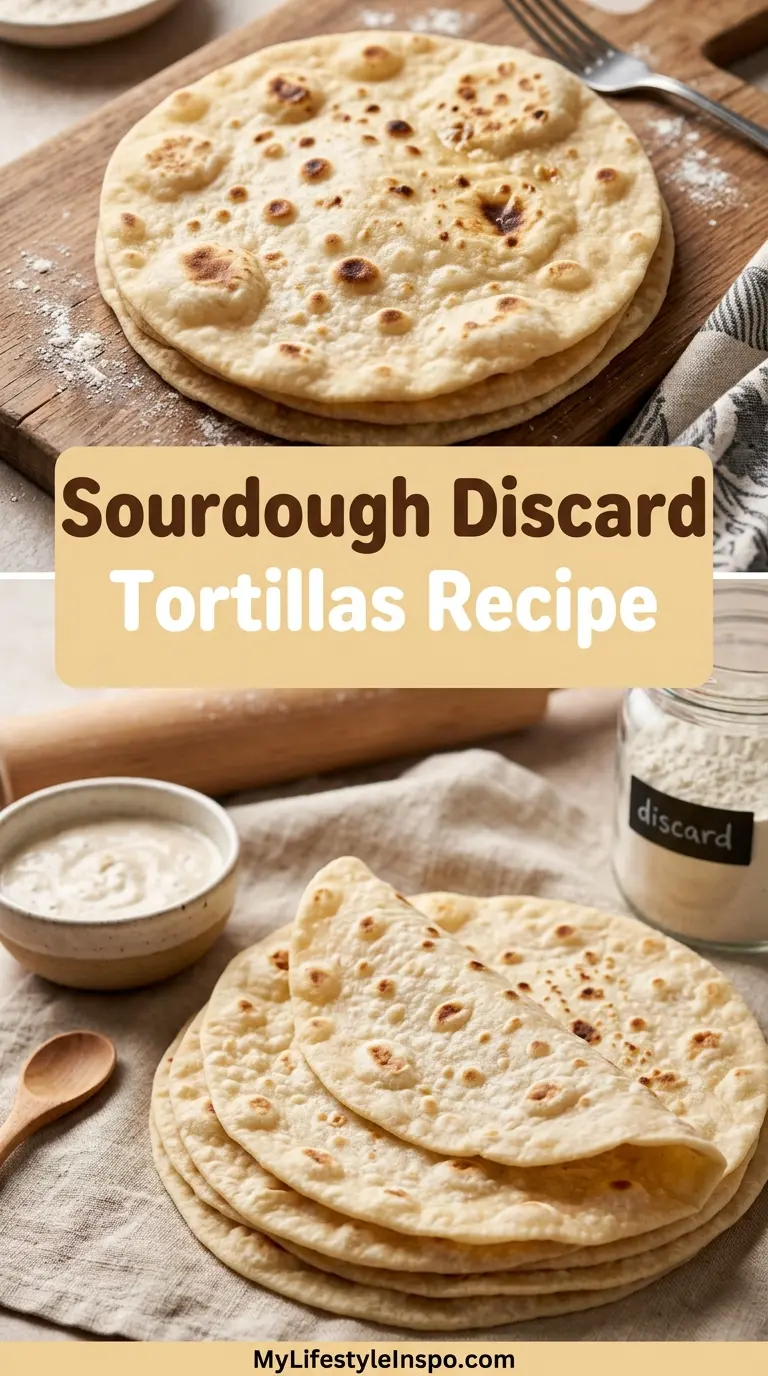
If you keep a sourdough starter, you already know that the discard pile builds up fast. This sourdough discard tortillas recipe is the best thing to happen to that extra starter. Made with just five pantry ingredients, these tortillas come together in under an hour and produce soft, pliable, subtly tangy flatbreads that absolutely embarrass anything from a plastic bag at the grocery store.
The sourdough discard does something special here that regular flour tortillas can’t replicate. The natural enzymes in the starter gently break down the gluten, giving the finished tortillas a uniquely soft, almost velvety texture that stays flexible even after cooling.
You don’t need any special equipment, no tortilla press required, and no yeast needed either. Just a bowl, a rolling pin, and a hot skillet.
These are the tortillas you’ll start making on repeat, and once you do, going back to store-bought feels impossible.
For another great way to use up your discard, try this Sourdough Discard Pizza Dough next.
Why You’ll Love This Sourdough Discard Tortillas Recipe
Making tortillas from scratch sounds like a project, but this recipe genuinely surprises people with how fast and straightforward it is.
The discard adds a subtle tangy depth that turns a simple flatbread into something you want to eat on its own.
Because there’s no rising time with leavened yeast, you go from mixing bowl to hot skillet in about 30 minutes of hands-on time.
The fat in this recipe (butter, lard, or oil) keeps the dough tender and makes each tortilla fold without cracking, which is exactly what you want for tacos, burritos, and wraps.
- Only 5 ingredients needed, all pantry staples
- Zero waste baking, your discard finally has somewhere to go
- Customizable size from small street taco rounds to large burrito wraps
- Better texture than store-bought, soft, flexible, and slightly charred in all the right spots
- Quick from start to finish in under 1 hour
- Works with active or inactive starter at any feeding stage
Another fan favorite in this family: Sourdough Discard Crackers make a brilliant snack with whatever discard is left over.
Ingredients
You only need five ingredients to make these tortillas, and every single one serves an important purpose. The flour provides structure, the fat creates tenderness, the salt adds flavor, the discard contributes that signature tang, and the warm water brings the dough together.
- 2 cups (240g) all-purpose flour, plus more for dusting
- 1 teaspoon fine sea salt or table salt
- 3 tablespoons (42g) unsalted butter, softened (or lard, coconut oil, or neutral vegetable oil)
- ½ cup (120g) sourdough discard, unfed and at room temperature
- ⅓ cup (80ml) warm water (about 100°F / 38°C), plus more as needed
If you’re building your first sourdough starter from scratch, check out this Sourdough Starter Recipe to get going.
Kitchen Equipment Needed
You likely have everything already. No specialty tools are required for this recipe, and a cast iron skillet will always give you the best results.
- Large mixing bowl
- Fork or pastry blender (for working fat into flour)
- Rolling pin
- Cast iron skillet or heavy-bottomed pan
- Clean work surface for rolling
- Kitchen scale (recommended for accuracy)
- Plastic wrap or damp towel (for resting the dough)
- Spatula or tongs for flipping
- Plate and clean kitchen towel for stacking finished tortillas
Read Also: Sourdough Focaccia Recipe
Recommended Products for This Recipe
These are products chosen based on quality, performance, and how much they genuinely improve the results.
1. Lodge Pre-Seasoned Cast Iron Skillet
A well-seasoned cast iron skillet gives tortillas those beautiful golden brown spots without burning them. The heat retention is far superior to thin non-stick pans, and once it’s hot, it cooks each tortilla evenly in under a minute. It’s an investment that will last decades with proper care.
2. French Rolling Pin (Tapered)
A tapered French rolling pin gives you much better control over pressure and shape than a pin with handles. You’ll be able to roll tortillas thinner and rounder with far less effort. For a recipe you’ll make again and again, it’s worth having the right tool.
3. OXO Good Grips Kitchen Scale
Measuring flour by weight is the single biggest upgrade you can make to any baking recipe. Too much flour is the most common reason homemade tortillas turn out stiff and dry. A good digital kitchen scale takes the guesswork out completely.
4. King Arthur All-Purpose Flour (5 lb)
The protein content of your flour directly affects how soft and pliable your tortillas turn out. King Arthur all-purpose is consistently milled and produces reliable results every time. It’s worth keeping a bag on hand specifically for bread and flatbread baking.
For more delicious sourdough discard baking, you’ll love these Sourdough Discard Pancakes.
Step-by-Step Instructions
Step 1: Prepare Your Work Area and Ingredients
- Measure out your flour by weight for the most accurate results. If you don’t have a scale, spoon the flour into your measuring cup and level it off to avoid packing.
- Make sure your sourdough discard is at room temperature before you begin. Cold discard straight from the fridge can make the dough stiffer and harder to combine.
- If you’re using butter, soften it to room temperature as well. It should leave an indent when pressed but still hold its shape. Lard or coconut oil should also be at a soft, scoopable consistency.
- Measure out your warm water and set it aside. You want it around 100°F (38°C), which feels warm but not hot on your wrist.
Step 2: Mix the Dry Ingredients and Work In the Fat
- Add the 2 cups (240g) all-purpose flour and 1 teaspoon salt to a large mixing bowl and whisk them together until evenly combined.
- Add the 3 tablespoons (42g) softened butter (or your fat of choice) to the flour mixture.
- Use your fingertips or a fork to work the fat into the flour. You’re looking for a texture similar to coarse, damp sand, with no large visible chunks of fat remaining. This step is important because it coats the flour particles in fat, which limits gluten development and keeps the finished tortilla tender.
- If using vegetable oil instead of a solid fat, skip this step and add the oil in the next step with the wet ingredients.
Step 3: Add the Sourdough Discard and Water
- Make a well in the center of your flour mixture.
- Add the ½ cup (120g) sourdough discard into the well.
- Pour in the ⅓ cup (80ml) warm water. If you’re using vegetable oil, add it now as well.
- Use a fork to stir everything together, starting from the center and working outward, until a shaggy dough begins to form.
- Switch to your hands once it’s too stiff for the fork. Knead briefly in the bowl for about 1 to 2 minutes until the dough comes together into a smooth, cohesive ball with no dry flour patches. The dough should feel soft and slightly tacky but not sticky. If it’s too dry and crumbly, add warm water one teaspoon at a time. If it’s sticking to your hands, add a small dusting of flour.
Step 4: Rest the Dough
- Cover the dough tightly with plastic wrap or a damp kitchen towel. This resting step is not optional. It allows the gluten to relax, which makes the dough much easier to roll out thin without it snapping back.
- Let the dough rest at room temperature for 30 minutes. You can rest it for up to 2 hours at room temperature or overnight in the refrigerator, which also deepens the tangy flavor from the discard.
- If chilling overnight, remove the dough from the fridge 30 minutes before rolling to allow it to come back to room temperature.
Step 5: Divide the Dough into Portions
- Lightly flour your work surface.
- Turn the rested dough out and gently fold it a couple of times to bring it together, then divide it into 8 equal pieces for standard-sized tortillas (about 8 to 9 inches / 20 to 23cm), or 12 to 16 smaller pieces for street taco size.
- To divide evenly, use a kitchen scale and weigh each piece, or flatten the whole dough into a rough log and cut it into equal portions.
- Roll each portion between your palms into a smooth ball. Place the dough balls on your work surface or a lightly floured baking sheet and cover with a damp towel. Let them rest for an additional 10 to 15 minutes. This second rest is just as important as the first because it relaxes the gluten once more, making rolling significantly easier.
Step 6: Roll Out the Tortillas
- Using your rolling pin on a lightly floured surface, press one dough ball flat with your palm first to start it off.
- Roll from the center outward, rotating the dough 90 degrees after each roll to encourage a round shape. Don’t worry too much about perfect circles. Rustic shapes taste just as good.
- Roll each tortilla to about ⅛ inch (3mm) thick or thinner if you can. The thinner you roll them, the more soft and flexible the finished tortilla will be. A tortilla that’s too thick will turn out bready and stiff.
- Keep the remaining dough balls covered while you work through the batch, as they can dry out quickly.
- Lightly flour the rolled tortillas if they seem sticky while you’re working, but avoid adding excess flour or the tortillas can taste floury.
Step 7: Cook the Tortillas
- Heat a cast iron skillet or heavy-bottomed pan over medium to medium-high heat. You want it properly hot before you add the first tortilla. To test it, flick a drop of water onto the surface. If it sizzles and evaporates immediately, it’s ready.
- Place one rolled-out tortilla flat in the dry skillet (no oil needed for a well-seasoned cast iron pan). You should hear a gentle sizzle when it hits the pan.
- Cook for 45 to 60 seconds on the first side. You’ll see bubbles starting to form across the surface and the edges will begin to look dry and set. Flip it using a spatula or your fingers.
- Cook the second side for another 30 to 45 seconds. You’re looking for golden brown or slightly charred spots in a few places, which is the sign of a perfectly cooked tortilla.
- Remove from the pan immediately and place it in a clean folded kitchen towel or tortilla warmer. The steam trapped inside the towel keeps them soft and pliable as you work through the rest of the batch.
- Repeat with the remaining dough balls, adjusting the heat as needed. If the pan starts smoking or the tortillas are browning too fast, lower the heat slightly.
Read Also: Flour Tortilla Recipe
Tips for Success
Getting great results every time comes down to a few key habits that make a real difference in texture and flavor.
- Weigh your flour. Too much flour is the single most common reason homemade tortillas come out stiff and bready. Use a kitchen scale for the best results every time.
- Don’t skip the resting time. Both rest periods, the one after mixing and the one after dividing, allow the gluten to relax. Trying to roll dough that hasn’t rested will be a frustrating fight.
- Roll thin. Err on the side of thinner. A tortilla that looks almost translucent when held up to the light will cook up beautifully soft.
- Get the pan hot before you start. A properly preheated skillet is what gives you those charred spots without drying out the tortilla.
- Stack them in a towel immediately. The moment a tortilla comes off the heat, it goes into the folded towel. The steam softens the surface and keeps them flexible.
- Use room temperature discard. Cold discard from the fridge doesn’t incorporate as smoothly and can make the dough inconsistent.
For a heartier bread project with your sourdough starter, try this Easy Sourdough Bread Recipe.
Serving Suggestions
These tortillas are as versatile as it gets. Honestly, the hardest part is choosing what to put in them.
They shine brightest in applications where softness and a subtle tang enhance the other flavors. A warm tortilla fresh off the skillet with just butter and salt is genuinely one of the best simple food experiences around.
- Fill with seasoned chicken, crema, and fresh salsa for Chicken Tacos
- Serve alongside crispy battered fish for Fish Tacos
- Use as the wrap for cheesy, crispy Quesadillas
- Roll up with grilled steak and peppers for Chicken Fajitas
- Pile with slow-braised meat and consommé for Birria Tacos
- Serve warm with a side of Refried Beans and Mexican Rice
- Top with fresh Pico de Gallo and sliced avocado for a light lunch
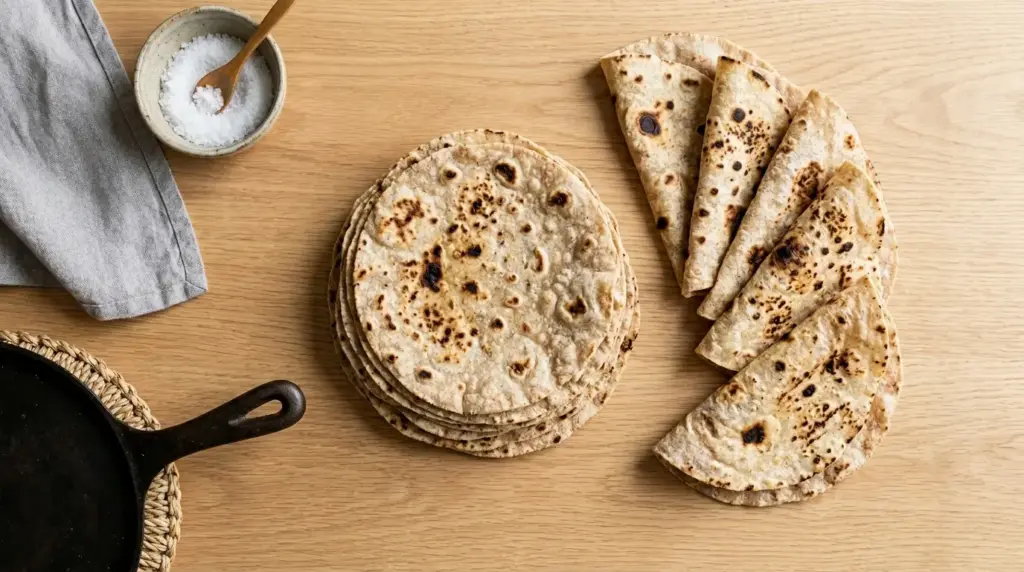
- Cut into wedges and bake for crispy Homemade Tortilla Chips
For a complete taco night spread, don’t miss this Cilantro Lime Rice on the side.
Variations to Try
Once you’ve mastered the basic recipe, it’s easy to experiment with different flavors and flour combinations to suit your taste and what’s in your pantry.
- Whole wheat tortillas: Replace up to half the all-purpose flour with whole wheat flour for a nuttier, heartier tortilla. The texture will be slightly denser but still very soft.
- Garlic herb tortillas: Add ½ teaspoon garlic powder and 1 teaspoon dried herbs (rosemary, thyme, or oregano) to the dry ingredients before mixing. These are amazing as wraps with hummus.
- Spiced tortillas: Mix in ½ teaspoon cumin and ½ teaspoon smoked paprika for a warm, earthy flavor that complements taco fillings beautifully.
- Long ferment version: After mixing the dough, wrap it tightly and refrigerate for 24 to 48 hours. The longer ferment produces a more pronounced tang and can make the tortillas easier to digest for people sensitive to gluten.
- Dairy-free: Substitute the butter with coconut oil or a neutral vegetable oil for a fully dairy-free version. Coconut oil adds a very mild sweetness that works well.
- Mini street taco tortillas: Divide the dough into 16 smaller pieces and roll each one to about 4 inches (10cm) across. Perfect for street-style tacos served with Taco Seasoning.
Read Also: Corn Tortilla Recipe
Storage and Reheating
These tortillas store beautifully, which makes it worthwhile to double the batch and keep extras on hand throughout the week.
- At room temperature: Stack cooled tortillas and wrap them tightly in foil or store in an airtight zip-lock bag. They stay soft and pliable for up to 2 days at room temperature.
- Refrigerator: Transfer to an airtight bag or container. Store for up to 7 days. Separate each tortilla with a small piece of parchment paper to prevent sticking.
- Freezer: For longer storage, place a piece of parchment paper between each tortilla, then stack and transfer to a freezer-safe bag. Freeze for up to 3 months. Thaw overnight in the fridge or at room temperature for about 30 minutes.
- To reheat on the stovetop: Place a tortilla in a dry skillet over medium heat for about 30 seconds per side until warmed through and pliable again. This is the best method for restoring the original soft texture.
- To reheat in the microwave: Wrap a stack of tortillas in a slightly damp paper towel and microwave for 30 to 45 seconds. The steam keeps them from drying out.
- To reheat from frozen: Thaw first, then use the stovetop or microwave method above.
You might also enjoy these Sourdough Discard Cinnamon Rolls for a sweet sourdough treat to make ahead and store.
Nutritional Facts
The following values are estimates per tortilla based on a batch of 8 medium tortillas made with butter.
| Nutrient | Per Tortilla |
|---|---|
| Calories | 175 kcal |
| Total Fat | 5g |
| Saturated Fat | 3g |
| Cholesterol | 11mg |
| Sodium | 295mg |
| Total Carbohydrates | 27g |
| Dietary Fiber | 1g |
| Total Sugars | 0g |
| Protein | 4g |
| Iron | 1.5mg |
Values will vary depending on the type of fat used and the exact hydration level of your sourdough discard.
Another great option for a lighter sourdough treat: Sourdough Discard Chocolate Chip Cookies.
Health Benefits of Key Ingredients
The ingredients in this recipe may be simple, but a few of them bring meaningful nutritional value to the table beyond just being delicious.
Sourdough discard contains live bacterial cultures and the byproducts of fermentation, including organic acids that can support gut health and contribute to a lower glycemic response compared to unfermented flour products. While discard has fewer active cultures than a fully fed starter, it still retains some of these beneficial compounds.
All-purpose flour provides carbohydrates as the main energy source, and when you opt to substitute part of the flour with whole wheat, you get the added benefit of more fiber, B vitamins, and minerals like iron and magnesium.
- Sourdough discard: Contains fermentation byproducts that may aid digestion, reduces phytic acid (which can block mineral absorption), and contributes to a potentially lower glycemic response than standard flour
- All-purpose flour: Good source of complex carbohydrates and B vitamins; whole wheat substitution adds fiber and magnesium
- Butter (or healthy fats): Provides fat-soluble vitamins A, D, E, and K; healthy fats support nutrient absorption and contribute to satiety
- Salt: Necessary for electrolyte balance and enhances the flavor of all the other ingredients
- Sourdough fermentation process: Even partial fermentation can reduce the presence of antinutrients and support better mineral absorption from the flour
For more sourdough baking inspiration, try making a loaf of Sourdough Sandwich Bread.
Frequently Asked Questions
1. Can I use active sourdough starter instead of discard?
Yes, active starter works perfectly well in this recipe. The tortillas may have a slightly more pronounced tangy flavor, especially if your starter is at peak rise. The texture will be essentially the same. If you do an extended rest with active starter (more than a few hours), refrigerate the dough to prevent over-fermentation, which can make the dough overly sticky and sour.
2. My dough keeps springing back when I try to roll it. What am I doing wrong?
This almost always means the dough hasn’t rested long enough. Gluten is elastic by nature, and it needs time to relax before you can roll it thin. Cover the dough balls and let them rest for at least 15 minutes after dividing. If they’re still fighting back, give them another 10 minutes. Patience here makes a huge difference.
3. Why are my tortillas stiff and not pliable?
The two most common causes are too much flour in the dough and rolling them too thick. Start by measuring your flour carefully (a kitchen scale is ideal), and aim to roll each tortilla as thin as you can, ideally close to ⅛ inch or less. Stacking the hot tortillas in a folded towel immediately after cooking is also essential, as the trapped steam is what softens the surface and makes them fold without cracking.
4. Can I make the dough ahead of time?
Absolutely, and it actually improves the flavor. Mix the dough, wrap it tightly in plastic wrap, and refrigerate for up to 2 days. The longer cold ferment deepens the tangy flavor from the discard. When you’re ready to cook, remove the dough from the fridge and let it sit at room temperature for 30 minutes before dividing and rolling.
5. Do I need to add oil to the pan when cooking these?
For a well-seasoned cast iron skillet, no oil is needed. The tortillas cook beautifully in a dry pan and develop the characteristic golden spots that make them so appealing. If you’re using a stainless steel pan or one that isn’t well-seasoned, a very thin wipe of oil will prevent sticking. Too much oil will make the tortillas greasy and blotchy rather than evenly spotted.
Read Also: Sourdough Pancake Recipe
Final Thoughts
Once you make these sourdough discard tortillas, it genuinely changes the way you think about taco night and every meal in between.
They’re soft, flavorful, and made from just a handful of ingredients you already have on hand. The discard does more than reduce waste here. It elevates a simple flatbread into something that tastes intentional and homemade in the best way.
Give them a try this week. Roll them out, cook them in a hot skillet, and stack them in a towel while you prep your fillings.
If you make these, drop a comment below to let me know how they turned out. Sharing what fillings you used or any tweaks you made is always welcome here!
Recommended:
- Sourdough Discard Cinnamon Rolls Recipe
- Sourdough Discard Pancakes Recipe
- Street Tacos Recipe
- Chicken Fajita Recipe
- Black Bean Quesadilla Recipe
- Homemade Tortilla Chips Recipe
- Pico de Gallo Recipe
- Sheet Pan Tacos Recipe
- Smashed Chicken Caesar Tacos Recipe
- Seven Layer Dip Recipe
