Making your own homemade tortilla chips recipe from scratch is one of those kitchen projects that sounds fancy but is almost embarrassingly easy. You need just a handful of ingredients, about 20 minutes, and a good bag of corn tortillas. The result? Chips that are fresher, crispier, and so much more flavorful than anything you’d pull out of a store-bought bag.
The secret really comes down to two things: the right oil temperature and a thin, even cut. Corn tortillas are made from masa (nixtamalized corn dough), which fries up into that satisfying crunch that flour tortillas simply can’t match. When you slice them into wedges and drop them into hot oil, they transform in under two minutes into golden, blistered, perfectly crisp chips.
These chips work just as well baked in the oven as they do fried, so this recipe gives you both methods. The fried version gives you that deep, rich flavor and super-crispy texture. The baked version is lighter and still wonderfully crunchy with a bit less oil.
Once you make these, it’s genuinely hard to go back to the bag.
If you love making your own tortillas from scratch, be sure to check out this Corn Tortilla Recipe for fresh, homemade tortillas that fry up beautifully into chips.
Why You’ll Love This Homemade Tortilla Chips Recipe
You get to control every single ingredient, from the oil you use to how much salt goes on at the end.
These chips are endlessly customizable. Add lime zest, chili powder, cumin, or smoked paprika right after frying while the oil is still hot enough to help the seasonings stick.
They take less than 20 minutes to make, start to finish. That includes prep, cooking, and draining time.
They taste dramatically better than store-bought. The fresh corn flavor is noticeably richer, and the texture has a satisfying thickness that pre-packaged chips rarely achieve.
You can fry a big batch and keep them crispy for up to a week in an airtight container. They hold up well and don’t go stale as fast as you might expect.
- Incredibly fresh flavor from real corn tortillas
- Customizable seasoning to match whatever dip you’re serving
- Two cooking methods included: frying and baking
- Ready in under 20 minutes with minimal prep
- Budget-friendly and uses just a few pantry staples
- Naturally gluten-free when made with 100% corn tortillas
- Crispy, golden results every single time with the right technique
For a perfect pairing, this Easy Guacamole Recipe is an absolute must to serve alongside your freshly made chips.
Ingredients
You only need a few simple things to pull this recipe off, but quality really does matter here. Use good corn tortillas (not flour) and a neutral oil with a high smoke point for the best results.
- 12 corn tortillas (6-inch / 15 cm), cut into 6 wedges each (yielding about 72 chips)
- 2 to 3 cups (480 to 720 ml) neutral oil for frying (vegetable oil, canola oil, or avocado oil work best)
- 1 teaspoon (5 g) fine sea salt, or to taste
- Optional seasonings: 1/2 teaspoon (1.5 g) chili powder, 1/4 teaspoon (0.5 g) garlic powder, 1/4 teaspoon (0.5 g) smoked paprika, zest of 1 lime
For oven-baked version:
- 2 tablespoons (30 ml) neutral oil (for brushing)
- 1/2 teaspoon (2.5 g) fine sea salt, or to taste
You might also enjoy: Fresh Salsa Recipe to serve with your chips fresh out of the fryer.
Kitchen Equipment Needed
You don’t need any special gadgets for this recipe, but having the right tools makes the process smoother and safer.
- Large heavy-bottomed pot or deep skillet (a cast iron skillet or Dutch oven works especially well for even heat distribution)
- Instant-read thermometer (critical for monitoring oil temperature)
- Wire cooling rack set over a sheet pan (for draining fried chips without steaming them)
- Spider strainer or slotted spoon for safely removing chips from hot oil
- Sharp chef’s knife and cutting board for slicing tortillas
- Large baking sheet (for oven-baked version)
- Pastry brush (for brushing oil in the baked version)
- Large mixing bowl for tossing chips with seasoning
Read Also: Easy Nachos Recipe
Recommended Products for This Recipe
These are products I genuinely recommend based on quality and performance. Each one makes a real difference in how your chips turn out.
1. Lodge Cast Iron Skillet
A cast iron skillet holds heat incredibly evenly, which means your oil stays at a steady temperature as you fry each batch of chips. Fluctuating oil temperature is the number one reason chips turn out greasy instead of crispy. Cast iron eliminates that problem, and it lasts forever.
2. ThermoPro Instant-Read Thermometer
Frying at the right temperature (between 350°F and 375°F) is non-negotiable for crispy chips. This thermometer gives you an accurate reading in seconds so you’re never guessing. It’s one of the most useful tools you can have in the kitchen.
3. OXO Good Grips Spider Strainer
Pulling hot chips out of oil safely is much easier with a spider strainer than a regular spoon. The wide basket lets you remove multiple chips at once and shake off excess oil before they hit the rack. It’s the tool serious home cooks reach for every time they fry.
4. Maldon Sea Salt Flakes
Sprinkling flaky sea salt on chips right out of the fryer is a completely different experience from regular table salt. The flakes sit on top of the chip rather than dissolving into it, giving you a little burst of salinity with every bite. It’s a small upgrade that makes a big difference.
This recipe also pairs beautifully with Pico de Gallo for a fresh, chunky dip that lets your crispy chips really shine.
Step-by-Step Instructions
1. Prepare Your Tortillas
- Start by stacking your 12 corn tortillas into a neat pile on your cutting board. Using a sharp chef’s knife, cut the stack in half, then rotate and cut into thirds, creating 6 even wedges per tortilla. You should end up with approximately 72 wedges total.
- Lay the cut tortillas out in a single layer on a clean kitchen towel or paper towels for 10 to 15 minutes before frying. This step is optional but highly recommended: drying out the surface moisture helps the chips fry up crispier and prevents dangerous oil splatter.
- If your tortillas feel particularly moist or fresh, you can let them sit uncovered at room temperature for up to 30 minutes.
2. Heat Your Oil (Frying Method)
- Pour 2 to 3 cups (480 to 720 ml) of neutral oil into your heavy-bottomed pot or cast iron skillet. You want the oil to be at least 1.5 inches (about 4 cm) deep so the chips can float and fry evenly on all sides.
- Set the burner to medium-high heat and clip or hold your instant-read thermometer in the oil. Heat the oil until it reaches 350°F to 360°F (175°C to 182°C). Do not let it exceed 375°F (190°C), as overheated oil can smoke and make the chips taste bitter.
- If you don’t have a thermometer, test the oil by dropping in a small piece of tortilla. It should sizzle actively and rise to the surface within a few seconds. If it sinks and sits without sizzling, the oil is not hot enough yet.
3. Fry the Chips in Small Batches
- Once the oil is at the right temperature, carefully lower 8 to 10 tortilla wedges into the oil using your spider strainer or slotted spoon. Do not overcrowd the pot. Overcrowding drops the oil temperature quickly, leading to greasy, soggy chips instead of crispy ones.
- Fry the chips for 1.5 to 2 minutes, turning them once or twice with the spider strainer so they color evenly on both sides.
- Watch for the chips to turn a light golden color and stop bubbling actively. That reduction in bubbling is a sign the moisture has cooked out and the chip is nearly done.
- Remove the chips promptly and transfer them immediately to your wire rack set over a sheet pan. Do not transfer them directly to paper towels alone, as the trapped steam can soften the bottom of the chip.
- Allow the oil temperature to return to 350°F (175°C) before adding the next batch. This usually takes 30 to 60 seconds.
4. Season Immediately
- While the chips are still hot and glistening from the oil, sprinkle them immediately with fine sea salt. The residual heat and oil on the surface help the salt adhere properly. Seasoning too late means the salt won’t stick.
- If you are adding optional seasonings like chili powder, smoked paprika, garlic powder, or lime zest, toss the hot chips gently in a large mixing bowl with your chosen seasonings right away. Work quickly while the chips are still warm.
- Taste a chip and adjust the salt as needed before moving on to the next batch.
5. Baked Version Instructions (Alternative Method)
- Preheat your oven to 400°F (200°C) and line one or two large baking sheets with parchment paper.
- Cut your tortillas into 6 wedges each as directed in Step 1.
- Arrange the wedges in a single layer on the prepared baking sheets. Make sure no wedges are overlapping, as they need direct heat contact to crisp up properly.
- Using a pastry brush, lightly coat the top surface of each wedge with the 2 tablespoons (30 ml) of neutral oil. Alternatively, you can spray them lightly with cooking spray.
- Sprinkle evenly with the 1/2 teaspoon (2.5 g) of sea salt and any optional seasonings.
- Bake for 10 to 14 minutes, flipping the chips over at the halfway mark (around the 6 to 7 minute point). Watch them closely in the last few minutes because they can go from golden to burnt very quickly.
- Remove from the oven when the chips are golden and feel firm to the touch. They will continue to crisp up slightly as they cool, so pull them out just before they look fully done.
- Transfer to a wire rack and let them cool for 3 to 5 minutes before serving.
Read Also: Loaded Nachos Recipe
Tips for Success
Small technique adjustments make a real difference between chips that are light and crispy versus chips that are greasy or unevenly cooked.
- Dry your tortillas before frying. Even a 10-minute air-dry on a towel significantly reduces moisture and improves crispiness. Excess moisture is the enemy of a good chip.
- Maintain oil temperature between batches. Let the oil come back up to 350°F (175°C) before adding each new batch. An instant-read thermometer makes this easy.
- Don’t overcrowd the pan. Fry in small batches of 8 to 10 chips. More chips = lower oil temperature = greasy results.
- Season while hot. Salt and spices stick best immediately after the chips come out of the oil. Waiting even two minutes means the seasoning won’t adhere well.
- Use corn tortillas, not flour. Flour tortillas don’t crisp the same way and tend to puff and soften. Corn tortillas are the classic choice for a reason.
- Let them cool on a rack, not a plate. A wire rack lets air circulate underneath, keeping the bottom crispy. A plate traps steam and softens the chips.
- Store in an airtight container (not a sealed bag) at room temperature to maintain crispiness.
For a fun homemade topping idea, this Corn Salsa Recipe is a sweet, tangy, crowd-pleasing dip that pairs perfectly with fresh tortilla chips.
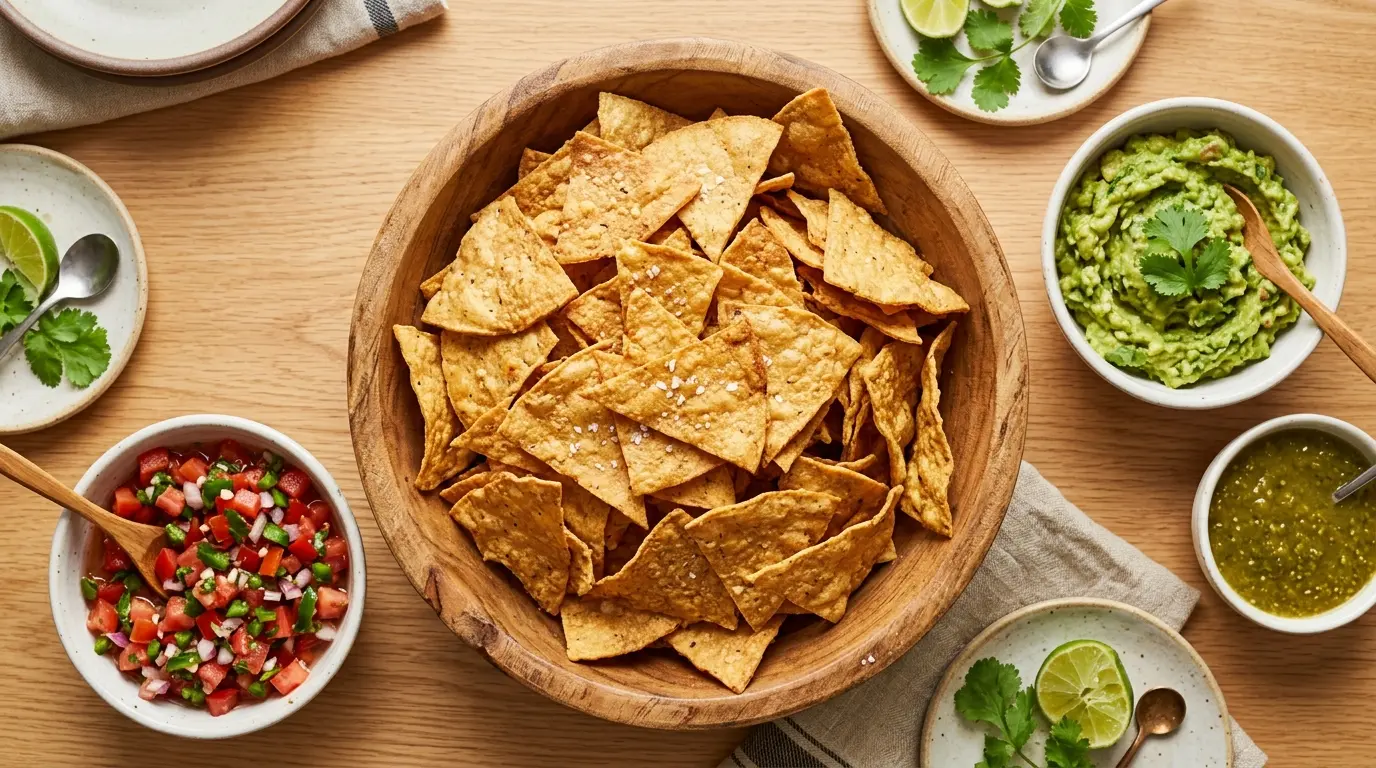
Serving Suggestions
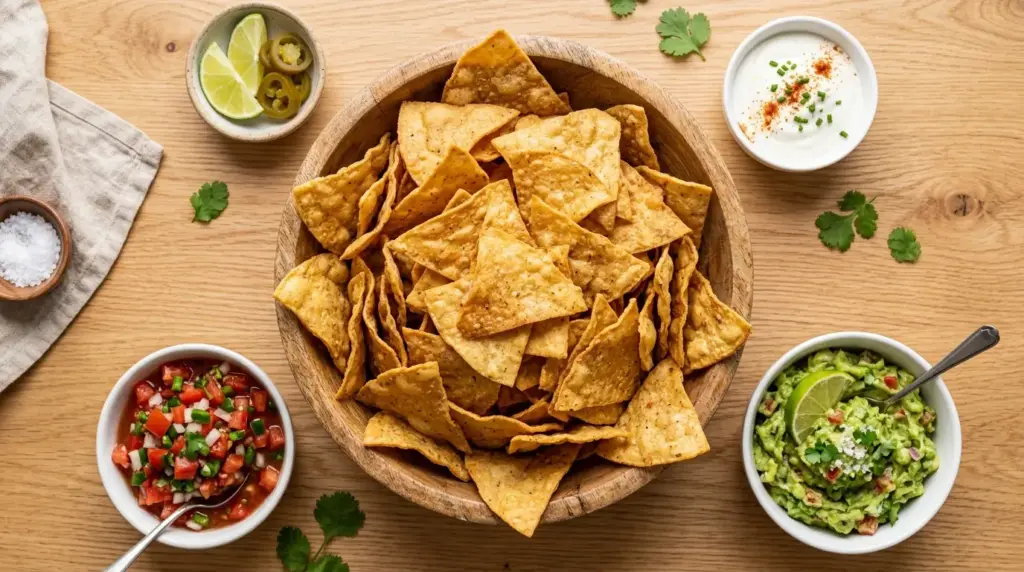
Freshly made tortilla chips are incredibly versatile. You can use them as the base for a whole appetizer spread or simply serve them alongside one great dip.
These chips are the natural partner for anything in the Mexican-inspired category, from creamy dips to chunky salsas to cheesy layered bowls. They hold up well under heavy toppings without going soggy quickly.
- Serve with Classic Guacamole for the ultimate classic pairing
- Use as the base for Loaded Nachos piled high with cheese, jalapeños, and sour cream
- Pair with Easy Salsa for a quick snack any time of day
- Scoop up Refried Beans straight from the pot for a satisfying side
- Serve alongside a warm bowl of Chicken Tortilla Soup as a crunchy accompaniment
- Pair with Buffalo Chicken Dip for a crowd-pleasing party spread
- Use as a topping crumbled over Mexican Rice for added texture
Read Also: Street Tacos Recipe
Variations to Try
Once you have the basic technique down, the flavors you can create are almost endless. These are some of the most popular ways to customize your homemade tortilla chips.
Start with the base recipe and then season creatively while the chips are still hot. The possibilities really do go well beyond plain salted.
- Lime and sea salt: Sprinkle chips with flaky salt and zest one fresh lime over them immediately out of the fryer.
- Chili lime: Combine 1/2 teaspoon chili powder, 1/4 teaspoon cayenne, and the zest of one lime. Toss with hot chips.
- Garlic parmesan: For a non-traditional twist, toss with garlic powder and finely grated Parmesan while hot.
- Smoky chipotle: Mix 1/2 teaspoon chipotle chili powder with 1/4 teaspoon smoked paprika and sprinkle over hot chips.
- Cinnamon sugar chips: Brush with butter, dust with cinnamon sugar, and bake for a dessert chip that’s amazing with fruit salsa.
- Blue corn tortilla chips: Use blue corn tortillas for a slightly nuttier flavor and a striking deep purple-blue color.
- Flour tortilla chips: While less traditional, flour tortillas can also be baked or fried using this same method and give a different, chewier texture.
- Everything bagel seasoning chips: Brush with oil and sprinkle with everything bagel seasoning before baking.
You might also enjoy: The Best Cheese Quesadilla as another easy Mexican-inspired snack to make alongside your chips.
Storage and Reheating
Properly stored, homemade tortilla chips stay crispy for longer than you’d expect. The key is airflow and keeping moisture away.
- Room temperature storage: Let chips cool completely before storing. Place them in an airtight container lined with a paper towel at the bottom to absorb any residual oil. They will stay crispy for up to 5 to 7 days at room temperature.
- Avoid refrigerating: The refrigerator introduces moisture and will make your chips go soft quickly. Room temperature is always better for chip storage.
- Avoid sealed plastic bags: Chips in a sealed bag tend to soften faster because any residual moisture has nowhere to go. A container with a slightly loose lid or paper towel lining works better.
- Reheating: If your chips lose their crunch, spread them in a single layer on a baking sheet and bake at 350°F (175°C) for 5 to 7 minutes. They will crisp right back up as they cool.
- Freeze for longer storage: Fried tortilla chips can be frozen in an airtight freezer bag for up to one month. Reheat straight from frozen at 350°F (175°C) for about 8 to 10 minutes.
Read Also: Enchilada Casserole Recipe
Nutritional Facts
Approximate values per serving (about 12 chips, based on the fried version):
| Nutrient | Amount |
|---|---|
| Calories | ~140 kcal |
| Total Fat | 7g |
| Saturated Fat | 1g |
| Carbohydrates | 17g |
| Dietary Fiber | 2g |
| Sugars | 0g |
| Protein | 2g |
| Sodium | 180mg |
Note: Nutritional values will vary based on the oil used, how much oil the chips absorb, and how much salt is added. Baked chips contain significantly less fat (approximately 3g per serving).
You might also enjoy: Cottage Cheese Chips Recipe for a lighter, high-protein chip alternative.
Health Benefits of Key Ingredients
Corn tortilla chips made at home are a genuinely better option than most commercial snacks, especially when you’re choosing your own oil and controlling the salt.
When made with corn tortillas, these chips provide a source of whole grain corn, which delivers fiber, B vitamins, and essential minerals like magnesium and phosphorus.
- Corn tortillas: Made from masa harina (nixtamalized corn), corn tortillas have a lower glycemic index than flour tortillas and contain more fiber per serving. Nixtamalization also increases the bioavailability of niacin (vitamin B3), making it easier for your body to absorb.
- Avocado oil or canola oil: High-smoke-point oils like avocado oil are rich in monounsaturated fats, the same heart-healthy fats found in olive oil. Canola oil is a budget-friendly option with a similarly favorable fat profile.
- Sea salt in moderation: Using good-quality sea salt and seasoning your chips yourself means you can use far less sodium than most commercial chip brands, which often contain 150 to 250mg of sodium per small serving.
- Gluten-free naturally: Corn tortillas contain no wheat, making these chips a safe, satisfying snack for those with gluten sensitivities or celiac disease.
- Lime zest (optional): Fresh lime zest delivers vitamin C and adds a burst of flavor without any additional calories or sodium.
Read Also: Air Fryer Zucchini Chips Recipe
Frequently Asked Questions
1. What kind of tortillas are best for making homemade tortilla chips?
Corn tortillas are the traditional and best choice for homemade tortilla chips. They have a sturdy, dense texture from masa harina that crisps up beautifully when fried or baked.
Flour tortillas can also be used, but they produce a different result: they tend to puff more and have a softer, slightly chewier texture rather than the hard, satisfying snap of a corn chip.
2. What is the best oil for frying tortilla chips?
Neutral oils with a high smoke point are ideal. Vegetable oil, canola oil, and avocado oil all work well.
Olive oil can be used for baking but is not recommended for frying because its lower smoke point means it breaks down at the temperatures needed for frying chips.
3. Why are my homemade tortilla chips not crispy?
The most common reasons are excess moisture in the tortilla before frying, oil that’s not hot enough (below 350°F / 175°C), or overcrowding the pan.
Letting your tortilla wedges air-dry for 10 to 15 minutes before frying and checking your oil temperature with a thermometer will fix this problem almost every time.
4. Can I make tortilla chips without frying?
Absolutely. The baked version in this recipe works really well and produces chips that are still quite crispy. Brush the wedges lightly with oil, season them, and bake at 400°F (200°C) for 10 to 14 minutes, flipping halfway through.
The baked chips have slightly less fat and a slightly different texture (a bit more brittle than fried), but they are absolutely delicious and much healthier.
5. How do I keep homemade tortilla chips crispy after making them?
Let them cool completely on a wire rack before storing. Once fully cooled, transfer to an airtight container lined with a paper towel at the bottom.
Avoid refrigerating them, as cold and moisture are the two biggest enemies of chip crispiness. If they soften at all, a quick 5 to 7 minute reheat in a 350°F (175°C) oven brings them right back to life.
For another great homemade dip to serve with your chips, this Easy Hummus Recipe comes together in minutes and is a crowd favorite at any gathering.
Final Thoughts
Making a homemade tortilla chips recipe at home is one of those simple pleasures that genuinely elevates snack time. With just a bag of corn tortillas, some oil, and a sprinkle of salt, you can make something that tastes miles better than anything from the store.
The whole process takes under 20 minutes, the ingredients are inexpensive, and the results are consistently satisfying. Once you try these, the bag of chips in the pantry just won’t compare.
Give this recipe a try the next time you’re hosting a get-together, prepping for taco night, or just craving a good snack. Leave a comment below to let me know how they turned out, and share this post with a friend who loves to snack!
Recommended:
- Flour Tortilla Recipe
- Classic Guacamole Recipe
- Chicken Tortilla Soup Recipe
- Taco Seasoning Recipe
- Cheese Ball Recipe
- Mexican Street Corn Recipe
- Classic Deviled Eggs Recipe
- Chicken Enchiladas Recipe
- Classic Bruschetta Recipe
- Carne Asada Tacos Recipe


