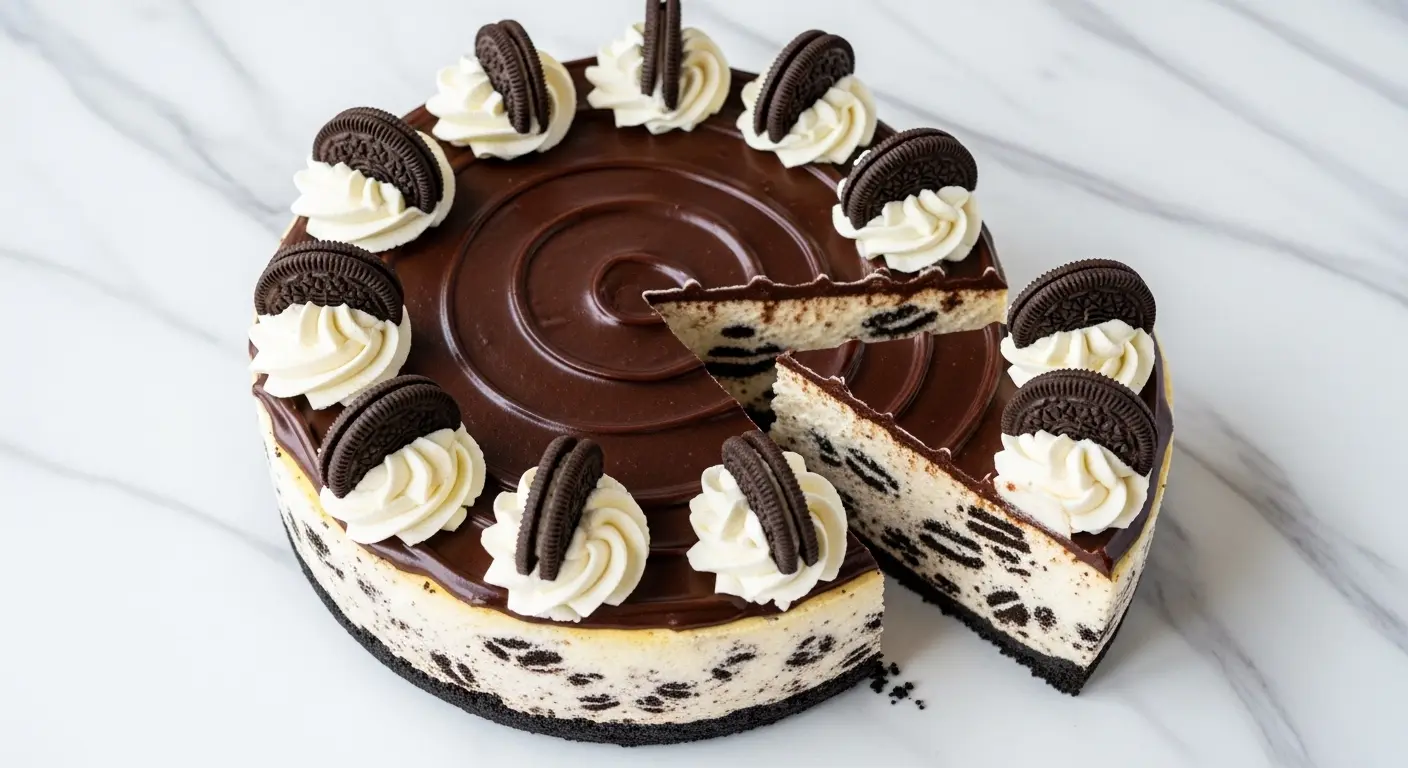
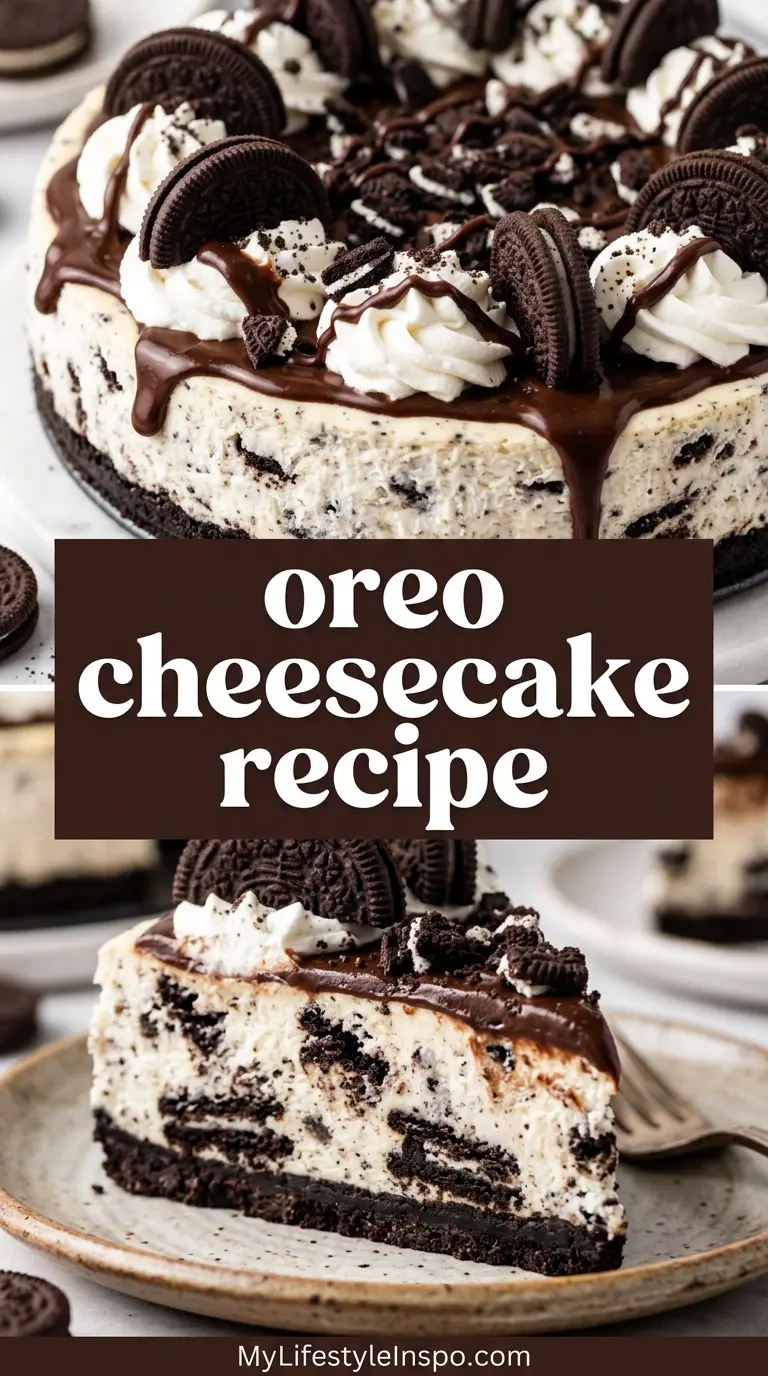
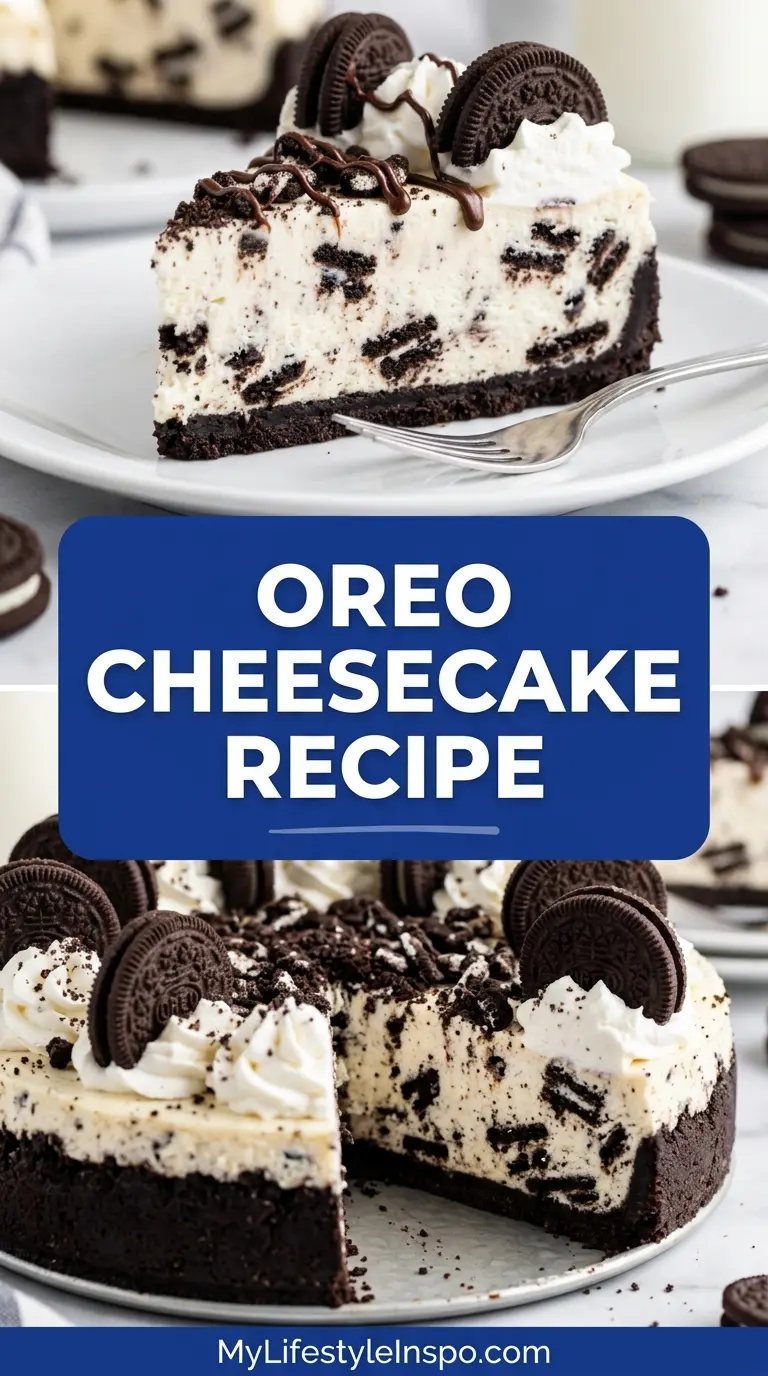
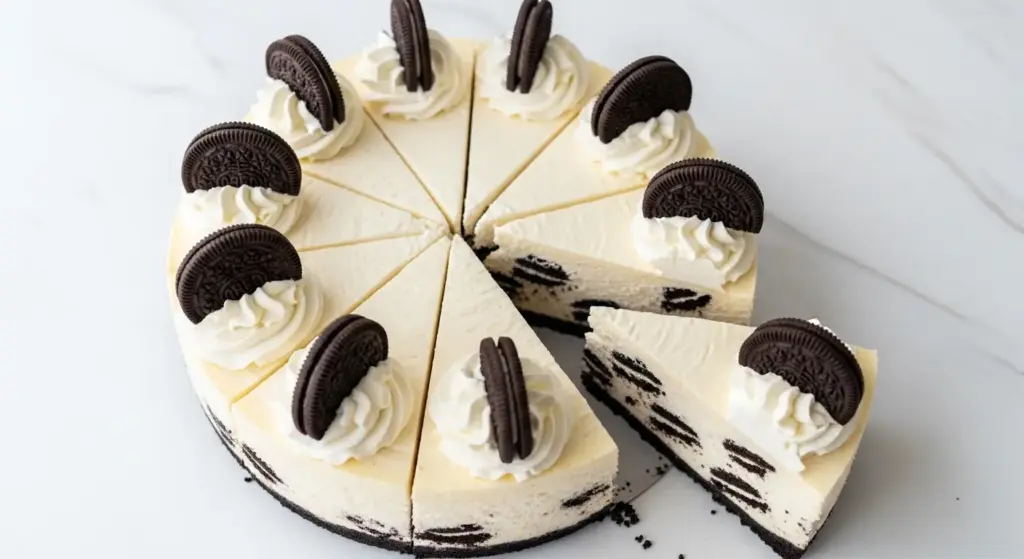
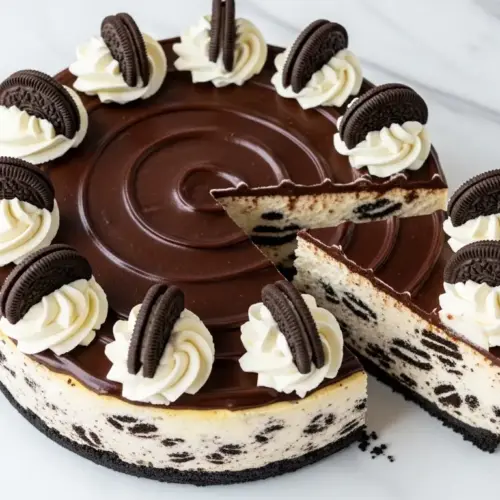
If you’ve been searching for the perfect oreo cheesecake recipe, this is the one you’ve been waiting for. It’s rich, creamy, and absolutely loaded with Oreos — in the crust, in the filling, and piled on top.
This is a classic baked cheesecake inspired by the beloved New York style, but taken to the next level with a buttery Oreo cookie crust, a silky cream cheese filling studded with chunky Oreo pieces, and a simple whipped cream topping.
Every element works together beautifully. The crisp, chocolatey crust provides the perfect contrast to the lush, tangy filling. The chunks of Oreo in the batter stay soft but distinct, giving you that iconic cookies-and-cream flavor in every single bite.
It does take some planning ahead — cheesecake needs time to chill — but the hands-on work is surprisingly straightforward. Make it a day before you need it, and you’ll have a showstopping dessert ready to go.
You might also enjoy: Strawberry Cheesecake
Why You’ll Love This Oreo Cheesecake Recipe
This dessert is the definition of crowd-pleasing. It’s the kind of thing people ask for by name, again and again.
Oreos show up in three different places — the crust, the filling, and the garnish — so you genuinely get cookie flavor in every bite.
The filling itself is ultra-creamy and rich without being heavy, thanks to the balance of full-fat cream cheese and sour cream. That combination is what gives cheesecake its signature tang and depth.
It’s a make-ahead dream. You can bake it the day before serving, and it actually gets better as it rests overnight in the fridge.
Here’s a quick look at what makes this recipe worth making:
- Triple Oreo action — crust, filling, and topping
- Classic baked cheesecake texture — dense, creamy, and smooth
- No water bath needed — simplified method that still delivers beautiful results
- Easy to customize — swap toppings, add ganache, or use flavored Oreos
- Feeds a crowd — makes 10 to 12 generous slices
- Make-ahead friendly — perfect for parties, holidays, and birthdays
Read Also: Blueberry Cheesecake Recipe
Ingredients
Using room-temperature ingredients is one of the most important details in this recipe. Cold cream cheese won’t blend smoothly, and lumpy batter can lead to a dense, uneven cheesecake. Pull everything out of the fridge at least one to two hours before you start.
For the Oreo Crust:
- 36 Oreo cookies (about 1 standard package), cream filling removed, cookies crushed into fine crumbs
- 6 tablespoons (85g) unsalted butter, melted
For the Cheesecake Filling:
- 32 oz (900g) full-fat brick-style cream cheese, softened to room temperature
- 1 cup (200g) granulated sugar
- 1 cup (240g) full-fat sour cream, at room temperature
- 1 teaspoon pure vanilla extract
- 3 large eggs, lightly beaten and at room temperature
- 20 Oreo cookies, roughly chopped into chunky pieces (do not crush — keep the cream filling in these)
For the Whipped Cream Topping:
- 1 cup (240ml) heavy whipping cream, cold
- 3 tablespoons (24g) powdered sugar
- 1 teaspoon pure vanilla extract
For Garnish:
- 8 to 10 Oreo cookies, halved or left whole
Another recipe you’ll love: No Bake Cheesecake
Kitchen Equipment Needed
Having the right tools makes this recipe much easier to execute, especially for the crust-pressing and batter-mixing steps.
Here’s what you’ll need:
- 9-inch springform pan — essential for easy removal; do not attempt this recipe without one
- Food processor — for crushing the Oreos into fine, even crumbs quickly
- Stand mixer or hand mixer — to achieve that silky, lump-free filling
- Large mixing bowl
- Rubber spatula
- Parchment paper — for lining the bottom of the springform pan
- Piping bag and star tip — for decorating the top with whipped cream (optional but lovely)
- Offset spatula — for smoothing the batter into the pan
- Aluminum foil — for lining the baking sheet under the springform pan to catch any drips
- Rimmed baking sheet
- Instant-read thermometer — to check doneness (the center should read 150°F/65°C)
- Sharp knife — for slicing clean pieces and running around the pan edge after baking
For a delicious no-oven variation, try this Easy Creme Brulee Recipe that uses a similar rich dairy base.
Recommended Products for This Recipe
These are products I genuinely recommend based on quality and performance. Using the right tools and ingredients makes a real difference in how this cheesecake turns out.
1. 9-Inch Springform Pan (Nonstick, Leak-Resistant)
A good springform pan is non-negotiable for cheesecake. A nonstick, leak-resistant model ensures the crust doesn’t stick and gives you clean, beautiful slices every time. Look for one with a tight-fitting latch to minimize any butter seeping through.
2. KitchenAid Stand Mixer
For the silkiest, lump-free cheesecake filling, a stand mixer is your best friend. It allows you to mix the cream cheese slowly and thoroughly without overbeating — which is one of the most common causes of cheesecake cracks.
3. Nielsen-Massey Pure Vanilla Extract
Pure vanilla extract makes a subtle but noticeable difference in the flavor of the filling. A high-quality extract like Nielsen-Massey adds warmth and complexity that imitation vanilla simply cannot replicate.
4. Wilton Piping Bags and Star Tips Set
If you want that beautiful bakery-style whipped cream swirl on top of your cheesecake, a piping bag and star tip are the tools to use. The large star tip creates the most gorgeous rosette pattern with very little effort.
5. OXO Offset Spatula
Smoothing the cheesecake batter into an even layer is much easier with an offset spatula than with a regular spoon. This simple tool helps you get that perfectly flat top that sets beautifully in the oven.
You might also love this indulgent Cheesecake Ice Cream Cake for another over-the-top dessert idea.
Step-by-Step Instructions
Step 1: Prepare Your Pan and Preheat the Oven
- Preheat your oven to 325°F (163°C). This lower temperature helps the cheesecake bake gently and evenly.
- Line the bottom of your 9-inch springform pan with a circle of parchment paper. Press it flat so it lies smoothly against the bottom.
- Lightly grease the sides of the springform pan with a thin layer of butter or non-stick cooking spray.
- Set the pan aside while you make the crust.
Step 2: Make the Oreo Cookie Crust
- Remove the cream filling from 36 Oreo cookies. You can do this by twisting each cookie apart and scraping the filling off with a small spoon or butter knife. Discard the cream filling (or eat it — no judgment).
- Place the scraped cookie wafers into a food processor and pulse until they become very fine, even crumbs. Alternatively, place them in a sealed zip-top bag and crush with a rolling pin until no large chunks remain.
- Transfer the crumbs to a medium mixing bowl. You should have about 3 cups of crumbs.
- Pour 6 tablespoons (85g) of melted butter over the crumbs. Stir with a fork until every crumb is moistened and the mixture resembles wet sand.
- Pour the crust mixture into the prepared springform pan. Using the bottom of a flat measuring cup or the back of a spoon, press the crumbs firmly and evenly into the bottom of the pan. Press the crust up the sides as well — aim for at least 1.5 inches up the sides. A higher crust helps prevent cracks.
- Place the pan on a foil-lined rimmed baking sheet (to catch any butter that drips). Bake the crust for 10 minutes, until set. Remove from the oven and allow to cool completely while you prepare the filling.
Step 3: Prepare the Cheesecake Filling
- Make sure your cream cheese, sour cream, and eggs are all fully at room temperature before mixing. Cold ingredients create lumps that are very difficult to smooth out.
- In the bowl of a stand mixer fitted with the paddle attachment (or a large mixing bowl if using a hand mixer), beat the 32 oz (900g) cream cheese on medium-low speed for 2 to 3 minutes, until completely smooth and fluffy. Scrape down the sides and bottom of the bowl with a rubber spatula every minute or so.
- Add the 1 cup (200g) granulated sugar. Beat on medium-low speed until fully incorporated and smooth, about 1 to 2 minutes. Scrape down the bowl again.
- Add the 1 cup (240g) sour cream and 1 teaspoon vanilla extract. Mix on low speed until just combined. Avoid beating vigorously at this stage — incorporating too much air into the batter increases the risk of cracking.
- Add the 3 lightly beaten eggs, one-third at a time. Mix on the lowest speed possible after each addition, just until the egg is no longer visible. Do not overbeat once the eggs go in — this is the most common mistake in cheesecake-making. Overbeating the eggs creates air bubbles that expand in the oven and can cause the cheesecake to crack.
- Scrape down the sides of the bowl one final time.
- Using a rubber spatula, gently fold in the 20 roughly chopped Oreo pieces. Do this by hand, not with the mixer. Fold slowly and deliberately so the cookie pieces don’t break down further — you want chunky pieces, not fine crumbs.
Step 4: Bake the Cheesecake
- Pour the cheesecake batter over the cooled Oreo crust in the springform pan. Use your offset spatula to smooth the top into an even, flat layer.
- Place the springform pan on the foil-lined rimmed baking sheet.
- Bake at 325°F (163°C) for 55 to 65 minutes. The cheesecake is done when the edges are fully set but the center 2 to 3 inches still has a gentle jiggle — similar to a soft Jell-O shake. Do not wait until the center looks completely firm, as the residual heat will finish setting it.
- Check the internal temperature with an instant-read thermometer: the center should read between 145°F and 150°F (63°C to 65°C) when done.
- Once baked, turn the oven off. Run a thin knife or offset spatula around the outer edge of the cheesecake to loosen it from the sides of the pan. This step is crucial — as the cheesecake cools, it contracts slightly, and loosening it from the pan prevents the top from cracking.
- Crack the oven door open and allow the cheesecake to cool inside the oven for 1 full hour. This gradual cool-down prevents the dramatic temperature change that causes cracking.
Step 5: Cool and Refrigerate
- After the oven cool-down, remove the cheesecake from the oven and place it on a wire cooling rack at room temperature.
- Allow it to cool completely to room temperature — this takes about 2 additional hours. Do not rush this step by placing it in the fridge while still warm, as condensation can form and affect the texture.
- Once fully cooled, cover the top of the springform pan loosely with plastic wrap or aluminum foil. Transfer to the refrigerator.
- Refrigerate for a minimum of 6 hours, though overnight (8 to 12 hours) is strongly recommended. The cheesecake needs this time to fully firm up, develop its flavor, and set into sliceable perfection.
Step 6: Make the Whipped Cream Topping
- Just before serving, pour 1 cup (240ml) of cold heavy whipping cream into a clean stand mixer bowl or a large mixing bowl.
- Whip on medium-high speed until the cream begins to thicken, about 1 minute.
- Add 3 tablespoons (24g) powdered sugar and 1 teaspoon vanilla extract.
- Continue whipping on high speed until stiff peaks form — the cream should hold its shape firmly when the beaters are lifted. This takes about 2 to 3 more minutes. Do not overwhip or the cream will become grainy and butter-like.
- Transfer the whipped cream to a piping bag fitted with a large star tip if you want a decorative finish. Alternatively, spread it over the top of the cheesecake with an offset spatula for a more casual look.
Step 7: Decorate and Serve
- Remove the cheesecake from the refrigerator. Run a thin knife around the edge of the pan one more time, then unlatch and remove the outer ring of the springform pan.
- Carefully slide the cheesecake off the parchment paper and bottom of the pan onto a serving platter, or serve it directly from the pan base.
- Pipe or spread the whipped cream over the top of the cheesecake in your preferred style. Rosettes around the border look stunning.
- Arrange 8 to 10 halved or whole Oreo cookies on top as garnish.
- To slice cleanly, dip a sharp knife in hot water, wipe it dry with a clean cloth, and make each cut. Repeat the dipping and wiping between each slice for the cleanest presentation.
- Serve immediately and enjoy.
For a festive twist on classic cheesecake, check out this fun Cannoli Poke Cake that uses similar creamy filling flavors.
Tips for Success
A few small techniques make a huge difference between a good cheesecake and a truly exceptional one. Here are the most important things to keep in mind:
- Room temperature everything. Cream cheese, eggs, and sour cream must all be at room temperature. This is the single biggest factor in achieving a lump-free, silky filling.
- Remove the cream from the crust Oreos. The fat in the cream filling can seep out of the springform pan during baking and create a mess. Scraping it out before crushing the cookies for the crust prevents this.
- Don’t overmix the batter once the eggs are in. Mix on the lowest speed possible, just until each addition is incorporated. Overbeating introduces air, which expands during baking and causes cracks.
- Press the crust high on the sides. Pushing the crust 1.5 to 2 inches up the sides of the pan helps brace the cheesecake as it bakes and shrinks, dramatically reducing cracking.
- The jiggle test. The center should wobble gently — not slosh like liquid — when you tap the pan. Trust this more than the timer.
- Cool gradually. Never move your cheesecake from the oven directly to the fridge. The oven rest, room temperature cool, and overnight chill are all important steps.
- Use a hot, dry knife for slicing. Dip the knife blade in hot water, wipe it dry, and slice. Repeat for every cut. This gives you clean, bakery-perfect slices.
Read Also: New York Cheesecake Recipe
Serving Suggestions
This cheesecake is a statement dessert all on its own, but a few simple pairings can make it even more memorable.
It pairs beautifully with a warm mug of coffee, an espresso, or a glass of cold milk — any rich, slightly bitter drink cuts through the sweetness in the best way. For a special celebration, serve slices alongside a scoop of vanilla or cookies-and-cream ice cream.
Here are some serving ideas to inspire you:
- A drizzle of warm Chocolate Pudding or hot fudge sauce poured over individual slices
- A spoonful of fresh Strawberry Sauce on the side for a fruity contrast
- A sprinkle of crushed Oreos and a light dusting of cocoa powder for extra texture and drama on the platter
- Served at room temperature rather than straight from the fridge — about 20 minutes out allows the flavors and creaminess to bloom
- Individual plated slices with a tiny dot of Caramel Sauce for a cookies-and-caramel vibe
Variations to Try
The base recipe here is classic and reliable, but there’s plenty of room to play. Once you’ve made this a couple of times, you’ll find it easy to adapt.
Here are some delicious ways to switch it up:
- No-bake version: Skip the oven entirely and set the filling with heavy whipped cream instead of eggs. It’s lighter in texture and takes only 4 hours to chill. Check out this No Bake Cheesecake for the base technique.
- Chocolate ganache topping: Melt 4 oz (115g) of semi-sweet chocolate with 1/3 cup (80ml) of heavy cream to make a glossy ganache. Let it cool slightly, then pour it over the chilled cheesecake before adding the whipped cream.
- Flavored Oreos: Golden Oreos, mint Oreos, or peanut butter Oreos all work beautifully in the crust and filling for a fun flavor twist.
- Mini cheesecakes: Divide the recipe into a 12-cup muffin tin lined with cupcake liners. Reduce the baking time to 18 to 22 minutes.
- Peanut butter swirl: Add 1/4 cup (65g) of warm peanut butter to the batter before folding in the Oreos, and swirl it in with a toothpick for a chocolate-peanut butter version.
- Lemon Oreo cheesecake: Add 2 tablespoons of fresh lemon zest and 1 tablespoon of lemon juice to the filling for a bright citrus note.
Storage and Reheating
Cheesecake is an excellent make-ahead dessert, and it stores beautifully both in the fridge and freezer. Here’s how to keep yours tasting its best:
- Refrigerator: Store leftover cheesecake covered in the refrigerator for up to 5 days. Lay a piece of plastic wrap directly over the cut surface to prevent it from drying out, or store individual slices in an airtight container.
- Freezer: Oreo cheesecake freezes very well. Freeze the whole cheesecake (without the whipped cream and garnish) or freeze individual slices on a baking sheet until solid, then wrap each piece tightly in plastic wrap followed by a layer of foil.
- Freeze for up to 3 months. When ready to serve, transfer the cheesecake from the freezer to the refrigerator and allow it to thaw overnight. Add the whipped cream and Oreo garnish just before serving.
- No reheating needed — cheesecake is always served cold or at cool room temperature. If serving a slice that came straight from the fridge, allow it to sit out for 15 to 20 minutes for the best flavor and texture.
Read Also: Pumpkin Cheesecake Recipe
Nutritional Facts
The values below are approximate and based on one slice, assuming the cheesecake is cut into 12 equal servings. Actual values may vary depending on the specific brands of ingredients used.
| Nutrient | Per Serving (1 of 12 slices) |
|---|---|
| Calories | ~520 kcal |
| Total Fat | 35g |
| Saturated Fat | 19g |
| Cholesterol | 125mg |
| Sodium | 370mg |
| Total Carbohydrates | 44g |
| Dietary Fiber | 1g |
| Total Sugars | 31g |
| Protein | 7g |
| Calcium | 90mg |
This is a rich, indulgent dessert best enjoyed in moderate portions. The high fat and calorie content comes primarily from the cream cheese, butter, and Oreo cookies — all intentional choices for the richest, most satisfying result.
You might also enjoy this lighter treat: Easy Tiramisu
Health Benefits of Key Ingredients
This is undeniably a treat, not a health food — and that’s perfectly fine. But it’s worth noting that a few ingredients do bring some genuine nutritional value to the table.
Cream cheese is a good source of calcium, which supports strong bones and teeth. While it is high in fat, the fat found in full-fat dairy products contains fat-soluble vitamins like A, D, E, and K that support immune function and skin health.
Eggs are one of the most nutrient-dense foods available. They provide complete protein, choline for brain health, and a range of B vitamins including B12 and riboflavin.
Here’s a breakdown of what key ingredients contribute:
- Cream cheese: Provides calcium, phosphorus, and fat-soluble vitamins A and K2
- Eggs: Complete protein, choline, B vitamins, and selenium
- Sour cream: Contains probiotics in small amounts that support gut health; also a source of calcium
- Heavy cream: Rich in fat-soluble vitamins; provides a satisfying texture that can help manage portion control
- Oreo cookies (in moderation): Primarily an energy source; using them in the right amounts keeps the dessert balanced without going overboard
For a dessert with more fruit-forward nutrition, try this Classic Apple Crisp.
Frequently Asked Questions
1. Why did my Oreo cheesecake crack?
Cracking is almost always caused by one of three things: overbeating the batter (especially after adding the eggs), baking at too high a temperature, or cooling the cheesecake too quickly.
To prevent cracks, mix on low speed once the eggs are added, bake at 325°F (163°C), and cool the cheesecake slowly — first in the oven with the door cracked, then at room temperature, before refrigerating. Running a knife around the edge of the pan immediately after baking also helps significantly.
2. Can I use a water bath for this recipe?
You can, and many bakers swear by it for the creamiest, crack-free results. To use a water bath, wrap the outside of your springform pan tightly in two layers of heavy-duty foil, place it in a large roasting pan, and add about 1 inch of hot water around it before baking.
That said, this recipe is designed to produce great results without a water bath, so it’s entirely optional.
3. How far in advance can I make this cheesecake?
This cheesecake is best made one to two days ahead of time. The overnight chill not only ensures it’s fully set, it also allows the flavors to develop and deepen.
You can make it up to 3 days in advance and keep it covered in the refrigerator. Add the whipped cream and Oreo garnish just before serving.
4. Do I need to remove the cream filling from the Oreos?
For the crust, yes — it’s recommended. The fat in the cream filling can seep out of the springform pan during baking and create an oily mess in the oven. Removing it ensures a cleaner bake.
For the Oreos folded into the filling, keep the cream filling intact. It adds sweetness and helps the cookie pieces hold their shape in the batter.
5. Can I use reduced-fat cream cheese?
It’s not recommended. Reduced-fat cream cheese contains more moisture and less fat, which produces a softer, less stable filling that is more prone to cracking. The cheesecake also won’t have that signature rich, dense texture.
Full-fat brick-style cream cheese is the only option that delivers the classic cheesecake experience this recipe is designed around. Avoid tub-style cream cheese as well — it contains stabilizers and extra moisture that affect the final texture.
For more cheesecake inspiration, try this: Best Cheesecake Recipe
Oreo Cheesecake
Equipment
- 9-inch springform pan - essential for easy removal
- Food processor - for crushing Oreos into fine crumbs
- Stand mixer or hand mixer - for smooth, lump-free filling
- Large mixing bowl
- Rubber spatula
- Parchment paper - for lining the bottom of the springform pan
- Piping bag and star tip - optional, for decorating the top
- Offset spatula - for smoothing the batter
- Aluminum foil - for lining the baking sheet
- Rimmed Baking Sheet - to catch any drips
- Instant-read thermometer - to check doneness
- Sharp knife - for slicing clean pieces and running around the pan edge
Ingredients
- 36 cookies Oreo cookies - about 1 standard package, cream filling removed, cookies crushed into fine crumbs
- 6 tablespoons unsalted butter - 85g, melted
For the Cheesecake Filling
- 32 oz full-fat brick-style cream cheese - 900g, softened to room temperature
- 1 cup granulated sugar - 200g
- 1 cup full-fat sour cream - 240g, at room temperature
- 1 teaspoon pure vanilla extract
- 3 large eggs - lightly beaten and at room temperature
- 20 cookies Oreo cookies - roughly chopped into chunky pieces, do not crush — keep the cream filling in these
For the Whipped Cream Topping
- 1 cup heavy whipping cream - 240ml, cold
- 3 tablespoons powdered sugar - 24g
- 1 teaspoon pure vanilla extract
For Garnish
- 8 to Oreo cookies - 10, halved or left whole
Instructions
- Preheat oven to 325°F (163°C). Line the bottom of a 9-inch springform pan with parchment paper and lightly grease the sides.
- Remove cream filling from 36 Oreos and pulse the wafers in a food processor until fine crumbs form. Combine with 6 tablespoons melted butter and press firmly into the bottom and 1.5 inches up the sides of the pan.
- Bake the crust for 10 minutes, then remove and cool completely.
- Beat softened cream cheese on medium-low speed for 2-3 minutes until smooth. Add sugar and mix until combined, then add sour cream and vanilla, mixing on low.
- Add beaten eggs one-third at a time, mixing on the lowest speed just until combined. Fold in 20 chopped Oreo pieces by hand.
- Pour filling over the cooled crust and smooth the top. Bake at 325°F for 55-65 minutes until edges are set and center jiggles gently.
- Turn off the oven, run a thin knife around the edge, crack the oven door open, and let the cheesecake cool inside for 1 hour.
- Remove from oven and cool completely at room temperature for about 2 hours. Refrigerate for a minimum of 6 hours or overnight.
- Just before serving, whip cold heavy cream until it thickens. Add powdered sugar and vanilla, then whip to stiff peaks.
- Pipe or spread whipped cream over the chilled cheesecake. Garnish with halved Oreo cookies. Slice with a hot, dry knife for clean cuts.
Notes
- Room temperature ingredients are crucial for a lump-free filling. Let cream cheese, eggs, and sour cream sit out for 1-2 hours before starting.
- Remove the cream filling from the crust Oreos to prevent oily seepage during baking. Keep the cream filling in the Oreos folded into the batter.
- Do not overmix once the eggs are added. Mix on the lowest speed just until combined to prevent cracks.
- Press the crust 1.5 to 2 inches up the sides of the pan to help prevent cracking as the cheesecake bakes and shrinks.
- The center should still jiggle gently when you tap the pan — do not wait until it looks completely firm. Internal temperature should read 145-150°F.
- Cool the cheesecake gradually — first in the oven with the door cracked, then at room temperature, then refrigerate overnight for best results.
- For clean slices, dip a sharp knife in hot water, wipe dry, and cut. Repeat between each slice.
- Store leftovers covered in the refrigerator for up to 5 days. Freeze without toppings for up to 3 months.
- Add the whipped cream and Oreo garnish just before serving for the best presentation.
- This cheesecake is best made 1-2 days ahead — the flavor develops and deepens as it rests.
Final Thoughts
This oreo cheesecake recipe is everything a great dessert should be: deeply satisfying, perfectly balanced, and genuinely impressive without being unnecessarily complicated.
Once you try making it at home, the boxed and restaurant versions just won’t compare. The creamy filling, the crunchy Oreo crust, and those chunky cookie pieces in every bite create something truly special.
It’s the kind of recipe that becomes a tradition — the one friends request for their birthdays, the one that disappears first at every gathering.
Give it a try, and when you do, come back and leave a comment below. Tell us how it turned out, what variations you tried, or share a photo on social media and tag us. We love hearing from you!
Recommended:
- Lemon Cheesecake Recipe
- Mini Cheesecake Recipe
- Japanese Cheesecake Recipe
- Basque Cheesecake Recipe
- Churro Cheesecake Recipe
- Classic Tiramisu Recipe
- Best Chocolate Chip Cookies
- Moist Chocolate Cake Recipe
- Classic Vanilla Cake Recipe
- Dirt Pudding Recipe


