Making a caramel sauce recipe at home sounds intimidating, but it’s actually one of the most rewarding things you’ll ever whip up in your kitchen. With just four or five pantry staples and about 15 minutes on the stovetop, you get a luscious, golden sauce that puts every store-bought jar to shame.
The secret to a truly great caramel sauce is understanding what’s happening at each stage. You’re not just melting sugar, you’re coaxing it through a chemical transformation that produces those deep, complex, slightly bittersweet flavors that make caramel so irresistible.
Once you nail this, you’ll find yourself making it on repeat. It’s the kind of recipe that quietly becomes a staple, ready to elevate everything from a simple bowl of ice cream to a holiday cheesecake.
This guide walks you through every step with beginner-friendly detail, so you get silky, smooth results on your very first try.
For a rich, indulgent topping with a completely different flavor profile, you might also love this Hot Fudge Sauce to have in your dessert repertoire.
Why You’ll Love This Caramel Sauce Recipe
This is not your average, one-note sweet sauce. Homemade caramel has a depth of flavor that comes from proper caramelization, something no jar on a grocery shelf can truly replicate.
It’s also incredibly versatile. One small batch covers dozens of uses, from morning coffee to weekend baking projects.
Here’s what makes this recipe a keeper:
- Only 4 to 5 ingredients you likely already have on hand
- No candy thermometer needed, just your eyes and a little patience
- Ready in 15 minutes or less from start to finish
- Thick, silky texture that coats the back of a spoon beautifully
- Customizable with vanilla, sea salt, or a splash of bourbon
- Stores well in the fridge for up to two weeks
You might also enjoy: Strawberry Sauce
Ingredients
This classic caramel sauce uses the dry method of melting sugar directly in a pan, which gives you the most control over color and flavor. Make sure your butter and cream are at room temperature before you start, as cold ingredients can cause the hot sugar to seize.
- 1 cup (200g) granulated white sugar
- 6 tablespoons (85g) unsalted butter, at room temperature, cut into small pieces
- ½ cup (120ml) heavy whipping cream, at room temperature
- 1 teaspoon pure vanilla extract
- ¼ to ½ teaspoon fine sea salt (adjust to taste; use ¼ tsp for a lightly salted version and ½ tsp for a classic salted caramel)
Read Also: Sticky Toffee Pudding Recipe
Kitchen Equipment Needed
Having everything ready before you start is essential here because caramel moves fast once the sugar begins to change. Set up your mise en place first, then light the burner.
- Medium heavy-duty stainless steel saucepan (2 to 3 quart capacity; do NOT use nonstick)
- Heat-resistant silicone spatula or wooden spoon
- Heatproof glass measuring cup or jar for pouring and storing
- Candy or instant-read thermometer (optional but helpful for beginners)
- Kitchen scale for accurate measurements (recommended)
- Pastry brush and small bowl of water (optional, to brush down sugar crystals on the pan sides)
- Oven mitts or kitchen gloves (caramel is extremely hot and can cause severe burns)
You might also enjoy: Easy Apple Crisp
Recommended Products for This Recipe
These are handpicked products that can genuinely improve your caramel sauce results, based on quality and performance.
1. All-Clad Stainless Steel Saucepan
A heavy-bottomed stainless steel saucepan is absolutely essential for making caramel. Thin pans create hot spots that burn the sugar unevenly, while a quality pan like this distributes heat gently and consistently. It is an investment that pays off every single time you make caramel.
2. OXO Good Grips Silicone Spatula
This spatula is heat-resistant up to 600°F (315°C), meaning it can handle the intense heat of molten caramel without melting or warping. The flexible head gets into the corners of the pan cleanly, which helps you incorporate butter and cream without leaving any behind.
3. Weck Glass Jars
Caramel sauce keeps beautifully in these airtight glass jars, and they look gorgeous on the counter or as homemade gifts. The glass is heat-safe, so you can pour the hot sauce directly in after it cools slightly, and the wide mouth makes it easy to spoon caramel out when serving.
4. Fleur de Sel Sea Salt
For truly elevated salted caramel, fleur de sel makes a noticeable difference. Its delicate, mineral flavor complements the bittersweet caramel beautifully, and the flaky crystals provide little pops of salinity that make each drizzle more complex and satisfying.
This recipe pairs especially well with a classic Best Cheesecake as a topping.
Step-by-Step Instructions
Step 1: Prepare All Your Ingredients Before You Start
- Measure out all your ingredients and have them within arm’s reach of your stovetop before turning on the heat. Caramel moves quickly and you will not have time to measure things mid-process.
- Cut your butter into 6 small, even pieces and set on a plate at room temperature. Cold butter added to hot caramel can cause it to seize and splatter dangerously.
- Pour your heavy cream into a liquid measuring cup and let it sit at room temperature for at least 20 to 30 minutes, or microwave it for 20 seconds to take the chill off.
- Have your heatproof jar or glass measuring cup positioned next to the stove so you can pour immediately once the sauce is done.
- Put on oven mitts or keep them nearby. Molten caramel reaches temperatures well above 300°F (149°C) and can cause serious burns on contact.
Step 2: Melt the Sugar (Dry Method)
- Pour all 1 cup (200g) of granulated white sugar into your heavy-duty stainless steel saucepan. Spread it into an even layer using the spatula.
- Place the pan over medium heat. Do NOT add any water. This is the dry method, which means you’re melting the sugar directly.
- After about 2 to 3 minutes, the sugar at the edges will start to melt and turn a pale golden color. At this point, use your spatula to gently stir the edges toward the center, nudging the unmelted sugar into the melted portions.
- Continue stirring gently and breaking up any clumps as the sugar melts. The goal is to melt everything evenly without letting any portion burn while another portion is still crystalline.
- As the sugar continues to cook, it will progress from pale yellow, to golden, to a rich amber color. This entire process takes about 8 to 12 minutes.
Step 3: Watch for the Right Color
- Once all the sugar has melted into a completely liquid state, stop stirring and pay close attention to the color. You’re looking for a deep amber, similar to the color of dark honey or iced tea.
- If you’re using a candy thermometer, the target temperature is around 350°F (177°C). This is the sweet spot for a well-developed, bittersweet caramel flavor.
- If the color is too light (pale gold), the caramel will taste overly sweet and one-dimensional. If it goes too dark (very dark brown), it will taste bitter.
- Trust your nose as well. When caramel is at the right stage, it smells nutty and deeply sweet, almost like butterscotch. If it starts to smell acrid or smoky, it has gone too far and you will need to start over.
Step 4: Add the Butter
- Remove the saucepan from the heat or reduce to the lowest setting. Immediately add the butter pieces one at a time, stirring vigorously after each addition.
- The mixture will bubble up aggressively when the butter hits the hot sugar. This is completely normal and expected. The bubbling is caused by the steam being released from the moisture in the butter.
- Keep stirring until each piece of butter is fully incorporated before adding the next. This ensures the fat emulsifies evenly into the caramel and prevents a greasy texture.
- Once all the butter is added, stir for another 30 seconds to make sure everything is fully combined and the sauce is smooth.
Step 5: Add the Heavy Cream
- Slowly and carefully pour in the room-temperature heavy cream while stirring constantly. Add it in a slow, steady stream rather than all at once.
- The sauce will bubble up dramatically again when the cream is added. Stand back slightly and be very cautious about steam burns. Using a long-handled spatula is helpful here.
- Stir continuously as you add the cream, making sure everything is fully incorporated. If you see any lumps or bits of solidified sugar, continue stirring and return the pan to low heat for 1 to 2 minutes. The lumps will dissolve back into the sauce with gentle heat.
- Once the cream is fully incorporated, stir for another 1 minute until the sauce is completely smooth and glossy.
Step 6: Add Vanilla and Salt
- Remove the pan from the heat completely.
- Stir in 1 teaspoon of pure vanilla extract. The vanilla is added at the end to preserve its delicate flavor, as prolonged heat can diminish the aroma.
- Add the fine sea salt, starting with ¼ teaspoon. Stir to combine, then taste carefully (the sauce is still very hot, so let a small amount cool on a spoon first).
- Adjust the salt to your preference. For a classic lightly salted caramel, ¼ teaspoon is ideal. For a properly salted caramel with that sweet-and-salty contrast, go up to ½ teaspoon.
Step 7: Cool and Transfer
- Let the caramel cool in the pan for 5 to 10 minutes. It will be very thin and liquid while hot, which is normal. It thickens considerably as it cools.
- Carefully pour the warm caramel sauce into your heatproof glass jar or measuring cup. Do not seal the jar with a lid immediately, as trapping the steam can add unwanted moisture back into the sauce.
- Allow the sauce to cool at room temperature for at least 30 minutes before using or covering. Once it reaches room temperature, it will have thickened to a beautiful, pourable consistency.
- For a thicker, spoonable sauce, refrigerate it for at least 1 hour before using.
Read Also: Classic Apple Pie Recipe
Tips for Success
Even with a simple recipe like this, a few key techniques separate a smooth, glossy caramel from a grainy, seized mess. Keep these in mind before you start.
- Use a heavy-bottomed stainless steel pan. Thin pans create hot spots that can burn the sugar in one spot before it melts in another. Never use a nonstick pan, as the coating can break down at the high temperatures required.
- Bring your dairy to room temperature. Cold butter or cream added to boiling hot caramel will cause violent splattering and can shock the sugar into crystallizing. Give both at least 20 minutes out of the fridge.
- Don’t walk away. Caramelizing sugar goes from perfect to burned in a matter of seconds. Stay at the stove with your full attention from the moment the sugar hits the pan.
- Don’t stir once the sugar is fully melted. Stirring after the sugar liquefies can promote crystal formation. Instead, gently swirl the pan if you need to even out the color.
- If it seizes, don’t panic. If the caramel forms lumps when you add the butter or cream, simply put the pan back on low heat and keep stirring. The lumps will melt back into the sauce.
- Use pure granulated white sugar. Brown sugar or coconut sugar can work but produce a butterscotch-style sauce rather than true caramel. For the classic version, stick with white granulated sugar.
This pairs beautifully with a warm Toffee to round out your candy-making skills.
Serving Suggestions
Once you have a jar of this golden sauce in the fridge, the possibilities are genuinely endless. Here are some of the best ways to use it.
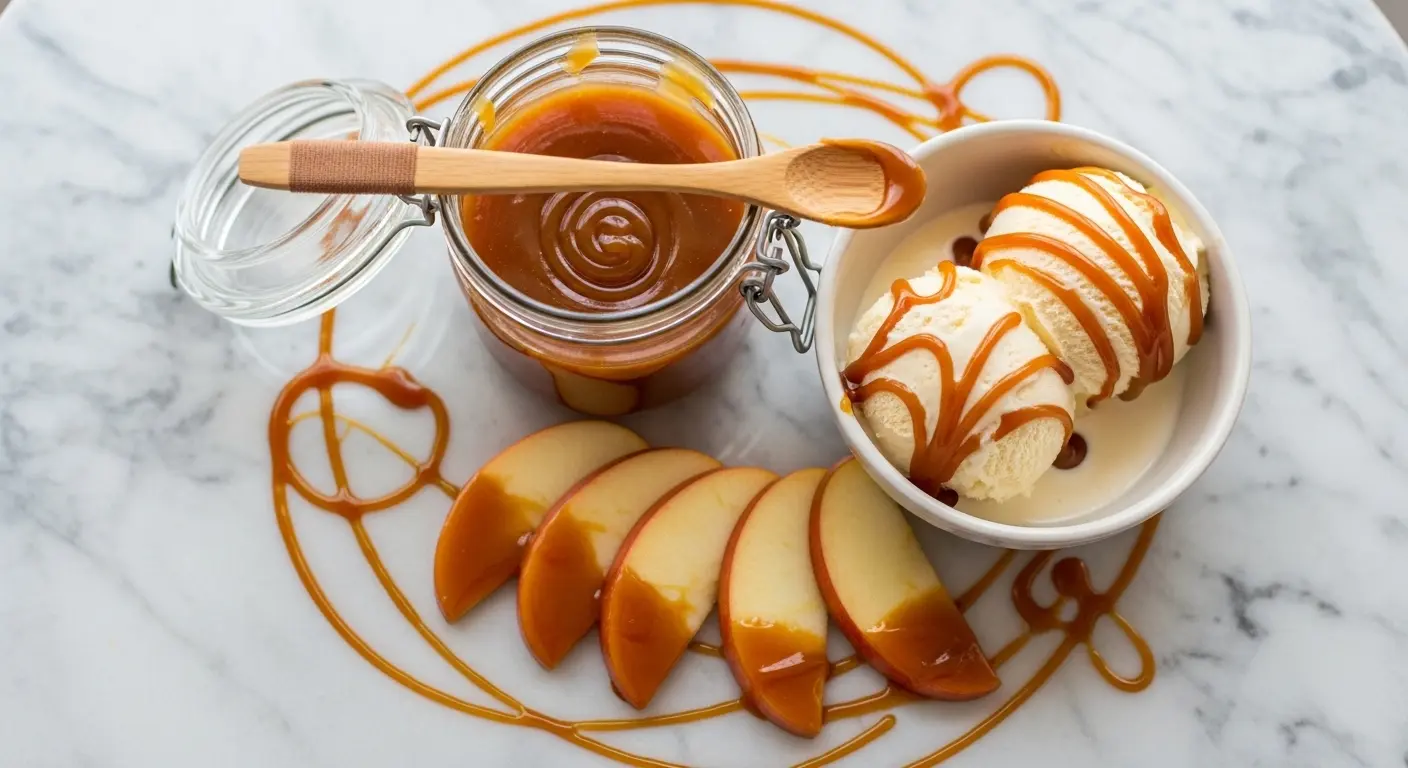
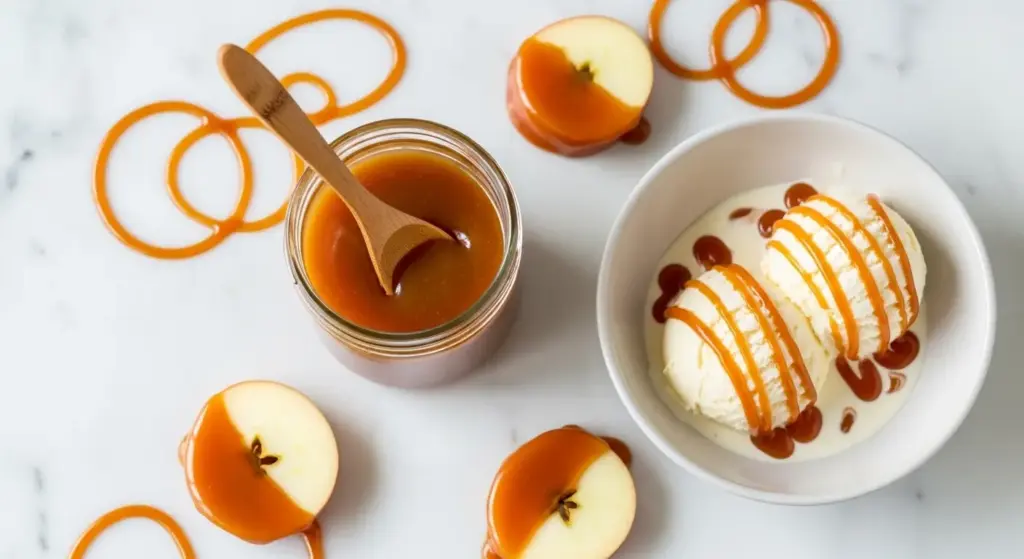
Drizzle it generously over a scoop of vanilla ice cream with a sprinkle of flaky sea salt for a simple but stunning dessert. The contrast between cold ice cream and warm caramel is absolutely perfect.
Use it as a topping, dip, or filling for a wide variety of baked goods and desserts:
- Hot Fudge Sundae with caramel sauce as a secondary drizzle
- Bread Pudding with caramel poured over each warm serving
- Pumpkin Cheesecake with caramel drizzled on top before serving
- Peach Cobbler with a generous caramel pour over the golden crust
- Stirred into morning coffee or lattes for a homemade caramel latte
- As a dip for fresh apple slices, pear wedges, or pretzel rods
- Spooned between layers of a layer cake for a salted caramel filling
Variations to Try
Once you’ve mastered the base recipe, there are several easy and delicious ways to customize this sauce. Each variation builds on the same technique with just a small tweak.
- Salted Caramel Sauce: Use the full ½ teaspoon of fine sea salt and finish with a pinch of flaky fleur de sel on top after plating. This is the most popular variation and the one most people fall in love with.
- Bourbon Caramel Sauce: Add 1 to 2 tablespoons of your favorite bourbon along with the vanilla extract. The whiskey adds a smoky, oaky depth that pairs beautifully with apple desserts.
- Vanilla Bean Caramel: Split a vanilla bean and scrape the seeds directly into the sauce along with or instead of the vanilla extract. The resulting flavor is fragrant and floral.
- Brown Butter Caramel: Brown the butter in a separate pan before adding it to the caramel. The nutty, roasted notes of brown butter make this version extraordinarily rich and complex.
- Dairy-Free Caramel: Substitute the butter with vegan butter and the heavy cream with full-fat coconut cream. The coconut version has a subtle tropical note that works beautifully with tropical fruit desserts.
You might also enjoy: Easy Crème Brûlée
Storage and Reheating
Caramel sauce stores incredibly well, making it a great make-ahead item. One batch can last you through multiple dessert occasions with zero extra effort.
- Room temperature: Freshly made sauce can sit at room temperature for up to 2 hours while it cools, but should not be left out indefinitely.
- Refrigerator: Store in an airtight glass jar or container in the refrigerator for up to 2 weeks. The sauce will thicken significantly when chilled.
- Freezer: Pour cooled caramel into a freezer-safe container and freeze for up to 3 months. Thaw overnight in the refrigerator before using.
- Reheating: To bring refrigerated caramel back to a pourable consistency, microwave it in 15 to 20 second intervals, stirring between each, until warm and fluid. Alternatively, place the jar in a bowl of warm water and let it slowly warm through without overheating.
- Important: Never seal a hot jar of caramel. Let it cool slightly and vent before capping to prevent moisture buildup inside the jar.
Read Also: Dutch Apple Pie Recipe
Nutritional Facts
The following is an estimate for the full batch of caramel sauce (approximately 1 cup / 240ml total yield), based on standard ingredients. Serving size is roughly 2 tablespoons.
| Nutrient | Per Serving (2 tbsp) |
|---|---|
| Calories | ~130 kcal |
| Total Fat | 7g |
| Saturated Fat | 4.5g |
| Cholesterol | 22mg |
| Sodium | 90mg (with ½ tsp salt) |
| Total Carbohydrates | 18g |
| Sugars | 17g |
| Protein | 0.2g |
Note: Nutritional values are estimates and will vary depending on exact amounts used and specific brands.
This recipe pairs wonderfully with a classic Easy Pecan Pie for the holidays.
Health Benefits of Key Ingredients
While caramel sauce is certainly a treat, a few of its core ingredients do carry some meaningful nutritional benefits worth noting.
Moderation is key with any sweet sauce, but understanding what’s in your food helps you make mindful choices.
Here’s a look at what each key ingredient brings to the table:
- Butter (unsalted): Butter contains fat-soluble vitamins A, D, E, and K2, which play important roles in bone health, immune function, and vision. It also contains butyrate, a short-chain fatty acid that supports gut health. Using unsalted butter allows you to control the sodium level of the recipe precisely.
- Heavy cream: A source of calcium and vitamin D, heavy cream also provides conjugated linoleic acid (CLA), a fatty acid that some research suggests may have anti-inflammatory properties. The fat content in cream is what gives caramel sauce its signature silky, coating texture.
- Granulated sugar: Sugar provides quick-release energy in the form of simple carbohydrates. While it should be consumed in moderation, the small amount per serving (roughly 17g) in a 2-tablespoon portion fits comfortably within a balanced diet when enjoyed occasionally.
- Vanilla extract: Pure vanilla extract contains small amounts of antioxidants, including vanillin, which has been studied for anti-inflammatory and antioxidant properties. It also adds significant flavor complexity, meaning a little goes a long way.
- Sea salt: A pinch of sea salt does more than balance sweetness. It contains trace minerals like magnesium, potassium, and calcium that are absent from heavily processed table salt. Sea salt also enhances the perception of sweetness, allowing you to appreciate more flavor with less sugar overall.
You might also enjoy: Honey Butter
Frequently Asked Questions
1. Why did my caramel sauce turn grainy or crystallize?
Crystallization is the most common issue with caramel, and it usually happens for one of a few reasons.
Stirring the sugar too vigorously after it starts to melt can encourage crystal formation. So can having any residue or moisture in your pan before you begin. If your caramel does seize up, add 2 to 3 tablespoons of warm water to the pan and stir over low heat until the crystals dissolve back in.
2. Can I use brown sugar instead of white sugar?
You can, but the result will be butterscotch sauce rather than true caramel sauce.
Brown sugar already contains molasses, which changes both the flavor and the way the sugar behaves when heated. It produces a deliciously rich, toffee-like sauce but skips the caramelization step entirely. If you want authentic caramel flavor, stick with granulated white sugar.
3. My caramel sauce is too thin. What did I do wrong?
Not necessarily anything. Caramel sauce is very thin and pourable when hot, and this is completely normal.
As it cools to room temperature it thickens noticeably, and after refrigeration it becomes quite thick, almost like a soft spreadable paste. If it still seems thin after cooling, it may have needed slightly longer on the stove. Next time, cook the sugar mixture one minute longer before adding the cream.
4. Can I double this recipe?
Yes, you can double the recipe with great success, but be aware that more sugar means it will take longer to caramelize, and the bubbling when you add butter and cream will be more intense.
Use a larger, deeper saucepan (at least 4 quarts) to give yourself plenty of room for the bubble-up. Be especially careful and patient, and do not rush the caramelization by cranking up the heat.
5. Is this caramel sauce the same as dulce de leche?
No, these are two very different things despite tasting somewhat similar.
Caramel sauce is made by caramelizing pure sugar before adding butter and cream, which produces that characteristic deep, slightly bittersweet flavor. Dulce de leche is made by slowly cooking sweetened condensed milk until it browns through a Maillard reaction. Both are delicious, but they have distinct flavors and textures, and are not interchangeable in most recipes.
Read Also: Classic Pecan Pie Recipe
Final Thoughts
Homemade caramel sauce is one of those recipes that genuinely changes the way you think about cooking from scratch.
It takes 15 minutes, uses ingredients you already own, and produces something so far beyond anything in a jar that you’ll wonder why you waited this long.
Give this caramel sauce recipe a try this week, and don’t be discouraged if your first batch isn’t perfect. The technique becomes intuitive quickly, and the reward is absolutely worth the learning curve.
Drop a comment below and let us know how your caramel turned out, what you drizzled it on first, or any fun variations you tried. We love hearing from you!
Recommended:
- Hot Fudge Cake
- Easy Tiramisu
- Banana Pudding
- Chocolate Pudding
- Classic Pumpkin Pie
- Easy Apple Crisp
- Teriyaki Sauce
- Bechamel Sauce
- BBQ Sauce
- Hollandaise Sauce


