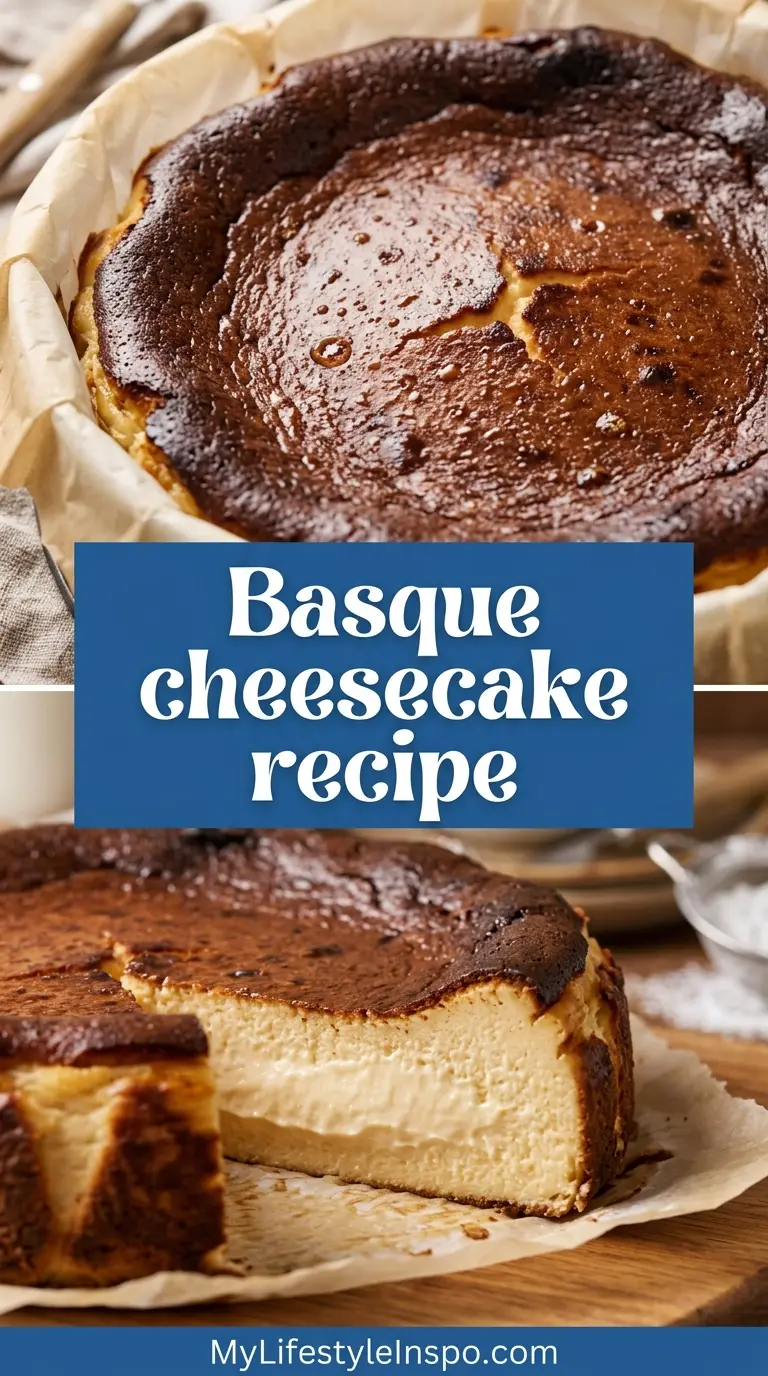
If you’ve been looking for a basque cheesecake recipe that actually delivers on its promise, you’ve come to the right place. This Spanish-born dessert is famous for its deeply caramelized, almost “burnt” top and impossibly creamy, custard-like center — and the best part? It’s shockingly simple to make.
No crust. No water bath. No stressing over cracks.
Basque cheesecake (also called tarta de queso or burnt Basque cheesecake) originated at La Viña restaurant in San Sebastián, Spain, in 1990. It was created by chef Santiago Rivera, and in the decades since, it’s taken over bakeries, home kitchens, and social media feeds worldwide.
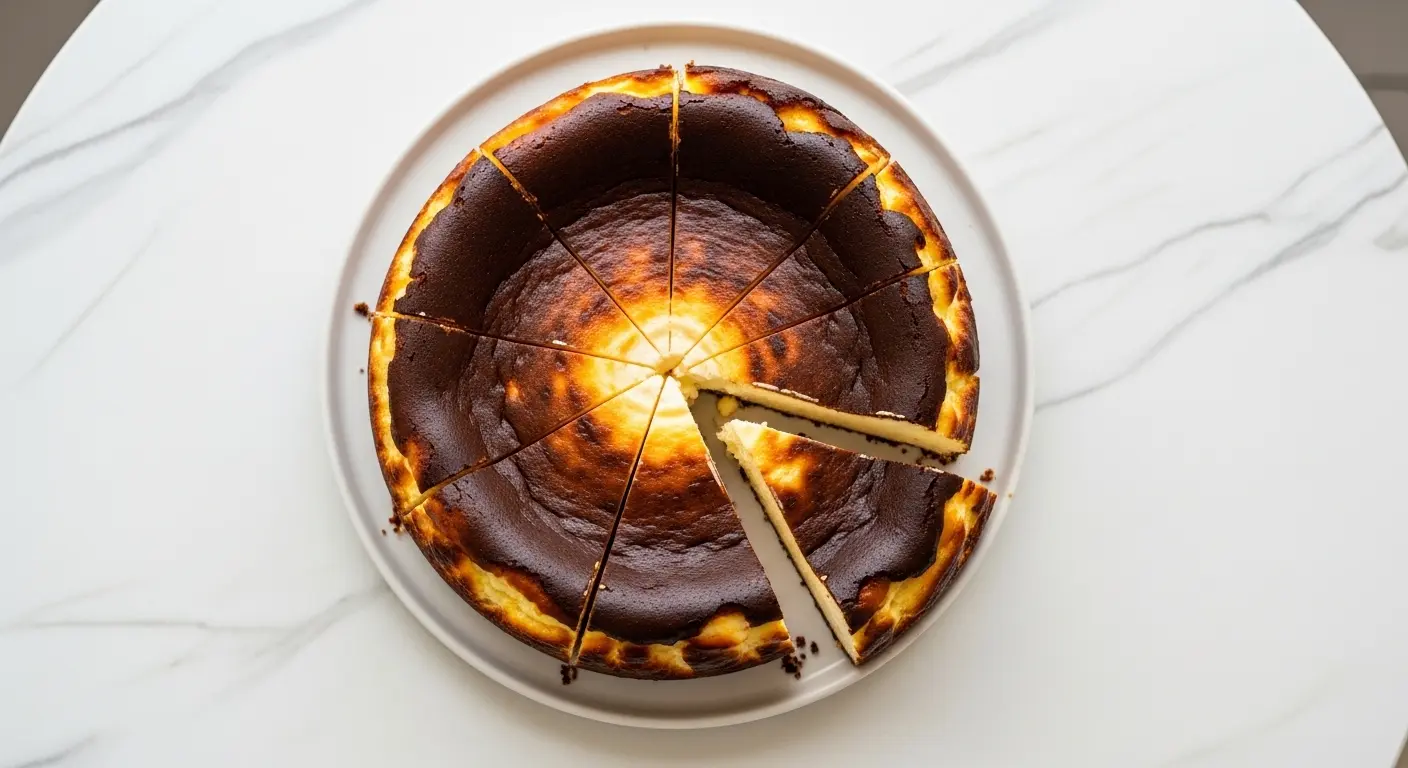
Unlike a classic New York-style cheesecake, which is dense, smooth, and careful, the Basque version is intentionally rustic. You bake it at a high temperature — around 400°F to 425°F (200°C to 220°C) — which causes the top to caramelize deeply and develop rich, toffee-like notes while the interior stays soft and almost mousse-like.
That contrast is everything.
The ingredients are minimal: full-fat cream cheese, eggs, heavy cream, sugar, a small amount of all-purpose flour, and vanilla extract. The key is using room-temperature ingredients so everything blends smoothly and bakes evenly. Cold cream cheese leads to lumps; lumps lead to uneven texture — and that’s the one thing you actually want to avoid with this otherwise forgiving recipe.
This is the version most people expect and love: creamy, jiggly in the center when it comes out of the oven, with a dramatic dark top that looks like it belongs in a café in the Basque Country.
You might also enjoy: New York Cheesecake
Why You’ll Love This Basque Cheesecake Recipe
This dessert has a way of turning first-timers into devoted fans with one single slice.
The flavor is rich, tangy, and gently sweet — almost like the best cheesecake you’ve ever had, but lighter and more sophisticated.
The texture is where it really sets itself apart. The inside is soft, almost custardy, and melts on your tongue in a way that dense American-style cheesecakes just don’t.
Baking it at high heat means you skip the slow, anxious water bath entirely. The caramelized top actually protects the cheesecake from over-drying on the outside.
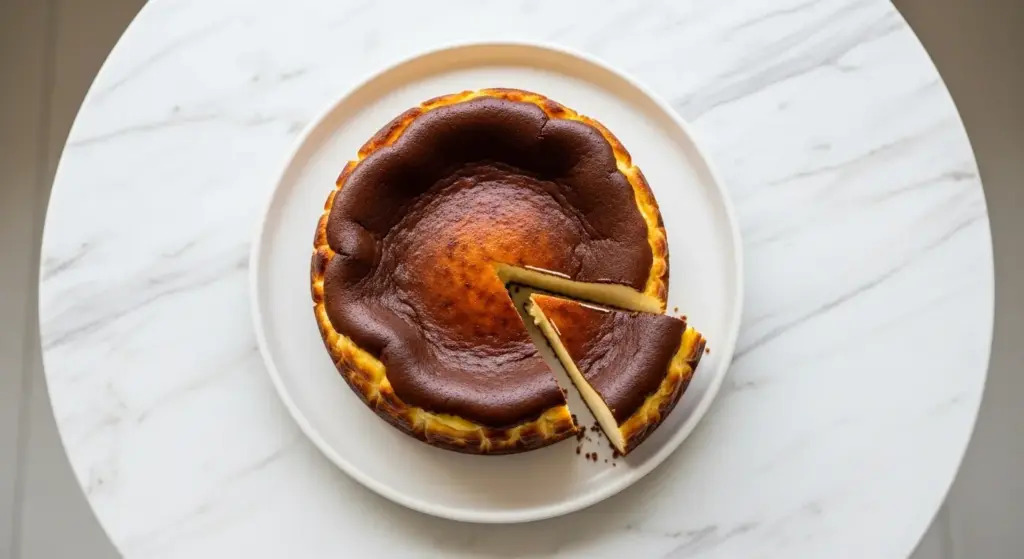
Cracks? Not your problem here. The rustic, slightly sunken appearance is part of its charm — embrace it.
It’s a natural make-ahead dessert. The flavor and texture improve after a night in the fridge, which makes it ideal for entertaining.
You don’t need a stand mixer, a springform pan collar, or any special technique. Just a bowl, a hand mixer, and an oven.
- Minimal ingredients — you likely have most on hand already
- No crust prep, no water bath, no complicated baking steps
- Visually stunning without any decoration needed
- Deeply caramelized top with contrasting creamy interior
- Perfect for dinner parties, birthdays, or a weekend baking project
- Gluten-free adaptable by swapping flour for cornstarch
- Scales easily for a larger or smaller crowd
Read Also: Japanese Cheesecake Recipe
Ingredients
This basque cheesecake recipe uses just a handful of simple ingredients, but their quality truly matters. Use full-fat cream cheese and real heavy cream for the best results — low-fat substitutes won’t give you the same rich, custardy texture.
- 2 lbs (900g) full-fat block cream cheese, at room temperature
- 1 cup (200g) granulated white sugar
- 5 large eggs, at room temperature
- 2 cups (480ml) heavy whipping cream, at room temperature
- 1 teaspoon pure vanilla extract
- ¼ cup (30g) all-purpose flour, sifted
- ¼ teaspoon fine salt
Read Also: Easy Creme Brulee Recipe
Kitchen Equipment Needed
You don’t need a lot of fancy equipment for this recipe, but a few key tools will make the process much smoother and produce a better result from start to finish.
- 9-inch springform pan
- Electric hand mixer or stand mixer with paddle attachment
- Large mixing bowl
- Parchment paper (enough for two overlapping sheets)
- Fine mesh sieve (for straining batter, optional but recommended)
- Rubber spatula
- Measuring cups and spoons
- Cooling rack
- Knife and offset spatula for serving
Another favorite for Spanish-inspired desserts: Easy Tiramisu Recipe
Recommended Products for This Recipe
These products come highly recommended based on quality and performance — they’ll make a real difference in your Basque cheesecake results.
1. Philadelphia Full-Fat Brick Cream Cheese
Philadelphia cream cheese is the gold standard for Basque cheesecake, and it’s actually the brand used at La Viña — the restaurant where this dessert was born. The brick-style format (not the tub) has lower moisture content, which gives you that perfectly dense-yet-creamy texture without the cheesecake turning watery. It’s the one ingredient worth not skimping on.
2. Cuisinart 9-Inch Non-Stick Springform Pan
A good springform pan with a tight seal is essential here — the high baking temperature means any leaks can become a smoky mess. Cuisinart’s version has a reliable latch, even heat distribution, and a non-stick surface that makes releasing your cheesecake clean and easy. It’s also dishwasher-safe for effortless cleanup.
3. OXO Good Grips Fine Mesh Strainer
Passing your cheesecake batter through a fine mesh strainer before baking is the pro move that separates a good Basque cheesecake from a great one. It removes any lumps and delivers a silky-smooth batter that bakes into that signature velvety texture. OXO’s fine mesh strainer is durable, easy to handle, and works beautifully for both sweet and savory recipes.
4. KitchenAid Hand Mixer
While you can make this cheesecake with a stand mixer, a reliable hand mixer gives you more control and flexibility. The KitchenAid hand mixer has multiple speed settings, which lets you start slow (to avoid flour clouds) and build up, preventing overmixing that can incorporate too much air into the batter. Overmixing is one of the most common mistakes with Basque cheesecake — a hand mixer with precision control helps you avoid it.
5. Nielsen-Massey Pure Vanilla Extract
Vanilla plays a supporting but crucial role in Basque cheesecake — it rounds out the cream cheese tang and adds warmth to the caramelized flavor. Nielsen-Massey is considered one of the best vanilla extracts on the market, with real vanilla bean specks and a complex, deep flavor that grocery store imitation vanilla simply can’t replicate.
This pairs beautifully with a slice of Classic Tiramisu at the same dinner table — both desserts share that elegant European café spirit.

Step-by-Step Instructions
Step 1: Bring All Ingredients to Room Temperature
- Remove the cream cheese from the refrigerator at least 2 to 3 hours before you begin baking.
- Take out the eggs and heavy cream about 1 hour before baking.
- Room-temperature cream cheese is essential — cold cream cheese will not blend smoothly, resulting in a lumpy batter that affects the final texture.
- If you’re short on time, microwave the cream cheese on 50% power for 20-second intervals until just softened (not melted).
- To warm eggs quickly, place them in a bowl of warm (not hot) water for 5 minutes.
Step 2: Preheat the Oven and Prepare the Pan
- Place your oven rack in the center position and preheat the oven to 400°F (205°C). Allow at least 20 to 30 minutes for a thorough preheat — a properly heated oven is key to achieving that deeply caramelized top.
- Take two large sheets of parchment paper and scrunch them up in your hands, then unfold them. This crumpling technique makes the paper more pliable and easier to press into the pan.
- Press the parchment sheets into your 9-inch springform pan in a crisscross pattern, making sure the paper extends at least 2 to 3 inches above the rim of the pan on all sides.
- No greasing is needed — the weight of the batter will hold the paper in place during baking.
Step 3: Beat the Cream Cheese Until Smooth
- Place the room-temperature cream cheese in a large mixing bowl.
- Using your hand mixer (or stand mixer fitted with the paddle attachment), beat the cream cheese on medium speed for about 2 minutes, until it is completely smooth and lump-free.
- Stop and scrape down the sides and bottom of the bowl with a rubber spatula at least once during this step.
- Starting with perfectly smooth cream cheese is the foundation of a great basque cheesecake — don’t rush this step.
Step 4: Add the Sugar
- With the mixer running on medium-low speed, add the granulated sugar to the cream cheese in a slow, steady stream.
- Beat for another 1 to 2 minutes until the sugar is fully incorporated and the mixture looks light and slightly fluffy.
- Scrape down the sides of the bowl once more to make sure everything is evenly mixed.
Step 5: Add the Eggs One at a Time
- Crack your eggs into a small bowl first to check for shells.
- With the mixer on low speed, add the eggs one at a time to the cream cheese mixture, beating well after each addition.
- Allow each egg to fully incorporate before adding the next — rushing this step can cause the batter to break or become uneven in texture.
- After all 5 eggs are in, you’ll notice the batter becomes looser and more liquid. That’s completely normal and expected.
Step 6: Add the Heavy Cream, Vanilla, and Salt
- With the mixer on low speed, slowly pour in the heavy cream, followed by the vanilla extract and the fine salt.
- Mix until everything is just combined — don’t overmix at this stage, as excess air in the batter can cause the cheesecake to crack or dome unevenly during baking.
- Scrape down the bowl one final time.
Step 7: Sift and Fold in the Flour
- Hold a fine mesh sieve over the bowl and sift the all-purpose flour directly into the batter.
- Using your rubber spatula (not the mixer), gently fold the flour into the batter with slow, sweeping strokes until no dry streaks remain.
- Folding by hand rather than using the mixer prevents overdeveloping the gluten in the flour, which would make the cheesecake denser than desired.
Step 8: Strain the Batter (Optional but Recommended)
- Place a fine mesh sieve over a large measuring cup or pitcher with a pour spout.
- Pour the batter through the sieve slowly, using a spoon to push it through if needed.
- This step removes any remaining lumps and produces an ultra-smooth, silky batter that will bake into that signature velvety interior.
- If you’re confident your batter is completely lump-free, you can skip this step — but it takes just 2 minutes and makes a noticeable difference.
Step 9: Pour and Bake
- Pour the strained batter into your parchment-lined springform pan. It should fill the pan fairly full — that’s fine.
- Give the pan a gentle tap on the counter two or three times to release any large air bubbles.
- Place the pan in the preheated oven on the center rack.
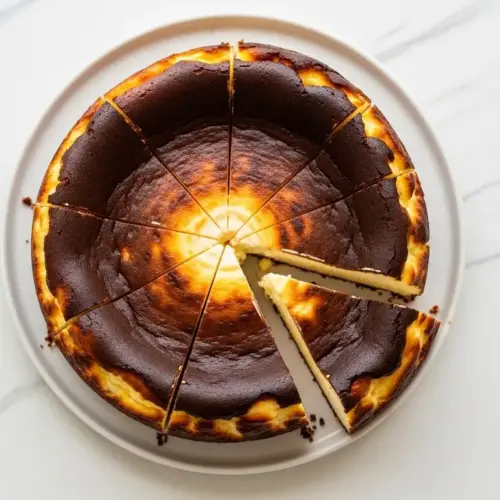
- Bake for 50 to 60 minutes, until the top is deeply caramelized and dark (it should look quite brown — don’t panic), and the edges are set but the center still jiggles like gelatin when you gently shake the pan.
- The internal temperature should reach around 150°F to 160°F (65°C to 71°C) in the center for a creamy, custardy texture — use an instant-read thermometer if you have one.
- Do not open the oven door during baking, especially in the first 40 minutes, as heat loss can affect browning and rise.
Step 10: Cool and Chill
- Remove the cheesecake from the oven and place it (still in the pan) on a cooling rack.
- Let it cool to room temperature — this takes about 2 hours. The cheesecake will sink dramatically in the center as it cools. That dramatic sink is totally normal and part of what gives it that beautiful, rustic look.
- Once fully cooled, refrigerate the cheesecake (uncovered) for at least 4 hours, ideally overnight.
- Do not remove the parchment paper until you’re ready to serve — it helps the cheesecake hold its shape during chilling.
Step 11: Unmold and Serve
- When ready to serve, unlatch the springform pan and carefully peel the parchment paper away from the sides.
- Transfer to a serving plate or board.
- Use a sharp knife dipped in warm water and wiped clean between cuts for the cleanest slices.
- Serve at room temperature for the softest, creamiest texture, or cold directly from the fridge for a firmer bite.
For another elegant baked dessert, check out this Easy Creme Brulee — it’s just as impressive with equally minimal effort.
Tips for Success
Even though Basque cheesecake is one of the most forgiving desserts out there, a few smart habits will take your results from good to outstanding every single time.
- Always use room-temperature ingredients. This is the single most important tip. Cold cream cheese creates lumps, and lumps don’t bake out — they stay in the finished cheesecake. Give yourself time to plan ahead.
- Don’t reduce the sugar. The sugar is what caramelizes and creates that iconic dark top. Significantly reducing the amount will result in a pale, underdeveloped surface.
- Don’t overbake. The center should still be visibly jiggly when you pull it from the oven. It will firm up considerably as it cools. An overbaked Basque cheesecake loses its silky, mousse-like quality.
- Fold the flour in by hand. Using the mixer for the flour step risks overmixing, which makes the batter tougher and can lead to a denser texture.
- Preheat your oven fully. Allow at least 20 to 30 minutes for the oven to reach temperature before placing the cheesecake inside. An under-heated oven means slower caramelization and an uneven bake.
- Strain your batter. This one step ensures the smoothest possible interior texture and takes less than 2 minutes.
- Make it the day before. Overnight chilling not only firms the cheesecake to the perfect sliceable consistency — it deepens the flavor. Day-two Basque cheesecake is even better than day-one.
Another baked treat: Classic Apple Crisp Recipe
Serving Suggestions
Basque cheesecake is so bold and complete on its own that it genuinely doesn’t need much — and in San Sebastián, it’s traditionally served plain on a plate, nothing else.
That said, a few thoughtful accompaniments can elevate the experience beautifully.
- Thin slices served at room temperature with a glass of Pedro Ximénez or Sauternes dessert wine — the classic pairing from Basque Country
- A small spoonful of Strawberry Sauce alongside each slice, which cuts through the richness with bright acidity
- Fresh seasonal berries such as raspberries, blackberries, or strawberries scattered over the plate
- A light drizzle of Caramel Sauce for extra indulgence
- A dusting of powdered sugar just before serving for a simple, elegant presentation
- A cold brew coffee or a strong espresso on the side — the bitterness plays perfectly against the caramelized sweetness
- Whipped cream on the side (not on top) for those who want a touch of lightness
- Paired with a Fruit Tart on a dessert platter for a party spread
For another crowd-pleasing dessert: Easy Tiramisu
Variations to Try
Once you’ve nailed the classic basque cheesecake recipe, there’s a whole world of flavor variations worth exploring — all built on the same simple, foolproof base.
- Matcha Basque Cheesecake: Whisk 2 tablespoons of high-quality matcha powder into the batter along with the sugar for a earthy, vibrant green version with a beautifully complex flavor.
- Chocolate Basque Cheesecake: Melt 4 ounces of dark chocolate and fold it into the batter after the eggs for a rich, bittersweet version with an even more dramatic appearance.
- Lemon Basque Cheesecake: Add 2 tablespoons of fresh lemon zest and 1 tablespoon of lemon juice to the batter for a bright, citrusy take that feels especially refreshing in warmer months.
- Pumpkin Basque Cheesecake: Fold in ½ cup of pumpkin puree and a teaspoon of pumpkin spice for a seasonal fall version — it pairs beautifully with a dollop of whipped cream.
- Coffee Basque Cheesecake: Dissolve 2 teaspoons of instant espresso powder in the vanilla extract before adding it to the batter. The result is a subtly coffee-forward cheesecake that pairs perfectly with a dessert wine.
- Honey and Sea Salt: Replace half the granulated sugar with good-quality honey and finish the top with a pinch of flaky sea salt after baking for a sophisticated, savory-sweet version.
- Gluten-Free Version: Simply swap the all-purpose flour for an equal amount of cornstarch. The result is equally creamy with a slightly smoother texture.
Read Also: Blueberry Cheesecake Recipe
Storage and Reheating
Basque cheesecake stores beautifully, and many people argue it’s actually at its best the day after baking when the flavors have had time to deepen and the texture has fully set.
- Refrigerator: Store the cheesecake loosely covered with plastic wrap or in an airtight container in the refrigerator for up to 5 days.
- Freezer: To freeze, wrap individual slices tightly in plastic wrap followed by a layer of aluminum foil, and place in a freezer-safe bag. Frozen slices keep well for up to 3 months.
- Thawing from Frozen: Transfer the wrapped slice to the refrigerator and allow it to thaw overnight, or for at least 4 to 5 hours. For the best texture, let it sit at room temperature for 15 minutes before eating.
- Serving from Cold: For the creamiest texture, remove refrigerated cheesecake from the fridge 15 to 30 minutes before serving. Cold cheesecake is firmer; room-temperature cheesecake is softer and more custardy.
- Reheating: Basque cheesecake is not meant to be reheated — it’s best served cold or at room temperature. Microwaving will alter the texture significantly and is not recommended.
Read Also: No Bake Cheesecake Recipe
Nutritional Facts
Based on 10 servings per 9-inch cheesecake. Values are approximate.
| Nutrient | Per Serving |
|---|---|
| Calories | ~480 kcal |
| Total Fat | ~40g |
| Saturated Fat | ~24g |
| Cholesterol | ~180mg |
| Sodium | ~300mg |
| Total Carbohydrates | ~22g |
| Sugars | ~20g |
| Protein | ~8g |
| Calcium | ~110mg |
Nutritional values will vary based on specific brands and exact ingredient amounts used.
You might also enjoy: Easy Carrot Cake Recipe with Cake Mix
Health Benefits of Key Ingredients
Basque cheesecake is an indulgent dessert — but its core ingredients do carry some genuine nutritional value worth knowing about.
This isn’t a “health food,” but it’s also not empty calories when you use quality, real-food ingredients.
- Cream cheese is a source of calcium and vitamin A, both of which support bone health and vision. Full-fat dairy also contains conjugated linoleic acid (CLA), a fatty acid that some research links to reduced inflammation.
- Eggs are one of the most complete protein sources available, containing all essential amino acids. They also deliver choline, which is critical for brain function and liver health, along with vitamins D, B12, and selenium.
- Heavy cream provides fat-soluble vitamins A, D, E, and K. These vitamins require dietary fat to be properly absorbed, making full-fat dairy a more effective vehicle for them than low-fat alternatives.
- Vanilla extract (pure, not imitation) contains small amounts of antioxidants and has been studied for its mild anti-inflammatory properties.
Key nutrient highlights:
- Eggs provide complete protein and brain-supporting choline
- Full-fat dairy delivers fat-soluble vitamins A, D, E, and K
- Cream cheese contributes calcium for bone and dental health
- Pure vanilla extract adds antioxidant compounds without artificial additives
- The flour provides a small amount of structure-building carbohydrates that help the cheesecake set
Read Also: Pumpkin Cheesecake Recipe
Frequently Asked Questions
1. Why is my Basque cheesecake not dark on top?
Your oven temperature is likely too low, or the oven was not preheated long enough.
Allow at least 25 to 30 minutes of preheating time before placing the cheesecake inside — especially if your oven runs cool. If the top still isn’t darkening after 45 minutes, switch to the broiler on low for 1 to 2 minutes and watch it carefully, as it can go from brown to burnt very quickly.
2. Is Basque cheesecake supposed to be jiggly when it comes out of the oven?
Yes, absolutely — that jiggle is exactly what you want.
The center should wobble like gelatin when you take it out of the oven. It will continue to cook from residual heat and then firm up significantly as it cools and chills. A perfectly still center when it comes out of the oven usually means it’s been overbaked.
3. Can I make this recipe without a springform pan?
You can, but a springform pan makes removing and serving the cheesecake much easier.
If you don’t have one, use a deep 9-inch cake pan lined generously with parchment paper, making sure the parchment extends well above the rim. Lift the cheesecake out using the parchment handles after it has been fully chilled.
4. Do I need to use all-purpose flour, or can I leave it out?
You can leave it out or substitute cornstarch, and the cheesecake will still set.
The original La Viña recipe does include a small amount of flour, which helps provide structure and contributes to the slightly denser-yet-creamy texture. Omitting it or swapping for cornstarch gives a marginally more custardy, meltier result — some people actually prefer this version.
5. How do I know when my Basque cheesecake is done baking?
Look for a deeply caramelized top and set edges, with a center that still jiggles noticeably.
If you have an instant-read thermometer, the center of the cheesecake should read between 150°F and 160°F (65°C to 71°C). Don’t wait for the center to look fully set in the oven — by then, it will be overbaked. Trust the jiggle.
For another delicious baked treat to serve alongside: Best Chocolate Chip Cookies Recipe
Basque Cheesecake
Equipment
- 9-inch springform pan
- Electric hand mixer or stand mixer with paddle attachment
- Large mixing bowl
- Parchment paper - enough for two overlapping sheets
- Fine-mesh sieve - optional but recommended for straining batter
- Rubber spatula
- Measuring cups and spoons
- Cooling rack
- Knife and offset spatula - for serving
- Instant-read thermometer - optional
Ingredients
- 2 lbs full-fat block cream cheese - 900g, at room temperature
- 1 cup granulated white sugar - 200g
- 5 large eggs - at room temperature
- 2 cups heavy whipping cream - 480ml, at room temperature
- 1 teaspoon pure vanilla extract
- ¼ cup all-purpose flour - 30g, sifted
- ¼ teaspoon fine salt
Instructions
- Bring cream cheese, eggs, and heavy cream to room temperature (cream cheese for 2-3 hours, eggs and cream for 1 hour).
- Preheat oven to 400°F (205°C). Crumple two large sheets of parchment paper, then press into a 9-inch springform pan with paper extending 2-3 inches above the rim on all sides.
- Beat room-temperature cream cheese on medium speed for about 2 minutes until completely smooth and lump-free, scraping down the bowl once.
- Add granulated sugar in a slow, steady stream and beat for 1-2 minutes until fully incorporated and the mixture looks light and slightly fluffy.
- Add eggs one at a time on low speed, beating well after each addition until fully incorporated before adding the next.
- Slowly pour in heavy cream, then add vanilla extract and fine salt. Mix until just combined, scraping down the bowl once more.
- Sift all-purpose flour directly into the batter and gently fold with a rubber spatula until no dry streaks remain.
- Strain the batter through a fine mesh sieve into a large measuring cup for an ultra-smooth, silky texture.
- Pour batter into the parchment-lined pan and gently tap on the counter to release air bubbles. Bake for 50-60 minutes until deeply caramelized on top and the center still jiggles like gelatin.
- Cool in the pan on a rack for 2 hours (the center will sink dramatically), then refrigerate uncovered for at least 4 hours, preferably overnight.
- Unlatch the springform pan, peel away parchment, and transfer to a serving plate. Cut with a sharp knife dipped in warm water for clean slices.
Notes
- Room-temperature ingredients are absolutely critical — cold cream cheese creates lumps that won’t bake out. Plan ahead and give yourself 2-3 hours for cream cheese and 1 hour for eggs and cream.
- Don’t reduce the sugar — it’s essential for achieving that deeply caramelized, dark top. A significant reduction will result in a pale, underdeveloped surface.
- Trust the jiggle! The center should wobble like gelatin when you take it out of the oven. It will continue to cook from residual heat and firm up during chilling.
- Fold the flour in by hand rather than using the mixer to prevent overdeveloping gluten, which would make the cheesecake denser than desired.
- Straining the batter takes just 2 minutes and makes a noticeable difference in achieving that signature velvety interior — highly recommended.
- This cheesecake is best made the day before serving — overnight chilling deepens the flavor and firms the texture to the perfect sliceable consistency.
- Serve at room temperature for the softest, creamiest texture, or cold directly from the fridge for a firmer bite.
- For a gluten-free version, substitute the all-purpose flour with an equal amount of cornstarch — the result is equally creamy with a slightly smoother texture.
- Store loosely covered in the refrigerator for up to 5 days. Freeze individual slices wrapped tightly in plastic wrap and foil for up to 3 months.
- The rustic, slightly sunken appearance is part of the charm — embrace the cracks and dark top. This is a dessert that looks intentionally imperfect and absolutely delicious.
Final Thoughts
The basque cheesecake recipe truly earns its reputation as one of the most approachable yet spectacular desserts a home baker can make.
It asks very little of you — a handful of real ingredients, a good preheat, and the patience to let it chill overnight — and gives back something that looks and tastes like it came from a professional kitchen.
The next time you need a dessert that will genuinely impress without stressing you out, pull this recipe out.
Make it the night before, let it chill, and watch it disappear at the table slice by slice.
If you try this recipe, please leave a comment below and let me know how it turned out! Share your photos, tag us on social media, or pass this recipe along to a fellow cheesecake lover — I’d love to see your beautiful caramelized tops.
Recommended:
- Oreo Cheesecake Recipe
- Lemon Cheesecake Recipe
- Strawberry Cheesecake Recipe
- Mini Cheesecake Recipe
- Churro Cheesecake Recipe
- Best Cheesecake Recipe
- Cheesecake Ice Cream Cake Recipe
- Classic Tiramisu Recipe
- Fruit Tart Recipe
- Dutch Baby Recipe


