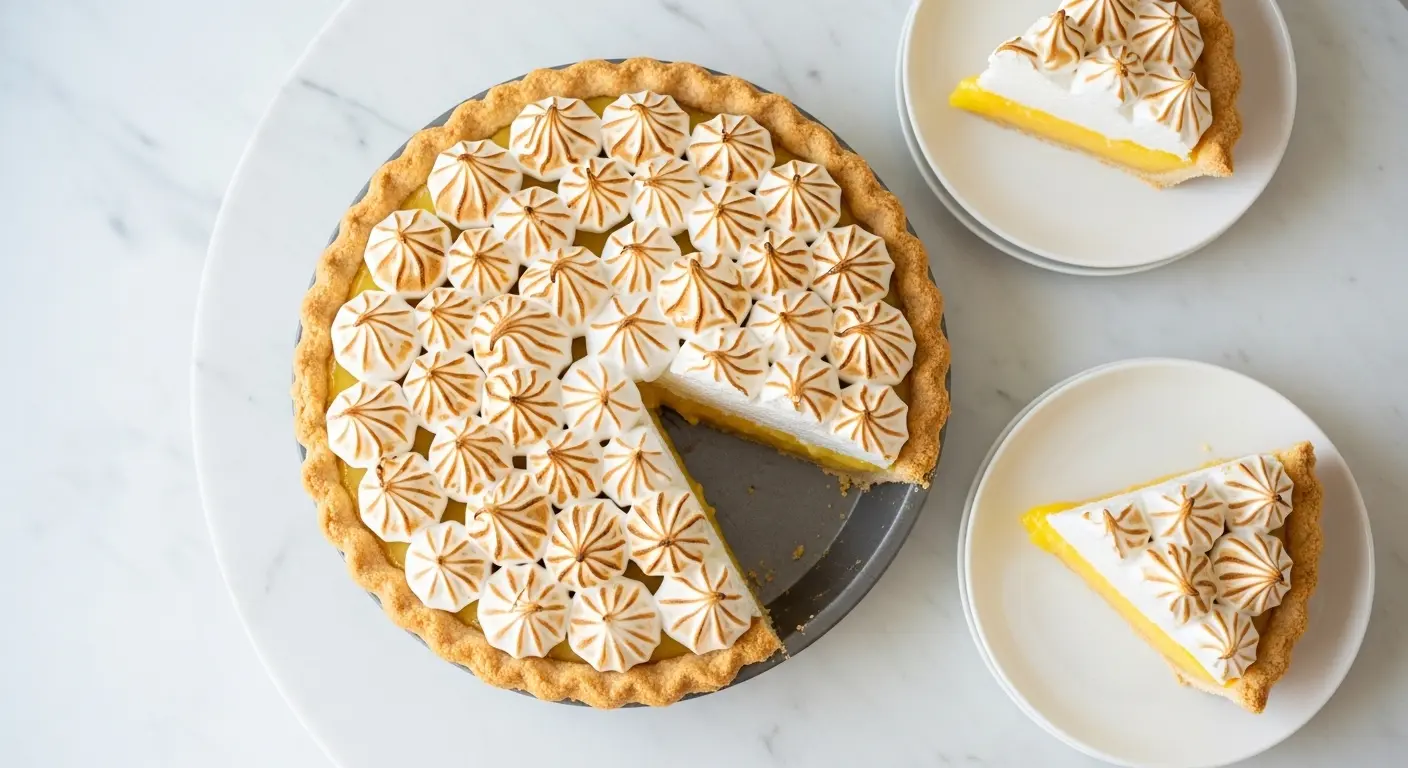
If you’ve been searching for the perfect lemon meringue pie recipe, you’ve landed in the right place.
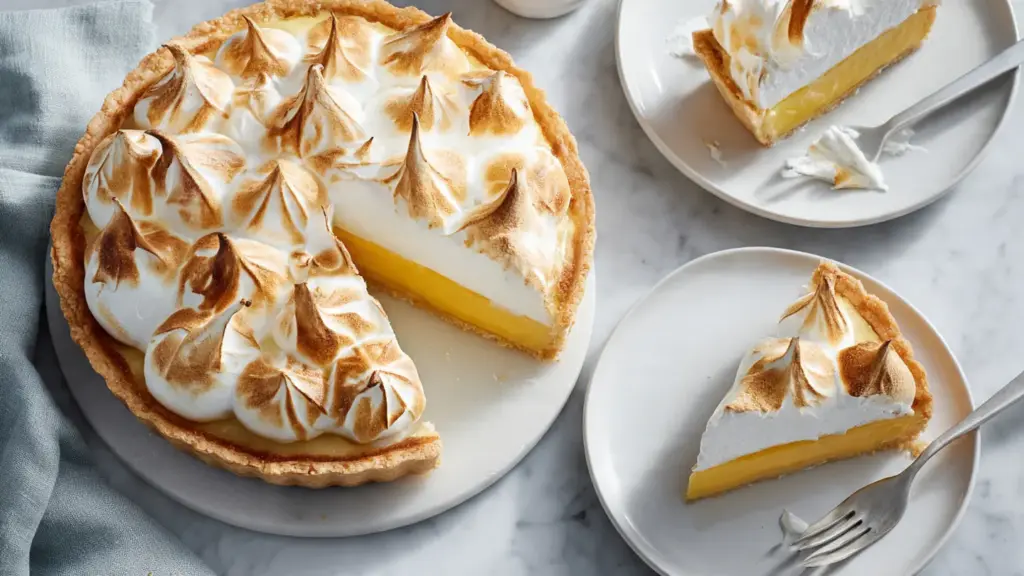
This is the pie that makes people go quiet at the table. That billowy, golden-tipped meringue. That silky, bright yellow lemon filling that’s tart, sweet, and impossibly smooth. And a buttery, flaky crust that holds it all together with dignity.
Lemon meringue pie is one of those classic American desserts that has stood the test of time for good reason.
It’s bold, beautiful, and completely made from scratch. Fresh lemon juice and zest are non-negotiable here because they’re what give the filling that vibrant, real lemon flavor you just cannot replicate from a bottle.
The filling is thickened with cornstarch, which creates that glossy, custardy texture that sets cleanly when sliced. The meringue is made from the egg whites left over after you’ve used the yolks in the filling, which means nothing goes to waste.
Every component has a purpose, and every technique makes a difference.
You might also enjoy: Key Lime Pie Recipe
Why You’ll Love This Lemon Meringue Pie Recipe
This pie is a total showstopper, and it’s more approachable than you might think.
Once you understand the logic behind each step, the whole process clicks together beautifully.
The lemon filling strikes exactly the right balance between tart and sweet. It’s bright and punchy without being overwhelming.
The meringue is fluffy, cloud-like, and lightly toasted on top, which adds a gorgeous visual and a subtle marshmallow-like flavor.
The crust is buttery and flaky, offering just the right amount of richness to anchor the other layers.
Making this pie from scratch means you control every element, from the sweetness level to the height of that meringue.
- Three distinct, complementary layers that each bring something unique
- The filling uses a classic cornstarch-based technique for a smooth, slice-able result
- Meringue is applied over hot filling to prevent weeping and help it bond to the crust
- Fresh lemon juice and zest make the flavor truly sing
- Impressive enough for holidays and dinner parties, yet totally doable at home
Read Also: Boston Cream Pie Recipe
Ingredients
This recipe uses three groups of ingredients, one for each component of the pie. Keep everything prepped and measured before you start, because the filling moves quickly once it’s on the heat.
For the Pie Crust:
- 1 1/4 cups (155g) all-purpose flour
- 1/2 tsp salt
- 1/2 cup (115g) unsalted butter, cold and cubed
- 3–4 tbsp ice water
For the Lemon Filling:
- 1 1/2 cups (300g) granulated sugar
- 1/3 cup (40g) cornstarch
- 1/4 tsp salt
- 1 1/2 cups (360ml) cold water
- 1/2 cup (120ml) fresh lemon juice (from about 3–4 large lemons)
- 1 tbsp lemon zest
- 4 large egg yolks, lightly beaten
- 2 tbsp unsalted butter
For the Meringue:
- 4 large egg whites, at room temperature
- 1/4 tsp cream of tartar
- 1/2 cup (100g) granulated sugar
- Pinch of salt
This pairs wonderfully with a dollop of lightly sweetened whipped cream, much like the topping you’d find on a banana cream pie.
Kitchen Equipment Needed
Having the right tools makes this recipe significantly easier, especially when it comes to the meringue.
- 9-inch (23cm) pie dish (ceramic or glass recommended)
- Rolling pin
- Pie weights or dried beans (for blind baking)
- Stand mixer or hand mixer (essential for stiff-peak meringue)
- Medium saucepan
- Whisk
- Fine mesh strainer (optional, for silky filling)
- Rubber spatula or offset spatula
- Instant-read thermometer (for checking meringue doneness)
- Parchment paper and plastic wrap
- Citrus zester or microplane
- Citrus juicer
- Wire cooling rack
- Pastry brush
The same stand mixer or hand mixer you’d use here also comes in handy for other desserts like the easy creme brulee.
Recommended Products for This Recipe
These are products I genuinely recommend based on their quality, reliability, and the difference they make in the final result.
1. KitchenAid Artisan Stand Mixer
Stiff meringue peaks require sustained, high-speed beating that hand-whisking simply cannot deliver. A stand mixer handles it hands-free, so you can focus on other elements of the recipe. It’s an investment that pays off across dozens of recipes.
2. Microplane Premium Zester Grater
Lemon zest is a key flavor driver in this recipe, and a quality microplane zester removes only the fragrant outer layer without digging into the bitter white pith. The difference in flavor from well-zested lemons is noticeable.
3. Emile Henry Ceramic Pie Dish
Ceramic conducts heat evenly, which means your crust bakes more uniformly without hot spots that can cause uneven browning. The Emile Henry dish also goes beautifully from oven to table for serving.
4. OXO Good Grips Glass Mixing Bowls
Grease-free bowls are critical for meringue success, and glass is the easiest material to fully degrease before whipping your egg whites. This set gives you multiple sizes for organizing your components.
5. Kitchen Torch for Meringue
A culinary torch lets you add extra golden color and that signature toasted look to the meringue peaks after baking. It’s a simple tool that gives professional-looking results.
For another dessert that benefits from similar kitchen tools, check out the fruit tart recipe.
Step-by-Step Instructions
1. Make the Pie Crust Dough
- Add 1 1/4 cups (155g) all-purpose flour and 1/2 tsp salt to a large mixing bowl and whisk them together briefly to combine.
- Add 1/2 cup (115g) cold, cubed unsalted butter to the flour mixture.
- Using a pastry cutter, two knives, or your fingertips, cut the butter into the flour until the mixture resembles coarse crumbs with some pea-sized butter pieces remaining. Those butter pieces are what create flakiness.
- Drizzle in ice water one tablespoon at a time, tossing gently with a fork after each addition. Add just enough water (3–4 tbsp) so the dough holds together when pressed between your fingers.
- Turn the dough out onto a lightly floured surface and press it into a flat disc. Wrap it tightly in plastic wrap and refrigerate for at least 1 hour. Chilling allows the butter to firm back up and the gluten to relax, which makes rolling much easier.
2. Blind Bake the Pie Crust
- Preheat your oven to 375°F (190°C).
- Remove the chilled dough from the refrigerator and let it sit at room temperature for 5 minutes.
- On a lightly floured surface, roll the dough out into a circle about 12 inches (30cm) in diameter and 1/8 inch thick.
- Carefully transfer the dough to your 9-inch (23cm) pie dish. Lift the dough gently and ease it into the dish without stretching it. Stretching causes the crust to shrink during baking.
- Trim any overhanging dough to about 1 inch beyond the rim, then fold the excess under itself to form a thick edge. Crimp the edges with your fingers or a fork for a decorative finish.
- Prick the bottom of the crust all over with a fork. This is called docking and it prevents large air bubbles from forming during baking.
- Line the crust with parchment paper and fill it with pie weights or dried beans to keep the crust from puffing up.
- Bake for 15 minutes, then remove the parchment and weights carefully.
- Return the crust to the oven and bake for another 10–12 minutes until the bottom is golden and dry.
- Transfer to a wire rack and let the crust cool completely while you make the filling. A fully cooled crust prevents the filling from seeping into and softening the pastry.
3. Make the Lemon Filling
- In a medium saucepan, whisk together 1 1/2 cups (300g) granulated sugar, 1/3 cup (40g) cornstarch, and 1/4 tsp salt until well combined.
- Gradually whisk in 1 1/2 cups (360ml) cold water and 1/2 cup (120ml) fresh lemon juice until the mixture is smooth with no lumps.
- Place the saucepan over medium-high heat and cook, whisking constantly, until the mixture comes to a full boil and thickens noticeably. This usually takes 6–8 minutes. Do not walk away at this stage; the mixture can scorch if left unattended.
- Continue whisking and boiling for 1 full minute after it thickens. This step cooks out the raw cornstarch flavor and ensures the filling sets properly.
- Remove the saucepan from the heat.
- In a separate bowl, lightly beat 4 egg yolks with a fork. Slowly ladle about 1/2 cup of the hot lemon mixture into the egg yolks while whisking constantly. This process is called tempering and it raises the temperature of the yolks gradually so they don’t scramble.
- Pour the tempered egg yolk mixture back into the saucepan, whisking as you go.
- Return the saucepan to medium heat and cook, whisking constantly, for 2 more minutes until the filling is thick, glossy, and bubbling gently.
- Remove from heat and stir in 2 tbsp unsalted butter and 1 tbsp lemon zest until the butter is fully melted and incorporated.
- Pour the hot lemon filling into the cooled, blind-baked pie crust. Spread it evenly with a spatula. Keep the filling hot while you immediately prepare the meringue because you will spread the meringue over the hot filling right away. This heat helps the bottom of the meringue cook and seal to the filling, which prevents weeping.
4. Make the Meringue
- Make sure your mixing bowl and beaters are completely clean and grease-free. Even a tiny trace of fat will prevent the egg whites from whipping properly. Wipe both with a paper towel dampened with a splash of white vinegar if you want to be thorough.
- Add 4 large egg whites (room temperature) and 1/4 tsp cream of tartar to the bowl.
- Beat on medium speed until the mixture becomes foamy and begins to hold very soft, drooping peaks.
- Increase the speed to high and begin adding 1/2 cup (100g) granulated sugar one tablespoon at a time, waiting about 15 seconds between additions. Adding the sugar too quickly deflates the structure you’ve built.
- Add a pinch of salt and continue beating until the meringue is glossy and holds stiff, firm peaks. When you lift the beater, the meringue should stand straight up without drooping. This typically takes 4–6 minutes on high speed.
- Do a quick test: rub a small amount of meringue between your fingers. If it feels gritty, the sugar hasn’t fully dissolved yet. Continue beating for another 1–2 minutes and test again.
5. Top the Pie and Bake
- Working quickly while the lemon filling is still hot, dollop the meringue all over the top of the filled pie.
- Using an offset spatula or the back of a large spoon, spread the meringue evenly across the entire surface of the filling, making sure the meringue touches and seals to the pie crust edges all the way around. This is crucial: any gap between the meringue and the crust creates a pathway for moisture to seep in, causing the meringue to weep or shrink during cooling.
- Use the spatula or the back of the spoon to create decorative peaks and swirls across the top of the meringue. These little peaks will toast beautifully in the oven and make the pie look bakery-level gorgeous.
- Bake at 350°F (175°C) for 12–15 minutes, until the meringue peaks are a deep golden brown. Watch it carefully during the final few minutes as the tops can go from golden to burnt quickly.
- Remove the pie from the oven and allow it to cool on a wire rack at room temperature for at least 1–2 hours.
- Once the pie has cooled to room temperature, transfer it to the refrigerator and chill for at least 2–3 hours before slicing. This allows the filling to fully set so you get clean, beautiful slices.
Read Also: Easy Pie Crust Recipe
Tips for Success
A few key techniques separate a great lemon meringue pie from a soggy, weepy one. Keep these in mind and your pie will come out looking and tasting exceptional.
- Use room-temperature egg whites. Cold egg whites take much longer to whip to stiff peaks, and room-temperature whites create a more voluminous meringue. Take the eggs out of the refrigerator about 30 minutes before you need them.
- Never stop whisking the filling. Constant movement prevents the cornstarch from clumping and the egg yolks from scrambling as the temperature rises.
- Temper the egg yolks properly. Rushing this step results in scrambled eggs in your filling, which is not what anyone wants.
- Spread meringue over hot filling. Always. The heat from the filling cooks the underside of the meringue and helps it adhere, which dramatically reduces the chance of a weeping, sliding topping.
- Seal the edges completely. Use your spatula to press the meringue firmly against the crust edge all the way around. No gaps.
- Bake on a dry day if possible. Humidity is the enemy of meringue. On very humid days, the meringue can absorb moisture from the air and turn soggy or weep even after baking.
- Chill before slicing. As tempting as it is to cut right in, the filling needs at least 2–3 hours in the refrigerator to fully set. A warm filling will not hold its shape when sliced.
- Use a hot knife for slices. Dip your knife in hot water and dry it between each cut for the cleanest, most picture-perfect slices.
For more baking guidance like this, check out the tips in the flaky pie crust recipe.
Serving Suggestions
Lemon meringue pie is a complete dessert on its own, but a few thoughtful accompaniments can elevate the whole experience.
The pie is best served cold or at room temperature, sliced into wedges at the table so everyone can see those gorgeous layers.
- A small scoop of vanilla ice cream alongside a chilled slice makes for a wonderful contrast of temperatures
- Lightly sweetened freshly whipped cream is a simple, classic pairing that complements the tartness
- A few thin slices of fresh lemon or a twist of lemon zest scattered on the plate adds a bright visual touch
- A cup of hot tea, particularly Earl Grey or chamomile, balances the sweetness of the meringue beautifully
- Serve it as the standout centerpiece at spring and summer gatherings, Easter celebrations, or Mother’s Day brunch
Pair this pie with other crowd-pleasing desserts like deviled eggs and classic apple crisp for a full dessert spread at your next gathering.
Variations to Try
Once you’ve mastered the classic version, these twists are fun to explore.
- Graham cracker crust: Swap the pastry crust for a buttery graham cracker base. Press 1 1/2 cups of graham cracker crumbs mixed with 6 tbsp melted butter into the pie dish and bake at 350°F for 8 minutes before filling. It adds a honeyed, slightly sandy crunch that contrasts beautifully with the smooth filling.
- Lime meringue pie: Use 1/2 cup fresh lime juice in place of lemon juice and reduce the sugar slightly for a more tropical flavor.
- Orange meringue pie: Substitute half the lemon juice with fresh orange juice and use orange zest. The flavor is more mellow and floral.
- Lemon meringue bars: Press the pastry dough into a 9×13 inch (23x33cm) baking pan, add the filling, top with meringue, and bake as directed. Cut into bars once fully chilled.
- Swiss meringue topping: For a more stable meringue that’s less prone to weeping, make Swiss meringue by combining the egg whites and sugar over a double boiler, whisking until the sugar dissolves and the mixture reaches 160°F (71°C), then beating to stiff peaks off the heat.
- Mini individual pies: Divide the crust and filling among six 4-inch (10cm) tartlet pans for individual portions that are perfect for parties.
You might also enjoy: Blueberry Pie Recipe
Storage and Reheating
Lemon meringue pie is at its absolute best on the day it is made, so plan your timeline accordingly.
- Refrigerator: Store leftover pie loosely covered in the refrigerator for up to 2 days. Place a few toothpicks in the top of the meringue to keep the plastic wrap from touching and damaging it, then drape the wrap over the picks.
- Avoid freezing: Lemon meringue pie does not freeze well. The filling becomes watery and the meringue loses its texture when thawed.
- Pie crust: The unbaked crust can be prepared and refrigerated for up to 5 days or frozen for up to 3 months. Blind bake it fresh on the day you plan to fill and assemble.
- Lemon filling: The filling can be made 1 day ahead and stored covered in the refrigerator. Reheat it gently over low heat, whisking constantly, until it is hot again before pouring into the baked crust.
- Reheating: Lemon meringue pie is not meant to be served warm after it has been chilled. Serve it cold straight from the refrigerator or allow it to sit at room temperature for about 20 minutes for a softer texture.
- Weeping meringue: If stored pie develops small water droplets under the meringue, this is normal moisture migration. The pie is still safe to eat.
Another great make-ahead dessert to try is the classic tiramisu.
Nutritional Facts
The following values are based on one slice, assuming the pie is cut into 8 equal portions.
| Nutrient | Amount Per Serving |
|---|---|
| Calories | 385 kcal |
| Total Fat | 15g |
| Saturated Fat | 9g |
| Cholesterol | 103mg |
| Sodium | 280mg |
| Total Carbohydrates | 59g |
| Sugars | 38g |
| Dietary Fiber | 1g |
| Protein | 5g |
| Vitamin C | 8mg |
Note: Nutritional values are estimates and will vary based on specific ingredient brands and portion sizes.
For another classic pie with a different nutritional profile, explore the classic pecan pie.
Health Benefits of Key Ingredients
While lemon meringue pie is certainly a dessert and a treat, some of its star ingredients carry real nutritional value.
Lemons are one of the most nutritionally dense citrus fruits available, and using the fresh juice and zest here means you get more than just flavor.
- Lemon juice is a rich source of Vitamin C, an antioxidant that supports immune function, skin health, and iron absorption. The approximately 1/2 cup used in this recipe contributes a meaningful amount toward the daily recommended intake.
- Lemon zest contains beneficial plant compounds called flavonoids, including hesperidin and diosmin, which have been studied for their anti-inflammatory properties. The zest also concentrates the essential oils that give lemon its characteristic aroma and flavor.
- Eggs provide high-quality complete protein, containing all essential amino acids. The yolks are a source of Vitamin D, choline, and lutein, which supports eye health. The whites contribute low-calorie protein that makes up the meringue topping.
- Butter used in small amounts provides fat-soluble Vitamins A, D, E, and K2, as well as butyrate, a short-chain fatty acid with potential gut health benefits when consumed as part of a balanced diet.
Read Also: Fruit Tart Recipe
Frequently Asked Questions
1. Why does my lemon meringue pie weep?
Weeping happens when moisture seeps between the meringue and the filling, forming small liquid droplets under the meringue layer. The most common cause is spreading meringue over a cooled or cold filling. Always pour meringue over filling that is piping hot. The heat from below cooks the underside of the meringue and helps it adhere firmly. Another culprit is under-beating the meringue, leaving dissolved sugar that later drains out as liquid. Beat until you have fully stiff, glossy peaks and ensure all the sugar has fully dissolved.
2. Can I use bottled lemon juice?
You can, but the flavor will be noticeably less vibrant. Bottled lemon juice is pasteurized and tends to taste flat and slightly bitter compared to freshly squeezed. Since lemon flavor is the entire point of this pie, using fresh lemons is strongly recommended. You’ll need approximately 3 to 4 large lemons for both the juice and zest required in this recipe.
3. How do I get clean slices without the meringue tearing?
The key is a hot knife. Fill a tall glass with very hot water, dip your knife in for a few seconds, then shake off the water and wipe the blade clean with a paper towel before each cut. The warmth prevents the meringue from dragging and tearing as you slice through it. Make sure the pie has chilled for at least 2 to 3 hours before slicing so the filling is fully set.
4. Can I make lemon meringue pie ahead of time?
The pie crust can be blind baked up to a day ahead and stored at room temperature, covered loosely. The lemon filling can also be made a day in advance and refrigerated, then reheated gently before using. However, the assembled pie with meringue is best made and served on the same day. The meringue begins to deteriorate in texture, soften, and potentially weep after 24 hours in the refrigerator.
5. Why is cream of tartar used in the meringue?
Cream of tartar is an acidic powder that stabilizes the egg whites during whipping by lowering the pH of the mixture. This stabilization helps the egg white proteins bond more effectively, resulting in a meringue that holds its peaks longer, is less prone to deflating, and is more resistant to humidity. If you don’t have cream of tartar, you can substitute a small amount of white vinegar or lemon juice, about 1 teaspoon per 4 egg whites.
Read Also: Easy Creme Brulee Recipe
Final Thoughts
A great lemon meringue pie is one of those recipes you make once and carry with you for life.
Once you understand the why behind each step, like why you temper the yolks, why the meringue goes on hot, and why you chill before slicing, the whole pie comes together with confidence.
The result is a genuinely stunning dessert that tastes as incredible as it looks.
Give this lemon meringue pie recipe a try and let me know how it goes in the comments below. Did you add any special twist? Did your meringue come out picture-perfect?
Share your experience and any questions, because I love hearing how these recipes turn out in real kitchens.
Recommended:
- Key Lime Pie Recipe
- Peach Pie Recipe
- Cherry Pie Recipe
- Chocolate Pie Recipe
- Peanut Butter Pie Recipe
- Sweet Potato Pie Recipe
- Dutch Apple Pie Recipe
- Classic Apple Pie Recipe
- Eggnog Pie Recipe
- Coconut Pie Recipe with Cream of Coconut