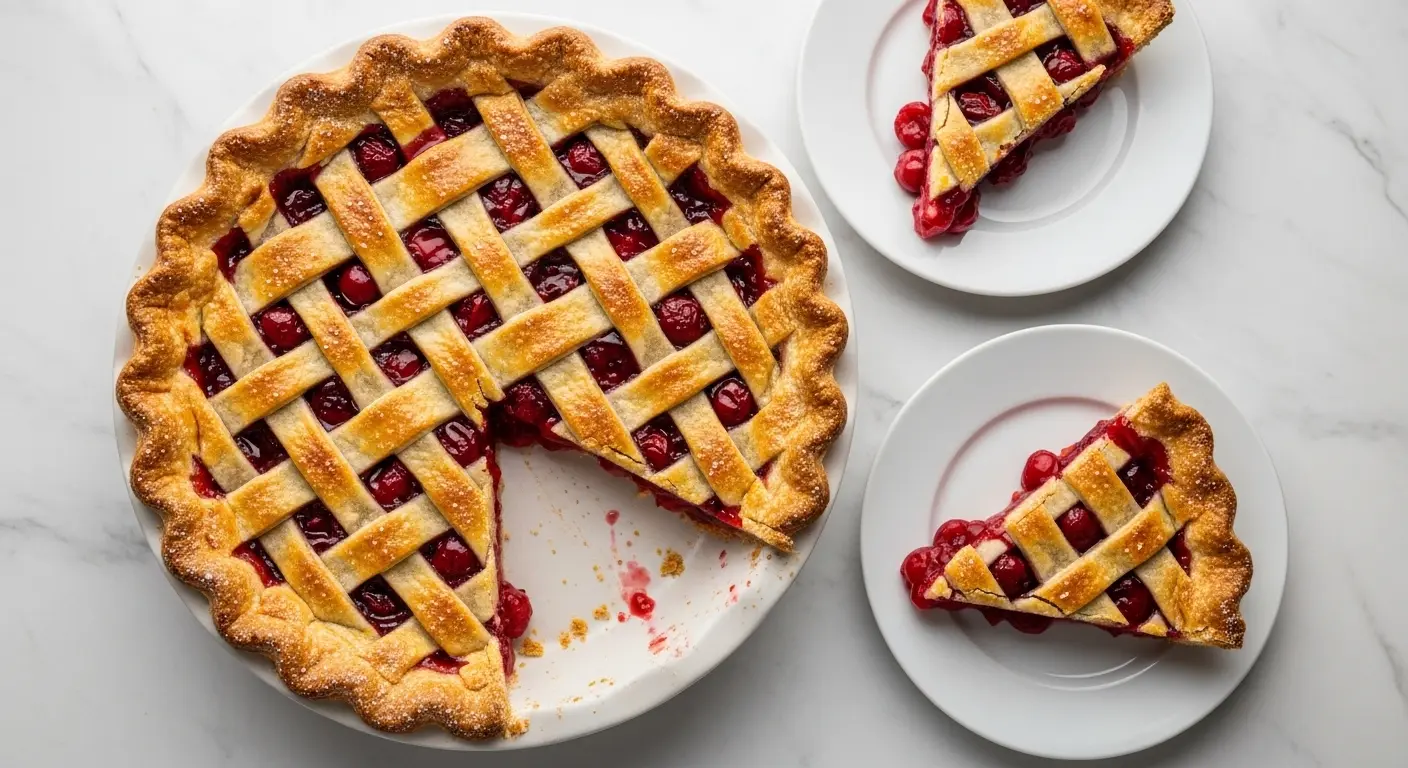
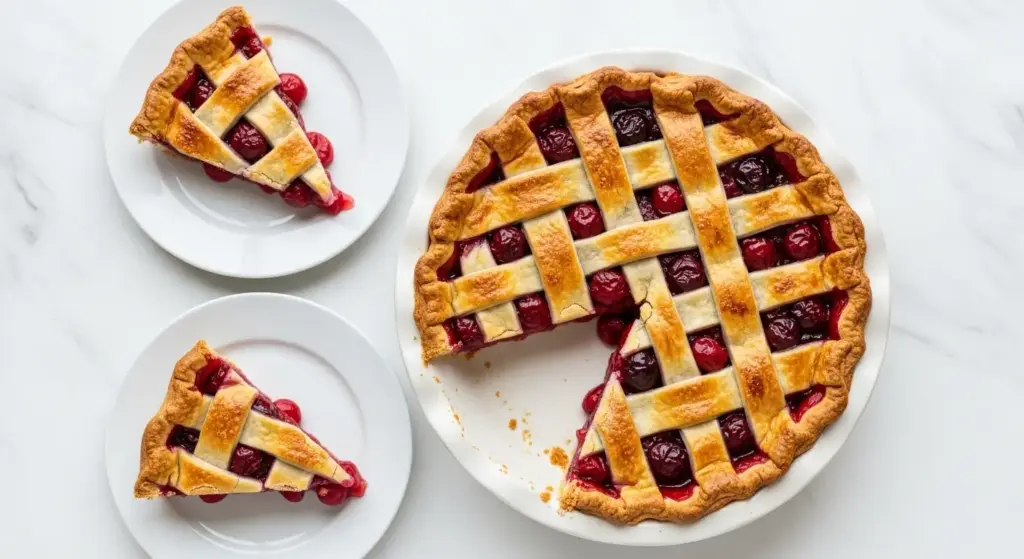
A homemade cherry pie recipe is one of those timeless desserts that never goes out of style. From the deep ruby-red filling bubbling up through a golden, flaky crust to the sweet-tart aroma that fills your kitchen while it bakes, this pie is pure comfort in every slice.
This version uses tart cherries, which give you the bold, classic flavor you expect from an old-fashioned cherry pie. Sweet cherries are sweeter and milder, but it’s the tart ones that create that signature pop of flavor against the buttery crust.
The filling comes together quickly, and you can use fresh, frozen, or canned tart cherries depending on the season. No matter which you choose, the result is a glossy, thick filling that holds its shape beautifully when sliced.
Making this pie from scratch is genuinely rewarding. Once you taste the difference a homemade crust and real cherry filling makes, there’s no going back to store-bought.
If you love fruit pies, you’ll also want to check out this Blueberry Pie Recipe for another stunning classic.
Why You’ll Love This Cherry Pie Recipe
This pie checks every box: gorgeous, delicious, and surprisingly approachable even for beginner bakers.
The filling uses simple pantry staples like sugar, cornstarch, and almond extract. Almond extract is the secret weapon here, adding a subtle nutty depth that elevates the cherry flavor without overpowering it.
The double crust provides a satisfying contrast of textures. You get a crisp, golden top layer and a softer, slightly chewy bottom crust that soaks up just a touch of the filling.
Here’s what makes this recipe stand out:
- Uses tart cherries for bold, authentic flavor
- Thick, glossy filling that slices cleanly without being runny
- Flaky, buttery homemade crust that melts in your mouth
- Easy to make with fresh, frozen, or canned cherries
- Perfect for holidays, summer gatherings, or any occasion
Another reader favorite to pair with this is the Peach Pie Recipe for a full stone-fruit dessert spread.
Ingredients
This cherry pie uses classic, widely available ingredients. The only specialty item is almond extract, which you can find at any grocery store.
- For the Pie Crust:
- 2 1/2 cups (315 g) all-purpose flour
- 1 tbsp granulated sugar
- 1 tsp salt
- 1 cup (225 g / 2 sticks) cold unsalted butter, cubed
- 6-8 tbsp ice water
- For the Cherry Filling:
- 5 cups (about 800 g) pitted tart cherries (fresh, frozen, or drained canned)
- 1 cup (200 g) granulated sugar
- 1/4 cup (30 g) cornstarch
- 1 tbsp lemon juice
- 1/2 tsp almond extract
- 1/4 tsp vanilla extract
- 1/4 tsp salt
- 1 tbsp unsalted butter, cut into small pieces
- For the Topping:
- 1 egg, beaten (for egg wash)
- 1 tbsp coarse sugar or granulated sugar (for sprinkling)
For extra peace of mind, try making the crust using a flaky pie crust recipe as your base guide.
Kitchen Equipment Needed
Having the right tools makes the process much smoother, especially when working with pie dough.
- 9-inch deep-dish pie dish
- Pastry cutter or food processor (for cutting butter into flour)
- Large mixing bowls
- Rolling pin
- Measuring cups and spoons
- Sharp knife or pastry wheel (for lattice strips)
- Parchment paper
- Cherry pitter (if using fresh cherries)
- Pastry brush (for egg wash)
- Wire cooling rack
Read Also: Easy Pie Crust Recipe
Recommended Products for This Recipe
These are products I genuinely recommend based on quality and how much they improve the pie-making process.
1. OXO Good Grips Cherry Pitter
Pitting fresh cherries by hand is tedious and messy. A good cherry pitter removes the pit cleanly and quickly, saving you significant time when working with 5 cups of cherries. This one handles both sweet and sour cherries effortlessly.
2. Emile Henry Deep Dish Pie Dish
A quality ceramic pie dish conducts heat evenly, giving you a perfectly baked bottom crust rather than a soggy one. The deep-dish design also gives you plenty of room for a generous cherry filling without spilling over in the oven.
3. Rodelle Almond Extract, Pure
Pure almond extract makes a noticeable difference in this recipe compared to imitation versions. The flavor is cleaner and more aromatic, and it enhances the cherry flavor rather than competing with it.
4. Ateco Stainless Steel Pastry Wheel
A fluted pastry wheel makes clean, beautiful lattice strips with decorative edges. It’s a small detail that makes a big visual difference on your finished pie.
You might also love these Classic Pecan Pie Recipe tools since many of the same equipment pieces apply.
Step-by-Step Instructions
1. Make the Pie Crust Dough
- In a large mixing bowl, whisk together 2 1/2 cups (315 g) of all-purpose flour, 1 tbsp of sugar, and 1 tsp of salt until combined.
- Add 1 cup (225 g) of cold cubed unsalted butter to the flour mixture. Using a pastry cutter or your fingertips, cut the butter into the flour until the mixture resembles coarse, pea-sized crumbles. Work quickly so the butter stays cold, as cold butter is what creates a flaky crust.
- Drizzle in 6 tbsp of ice water, one tablespoon at a time, stirring gently with a fork after each addition. Add only as much water as needed for the dough to just come together. It should hold when you press it between your fingers but not feel wet or sticky.
- Divide the dough into two equal discs. Wrap each disc tightly in plastic wrap and refrigerate for at least 1 hour, or up to 2 days. Chilling the dough is non-negotiable; it relaxes the gluten and keeps the butter cold, both of which are essential for a flaky result.
2. Preheat the Oven and Prepare Your Equipment
- Position one rack in the lower third of your oven and place a baking sheet on that rack. Preheat your oven to 425°F (220°C).
- The baking sheet underneath the pie serves two purposes: it catches any drips if the filling bubbles over, and it adds extra bottom heat to help prevent a soggy crust.
- Grease your 9-inch deep-dish pie dish lightly with butter or non-stick spray.
3. Make the Cherry Filling
- If using fresh cherries, wash, stem, and pit all 5 cups (800 g) of cherries. If using frozen cherries, thaw them completely and drain off excess liquid. If using canned tart cherries, drain them thoroughly and pat dry with paper towels.
- In a large mixing bowl, combine the drained cherries, 1 cup (200 g) of granulated sugar, 1/4 cup (30 g) of cornstarch, 1 tbsp of lemon juice, 1/2 tsp of almond extract, 1/4 tsp of vanilla extract, and 1/4 tsp of salt.
- Stir gently until everything is evenly coated. The cornstarch will absorb the excess juice as the pie bakes, resulting in a thick, glossy filling rather than a watery one.
- Let the filling sit for about 10 minutes to allow the juices to release slightly, then stir once more before adding to the crust.
4. Roll Out the Bottom Crust
- Remove one disc of dough from the refrigerator. On a lightly floured surface, roll the dough out from the center outward, rotating it a quarter turn every few rolls to maintain an even circle.
- Roll it to about 12 inches (30 cm) in diameter and about 1/8 inch (3 mm) thick. The dough should be large enough to drape over the edges of your 9-inch pie dish with about 1 inch of overhang all around.
- To transfer the dough, gently fold it in half, then in half again. Place the folded dough into the center of the pie dish and unfold it carefully. Press it gently into the bottom and sides of the dish without stretching it.
- Trim any excess dough so there’s about a 1-inch overhang around the rim. Don’t discard the trimmings; you can use them to patch any cracks or tears.
5. Add the Cherry Filling
- Pour the cherry filling into the prepared bottom crust, spreading it into an even layer.
- Scatter the 1 tbsp of butter pieces evenly over the top of the filling. These small pats of butter add richness and help the filling become glossy as it bakes.
- The filling should mound slightly in the center; this is normal and it will settle as it bakes.
6. Roll Out and Add the Top Crust
- Remove the second disc of dough from the refrigerator and roll it out to the same 12-inch (30 cm) diameter as the bottom crust.
- Option A – Full Top Crust: Fold the dough in half, then in quarters, and place it over the filled pie. Unfold it gently to drape over the filling. Use a sharp knife to cut 4-6 slits in the center to allow steam to escape during baking.
- Option B – Lattice Top (Recommended): Cut the rolled dough into strips approximately 1/2 to 3/4 inch (1.5-2 cm) wide using a sharp knife or pastry wheel. Lay half the strips parallel across the pie, leaving space between each. Fold back every other strip halfway, then lay a perpendicular strip across the center. Unfold the folded strips over the new strip. Fold back the alternate strips and add another perpendicular strip. Continue this weaving pattern across the whole pie.
- Once the top crust is in place, trim any overhang so it’s even with the bottom crust overhang. Press the top and bottom crust edges together firmly, then fold the combined edge under itself to create a thick border. Crimp the border decoratively using your fingers or the tines of a fork.
7. Apply the Egg Wash and Sugar
- In a small bowl, beat 1 egg lightly. Using a pastry brush, gently brush the egg wash over the entire top crust, including the crimped edges. The egg wash creates a beautiful golden-brown color as the pie bakes.
- Sprinkle coarse sugar or granulated sugar evenly over the top crust. This adds a slight sparkle and a satisfying crunch to the finished crust.
8. Bake the Pie
- Place the pie on the preheated baking sheet in the lower third of the oven and bake at 425°F (220°C) for 20 minutes. This initial high heat helps set the crust and begin caramelizing the filling.
- After 20 minutes, reduce the oven temperature to 375°F (190°C) and continue baking for an additional 35-45 minutes. The pie is done when the crust is deep golden brown and the cherry filling is bubbling actively through the slits or around the lattice. If the edges brown too quickly, cover them loosely with strips of aluminum foil or a pie shield.
- You need to see the filling actively bubbling in the center of the pie, not just around the edges. Bubbling at the center means the cornstarch has reached the temperature needed to thicken the filling properly.
9. Cool the Pie Completely Before Slicing
- Remove the pie from the oven and transfer it to a wire cooling rack. Let it cool for at least 3-4 hours before slicing. This step is critical.
- Cutting into a hot cherry pie will result in a runny filling because the cornstarch needs time to fully set as the pie cools. Patience here makes the difference between a clean slice and a collapsing mess.
- For the cleanest slices, allow the pie to cool fully at room temperature, then refrigerate for 1 hour before cutting.
For another classic homemade baked dessert, this Classic Apple Pie Recipe uses many of the same techniques.
Tips for Success
A few focused techniques will make the difference between a good cherry pie and an exceptional one.
- Keep everything cold when making the crust. Cold butter creates steam pockets during baking, which is what makes the crust flaky. If your dough feels warm or greasy at any point, refrigerate it for 15 minutes before continuing.
- Don’t skip the cornstarch. It’s the thickening agent that transforms the cherry juice into a glossy, sliceable filling rather than a watery soup. Use the full measured amount.
- Always wait for active bubbling before removing from the oven. Many pies are underbaked because the outside looks done. The bubbling filling is your confirmation that the starches have gelatinized properly.
- Use tart cherries, not sweet. Tart cherries (also called sour cherries or Montmorency cherries) are traditional in a classic cherry pie and produce far more flavor and better filling consistency than sweet cherries.
- Avoid overbaking the crust edges. Protect the crimped border with foil or a pie shield once it reaches golden-brown color.
Pie shields:
- Adjustable Silicone Pie Shield to protect edges from burning
Read Also: Dutch Apple Pie Recipe
Serving Suggestions
Cherry pie is wonderful on its own, but a few thoughtful additions take it to the next level.
A scoop of vanilla ice cream melting over a warm slice is an absolute classic pairing. The cold, creamy sweetness contrasts beautifully with the tart, warm filling.
Here are some great ways to serve it:
- Vanilla ice cream for the classic hot-and-cold contrast
- Fresh whipped cream for a lighter, airier topping
- A dusting of powdered sugar for a simple, elegant presentation
- A drizzle of Caramel Sauce over each slice for a decadent touch
- Served slightly warm after a quick 10-minute reheat at 300°F (150°C)
- Alongside a slice of Lemon Meringue Pie for a stunning dessert platter
Variations to Try
Once you have the base recipe mastered, there are plenty of ways to put your own spin on it.
- Sweet Cherry Pie: Replace tart cherries with sweet Bing cherries. Reduce the sugar to 3/4 cup (150 g) and add an extra teaspoon of lemon juice to bring some acidity back.
- Cherry Almond Pie: Double the almond extract to 1 tsp and scatter 1/2 cup (50 g) of sliced almonds over the filling before adding the top crust.
- Cherry Bourbon Pie: Add 2 tbsp of bourbon to the filling mixture for a deep, smoky-sweet undertone.
- Mini Cherry Pies: Use a muffin tin and make individual hand-sized pies. Reduce baking time to about 25-30 minutes total.
- Cherry Crumble Pie: Skip the top crust entirely and replace it with a streusel topping made from brown sugar, flour, and butter for a crunchy alternative.
For a different style of cherry dessert altogether, try the Cherry Cobbler Recipe with Cake Mix as a quick and easy option.
Storage and Reheating
Cherry pie stores beautifully and actually improves slightly in flavor after the first day as the filling continues to set.
- Room temperature: Cover loosely with foil or plastic wrap and store at room temperature for up to 2 days.
- Refrigerator: Store covered in the refrigerator for up to 5 days. The crust softens slightly in the fridge but remains delicious.
- Freezer: You can freeze a fully baked pie for up to 3 months. Wrap tightly in plastic wrap, then a layer of aluminum foil. Thaw overnight in the refrigerator before serving.
- Reheating individual slices: Place slices on a baking sheet and warm at 300°F (150°C) for 10-15 minutes until heated through.
- Reheating the whole pie: Cover loosely with foil and bake at 325°F (163°C) for 20-25 minutes.
You might also enjoy: Boston Cream Pie Recipe
Nutritional Facts
The following nutrition information is an estimate per slice, based on cutting the pie into 8 equal servings.
| Nutrient | Per Slice |
|---|---|
| Calories | ~380 kcal |
| Total Fat | 16 g |
| Saturated Fat | 10 g |
| Cholesterol | 55 mg |
| Sodium | 210 mg |
| Total Carbohydrates | 57 g |
| Dietary Fiber | 2 g |
| Total Sugars | 30 g |
| Protein | 4 g |
Nutritional values are estimates and will vary depending on the specific brands and ingredients used.
Read Also: Pumpkin Roll Recipe
Health Benefits of Key Ingredients
This pie isn’t just delicious; several of its core ingredients carry genuine nutritional benefits.
Tart cherries in particular are a nutritional standout. They are one of the best dietary sources of melatonin, which supports healthy sleep, and they contain anthocyanins, the powerful antioxidants responsible for their deep red color.
Here are the key benefits of the ingredients in this recipe:
- Tart cherries: High in antioxidants, anti-inflammatory compounds, and melatonin; may support heart health and muscle recovery
- Butter (in moderation): Contains fat-soluble vitamins A, D, E, and K2, which support bone and immune health
- Lemon juice: A good source of vitamin C and citric acid, which brightens flavor and aids in preserving the cherry filling’s color
- Almond extract (from almonds): Trace amounts of vitamin E and healthy monounsaturated fats
- Eggs (in the egg wash): Provide protein, choline, and essential vitamins
Another fruit-forward dessert worth exploring for its own benefits is the Classic Apple Crisp Recipe.
Frequently Asked Questions
1. Can I use sweet cherries instead of tart cherries?
Yes, you can use sweet cherries, but the flavor profile will be noticeably different.
Tart cherries produce that bold, classic cherry pie flavor with a pleasant acidity that balances the sugar. Sweet cherries make a milder, softer-flavored pie. If you use sweet cherries, reduce the sugar to about 3/4 cup (150 g) and add an extra teaspoon of lemon juice.
2. Why is my cherry pie filling runny?
Runny filling is almost always caused by one of two things: underbaking or cutting the pie too soon.
Make sure the filling is actively bubbling in the center of the pie before removing it from the oven, and let the pie cool for a full 3-4 hours before slicing. The cornstarch needs time and heat to thicken properly.
3. Can I make cherry pie ahead of time?
Absolutely, and it’s actually encouraged.
Cherry pie can be made 1-2 days in advance and stored covered at room temperature or in the refrigerator. The filling sets more firmly by the next day, making it even easier to slice cleanly.
4. Can I use frozen cherries for this recipe?
Frozen tart cherries work extremely well in this recipe.
Thaw them completely and drain off as much liquid as possible before mixing with the other filling ingredients. Pat them dry with paper towels if needed. Using too much excess liquid from frozen cherries is one of the main causes of a runny filling.
5. How do I prevent the crust edges from burning?
The edges of a pie crust tend to brown faster than the center because they’re thinner and more exposed to the heat.
Check the pie about 25-30 minutes into baking and cover the edges loosely with strips of aluminum foil or a silicone pie shield if they’re darkening too quickly. Remove the foil in the last 10 minutes if you want a bit more color on the edges.
For even more baking FAQ help, the Classic Pumpkin Pie Recipe post covers many shared techniques.
Final Thoughts
A homemade cherry pie is one of those recipes that pays you back in full for every minute you spend making it.
The buttery crust, the glossy ruby filling, the sweet-tart flavor that hits just right, this is the kind of pie that earns requests every time you bring it to the table.
Don’t be intimidated by the double crust. Follow the steps carefully, keep your butter cold, and let the pie cool completely, and you’ll have a stunning pie that looks and tastes like it came from a top bakery.
Give this recipe a try and let me know how it turned out in the comments below. Did you go with a classic full top crust or a beautiful lattice? Share your photos and any tips you picked up along the way!
Recommended:
- Cherry Chip Cookie Recipe
- Cherry Almond Shortbread Cookies
- Banana Cream Pie
- Sweet Potato Pie Recipe
- Key Lime Pie Recipe
- Fruit Tart Recipe
- From Scratch Pumpkin Pie Recipe
- Chocolate Pie Recipe
- Easy Pecan Pie Recipe
- Eggnog Pie Recipe


