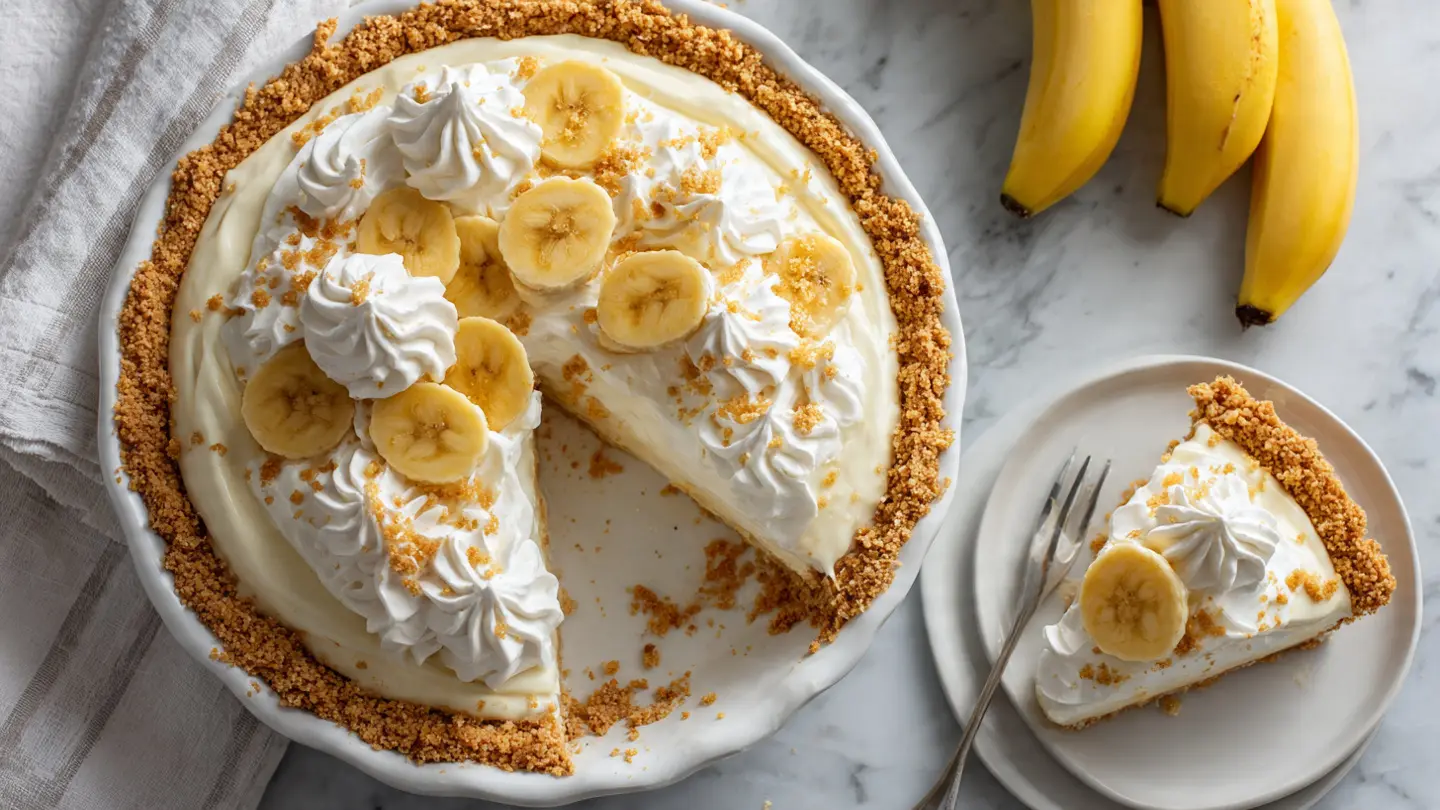
If you have been searching for the ultimate banana cream pie recipe, you are in exactly the right place. This is the kind of pie that stops conversations at the dinner table — a buttery, golden pastry crust filled with thick, silky vanilla custard, layered with fresh banana slices, and piled high with fluffy homemade whipped cream.
It is pure nostalgia in every single bite.
This banana cream pie is made completely from scratch. That means a real, flaky pie crust, a genuine stovetop custard made with egg yolks and whole milk, and whipped cream you beat yourself. It tastes worlds apart from anything made with a boxed pudding mix.
The key to getting the filling right is cooking the custard long enough so it thickens properly. Many people pull it off the heat too soon, and end up with a soupy pie. This recipe walks you through exactly what to look for so you get a clean, perfect slice every single time.
It does take a bit of patience, but none of it is complicated. If you can stir a pot and roll out dough, you can absolutely make this.
This pie is the kind of dessert that earns the recipe card a permanent spot in your collection. For another classic custard-based treat, check out this Vanilla Pudding Recipe — the same principles that make your custard filling silky and smooth apply there too.
Why You’ll Love This Banana Cream Pie Recipe
Making banana cream pie from scratch might sound intimidating, but this recipe is laid out in a way that makes it completely approachable.
Every element of this pie is designed to complement the others. The flaky pastry crust gives you a satisfying crunch that contrasts beautifully with the creamy custard.
The custard itself uses both whole milk and egg yolks, which gives it an incredibly rich, smooth texture that sets up firm enough to slice cleanly.
Fresh bananas add natural sweetness and a soft, fruity layer that a pudding mix simply cannot replicate.
The homemade whipped cream on top stays fluffy and light, balancing the richness of the custard without being overwhelmingly sweet.
This pie is also a fantastic make-ahead dessert. You can prepare the crust and custard the night before, and simply assemble and top with whipped cream when you are ready to serve.
Here is a quick summary of why this recipe is so worth making:
- Made completely from scratch with no boxed mixes
- Flaky, buttery homemade pie crust
- Rich, thick vanilla custard that sets up cleanly for perfect slices
- Layers of fresh banana slices for natural sweetness
- Light, fluffy homemade whipped cream topping
- A perfect make-ahead dessert for parties, holidays, and family gatherings
- Easily customized with a graham cracker or Nilla wafer crust
You might also enjoy: Boston Cream Pie Recipe
Ingredients
Everything in this recipe plays a specific role. The cornstarch and egg yolks work together to thicken the custard, while the vanilla extract deepens the flavor. Use ripe but firm bananas — ones with a few small spots are perfect and sweet, but still hold their shape when sliced.
- For the Pie Crust:
- 1 1/4 cups (155g) all-purpose flour
- 1/2 teaspoon salt
- 1 teaspoon granulated sugar
- 1/2 cup (115g / 1 stick) cold unsalted butter, cut into small cubes
- 3 to 4 tablespoons ice water
- For the Vanilla Custard Filling:
- 3/4 cup (150g) granulated sugar
- 1/3 cup (40g) cornstarch
- 1/4 teaspoon salt
- 3 cups (720ml) whole milk
- 4 large egg yolks
- 2 tablespoons (30g) unsalted butter
- 1 1/2 teaspoons pure vanilla extract
- For Assembly:
- 3 medium ripe but firm bananas (about 340g / 12 oz), sliced into 1/2-inch rounds
- 1 teaspoon fresh lemon juice (optional, to prevent browning)
- For the Whipped Cream Topping:
- 1 1/2 cups (360ml) cold heavy whipping cream
- 3 tablespoons (22g) powdered sugar
- 1 teaspoon pure vanilla extract
This banana cream pie is perfectly paired with Cherry Pie Recipe as a dessert spread for any gathering — both are classic favorites that please every crowd.
Kitchen Equipment Needed
Having the right tools on hand makes this recipe go much more smoothly. A sturdy saucepan with a heavy bottom is especially important for making the custard — thin pots can cause the mixture to scorch before it thickens properly.
- 9-inch pie dish (at least 1.5 inches deep)
- Pie weights or dried beans (for blind baking)
- Heavy-bottomed saucepan (2 to 3 quart)
- Stand mixer or hand mixer (for whipping cream)
- Rolling pin
- Pastry cutter or fork
- Large mixing bowls
- Medium mixing bowl
- Whisk
- Rubber spatula
- Fine mesh sieve (optional, for straining custard)
- Plastic wrap
- Parchment paper
- Sharp knife and cutting board
Read Also: Easy Pie Crust Recipe
Recommended Products for This Recipe
These products are recommended based on quality and performance — they make a genuine difference in the way this recipe turns out.
1. Nielsen-Massey Madagascar Bourbon Pure Vanilla Extract
The quality of your vanilla directly affects the flavor of the custard. A premium vanilla extract like Nielsen-Massey delivers a warm, complex flavor that makes the filling taste like something from a professional bakery. It is one ingredient upgrade that is absolutely worth it.
2. Emile Henry Modern Classics Pie Dish
A ceramic pie dish retains heat evenly and helps the bottom crust bake through completely without burning the edges. The sloped sides and generous depth make it ideal for a fully loaded banana cream pie. It is also beautiful enough to bring straight to the table.
3. OXO Good Grips Ceramic Pie Weights
Ceramic pie weights are the most reliable way to blind bake a pie crust without it puffing up or shrinking dramatically. They distribute heat evenly and are easy to handle, wash, and store. A proper blind bake is the foundation of a clean, crispy crust.
4. KitchenAid Hand Mixer
For whipping cream to firm, stable peaks, a quality electric hand mixer is hard to beat. It gives you full control over speed and texture, and it does the job in just a couple of minutes without overworking the cream.
For a beautiful no-bake alternative to pair alongside this pie, try this No Bake Cheesecake Recipe — it makes an elegant dessert table with almost zero oven time required.
Step-by-Step Instructions
Step 1: Make the Pie Dough
- In a large mixing bowl, whisk together 1 1/4 cups (155g) all-purpose flour, 1/2 teaspoon salt, and 1 teaspoon granulated sugar until combined.
- Add 1/2 cup (115g) cold unsalted butter cubes to the flour mixture.
- Using a pastry cutter, two butter knives, or your fingertips, cut the butter into the flour until the mixture resembles coarse crumbs with some pea-sized butter pieces remaining. Those small butter chunks are what create flaky layers in the finished crust — do not overwork the dough.
- Drizzle 3 tablespoons of ice water over the mixture, one tablespoon at a time, stirring with a fork after each addition.
- Press a small handful of dough together; if it holds without crumbling, it is ready. If it is still too dry, add the remaining tablespoon of ice water.
- Turn the dough out onto a lightly floured surface and gently press it into a flat disc. Do not knead or overwork it.
- Wrap the disc tightly in plastic wrap and refrigerate for at least 1 hour (or up to 2 days). Chilling the dough relaxes the gluten, which prevents the crust from shrinking during baking.
Step 2: Blind Bake the Pie Crust
- Remove the chilled dough from the refrigerator and let it sit at room temperature for 5 minutes — just enough to make it pliable without being warm.
- On a lightly floured surface, roll the dough out into a 12-inch (30cm) circle, rotating it a quarter turn after each roll to keep it even.
- Carefully transfer the dough to a 9-inch pie dish. To do this easily, fold the dough gently in half, lift it into the dish, and unfold it. Press it gently into the bottom and sides of the dish without stretching it.
- Trim any excess dough hanging over the edge, leaving about a 1-inch (2.5cm) overhang. Fold the overhang under itself and crimp the edges decoratively using your fingers or the back of a fork.
- Prick the bottom of the crust all over with a fork. This prevents large air bubbles from forming during baking.
- Place the crust back in the refrigerator for 30 minutes to firm up. This second chill is important — it helps the crust hold its shape.
- Preheat the oven to 375°F (190°C).
- Line the chilled crust with a piece of parchment paper, pressing it down into the corners, and fill it with pie weights or dried beans.
- Bake for 20 minutes. Then carefully lift out the parchment and weights.
- Return the crust to the oven and bake for another 10 to 15 minutes, until the bottom looks dry and the edges are golden brown.
- Remove from the oven and allow to cool completely on a wire rack before filling. This is essential — a warm crust will cause the custard to melt rather than set.
Step 3: Make the Vanilla Custard Filling
- In your heavy-bottomed saucepan, whisk together 3/4 cup (150g) granulated sugar, 1/3 cup (40g) cornstarch, and 1/4 teaspoon salt until combined.
- Slowly pour in 3 cups (720ml) whole milk, whisking constantly as you add it to prevent lumps from forming. Start with just a splash, whisk it in, then add the rest gradually.
- Place the saucepan over medium heat. Cook the mixture, whisking constantly and scraping the bottom of the pan, until it begins to thicken and just starts to bubble. This will take about 8 to 10 minutes. Do not walk away — the mixture can scorch quickly if left unstirred.
- In a separate medium bowl, whisk the 4 egg yolks until smooth and uniform in color.
- Once the milk mixture is bubbling, slowly ladle about 1 cup (240ml) of the hot mixture into the egg yolks while whisking constantly. This step is called tempering — adding hot liquid slowly prevents the eggs from scrambling.
- Pour the tempered egg yolk mixture back into the saucepan with the remaining hot milk mixture, whisking continuously as you pour.
- Return the saucepan to medium heat and continue to cook, whisking constantly, for another 2 to 3 minutes. The custard should become noticeably thicker — it should coat the back of a spoon and hold a line when you drag your finger through it. It should also reach a full boil and be visibly bubbling in the center, not just at the edges. This is the key step: undercooking here is what causes a runny pie.
- Remove from heat and immediately whisk in 2 tablespoons (30g) unsalted butter and 1 1/2 teaspoons pure vanilla extract until fully incorporated and smooth.
- If you want an extra-silky custard, pour it through a fine mesh sieve into a clean bowl to remove any small bits of cooked egg.
- Press a sheet of plastic wrap directly onto the surface of the custard (touching the custard, not just covering the bowl). This prevents a skin from forming on top.
- Refrigerate for at least 2 hours, or until completely chilled and thickened. The custard will continue to firm up as it cools.
Step 4: Assemble the Pie
- Once both the crust and the custard are completely cool, you are ready to assemble.
- Slice 2 of the bananas into 1/2-inch (1.25cm) rounds. If desired, toss the slices gently in 1 teaspoon of fresh lemon juice to slow browning slightly.
- Arrange the banana slices in an even layer across the bottom of the cooled pie crust, covering it completely.
- Spoon all of the chilled custard over the banana layer. Use a rubber spatula to spread it smoothly and push it all the way to the edges, making sure the bananas are fully covered by the custard — this is important because any exposed banana will begin to brown.
- Smooth the top of the custard flat.
- Cover the assembled pie loosely with plastic wrap and refrigerate for at least 2 hours (or up to overnight) to allow the custard to set firmly around the bananas.
Step 5: Make the Whipped Cream and Garnish
- When you are ready to serve, make the whipped cream. Pour 1 1/2 cups (360ml) cold heavy whipping cream into the bowl of a stand mixer fitted with the whisk attachment, or use a hand mixer and a large bowl. Cold cream whips much faster and holds its shape better than room-temperature cream.
- Whip on medium-high speed until it begins to thicken and hold soft peaks.
- Add 3 tablespoons (22g) powdered sugar and 1 teaspoon vanilla extract, then continue whipping until the cream holds firm peaks. Be careful not to over-whip — stop as soon as the cream holds its shape.
- Spread or pipe the whipped cream over the top of the chilled pie, covering the custard entirely.
- Slice the remaining banana into rounds and arrange the slices decoratively on top of the whipped cream. For the best appearance, add these garnish bananas right before serving so they do not have time to brown.
- Slice with a sharp knife, wiping the blade clean between cuts for neat servings.
You might also enjoy: Banana Pudding Recipe
Tips for Success
A few simple tips make the difference between a perfect banana cream pie and a frustrating one. Most problems with this recipe come down to two things: undercooking the custard or rushing the chilling time.
Here are the most important things to keep in mind:
- Cook the custard until it truly boils. The filling needs to bubble visibly in the center (not just around the edges) and should be thick enough to coat a spoon heavily. If you pull it too early, the pie will be runny when sliced.
- Temper the eggs slowly. Add the hot milk to the yolks gradually while whisking constantly. If you pour the hot liquid in all at once, the eggs will scramble.
- Chill everything fully. Both the crust and the custard must be completely cool before you assemble the pie. Rushing this step is the number one reason pies turn out messy.
- Keep custard-covered bananas. Make sure every banana slice is fully submerged under the custard filling. Exposed banana will oxidize and turn brown, even in the refrigerator.
- Use cold cream for whipping. Warm heavy cream will not whip properly. Keep it refrigerated right up until you use it, and chill your mixing bowl too if your kitchen is warm.
- Do not add garnish bananas in advance. The sliced bananas you use as a topping will brown within an hour or two. Add them right before serving.
- Let the assembled pie set for at least 2 hours. This rest time in the refrigerator allows the custard to fully firm up so the pie slices cleanly.
Read Also: Flaky Pie Crust Recipe
Serving Suggestions
Banana cream pie is a showstopper on its own, but it pairs wonderfully with a few extras that bring out its rich, creamy flavors even more.
A drizzle of warm caramel sauce over the finished pie adds a buttery depth that complements the vanilla custard beautifully.
Here are a few serving ideas to make this pie even more memorable:
- Serve it chilled — banana cream pie is always best eaten cold, straight from the refrigerator
- Add a drizzle of warm caramel or hot fudge sauce over individual slices
- Offer it as part of a dessert spread alongside cherry pie and key lime pie for a classic pie trio
- Pair with a strong cup of coffee or cold brew to offset the sweetness
- Serve alongside a scoop of vanilla ice cream for extra indulgence on warm days
- Garnish individual slices with a light dusting of toasted coconut flakes for added texture and flavor
- Serve with a fruit salad as a refreshing, lighter counterpart on the side
Variations to Try
Once you have mastered the classic version, there are several fun twists you can explore. Each one keeps the essence of banana cream pie intact while bringing in a new flavor or texture.
- Graham cracker crust version: Swap the pastry crust for a graham cracker crust (combine 1 1/2 cups / 150g of graham cracker crumbs with 5 tablespoons / 70g of melted butter and 1/4 cup / 50g of sugar, press into the dish, and bake at 350°F / 175°C for 8 minutes). This version is slightly easier and gives a sweeter, crunchier base.
- Nilla wafer crust: Substitute Nilla wafers for the graham crackers in the crust recipe above. The mild vanilla flavor of the wafers pairs especially well with the banana filling.
- Banoffee-style pie: Spread a layer of store-bought or homemade dulce de leche or toffee sauce over the crust before layering the bananas. Finish with a sprinkle of dark chocolate shavings on top.
- Coconut banana cream pie: Substitute 1 cup (240ml) of the whole milk in the custard with full-fat coconut milk, and finish with a handful of toasted shredded coconut on top of the whipped cream.
- Peanut butter banana cream pie: Whisk 2 tablespoons of creamy peanut butter into the warm custard along with the butter at the end of cooking. Drizzle melted peanut butter over the whipped cream topping just before serving.
- Chocolate banana cream pie: Use a chocolate cookie crust (crushed Oreos work well) and add 2 ounces of finely chopped dark chocolate to the warm custard after removing it from the heat. Stir until fully melted and smooth.
For another elegant banana-forward bake, check out this Banana Bread Recipe with Sour Cream — it is a crowd-pleaser that uses up ripe bananas beautifully.
Storage and Reheating
Banana cream pie stores well in the refrigerator but does not freeze well because the custard and whipped cream both change texture significantly when frozen and thawed.
Follow these guidelines to keep your pie at its best:
- Refrigerator: Store the assembled pie loosely covered with plastic wrap for up to 3 days. After day two, the bananas may begin to soften slightly and the crust may absorb a little moisture from the filling, but the flavor will still be excellent.
- Whipped cream topping: If you are making the pie ahead of time, you can store the assembled pie (without the whipped cream) covered in the refrigerator for up to 24 hours and add the whipped cream right before serving.
- Individual slices: Store leftover slices in an airtight container in the refrigerator for up to 3 days.
- Do not freeze: Freezing is not recommended for assembled banana cream pie. The custard will weep, the bananas will turn mushy, and the crust will become soggy upon thawing.
- Reheating: This pie is meant to be served cold and does not require any reheating. Simply take it straight from the refrigerator to the table.
Read Also: Easy Pecan Pie Recipe
Nutritional Facts
The following values are estimates per serving, based on 8 servings.
| Nutrient | Per Serving (approx.) |
|---|---|
| Calories | 430 kcal |
| Total Fat | 26g |
| Saturated Fat | 15g |
| Cholesterol | 160mg |
| Sodium | 230mg |
| Total Carbohydrates | 45g |
| Dietary Fiber | 1g |
| Total Sugars | 28g |
| Protein | 6g |
| Potassium | 310mg |
| Vitamin C | 5mg |
| Calcium | 130mg |
| Iron | 1mg |
Nutritional values are estimates and will vary based on exact ingredient brands, quantities, and any substitutions made.
For a lighter dessert that still delivers classic comfort, try this Classic Apple Pie Recipe — it is lower in fat and packed with wholesome fruit flavor.
Health Benefits of Key Ingredients
While banana cream pie is certainly a treat, several of its key ingredients do bring genuine nutritional value to the table.
Knowing what is in your food always makes the experience a little richer.
- Bananas are one of the most nutrient-dense fruits available. They are an excellent source of potassium, which supports heart health and healthy blood pressure. Bananas also provide vitamin B6, which helps the body produce serotonin and norepinephrine — chemicals that influence mood. They contain dietary fiber as well, which supports healthy digestion and helps you feel full.
- Whole milk is a rich source of calcium, phosphorus, and vitamin D, all of which contribute to strong bones and teeth. It also provides high-quality protein and fat-soluble vitamins like A and B12.
- Egg yolks are among the most nutrient-dense foods in any kitchen. They are packed with choline, which is essential for brain health and cognitive function. Egg yolks also supply vitamins A, D, E, and K, as well as healthy fats that support cell membrane integrity.
- Butter (used in moderation) provides fat-soluble vitamins, particularly vitamin A, and contains butyrate — a short-chain fatty acid that research suggests may support gut health and have anti-inflammatory properties.
- Heavy cream contributes fat-soluble vitamins and provides the essential fatty acids used to build cell membranes and support the absorption of vitamins.
Here is a quick summary of the key nutritional highlights:
- Bananas provide potassium, vitamin B6, and dietary fiber
- Whole milk contributes calcium, phosphorus, and vitamin D
- Egg yolks supply choline, vitamins A, D, E, and K, and healthy fats
- Butter provides vitamin A and butyrate for gut health support
- Heavy cream delivers fat-soluble vitamins and essential fatty acids
For another dessert that leans into the natural sweetness of fruit, this Peach Pie Recipe is a seasonal favorite worth bookmarking.
Frequently Asked Questions
1. Why did my banana cream pie turn out runny?
The most common reason is that the custard was not cooked long enough. The filling needs to come to a full, bubbling boil in the center of the pan — not just around the edges — and should be thick enough to heavily coat the back of a spoon before you remove it from the heat.
If it looked right on the stove but was still runny after chilling, the custard likely needed another minute or two of cooking. It will continue to thicken as it cools, but it will only set up well if it was cooked sufficiently in the first place.
2. Can I make banana cream pie a day ahead?
Absolutely. In fact, making it a day ahead often results in a better pie because the custard has more time to set fully. You can make the crust and custard up to 48 hours in advance.
However, hold off on adding the whipped cream and the garnish banana slices until right before serving — the cream will weep if left too long, and the banana slices will brown.
3. Can I use a store-bought pie crust?
Yes, a store-bought refrigerated or frozen pie crust works well and saves significant time. Simply follow the package instructions for blind baking, then cool it completely before filling.
The homemade crust does produce a noticeably flakier, more flavorful result, but using a store-bought crust is a perfectly good shortcut and the filling will still taste incredible.
4. How do I prevent the banana slices from browning?
Toss the banana slices very lightly in fresh lemon juice before layering them into the pie. This slows the oxidation process.
More importantly, make sure the banana slices are completely covered by the custard filling — any exposed surface will brown faster. Adding your garnish bananas on top of the whipped cream right before serving (rather than hours ahead) also makes a big difference in how they look.
5. Can I use low-fat or non-dairy milk?
You can use 2% milk, but the custard will be noticeably less rich and may be slightly thinner in texture. Skim milk is not recommended because it does not have enough fat to create a creamy, stable custard.
For a dairy-free version, full-fat canned coconut milk works quite well as a substitute and adds a pleasant, subtle coconut flavor that actually pairs nicely with the banana. Plant-based milks like almond or oat milk are not recommended because they do not have the fat content needed to produce a properly thick custard.
Read Also: Lemon Meringue Pie Recipe
Final Thoughts
Banana cream pie is one of those timeless recipes that never goes out of style. It is the kind of dessert that brings people back to childhood, slows everyone down at the dinner table, and earns you serious compliments from anyone lucky enough to get a slice.
Making it from scratch is genuinely worth the extra effort. The homemade custard is richer, the crust is flakier, and the whole pie just tastes like something special.
Give this banana cream pie recipe a try at your next gathering, holiday dinner, or even just a quiet weekend at home. You will not be disappointed.
Drop a comment below to let me know how it turned out, and feel free to share this recipe with anyone who would love a truly great slice of classic banana cream pie!
Recommended:
- Chocolate Pie Recipe
- Peanut Butter Pie Recipe
- Sweet Potato Pie Recipe
- Blueberry Pie Recipe
- Dutch Apple Pie Recipe
- Classic Pumpkin Pie Recipe
- From Scratch Pumpkin Pie Recipe
- Classic Pecan Pie Recipe
- Easy Creme Brulee Recipe
- Fruit Tart Recipe


