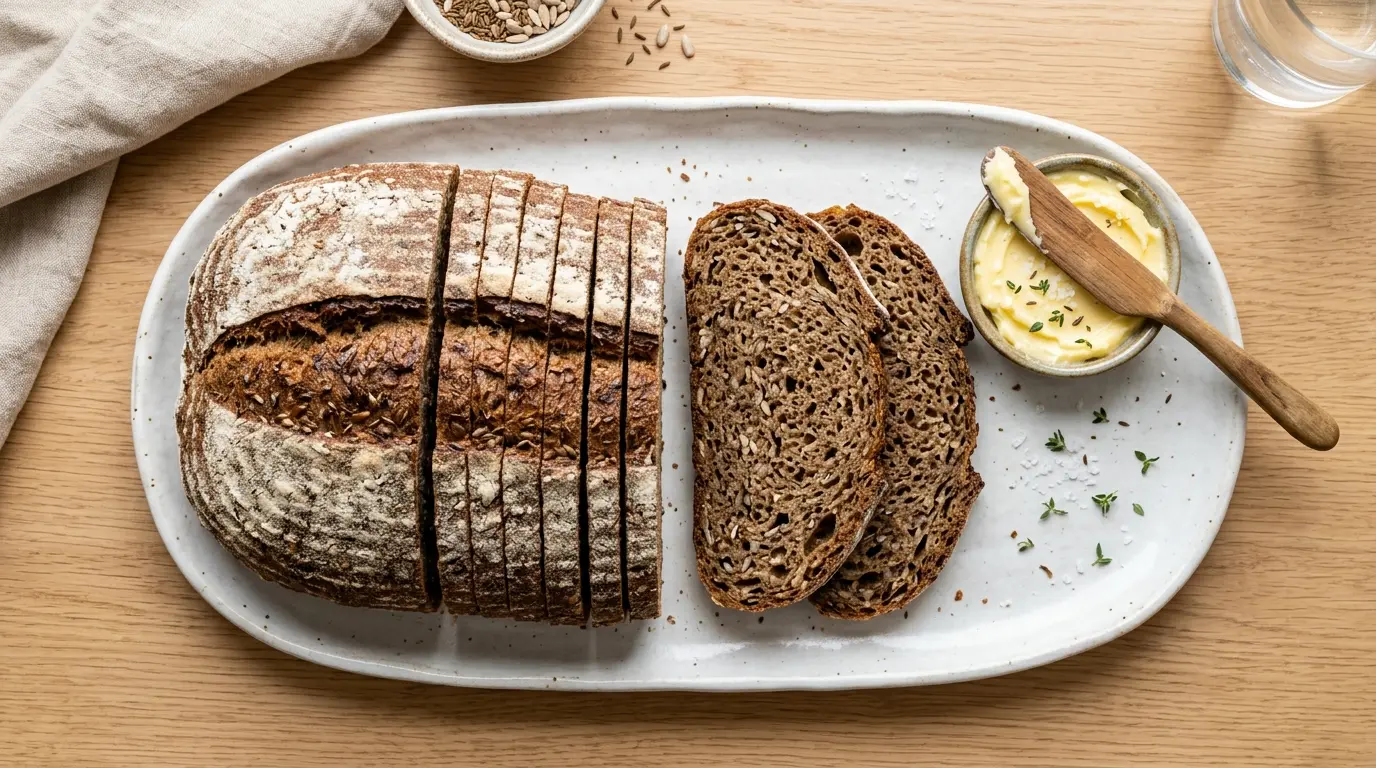
Few loaves smell as good coming out of the oven as a homemade rye bread recipe with caraway seeds baked right in. The earthy, slightly tangy flavor of rye flour paired with that classic caraway crunch is exactly what makes this bread a staple at delis and bakeries everywhere.
This rye bread recipe combines bread flour and rye flour for a loaf that’s soft enough for everyday sandwiches but still has that signature rye character people love. A touch of honey and molasses adds warmth, sweetness, and a deep golden brown color, while caraway seeds bring the bold flavor that rye bread is known for.
If baking with rye flour has felt intimidating before, this recipe breaks the whole process down into clear, simple steps. By the time you pull this loaf out of the oven, you’ll have a beautiful, bakery style bread that tastes even better than store bought.
If you enjoy baking your own loaves at home, you might also like this Sourdough Sandwich Bread Recipe, which is another great option for everyday sandwiches.
Why You’ll Love This Rye Bread Recipe
This rye bread recipe strikes a great balance between traditional flavor and approachable baking. It uses simple, accessible ingredients along with rye flour, so you don’t need anything fancy or hard to find to get started.
Here’s what makes this loaf so special:
- Authentic deli style flavor from rye flour, caraway seeds, and a touch of molasses for color and depth
- Soft, tender crumb thanks to the combination of bread flour and rye flour working together
- Beginner friendly steps with clear timing for each rise so you always know what to expect
- Versatile for any meal, equally great as toast at breakfast or a hearty sandwich at lunch
- Freezer friendly, so you can bake one loaf and enjoy slices for weeks to come
Another favorite to try next: No Knead Bread Recipe
Ingredients
Here’s everything you’ll need to make this rye bread recipe from scratch. Each ingredient plays an important role in building the flavor, texture, and color this loaf is known for.
- 2 cups (240g) bread flour
- 1 1/2 cups (180g) dark rye flour
- 2 1/4 teaspoons (7g) instant yeast (one standard packet)
- 1 1/4 cups (300ml) warm water, about 110°F (43°C)
- 2 tablespoons (30ml) honey
- 1 tablespoon (15ml) molasses
- 2 tablespoons (28g) unsalted butter, melted and slightly cooled
- 1 1/2 teaspoons (9g) fine sea salt
- 2 tablespoons (16g) caraway seeds, plus extra for topping
- 1 large egg, beaten, for the egg wash
- 1 tablespoon cornmeal, for dusting the pan (optional)
If you’d rather start with a bubbly homemade starter instead of commercial yeast, our Sourdough Starter Recipe walks you through building one from scratch.
Kitchen Equipment Needed
Having the right tools on hand makes this rye bread recipe go much more smoothly from start to finish. Most of these items are kitchen basics, but a couple of upgrades can really make a difference with sticky rye dough.
- Stand mixer with a dough hook attachment, or a large mixing bowl for hand kneading
- 9×5 inch loaf pan
- Kitchen scale for accurate measuring
- Instant read thermometer
- Bench scraper for handling sticky dough
- Pastry brush for the egg wash
- Plastic wrap or a clean kitchen towel for covering the dough
- Wire cooling rack
Read Also: Dutch Oven Bread Recipe
Recommended Products for This Recipe
These are a few products I personally recommend for this rye bread recipe, based on quality, performance, and how much easier they make the baking process. None of these are required, but they can take your results from good to great.
1. Bob’s Red Mill Organic Dark Rye Flour
A good quality dark rye flour makes a noticeable difference in both the flavor and the color of this loaf. This stone ground option has a robust, earthy taste that gives the bread real depth without any artificial additives.
2. KitchenAid Stand Mixer
Rye dough tends to be stickier and heavier than regular bread dough, which can be tough on your arms if you’re kneading by hand. A sturdy stand mixer with a dough hook handles the job effortlessly and keeps the dough from sticking to your hands and countertop.
3. USA Pan Nonstick Loaf Pan
A heavy duty loaf pan with a nonstick coating ensures your bread releases cleanly every single time, with no sticking or tearing on the bottom crust. The even heat distribution also helps the loaf bake uniformly from edge to edge.
4. Digital Instant Read Meat Thermometer
Checking the internal temperature is the most reliable way to know your rye bread is fully baked without cutting into it too soon. This thermometer gives an accurate reading in seconds, so there’s no more guessing games with dense breads like rye.
If you love working with rustic shaping techniques, this method translates beautifully to our Artisan Bread Recipe as well.
Step-by-Step Instructions
1. Activate the Yeast
- In the bowl of your stand mixer, or a large mixing bowl, combine the warm water (about 110°F or 43°C) with the honey.
- Stir gently until the honey dissolves completely into the water.
- Sprinkle the instant yeast evenly over the surface of the liquid.
- Let the mixture sit undisturbed for 5 to 10 minutes, until it looks foamy and slightly bubbly on top.
- If the mixture doesn’t foam at all, your yeast may be expired, so it’s worth starting over with a fresh packet before moving on.
2. Mix the Dry Ingredients
- In a separate large bowl, add the bread flour and dark rye flour.
- Sprinkle the fine sea salt evenly over the flours.
- Add the caraway seeds to the bowl as well.
- Whisk everything together until the salt and caraway seeds are evenly distributed throughout the flour mixture.
- Set this bowl aside while you finish preparing the wet ingredients.
3. Combine the Wet and Dry Ingredients
- Once your yeast mixture is foamy, add the melted butter and the molasses directly into the bowl with the yeast mixture.
- Stir briefly with a spoon or spatula until the butter and molasses are mostly combined with the liquid.
- Pour the flour mixture into the bowl with the wet ingredients, or pour the wet mixture into the flour bowl, whichever is easier for your setup.
- Mix on low speed with the dough hook, or stir by hand with a wooden spoon, until a rough, shaggy dough forms and no dry flour remains at the bottom of the bowl.
- The dough will look sticky and uneven at this stage, which is completely normal for rye bread.
4. Knead the Dough
- Increase the mixer speed to medium and knead the dough for 8 to 10 minutes, or knead by hand on a lightly floured surface for the same amount of time.
- The dough should become smoother and more elastic as you knead, although it will remain noticeably stickier than a standard white bread dough.
- Resist the urge to add a lot of extra flour during kneading, since too much flour can make the finished loaf dense and dry.
- If the dough is sticking heavily to your hands, lightly wet your hands with water instead of dusting with more flour.
- The dough is ready when it holds together in a ball and springs back slowly when you press it gently with a finger.
5. Let the Dough Rise (First Rise)
- Lightly grease a large bowl with a small amount of oil or butter.
- Shape the dough into a rough ball and place it into the greased bowl, turning it once so the surface is lightly coated.
- Cover the bowl tightly with plastic wrap or a clean kitchen towel.
- Place the bowl in a warm spot, such as inside an oven that’s turned off with the light on, and let the dough rise for 1 to 1 1/2 hours.
- The dough is ready for the next step once it has roughly doubled in size.
6. Shape the Loaf
- Lightly dust your work surface with flour and gently turn the risen dough out onto it.
- Press down gently on the dough with your palms to release some of the air, but don’t punch it down completely.
- Fold the dough into a rectangle, then roll it up tightly from one short end to the other to form a loaf shape.
- Pinch the seam closed and tuck the ends of the loaf underneath so it forms a neat, even shape.
- Lightly grease your 9×5 inch loaf pan and sprinkle the bottom with the cornmeal, if using, then place the dough seam side down into the pan.
7. Let the Dough Rise Again (Second Rise)
- Cover the loaf pan loosely with plastic wrap or a clean kitchen towel.
- Place it back in your warm spot and let it rise for 45 minutes to 1 hour, or until the dough has risen about an inch above the rim of the pan.
- About 20 minutes before the rise is finished, preheat your oven to 375°F (190°C) so it’s fully heated and ready when the dough is.
- Avoid letting the dough over rise, since rye dough can deflate slightly in the oven if it rises too far before baking.
8. Brush, Top, and Bake
- Once the dough has finished its second rise, gently brush the top of the loaf with the beaten egg using your pastry brush.
- Sprinkle the extra caraway seeds evenly over the top of the egg washed loaf.
- Using a sharp knife or razor blade, make one or two shallow diagonal slashes across the top of the loaf to help it expand evenly as it bakes.
- Place the pan in the preheated oven and bake for 30 to 35 minutes, until the crust is deep golden brown.
- Check for doneness by inserting your instant read thermometer into the center of the loaf, which should register between 195°F and 200°F (90°C to 93°C).
9. Cool Before Slicing
- Remove the loaf pan from the oven and let it sit on a cooling rack for about 10 minutes.
- Carefully run a butter knife around the edges of the pan, then turn the loaf out onto the wire rack.
- Let the bread cool completely on the rack, which usually takes at least 1 hour.
- Slicing into the loaf too early can cause the crumb to look gummy, even if the bread is fully baked, so patience really pays off here.
- Once cooled, slice with a serrated bread knife for the cleanest cuts.
Another favorite to bake next: Whole Wheat Bread Recipe
Tips for Success
A few small adjustments can make a big difference with this rye bread recipe, especially if you’re working with rye flour for the first time. Keep these tips in mind as you bake.
- Use a kitchen scale whenever possible, since flour measured by volume can vary quite a bit and rye flour is sensitive to extra moisture.
- Don’t be tempted to add more flour just because the dough feels sticky, as rye dough is naturally tackier than wheat dough.
- Keep your rising spot warm and draft free, since rye dough can be slower to rise than all purpose flour doughs.
- Always check the internal temperature with a thermometer rather than relying on color alone, since the dark color from molasses can make the crust look done before it actually is.
- Let the loaf cool completely before slicing for the cleanest crumb and the best texture.
These same tips also apply nicely to our Easy Sourdough Bread Recipe if you decide to try that one next.
Serving Suggestions
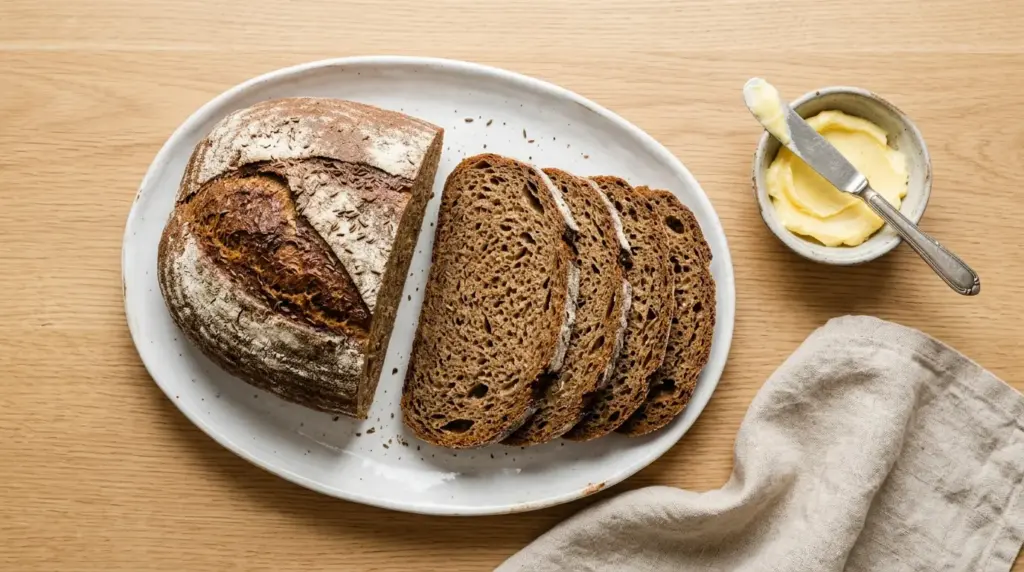
This rye bread recipe is incredibly versatile once it’s cooled and sliced. It works just as well for a simple breakfast as it does for a full dinner spread.
Here are some of my favorite ways to serve it:
- Toasted with butter and a drizzle of honey for breakfast
- Layered with deli meat, cheese, and mustard for a classic sandwich
- Sliced and toasted alongside a bowl of hearty soup or stew
- Cubed and toasted into homemade croutons for salads
- Served alongside a cheese board with sharp cheddar and pickles
Another favorite pairing to try: Borscht Recipe
Variations to Try
Once you’ve made this rye bread recipe a time or two, it’s fun to start experimenting with different flavors and add ins. Here are a few ideas worth trying.
- Seeded rye: Add a tablespoon each of sesame and poppy seeds along with the caraway seeds for extra crunch.
- Onion rye: Mix in 2 tablespoons of dried minced onion with the dry ingredients for a savory twist.
- Pumpernickel style: Add 2 tablespoons of cocoa powder and an extra tablespoon of molasses for a darker, richer loaf.
- Raisin rye: Fold in 1/2 cup of raisins during shaping for a slightly sweet variation that’s great with cream cheese.
- No caraway version: Simply omit the caraway seeds if you prefer a milder, more neutral flavored rye loaf.
If you enjoy trying new bread recipes, you might also like our Beer Bread Recipe.
Storage and Reheating
This rye bread recipe stores well, which makes it great for meal prep or for enjoying over several days. A little planning goes a long way toward keeping it fresh.
- Store cooled bread at room temperature in a bread bag or wrapped tightly in plastic wrap for up to 4 days.
- Keep the loaf away from direct sunlight or heat sources, which can dry it out faster.
- For longer storage, slice the loaf and freeze the slices in a freezer safe bag for up to 3 months.
- Thaw frozen slices at room temperature, or toast them straight from frozen.
- To refresh a slightly stale loaf, wrap it in foil and warm it in a 300°F (150°C) oven for about 10 minutes.
Read Also: Irish Soda Bread Recipe
Nutritional Facts
These values are approximate and will vary slightly depending on the exact ingredients and brands you use. This rye bread recipe yields about 12 slices per loaf.
- Calories: approximately 140 per slice
- Carbohydrates: approximately 25g per slice
- Protein: approximately 4g per slice
- Fat: approximately 3g per slice
- Fiber: approximately 2g per slice
- Sugar: approximately 3g per slice
- Sodium: approximately 200mg per slice
For another comforting homemade option, take a look at our French Bread Recipe.
Health Benefits of Key Ingredients
A few of the ingredients in this rye bread recipe offer more than just great flavor. Here’s a quick look at what they bring to the table nutritionally.
- Rye flour: Higher in fiber than refined white flour, which can help support healthy digestion and steady energy levels.
- Caraway seeds: Traditionally used to support digestion and contain antioxidant compounds.
- Honey: A natural sweetener that adds flavor without relying on refined sugar.
- Molasses: Contains small amounts of iron and other minerals, in addition to adding rich color and flavor.
- Whole grains in general: Linked to better heart health and more stable blood sugar levels when eaten as part of a balanced diet.
Another loaf worth exploring: Sourdough Discard Bread Recipe
Frequently Asked Questions
1. What makes rye bread different from regular bread?
Rye bread uses rye flour instead of, or in addition to, wheat flour, which gives it a denser texture and a slightly tangy, earthy flavor. This recipe combines rye flour with bread flour to keep the crumb soft while still getting that classic rye taste.
2. Can I make this recipe using only rye flour?
You can, but the loaf will be much denser and heavier since rye flour has less gluten than wheat flour. For a softer, more sandwich friendly loaf, the blend of bread flour and rye flour used in this recipe is recommended.
3. Why didn’t my dough rise as much as expected?
This is often caused by yeast that’s old or water that was too hot, which can kill the yeast before it gets a chance to work. Make sure your water is warm rather than hot, around 110°F (43°C), and check that your yeast is within its expiration date.
4. Can I leave out the caraway seeds?
Yes, caraway seeds can be left out completely if you prefer a milder flavored loaf. The bread will still have that classic rye texture and color from the rye flour and molasses, just with a softer overall taste.
5. How do I know when the bread is fully baked?
The most reliable method is to check the internal temperature with an instant read thermometer, aiming for 195°F to 200°F (90°C to 93°C). The crust should also be a deep golden brown and the loaf should sound hollow when tapped on the bottom.
Another helpful read: Dutch Oven Sourdough Bread Recipe
Final Thoughts
Baking your own rye bread recipe at home is one of those simple kitchen wins that pays off again and again. Once you taste a warm slice straight from the oven, store bought rye bread just won’t compare.
This loaf is forgiving, flavorful, and perfect for everything from weekday sandwiches to weekend brunch spreads. Give it a try this week and let it become part of your regular baking rotation.
If you make this recipe, I’d love to hear how it turned out for you. Drop a comment below or share a photo with friends and family who love good bread as much as you do.
Recommended:
- Classic Tuna Salad Recipe
- Classic Egg Salad Recipe
- Honey Butter Recipe
- Cinnamon Butter Recipe
- Easy Garlic Bread Recipe
- Challah Recipe
- Brioche Recipe
- Potato Leek Soup Recipe
- Pasta Fagioli Recipe
- Sweet Sourdough Bread Recipe