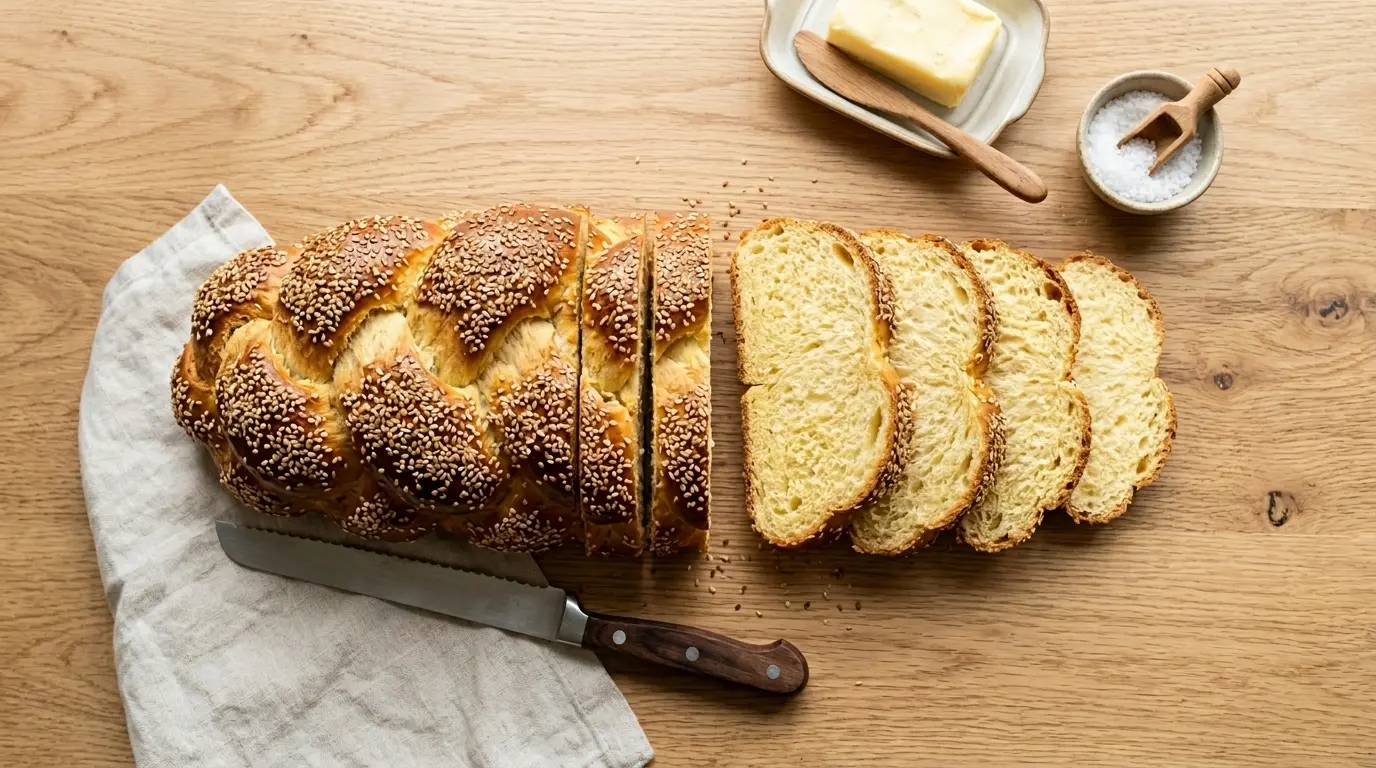
This challah recipe gives you that bakery style braided loaf with a tender, slightly sweet crumb and a shiny golden crust. It is the kind of bread that turns an ordinary dinner into something special, and it is far more approachable to make at home than most people expect.
If you have ever pulled apart a fresh, eggy slice of challah and wondered how it gets that soft, pillowy texture, the secret is in the enriched dough. Eggs, oil, and a touch of honey work together to create a loaf that stays soft for days and tastes amazing whether you eat it plain, toasted, or turned into French toast the next morning.
This recipe walks you through every single step, from activating the yeast to braiding the dough like a pro. By the end, you will have two beautiful loaves of challah that look like they came straight from a Jewish bakery.
This bread also makes a wonderful base for Dinner Rolls if you want to turn the same dough into individual portions for a holiday table.
Why You’ll Love This Challah Recipe
Challah has earned its reputation as one of the most beloved breads for a reason. It is rich without being heavy, sweet without being a dessert, and the braided shape makes it as beautiful as it is delicious.
Once you make it from scratch, you will understand why so many families pass this recipe down through generations.
Here is why this particular challah recipe works so well:
- Soft, pillowy texture thanks to the combination of eggs, oil, and a resting period that lets the gluten relax
- Beautiful golden crust from a double layer of egg wash applied before baking
- Slightly sweet flavor from honey, which also helps keep the bread moist for days
- Beginner friendly braiding instructions with a simple three strand method that still looks impressive
- Versatile leftovers that work beautifully in French toast, bread pudding, or simple toast with butter
- Make ahead friendly since the dough can rise slowly in the refrigerator overnight
If you love baking with enriched doughs, you might also enjoy Homemade Bagels for another classic recipe that uses similar techniques.
Ingredients
Most of the ingredients for challah are pantry staples, which is part of what makes this bread so approachable. The key players are flour, yeast, eggs, oil, and a sweetener, usually honey or sugar.
Using room temperature eggs helps them blend smoothly into the dough, and bread flour (if you have it) gives the loaf a slightly chewier bite, though all purpose flour works wonderfully too.
For the dough:
- 4 ½ cups (565 g) all purpose flour, plus more for kneading
- 2 ¼ teaspoons active dry yeast (one standard packet)
- ¼ cup (50 g) granulated sugar
- 1 ½ teaspoons fine sea salt
- ¾ cup (180 ml) warm water, about 110°F (43°C)
- ⅓ cup (75 ml) neutral vegetable oil or mild olive oil
- ¼ cup (85 g) honey
- 3 large eggs, at room temperature, plus 1 extra yolk
For the egg wash and topping:
- 1 large egg
- 1 tablespoon water
- 1 tablespoon sesame seeds or poppy seeds, optional
For a touch of extra flavor, you can also pair this bread with Honey Butter when serving, since the sweetness of the butter mirrors the honey already baked into the dough.
Kitchen Equipment Needed
You do not need anything fancy to make challah, but a few specific tools will make the process much smoother, especially when it comes to mixing the dough and getting an even bake.
A stand mixer is the biggest time saver here, though kneading by hand is completely doable if you do not have one.
Here is what you will want to have on hand:
- Stand mixer with a dough hook attachment, or a large mixing bowl and your hands for kneading
- Large mixing bowls for proofing the dough
- Kitchen scale for accurate flour measurements, especially helpful if you bake often
- Measuring cups and spoons
- Pastry brush for applying the egg wash evenly
- Two large baking sheets
- Parchment paper
- Plastic wrap or clean kitchen towels for covering the dough while it rises
- Instant read thermometer to check the internal temperature of the baked loaves
- Cooling rack so the bottoms of the loaves do not get soggy as they cool
Since this recipe makes two loaves, you might also want to check out Sourdough Discard Bread if you are interested in exploring other enriched and rustic bread styles using similar equipment.
Recommended Products for This Recipe
These are a few products that genuinely make a difference when baking challah, whether you are working on consistency, getting that perfect golden crust, or simply making the whole process easier on yourself.
1. KitchenAid Stand Mixer
A stand mixer takes the guesswork out of kneading enriched dough, which can be quite sticky due to the eggs and oil. It kneads consistently for the full time needed to develop gluten, giving you that soft, stretchy texture every time. This is one of those tools that, once you have it, you will use constantly for all kinds of bread baking.
2. Half Sheet Baking Pans
Sturdy, heavy duty baking sheets help your challah bake evenly without warping in the oven, which can happen with thinner pans. Even heat distribution means a more uniform golden color across both loaves. These pans are also useful for countless other baking projects beyond bread.
3. Glass Mixing Bowl Set
A set of glass bowls in various sizes is incredibly handy for proofing dough, since you can actually see the dough rise through the sides. They are also easy to clean and do not retain odors the way some plastic bowls can. Having a few different sizes makes prepping the egg wash, mixing dry ingredients, and proofing the dough much more organized.
4. Silicone Pastry Brush
A silicone pastry brush applies egg wash smoothly and evenly without shedding bristles into your dough, which can happen with older natural bristle brushes. It is also dishwasher safe, making cleanup quick. For a recipe like challah where the egg wash is key to that glossy finish, a good brush really does matter.
5. Bench Scraper
A bench scraper makes dividing your dough into equal portions for braiding so much easier, helping you get strands that are roughly the same size for a more even braid. It is also great for cleaning up your work surface afterward. This small tool makes a noticeable difference in how professional your braided loaves look.
If you enjoy working with enriched dough, Rosemary Focaccia is another great recipe to try with some of this same equipment.
Step-by-Step Instructions
This recipe makes two loaves of challah, each braided with three strands. The process involves activating the yeast, mixing and kneading the dough, letting it rise twice, braiding, and baking. Take your time with each step, especially the rising stages, since rushing them is the most common reason homemade bread does not turn out as soft as expected.
1. Activate the Yeast
- In a small bowl or liquid measuring cup, combine the warm water (about 110°F or 43°C) with 1 teaspoon of the sugar from your ¼ cup measurement.
- Sprinkle the active dry yeast over the top of the water and give it a gentle stir.
- Let the mixture sit undisturbed for 5 to 10 minutes, until it becomes foamy and bubbly on top.
- If the mixture does not foam after 10 minutes, your yeast may be expired, and it is best to start over with a fresh packet before continuing.
2. Mix the Wet Ingredients
- In the bowl of your stand mixer, or a large mixing bowl if working by hand, add the activated yeast mixture.
- Add the oil and honey to the bowl.
- Crack in 3 of the large eggs, plus the extra egg yolk, reserving the egg white from that extra egg for later if you like, though it can also simply be discarded.
- Whisk everything together by hand until the eggs are fully combined with the wet ingredients and the mixture looks smooth and slightly frothy.
3. Add the Dry Ingredients
- In a separate bowl, whisk together the flour, the remaining sugar, and the salt until evenly distributed.
- Add about half of the flour mixture to the wet ingredients in the mixer bowl.
- Attach the dough hook and mix on low speed until the flour is mostly incorporated and the mixture looks like a thick, wet batter.
- Gradually add the remaining flour mixture, about a cup at a time, mixing on low speed between additions.
- Continue adding flour until the dough pulls away from the sides of the bowl and forms a soft, slightly sticky ball around the dough hook.
4. Knead the Dough
- Increase the mixer speed to medium and knead the dough for 7 to 8 minutes.
- The dough should become smooth, elastic, and only slightly sticky to the touch by the end of kneading.
- If the dough still seems very wet and is sticking heavily to the sides of the bowl after 5 minutes, add an extra tablespoon of flour at a time until it comes together.
- If kneading by hand, turn the dough out onto a lightly floured surface and knead for 10 to 12 minutes, until smooth and elastic.
5. First Rise
- Lightly oil a large clean bowl, then transfer the dough into it, turning the dough once so all sides get a light coating of oil.
- Cover the bowl tightly with plastic wrap or a damp kitchen towel.
- Place the bowl in a warm spot, such as near a sunny window or inside an oven that is turned off with the light on.
- Let the dough rise for 1 to 1 ½ hours, or until it has roughly doubled in size.
6. Divide and Shape the Strands
- Once the dough has doubled, gently punch it down to release the air.
- Turn the dough out onto a lightly floured surface and divide it in half using a bench scraper or knife, since this recipe makes two loaves.
- Divide each half into 3 equal pieces, for a total of 6 pieces of dough.
- Roll each piece into a long rope, about 14 to 16 inches in length, using your palms to gently roll the dough back and forth on the counter, working from the center outward toward the ends.
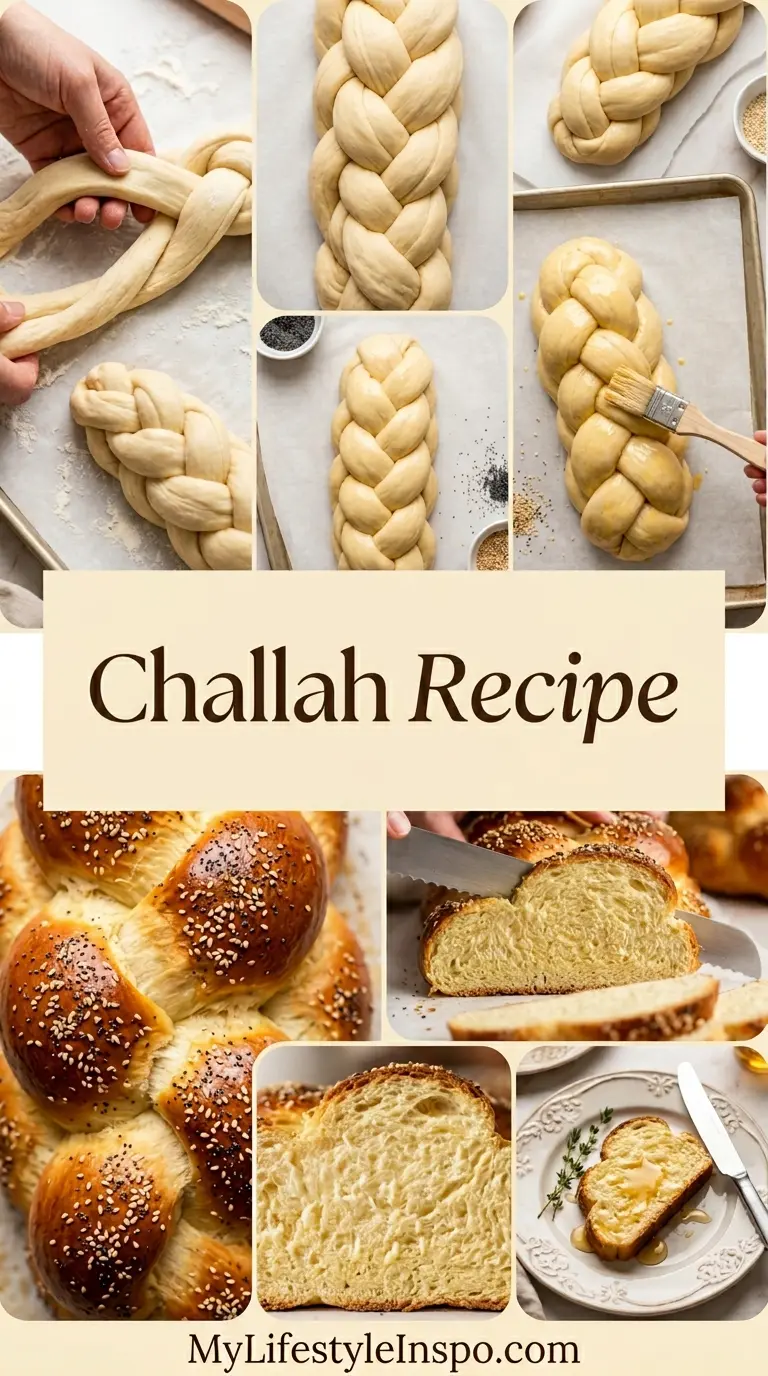
7. Braid the Loaves
- Take 3 ropes and lay them side by side on a parchment lined baking sheet, pinching the tops together firmly.
- Braid the strands by crossing the right strand over the middle strand, then the left strand over the new middle strand, repeating this pattern down the length of the dough.
- Once you reach the bottom, pinch the ends together and tuck them slightly underneath the loaf to create a neat finish.
- Repeat this process with the remaining 3 strands to form your second loaf, placing it on the second prepared baking sheet.
8. Second Rise
- Loosely cover both braided loaves with plastic wrap or a clean kitchen towel, making sure the covering does not stick to the dough.
- Let the loaves rise in a warm spot for 45 minutes to 1 hour, until they look noticeably puffier, though they do not need to fully double again.
- While the loaves are rising, preheat your oven to 350°F (175°C) toward the end of this rising time.
9. Apply the Egg Wash
- In a small bowl, whisk together the remaining egg and 1 tablespoon of water until fully combined.
- Using a pastry brush, gently brush the egg wash over the entire surface of each loaf, making sure to get into the crevices of the braid.
- If using sesame seeds or poppy seeds, sprinkle them evenly over the top of each loaf right after applying the egg wash so they stick to the surface.
10. Bake the Challah
- Place both baking sheets in the preheated oven, ideally on the middle racks, leaving some space between them for air circulation.
- Bake for 25 to 30 minutes, until the loaves are deeply golden brown on top.
- For a more accurate check, insert an instant read thermometer into the thickest part of a loaf, it should read about 190°F (88°C) when fully baked.
- If the tops are browning too quickly before the loaves are fully baked through, loosely tent them with aluminum foil for the remaining bake time.
11. Cool the Loaves
- Remove the baking sheets from the oven and let the loaves sit on the pans for about 5 minutes.
- Transfer the loaves to a cooling rack to cool completely, which usually takes about 1 hour.
- Allowing the bread to cool fully before slicing helps the crumb set properly, so the slices hold together rather than tearing apart.
For another recipe that uses a similar enriched dough and rising technique, take a look at Sourdough Discard Cinnamon Rolls.
Tips for Success
A few small details can make a big difference between a good loaf of challah and a truly great one. Most of these tips come down to temperature control and patience during the rising stages.
Keep these pointers in mind as you bake:
- Make sure your water is warm, not hot, since water above 120°F (49°C) can kill the yeast before it even gets started
- Resist the urge to add too much flour while kneading, since a slightly sticky dough will bake up softer than a dry, stiff one
- If your kitchen is cold, let the dough rise in the oven with just the oven light on for a gentle, consistent warmth
- Apply the egg wash in a thin, even layer rather than pouring it on, so it does not pool in the creases of the braid
- For extra shine, you can apply a second light coat of egg wash about 10 minutes after the first, before baking
- Always check the internal temperature with an instant read thermometer rather than relying on color alone, since ovens vary
If you want to explore more bread baking techniques, Dutch Oven Sourdough Bread is a great next project once you feel comfortable with yeast doughs.
Serving Suggestions
Challah is wonderfully versatile, and it tends to disappear quickly no matter how it is served. Its slightly sweet flavor pairs beautifully with both savory and sweet toppings.
Here are some of the best ways to enjoy it:
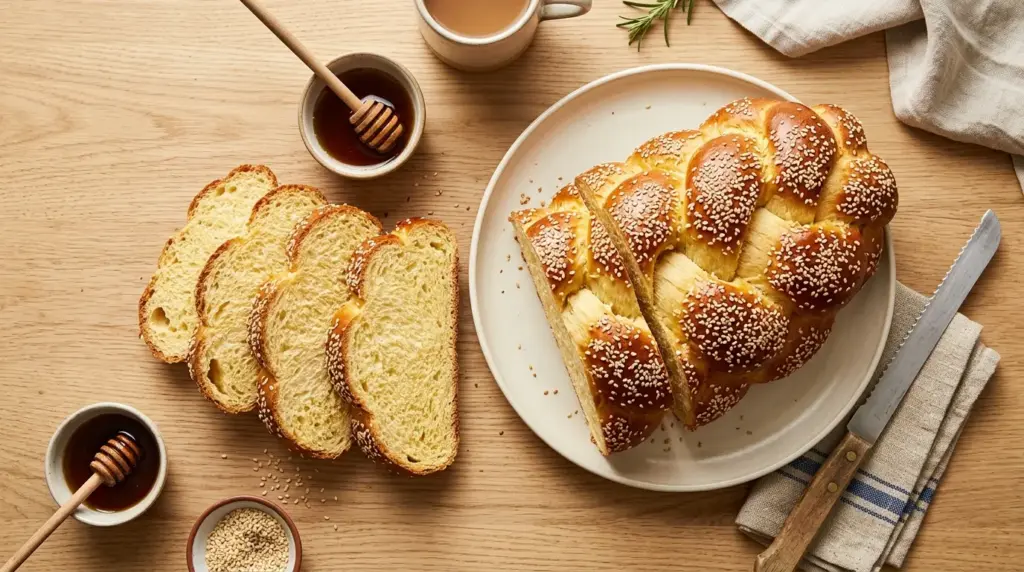
- Sliced thick and toasted, then spread generously with butter or jam
- Used as the base for an incredible Classic French Toast, since the eggy bread soaks up custard beautifully
- Served alongside soups and stews for dipping into broth
- Torn into pieces and used for bread pudding once it starts to go a bit stale
- Made into sandwiches, especially with deli meats or grilled cheese fillings
- Sliced and served warm with honey drizzled over the top for a simple dessert
Read Also: Sourdough Bagel Recipe
Variations to Try
Once you have the basic challah recipe down, there are plenty of fun ways to customize it. Many of these variations are popular for specific holidays or simply for adding extra flavor to the classic loaf.
Here are some variations worth trying:
- Chocolate chip challah, where mini chocolate chips are folded into the dough during the final stages of kneading for a sweeter, dessert like loaf
- Cinnamon raisin challah, made by mixing cinnamon and raisins into the dough before shaping
- Round challah, often made for Rosh Hashanah by coiling a single long rope of dough into a spiral instead of braiding
- Whole wheat challah, substituting up to half of the all purpose flour with whole wheat flour for a heartier, nuttier loaf
- Everything bagel challah, where the egg washed loaf is topped with an everything bagel seasoning blend instead of sesame seeds
- Mini challah rolls, dividing the dough into smaller portions and braiding individual rolls for a holiday table
For another bagel inspired variation, check out the New York Style Bagel Recipe for more ideas on working with enriched, egg based doughs.
Storage and Reheating
Challah stays soft for several days when stored properly, and it also freezes beautifully if you want to save one loaf for later. Because of the eggs and oil in the dough, it tends to stay fresher longer than a basic lean bread.
Here is how to store and reheat your challah:
- Store cooled challah at room temperature in a sealed plastic bag or airtight container for up to 3 days
- For longer storage, wrap the loaf tightly in plastic wrap, then in foil, and freeze for up to 2 months
- To thaw a frozen loaf, leave it wrapped at room temperature for several hours or overnight
- To refresh a slightly stale loaf, wrap it in foil and warm it in a 300°F (150°C) oven for about 10 minutes
- Individual slices can be toasted directly from frozen if you are in a hurry
If you enjoy baking ahead and freezing dough, Sourdough Discard Pretzels is another great recipe that freezes and reheats well.
Nutritional Facts
The nutritional values below are estimates for one slice of challah, based on a loaf cut into 12 slices.
These values can vary depending on the exact size of your slices and any optional toppings used.
- Calories: approximately 180 to 200 per slice
- Carbohydrates: approximately 30 grams
- Protein: approximately 5 grams
- Fat: approximately 5 grams
- Sugar: approximately 4 grams
- Sodium: approximately 200 milligrams
For a different take on enriched bread with a lighter nutritional profile, Whole Wheat Sourdough Bread is worth a look.
Health Benefits of Key Ingredients
While challah is certainly a treat, a few of its key ingredients do offer some nutritional benefits worth mentioning. Understanding what goes into your food can help you enjoy it with a little extra appreciation.
Here is a quick look at some of the standout ingredients:
- Eggs are a great source of protein and contain choline, which supports brain health
- Honey offers antioxidants and has been used traditionally for its soothing properties, especially in warm drinks
- Whole wheat flour, if used in a variation, adds fiber that supports digestion compared to all purpose flour alone
- Sesame seeds provide healthy fats, calcium, and a good dose of magnesium
- Olive oil, if used in place of neutral oil, contains heart healthy monounsaturated fats
Pairing your challah with naturally nutrient dense sides, like Honey Roasted Carrots, can help round out a meal nicely.
Frequently Asked Questions
1. Why is my challah dense instead of light and fluffy?
Dense challah is usually the result of either not kneading the dough long enough or not allowing it to rise fully during both proofing stages.
Make sure your dough doubles in size during the first rise, and that your yeast was active before you started, since old or inactive yeast will not produce enough lift.
2. Can I make the dough ahead of time?
Yes, you can prepare the dough through the first rise, then place it in the refrigerator overnight instead of letting it rise at room temperature.
The next day, let the dough come to room temperature for about an hour before shaping and braiding, then proceed with the second rise and baking as usual.
3. What can I substitute for honey in this recipe?
Granulated sugar or maple syrup can both be used in place of honey at roughly the same quantity.
Keep in mind that honey adds a subtle floral note and helps with moisture retention, so the texture may be very slightly different with substitutions.
4. Why did my braided loaf lose its shape during baking?
This usually happens when the dough strands are too loose or the second rise went on too long, causing the dough to spread rather than hold its shape.
Try braiding the strands a bit more snugly next time, and keep an eye on the second rise so the loaves are puffy but not over proofed.
5. Is challah the same as brioche?
Challah and brioche are similar enriched breads, but challah is traditionally dairy free, using oil instead of butter, while brioche relies heavily on butter for its rich flavor.
This makes challah a great option for those avoiding dairy, while still delivering a soft, slightly sweet crumb.
For more troubleshooting on enriched dough recipes, Sourdough Discard Naan covers similar dough handling tips that can apply here too.
Final Thoughts
Homemade challah is one of those recipes that feels far more impressive than the effort it actually takes. Once you get the hang of braiding, it becomes a relaxing, almost meditative part of the process.
Give this recipe a try this weekend, and you will likely find yourself making it again and again for family dinners, holidays, or simply because the smell of fresh bread baking is hard to beat.
If you make this challah recipe, let us know how it turned out in the comments below, and feel free to share a photo of your braided loaves. We would love to see how yours came out.
Recommended:
- Everything Bagel Recipe
- Sourdough Discard Focaccia Recipe
- French Toast Casserole Recipe
- Sourdough Discard Dinner Rolls Recipe
- Gluten Free Sourdough Bread Recipe
- Sourdough Bagel Recipe
- Sourdough Discard Pita Bread Recipe
- Easy French Toast Recipe
- Sourdough Discard Flatbread Recipe

