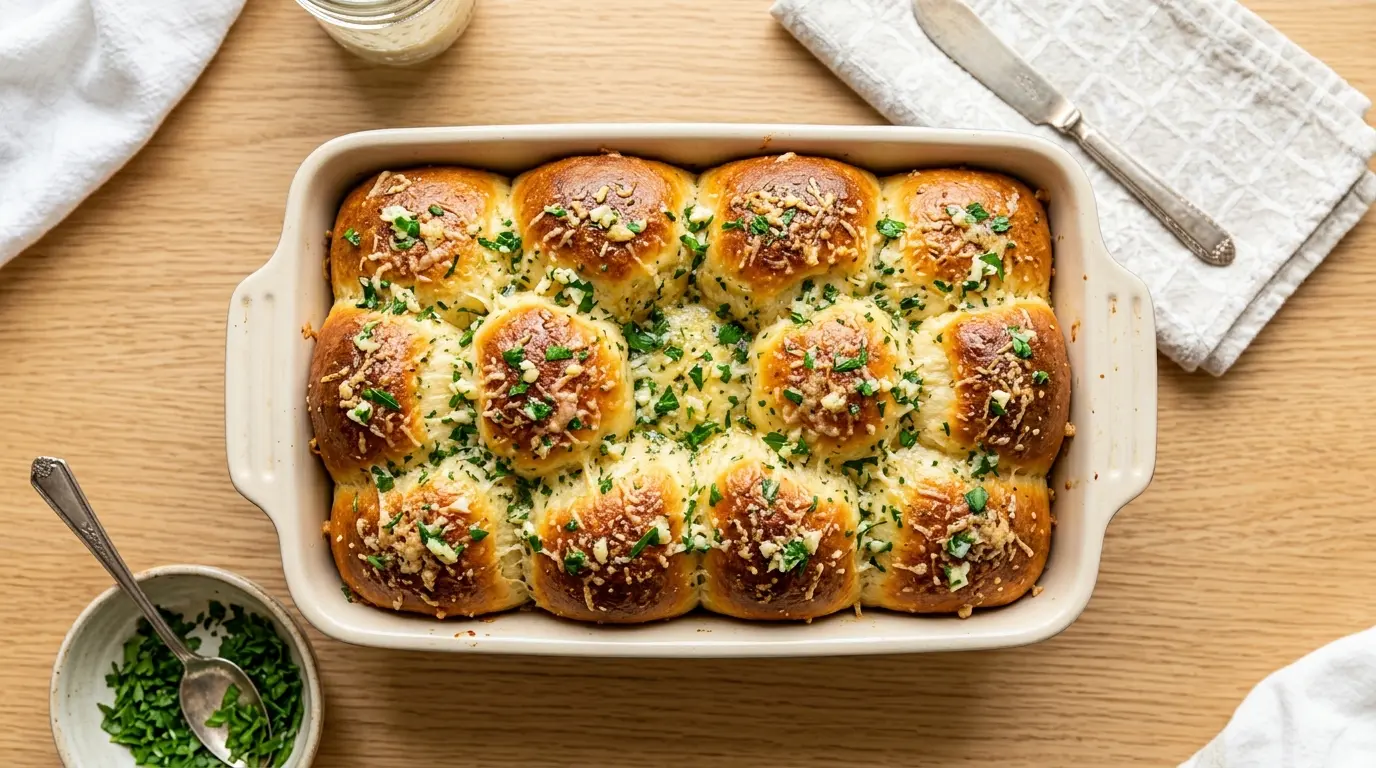
Few things at the dinner table disappear faster than a freshly baked pull apart garlic bread recipe done right. Golden on the outside, pillowy soft on the inside, and loaded with garlicky herb butter in every single layer, this is the kind of bread that makes people forget about everything else on the table.
The magic behind this recipe is in the technique. You roll homemade yeast dough into small balls, coat each one in a deeply flavored garlic butter mixture, and nestle them together in a loaf pan. As the bread bakes, those buttered balls rise and merge into a beautiful, tearable loaf that practically begs to be pulled apart piece by piece.
Fresh garlic is key here. Garlic powder is fine in a pinch, but freshly minced cloves give you that sharp, aromatic punch that makes this bread truly memorable. Salted butter adds richness and depth, while dried or fresh parsley keeps things bright and herby.
Whether you are making this for a weeknight pasta dinner or bringing it to a gathering, it never fails to impress.
This pairs wonderfully alongside a bowl of Zuppa Toscana for a hearty, crowd-pleasing Italian-inspired meal.
Why You’ll Love This Pull Apart Garlic Bread Recipe
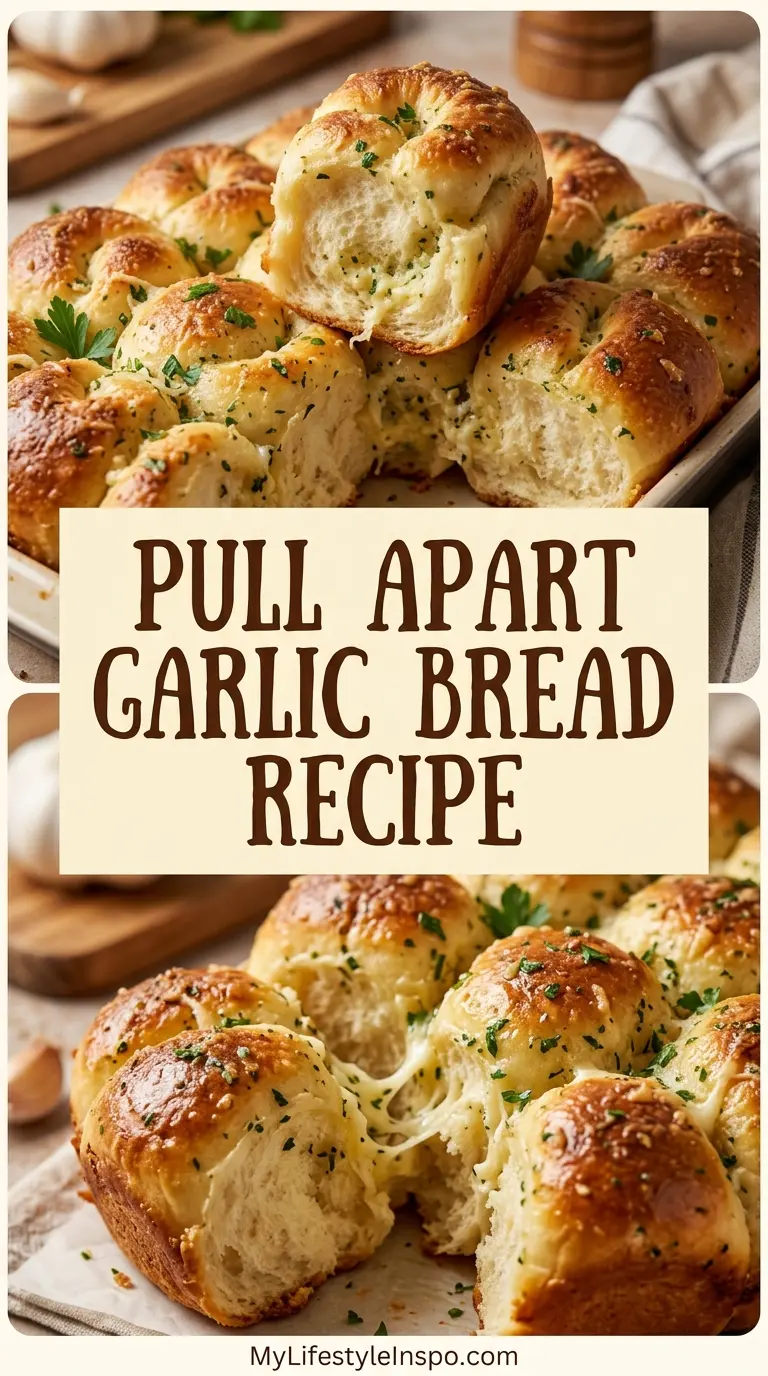
This recipe hits every note you want from a homemade bread. It is warm, buttery, garlicky, and impossibly soft in the center with just the right amount of golden crunch on the edges.
The tear-and-share format is part of the charm. There is no slicing, no fuss, just reach in and pull away a piece. It is naturally interactive, which makes it perfect for family dinners, game nights, and casual get-togethers.
The dough itself is forgiving and beginner-friendly. You do not need advanced baking skills or specialty equipment to get a beautiful result.
Each dough ball is individually coated in garlic butter before baking, which means every single bite carries that full, bold flavor all the way through.
- Beginner-friendly yeast dough that is soft, easy to handle, and rises reliably
- Loaded with fresh garlic and herb butter in every bite, not just on the surface
- Ready in about two hours from start to finish, including rising time
- Endlessly adaptable with cheese, herbs, or spice variations
- Makes a generous loaf perfect for groups of four to eight people
- Doubles beautifully if you need to feed a crowd
Another favorite to pair with this: Easy Garlic Bread
Ingredients
The ingredient list here is short and simple, which is exactly what makes this recipe so reliable. Fresh garlic and real butter are the non-negotiables; do not skip or substitute those.
- 2 1/4 teaspoons (7g) active dry yeast
- 1 cup (240ml) warm whole milk, around 110°F (43°C)
- 1 tablespoon granulated sugar
- 3 cups (375g) all-purpose flour, plus more for kneading
- 1 teaspoon salt
- 1 large egg, room temperature
- 3 tablespoons (42g) unsalted butter, softened, for the dough
- 6 tablespoons (84g) unsalted butter, melted, for the garlic coating
- 5 cloves fresh garlic, minced
- 2 tablespoons fresh flat-leaf parsley, finely chopped
- 1/2 teaspoon garlic powder
- 1/2 teaspoon salt, for the garlic butter
- 1/2 cup (50g) freshly grated Parmesan cheese (optional but highly recommended)
For a deeply cheesy version, you can also add 1/2 cup shredded mozzarella to the coating mix.
Read Also: Cheesy Garlic Bread Recipe
Kitchen Equipment Needed
None of this requires specialized tools, though a stand mixer will save you some effort during kneading. Everything else is standard kitchen gear.
- Stand mixer with dough hook (or a large bowl and your hands for hand-kneading)
- 9×5-inch loaf pan
- Large mixing bowl
- Small mixing bowl for the garlic butter
- Bench scraper or sharp knife for dividing dough
- Kitchen scale (recommended for accuracy)
- Clean kitchen towel or plastic wrap for covering dough
- Pastry brush for extra butter
- Oven mitts
- Wire cooling rack
You might also enjoy: Rosemary Focaccia
Recommended Products for This Recipe
These are products based on quality and performance that will genuinely make a difference when baking this pull apart garlic bread.
1. KitchenAid Stand Mixer with Dough Hook
A stand mixer takes all the effort out of kneading and gives you a consistently smooth, elastic dough every time. The dough hook attachment is especially well-suited to enriched doughs like this one. This is an investment that pays off across dozens of baking projects.
2. USA Pan Nonstick Loaf Pan
This pan distributes heat evenly for a uniformly golden crust without hotspots. The aluminized steel construction holds up beautifully over years of use, and the nonstick coating makes releasing the loaf clean and easy.
3. Microplane Garlic Grater
A fine grater or microplane turns fresh garlic into a smooth paste that disperses evenly throughout the butter coating. This means every bite gets maximum garlic flavor without any harsh raw chunks.
4. Parmigiano Reggiano Wedge
The real thing makes a noticeable difference in flavor. Freshly grated Parmigiano Reggiano has a nuttiness and depth that pre-grated products simply cannot match, and it melts beautifully into the bread.
5. OXO Kitchen Scale
Measuring flour by weight rather than volume gives you a consistently soft dough. Even small differences in how flour is scooped can affect the final texture, and a scale eliminates that variable entirely.
For another great use of homemade dough, check out: Sourdough Discard Dinner Rolls
Step-by-Step Instructions
Step 1: Activate the Yeast
- Pour the warm milk into the bowl of your stand mixer (or a large mixing bowl). The milk should be around 110°F (43°C). Too hot will kill the yeast; too cold will keep it dormant.
- Add the granulated sugar and sprinkle the active dry yeast over the surface of the milk.
- Stir very gently to combine, then let the mixture sit undisturbed for 5 to 10 minutes. During this time, the yeast will wake up and the surface will become visibly foamy with small bubbles. If nothing happens after 10 minutes, your yeast may be expired or your milk too hot. Start over with fresh yeast.
Step 2: Make the Dough
- Once the yeast is foamy, add the softened butter and the egg to the yeast mixture. Mix briefly to combine.
- Add 2 cups (250g) of the flour along with the salt. Mix on low speed using the dough hook (or stir with a wooden spoon) until a shaggy dough forms.
- Continue adding flour a little at a time, about 1 tablespoon at a time, mixing between additions, until the dough pulls away cleanly from the sides of the bowl but is still slightly tacky. You may not need all 3 cups of flour.
- Increase the mixer speed to medium (setting 4 on most stand mixers) and knead the dough for 5 to 7 minutes, until it is smooth, elastic, and slightly springy when you press a finger into it. If kneading by hand, knead on a lightly floured surface for 8 to 10 minutes.
Step 3: First Rise
- Shape the dough into a smooth ball. Lightly coat a large clean bowl with a neutral oil or cooking spray, then place the dough ball inside. Turn it once to coat all sides with oil.
- Cover the bowl tightly with plastic wrap or a clean damp kitchen towel to keep moisture in.
- Place the bowl somewhere warm. A good trick is to turn your oven on to the lowest setting for two minutes, then turn it off and place the dough inside. Let the dough rise for 60 to 90 minutes, or until it has roughly doubled in size.
Step 4: Make the Garlic Butter
- While the dough rises, prepare your garlic coating. Melt the 6 tablespoons of butter in a small saucepan over low heat or in the microwave in 20-second bursts.
- Add the minced fresh garlic, garlic powder, fresh parsley, and salt to the melted butter. Stir well to combine.
- Taste the mixture. It should be boldly garlicky and well-seasoned. If you want more garlic flavor, add one more minced clove. Set the garlic butter aside but keep it in a spot where it stays fluid. If it starts to solidify as the butter cools, gently reheat it.
- If you are using Parmesan, measure it out and keep it close.
Step 5: Shape the Dough into Balls
- Once the dough has doubled, punch it down firmly in the center to release the built-up gas. Turn the dough out onto a lightly floured work surface.
- Using a bench scraper or sharp knife, divide the dough into 24 equal pieces. If you have a kitchen scale, each piece should weigh about 25 to 28 grams (about 1 oz).
- Roll each piece between your palms using a circular motion, applying gentle downward pressure, to form a smooth, tight ball. Rough or uneven shaping is completely fine at this stage.
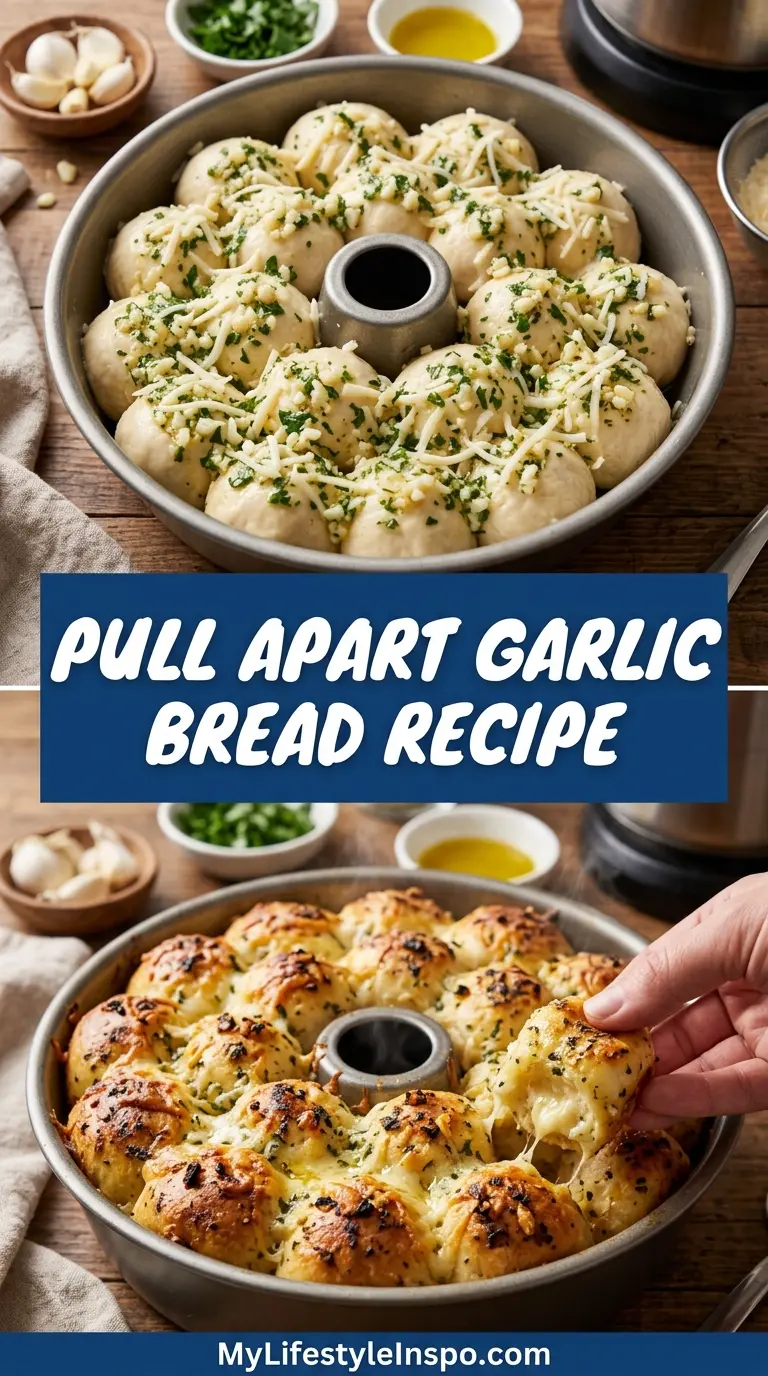
Step 6: Coat Each Ball and Assemble the Loaf
- Grease your 9×5-inch loaf pan thoroughly with butter or cooking spray. Make sure to get into the corners.
- One at a time, roll each dough ball in the garlic butter mixture until fully coated on all sides. If you are using Parmesan, either stir it directly into the butter mixture or sprinkle it over the coated balls as you place them in the pan.
- Arrange the coated dough balls in the pan in two rows of 12, standing them upright or simply stacking them in a single layer depending on the size of your balls. They should fit snugly but still have a small amount of room to expand.
- Pour any remaining garlic butter over the top of the assembled loaf so every exposed surface is well-coated.
Step 7: Second Rise
- Cover the assembled loaf loosely with plastic wrap or a kitchen towel.
- Let it rise again at room temperature for 30 to 45 minutes. The dough balls should puff up noticeably and fill more of the pan. This second rise is what gives the bread its pillowy, cloud-like interior.
- While the dough completes its second rise, preheat your oven to 375°F (190°C) so it is fully up to temperature when the bread is ready to bake.
Step 8: Bake the Bread
- Once the oven is fully preheated and the dough has completed its second rise, remove the covering from the pan.
- If you have any remaining garlic butter, brush or drizzle it over the top of the loaf for extra golden color and flavor.
- Place the loaf pan on the center rack of the oven and bake for 25 to 30 minutes, until the top is deep golden brown and the bread sounds hollow when you tap the center.
- If the top is browning too quickly before the bread has fully cooked through, loosely tent it with a piece of aluminum foil during the last 10 minutes of baking.
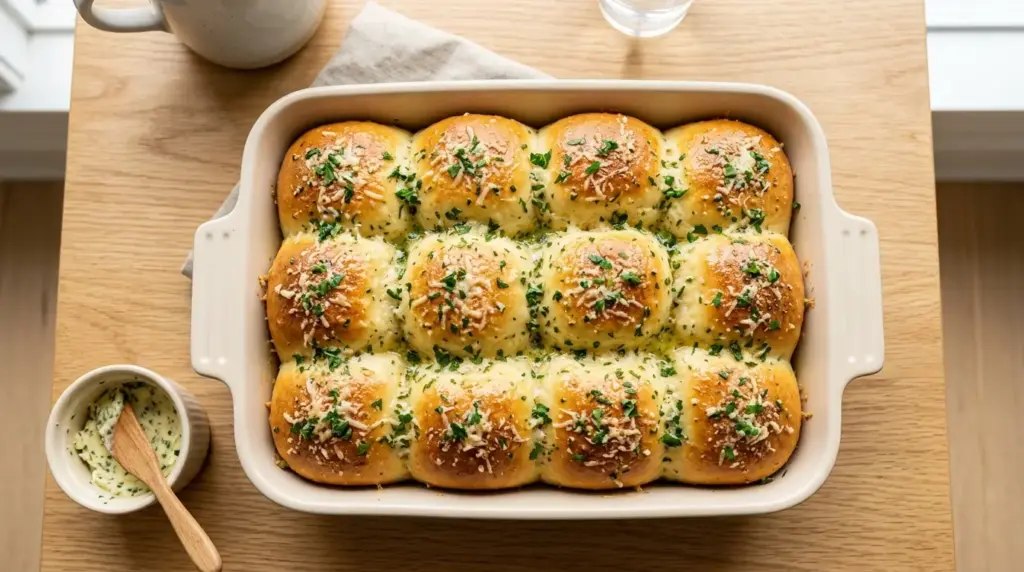
- Remove from the oven and let the bread cool in the pan for 5 minutes before turning it out onto a wire rack or serving board.
You might also enjoy: Garlic Naan Bread
Tips for Success
Small details make a big difference when baking yeasted bread. These tips will help you get the best result from your first try.
- Check your yeast before you start. Yeast that does not foam within 10 minutes is dead. Use fresh, unexpired yeast and always proof it in warm (not hot) liquid first.
- Weigh your flour. Scooping flour directly from the bag compresses it and can easily add 20 to 30% more flour than the recipe intends. A kitchen scale gives you accuracy and a consistently soft dough.
- Do not rush the rises. Rushing the first rise by using too much yeast or too much heat gives you bread with a coarser crumb and less flavor. Slow and steady gives you a better texture and a more developed taste.
- Keep the garlic butter warm. Cold butter will solidify and clump around the dough balls instead of coating them evenly. If it thickens, gently reheat it before continuing.
- Press the dough balls together firmly when placing them in the pan. This helps them bake into a cohesive loaf that holds together when you pull it apart.
- Use real butter, not margarine. The flavor difference is significant and the emulsification properties of real butter help create that signature soft, rich texture.
Read Also: Dinner Rolls Recipe
Serving Suggestions
Pull apart garlic bread is one of those sides that works with almost anything. Its bold garlic flavor is strong enough to complement hearty mains while still being versatile enough for lighter dishes.
It is absolutely ideal alongside a bowl of rich, saucy pasta like Baked Ziti or a big pot of Spaghetti Sauce.
- Serve it with Italian Meatballs and marinara for a crowd-pleasing Italian spread
- Pair it with a creamy Tomato Soup for dunking
- Use individual pieces to scoop up thick, saucy dishes like Shakshuka
- Serve alongside a fresh broccoli salad for a satisfying casual dinner
- Set it on the appetizer table next to a bowl of warm marinara for dipping
- Pair it with a hearty soup like Minestrone for a complete meal
Variations to Try
Once you have the base recipe down, it is easy to customize in all kinds of delicious directions.
- Cheesy pull apart bread: Stir 1/2 cup shredded mozzarella and 1/4 cup Parmesan directly into the garlic butter before coating the dough balls. The cheese melts between the layers as it bakes.
- Herb and olive oil version: Replace the butter coating with a mix of good quality extra virgin olive oil, minced garlic, rosemary, thyme, and flaky sea salt for a Mediterranean flavor profile.
- Spicy garlic bread: Add 1/4 to 1/2 teaspoon red pepper flakes to the garlic butter. This gives a pleasant heat without overwhelming the garlic.
- Everything bagel pull apart bread: Replace the garlic herb coating with a generous amount of everything bagel seasoning mixed into melted butter.
- Sun-dried tomato and basil: Add finely chopped sun-dried tomatoes and fresh basil to the butter coating for a more Italian-forward flavor.
- Pesto pull apart bread: Brush each dough ball with a thin layer of basil pesto before placing in the pan, then top with Parmesan.
For a focaccia-style variation, try this Sourdough Focaccia
Storage and Reheating
This bread is at its absolute best the day it is baked, but it does store well for a couple of days with the right approach.
- Room temperature: Wrap the cooled loaf tightly in aluminum foil or an airtight bag. It will stay fresh at room temperature for up to 2 days.
- Refrigerator: You can refrigerate the wrapped loaf for up to 4 days. The texture will be slightly firmer, but reheating fixes that completely.
- Freezer: Wrap individual pieces or the whole loaf tightly in plastic wrap, then foil, and freeze for up to 2 months. Thaw overnight in the refrigerator before reheating.
- Reheating in the oven: Wrap the bread in foil and warm it in a 300°F (150°C) oven for 10 to 15 minutes. This restores that fresh-from-the-oven softness.
- Reheating individual pieces: Microwave individual rolls for 15 to 20 seconds. They come out soft and warm, though without the crispy exterior.
- Avoid reheating uncovered in a dry oven. This dries out the bread quickly. Foil is your best friend for reheating.
Read Also: Easy Sourdough Bread
Nutritional Facts
The following values are approximate, based on a standard serving of 2 to 3 rolls (about 1/8 of the total loaf) without optional Parmesan.
| Nutrient | Amount per Serving |
|---|---|
| Calories | 280 kcal |
| Total Fat | 12g |
| Saturated Fat | 7g |
| Cholesterol | 50mg |
| Sodium | 360mg |
| Total Carbohydrates | 36g |
| Dietary Fiber | 1g |
| Sugars | 3g |
| Protein | 6g |
These values will vary depending on exact ingredient amounts, whether cheese is added, and how generously you coat the dough in garlic butter.
This pairs beautifully with a lighter main dish. Try it with Italian Wedding Soup for a well-balanced, satisfying meal.
Health Benefits of Key Ingredients
While pull apart garlic bread is very much an indulgence, a few of its core ingredients do come with genuine nutritional value worth noting.
Garlic is one of the most researched culinary ingredients for its health properties. It contains allicin, a compound with natural antibacterial and anti-inflammatory effects. Regular consumption has been linked to improved circulation and immune support.
Whole milk adds calcium, protein, and fat-soluble vitamins like A and D to the dough, contributing to the richness of both the flavor and the nutritional profile of the bread.
Real butter, used in moderate amounts, provides fat-soluble vitamins including vitamin K2, which plays a role in bone and cardiovascular health.
Eggs contribute complete protein, along with B vitamins and choline, which supports brain function and liver health.
- Garlic: Contains allicin, a natural antimicrobial compound; linked to heart health and immune support
- Whole milk: Rich in calcium and vitamin D; supports bone strength
- Eggs: A complete protein source providing essential amino acids and B vitamins
- Real butter: Contains fat-soluble vitamins A, D, E, and K2 in small but meaningful amounts
- Parmesan cheese (optional): A dense source of calcium, protein, and umami flavor without a large serving size
- Parsley: A surprisingly good source of vitamin C and vitamin K, with mild antioxidant properties
For another comforting recipe with wholesome ingredients, try this Homemade Biscuit Recipe
Frequently Asked Questions
1. Can I make this pull apart garlic bread recipe without a stand mixer?
Absolutely. Knead the dough by hand on a lightly floured surface for 8 to 10 minutes until it is smooth and elastic. It takes a bit more effort but produces the exact same result. Make sure your surface and hands are lightly floured but not overly so, to avoid incorporating too much flour into the dough.
2. Can I use instant yeast instead of active dry yeast?
Yes, and it is actually a little easier. With instant yeast, you do not need to proof it in liquid first. Simply mix it directly with the dry flour, then add your warm milk and other wet ingredients. The rise times may also be slightly shorter, so keep an eye on the dough rather than strictly following the clock.
3. How do I know when the dough has risen enough?
The most reliable test is the poke test. Gently press a floured finger about half an inch into the dough. If the indent slowly springs back about halfway, the dough is ready. If it springs back immediately, it needs more time. If the indent stays completely without springing back at all, the dough has over-proofed, though it can usually still be baked successfully.
4. Can I prepare the dough the night before?
Yes. After the first rise, cover the bowl tightly with plastic wrap and place it in the refrigerator overnight. The cold temperature slows the yeast significantly, giving you a slow, flavor-developing rise. The next day, bring the dough out, let it come to room temperature for 30 minutes, then shape, coat, and do the second rise as normal.
5. Why did my bread turn out dense instead of fluffy?
Dense bread is almost always caused by one of three things: under-proofed dough (not enough rise time), dead or expired yeast, or too much flour incorporated during kneading. Make sure your yeast is fresh and foamy before proceeding, give the dough ample time to double in size, and measure flour by weight rather than volume for the most accurate and consistent results.
Read Also: Buttermilk Biscuit Recipe
Final Thoughts
This pull apart garlic bread recipe is exactly the kind of recipe that earns a permanent spot in your regular rotation. It is simple enough for beginners and satisfying enough to make for any occasion, from busy weeknight dinners to weekend entertaining.
The combination of a soft, pillowy homemade dough and a deeply flavored garlic butter coating gives you something far better than anything from a store. Once you smell it coming out of the oven, you will understand why it never makes it to the next day.
Give it a try this week and let us know how it turned out in the comments below. Did you add cheese? Try a variation? We would love to hear about it, so share your experience and tag us if you make it.
Recommended:
- Cheesy Garlic Bread
- Easy Garlic Bread
- Rosemary Focaccia
- Sourdough Discard Breadsticks
- Pizza Hut Breadstick
- Garlic Mashed Potatoes
- Classic Bruschetta
- Dutch Oven Sourdough Bread
- Macaroni Grill Bread
- Sourdough Discard Focaccia

