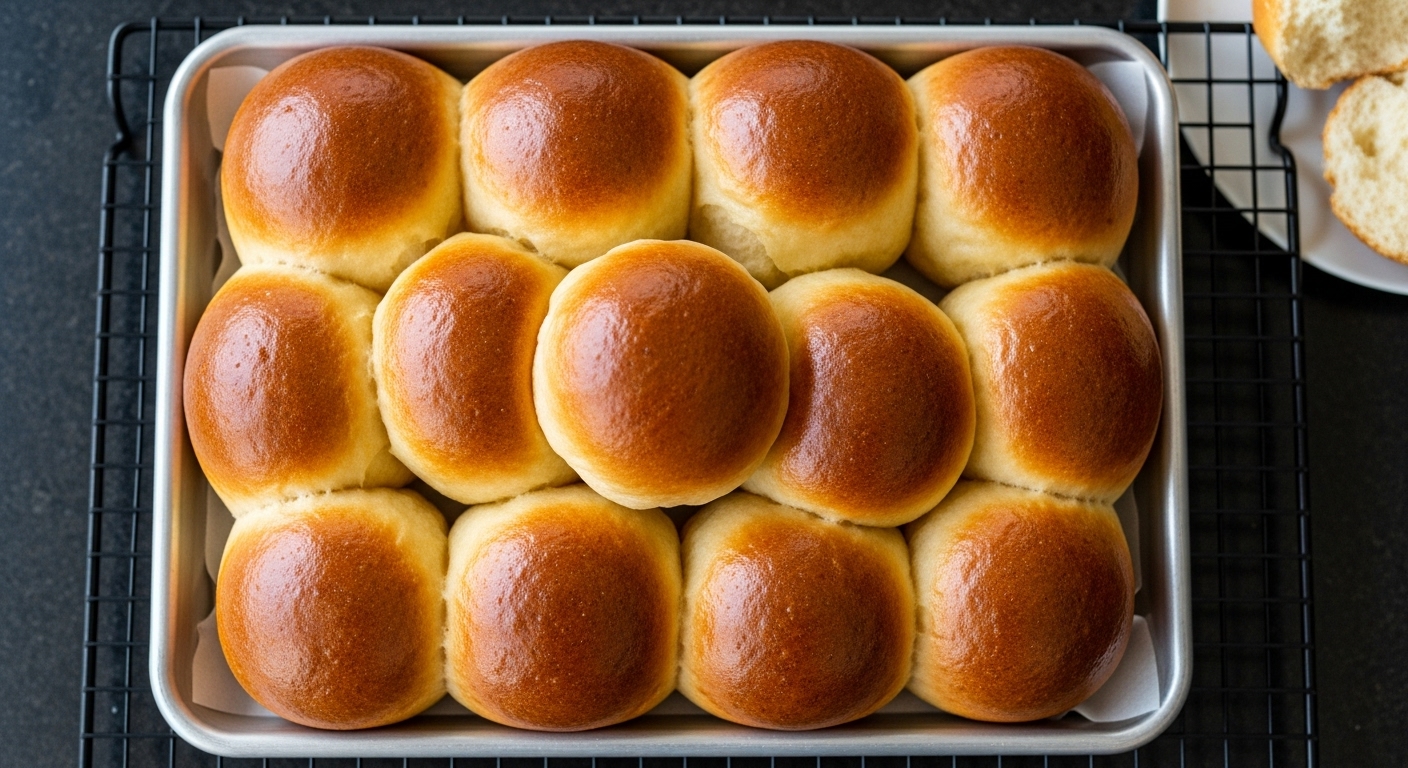
Pull apart a soft, buttery dinner roll and watch the steam rise as you tear into its fluffy center. That’s exactly what you’ll get with this dinner rolls recipe, and honestly, there’s no better way to complete any meal.
I’ve made countless batches of these rolls over the years, and they never fail to disappear within minutes of hitting the table. The golden brown tops give way to an incredibly tender crumb that practically melts in your mouth.
What makes this recipe special is how forgiving it is for beginners, yet produces bakery-quality results every single time. The dough comes together easily, doesn’t require any fancy techniques, and the rising times are flexible enough to work around your schedule.
You’ll end up with a dozen perfectly soft rolls with that classic yeasty aroma wafting through your kitchen. They’re buttery without being heavy, fluffy without being dry, and have just the right amount of sweetness to complement both savory dinners and sweet spreads.
Why You’ll Love This Dinner Rolls Recipe
These homemade rolls will change how you think about dinner bread forever. Once you taste the difference between store-bought and fresh-from-the-oven rolls, you’ll never want to go back.
The recipe is incredibly versatile and fits into any meal plan, from weeknight dinners to holiday feasts. Plus, making your own bread at home is surprisingly satisfying and fills your house with an irresistible aroma.
- Soft and pillowy texture that stays fresh for days
- Simple ingredients you probably already have in your pantry
- Make-ahead friendly so you can prep the dough in advance
- Budget-friendly compared to buying bakery rolls
- Impressive presentation that makes any meal feel special
- Customizable with different shapes, sizes, and add-ins
For another fantastic bread option to serve alongside dinner, check out my Homemade Biscuit Recipe.
Ingredients
The beauty of this dinner rolls recipe lies in its straightforward ingredient list. You won’t need to make a special trip to the store for exotic items, and everything works together to create that perfect tender crumb.
- 1 cup whole milk, warmed to 110°F (240ml)
- 2¼ teaspoons active dry yeast (one ¼-ounce packet)
- ⅓ cup granulated sugar (65g)
- ⅓ cup unsalted butter, melted (75g)
- 1 large egg, room temperature
- 1 teaspoon salt
- 3½ cups all-purpose flour (420g), plus more for dusting
- 3 tablespoons unsalted butter, melted (for brushing)
Kitchen Equipment Needed
Having the right tools makes the bread-making process much smoother and more enjoyable. While you don’t need anything too specialized, these items will help you achieve the best results.
- Stand mixer with dough hook attachment (or mix by hand)
- Large mixing bowl
- 9×13-inch baking pan
- Clean kitchen towel or plastic wrap
- Measuring cups and spoons
- Instant-read thermometer
- Pastry brush
- Sharp knife or bench scraper
Recommended Products for This Recipe
After making dinner rolls dozens of times, I’ve found that certain products genuinely make a difference in how your rolls turn out. These are my tried-and-true recommendations based on years of baking experience.
1. KitchenAid Stand Mixer with Dough Hook
Kneading dough by hand works perfectly fine, but a stand mixer saves so much time and effort while developing the gluten structure more consistently. The dough hook attachment does all the hard work while you can prep other parts of your meal.
2. Fleischmann’s Active Dry Yeast
Not all yeast is created equal, and Fleischmann’s has never let me down. It activates reliably every time and gives the rolls that perfect rise with excellent flavor development.
3. USA Pan Bakeware Rectangular Baking Pan
This commercial-grade pan distributes heat evenly, which means all your rolls brown at the same rate with no burnt corners. The nonstick coating makes cleanup effortless, even with all that butter.
4. King Arthur Baking Company All-Purpose Flour
The protein content in King Arthur flour creates the ideal texture for dinner rolls. It’s consistent from bag to bag, which means your rolls will turn out the same way every single time you make them.
Step-by-Step Instructions
Making dinner rolls from scratch might seem intimidating, but I promise the process is more straightforward than you think. Follow these detailed steps, and you’ll have perfect rolls every time.
1. Activate the Yeast
- Warm the milk to 110°F using a microwave or stovetop (this temperature is crucial for yeast activation)
- Pour the warm milk into the bowl of your stand mixer
- Sprinkle the yeast over the milk and add 1 tablespoon of the sugar
- Let the mixture sit undisturbed for 5-10 minutes until it becomes foamy and bubbly
- If the mixture doesn’t foam, your yeast may be dead or the milk temperature was off; start over with fresh yeast
2. Mix the Wet Ingredients
- Add the remaining sugar, melted butter, and egg to the yeast mixture
- Using the paddle attachment, mix on low speed for about 30 seconds until everything is combined
- The mixture will look liquidy and slightly curdled, which is completely normal
- Make sure the melted butter isn’t too hot or it will kill the yeast
3. Add the Dry Ingredients
- Add the salt and 2 cups of flour to the wet ingredients
- Mix on low speed until the flour is incorporated and no dry streaks remain
- Gradually add the remaining flour, ½ cup at a time, mixing between additions
- Continue adding flour until the dough starts to pull away from the sides of the bowl
- You may need slightly more or less than 3½ cups depending on humidity and flour brand
4. Knead the Dough
- Switch to the dough hook attachment if using a stand mixer
- Knead on medium-low speed for 6-8 minutes until the dough is smooth and elastic
- The dough should be slightly tacky but not sticky when touched
- If kneading by hand, turn the dough onto a lightly floured surface and knead for 8-10 minutes
- To test if it’s ready, poke the dough with your finger; it should spring back slowly
5. First Rise
- Lightly grease a large bowl with butter or cooking spray
- Shape the dough into a ball and place it in the greased bowl, turning once to coat all sides
- Cover the bowl with a clean kitchen towel or plastic wrap
- Place in a warm, draft-free location for 1-1½ hours until doubled in size
- A turned-off oven with the light on works perfectly as a warm rising spot
6. Shape the Rolls
- Grease your 9×13-inch baking pan with butter or cooking spray
- Punch down the risen dough to release the air bubbles
- Turn the dough out onto a lightly floured surface
- Divide the dough into 12 equal pieces (each piece should weigh about 2.5 ounces)
- Roll each piece into a smooth ball by cupping your hand over it and moving in circular motions
- Place the shaped rolls in the prepared pan, spacing them evenly in 3 rows of 4
7. Second Rise
- Cover the pan loosely with a kitchen towel or plastic wrap
- Let the rolls rise in a warm spot for 30-45 minutes until puffy and touching each other
- They should look noticeably larger but not quite doubled in size
- During the last 15 minutes of rising, preheat your oven to 375°F (190°C)
8. Bake the Rolls
- Remove the towel from the risen rolls
- Place the pan in the center of the preheated oven
- Bake for 18-22 minutes until the tops are golden brown
- The internal temperature should reach 190°F when checked with an instant-read thermometer
- If the tops are browning too quickly, tent the pan with aluminum foil halfway through baking
9. Brush with Butter
- Remove the rolls from the oven immediately
- Brush the tops generously with melted butter while they’re still hot
- The butter will soak into the rolls and give them an incredible flavor and glossy finish
- Let the rolls cool in the pan for 5 minutes before serving
Another favorite: Croissant Recipe
Tips for Success
These practical tips come from years of trial and error in my own kitchen. They’ll help you avoid common pitfalls and ensure your dinner rolls turn out perfect every time.
- Check your yeast expiration date before starting; expired yeast won’t rise properly
- Temperature matters – too hot kills the yeast, too cold won’t activate it
- Don’t add too much flour – the dough should be soft and slightly sticky
- Create a warm rising environment by placing dough in a turned-off oven with the light on
- Use room temperature ingredients for more consistent results and better rise
- Don’t skip the second rise – it’s crucial for light, fluffy texture
- Brush with butter immediately after baking for the softest tops
- Space rolls evenly in the pan so they rise uniformly and bake at the same rate
You might also enjoy: Sausage Stuffing Recipe
Serving Suggestions
These versatile rolls complement just about any meal you can think of. The slightly sweet flavor works beautifully with both savory dishes and sweet spreads.
Serve them warm alongside hearty soups and stews, where they’re perfect for soaking up every last drop of broth. They also shine at holiday dinners, positioned right next to the turkey and mashed potatoes.
For breakfast or brunch, split them open and slather with jam, honey butter, or cream cheese. They make excellent slider buns for pulled pork or ham, and you can even use them for breakfast sandwiches.
- Pair with Chicken Soup for a comforting meal
- Serve alongside Zuppa Toscana for Italian night
- Use as sliders with Mississippi Pot Roast
- Accompany Thanksgiving Turkey on the holiday table
- Match with Turkey Chili for game day
- Complement Beef Bourguignon for an elegant dinner
Read Also: Turkey Gravy Recipe
Variations to Try
Once you’ve mastered the basic recipe, experimenting with different flavors and additions keeps things interesting. These variations use the same base dough with simple tweaks.
- Garlic herb rolls – Mix 2 teaspoons garlic powder and 1 tablespoon dried herbs into the flour
- Cinnamon sugar rolls – Brush with butter and sprinkle with cinnamon sugar after baking
- Cheese rolls – Add 1 cup shredded cheddar cheese to the dough during mixing
- Whole wheat rolls – Replace 1 cup all-purpose flour with whole wheat flour
- Honey butter rolls – Replace sugar with honey and brush with honey butter after baking
- Rosemary parmesan rolls – Add 2 tablespoons fresh rosemary and ½ cup grated parmesan to dough
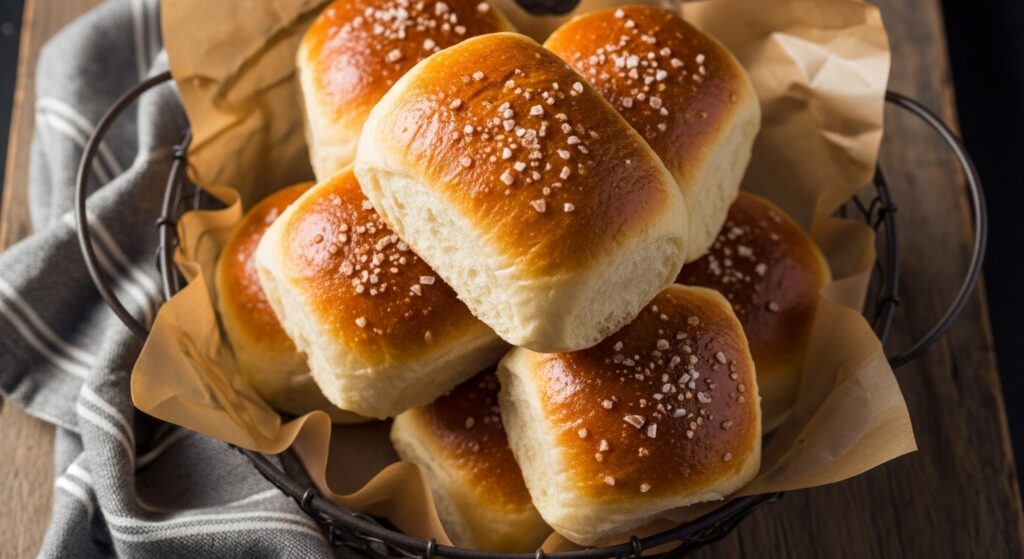
- Pretzel rolls – Boil shaped rolls in baking soda water before baking and top with coarse salt
I learned this technique while perfecting my Sourdough Sandwich Bread Recipe.
Storage and Reheating
Proper storage keeps your dinner rolls tasting fresh and delicious for several days after baking. The key is protecting them from drying out while preventing them from becoming soggy.
- Room temperature storage – Keep rolls in an airtight container or resealable bag for up to 3 days
- Refrigerator storage – Extends freshness up to 1 week but can dry them out faster
- Freezer storage – Wrap individual rolls in plastic wrap, then place in a freezer bag for up to 3 months
- Reheating from frozen – Thaw at room temperature for 1 hour, then warm in a 300°F oven for 5-7 minutes
- Quick reheat method – Microwave for 10-15 seconds wrapped in a damp paper towel
- Refresh day-old rolls – Brush with melted butter and warm in a 350°F oven for 5 minutes
This pairs beautifully with my Hashbrown Casserole Recipe for a complete brunch spread.
Nutritional Facts
Serving Size: 1 roll (makes 12 rolls)
- Calories: 215
- Total Fat: 7g
- Saturated Fat: 4g
- Cholesterol: 35mg
- Sodium: 220mg
- Total Carbohydrates: 33g
- Dietary Fiber: 1g
- Sugars: 6g
- Protein: 5g
Health Benefits of Key Ingredients
While dinner rolls are definitely a comfort food, some of the ingredients do offer nutritional value. Understanding what goes into your homemade rolls helps you make informed choices about your meals.
Whole milk provides calcium, vitamin D, and protein that support bone health and muscle function. The fat content also helps your body absorb fat-soluble vitamins.
Eggs contribute high-quality protein, vitamin B12, and choline for brain health. Yeast itself contains B vitamins and minerals like selenium, which supports immune function.
- Milk delivers calcium for strong bones and teeth
- Eggs provide essential amino acids and vitamins A, D, and E
- Butter contains fat-soluble vitamins and conjugated linoleic acid
- Yeast offers B-complex vitamins and trace minerals
- Flour provides energy through complex carbohydrates and some protein
The same cheese blend works wonderfully in Taco Casserole Recipe too.
Frequently Asked Questions
1. Can I make the dough ahead of time?
Absolutely! After the first rise, punch down the dough and refrigerate it in a covered bowl for up to 24 hours. When you’re ready to bake, let the dough sit at room temperature for 30 minutes, then shape the rolls and proceed with the second rise as directed. The cold fermentation actually develops more complex flavors in the bread.
2. Why didn’t my rolls rise properly?
The most common culprits are dead yeast or incorrect milk temperature. Always check that your yeast is fresh and not expired. The milk should be between 105-115°F; too hot will kill the yeast, while too cold won’t activate it. Also ensure you’re giving the dough enough time to rise in a warm, draft-free spot.
3. Can I use instant yeast instead of active dry yeast?
Yes, you can substitute instant yeast in the same amount. The main difference is that instant yeast can be mixed directly into the dry ingredients without proofing in warm milk first. However, I still prefer to proof it because it confirms the yeast is alive before you invest time in the recipe.
4. How do I know when the rolls are fully baked?
The tops should be golden brown, and the rolls should sound hollow when tapped on the bottom. For the most accurate test, use an instant-read thermometer inserted into the center of a roll; it should read 190°F. Underbaked rolls will be doughy in the center, while overbaked ones become dry.
5. Can I make these rolls dairy-free?
You can substitute the milk with almond milk, oat milk, or soy milk, and replace the butter with vegan butter or coconut oil. The texture will be slightly different but still delicious. Make sure to warm the dairy-free milk to the same temperature as regular milk for proper yeast activation.
Read Also: Collard Greens Recipe
Final Thoughts
There’s something magical about pulling apart a warm, freshly baked dinner roll at the table. This recipe has become my go-to for every occasion because it delivers consistent, bakery-quality results with minimal fuss.
The beauty of homemade rolls is how they transform an ordinary meal into something special. Your family and guests will absolutely notice the difference, and you’ll love how your kitchen smells while they bake.
Don’t be intimidated by working with yeast. Once you make these rolls a few times, the process becomes second nature, and you’ll wonder why you ever bought store-bought versions. Give this dinner rolls recipe a try, and I bet it becomes a staple in your home too.
I’d love to hear how your rolls turn out! Drop a comment below with any questions or share your favorite way to serve them.
Recommended:
- Sausage Balls Recipe
- Broccoli Casserole Recipe
- Green Bean Casserole Recipe
- Scalloped Potatoes Recipe
- Cornish Hen Recipe
- Cheese Ball Recipe
- Stuffed Shells Recipe
- Baked Oatmeal Recipe
- Swedish Meatball Recipe
- Quiche Lorraine Recipe


