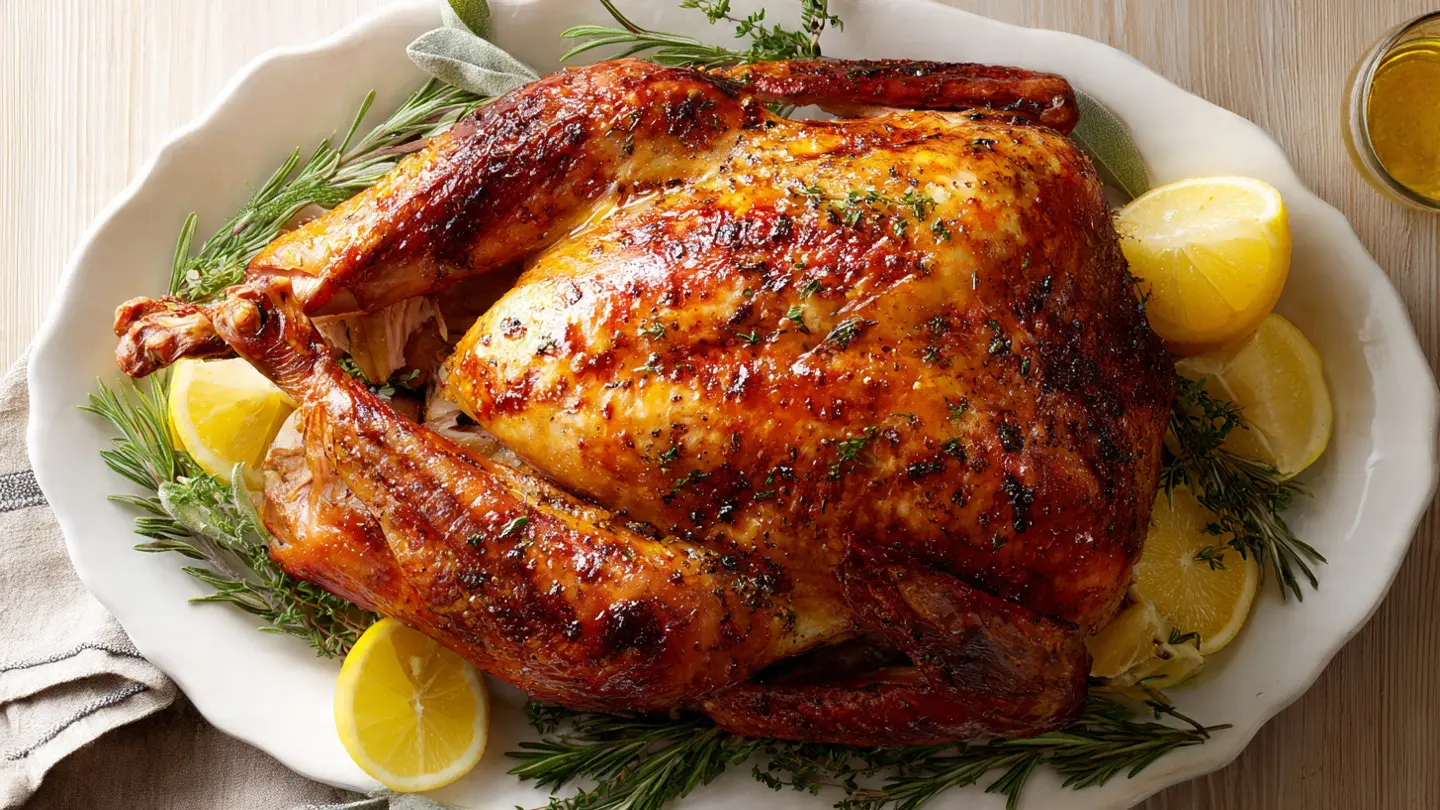
Every Thanksgiving table deserves a showstopping centerpiece, and this thanksgiving turkey recipe delivers exactly that. A beautifully bronzed, juicy whole roasted turkey with crispy skin, herb butter tucked under the skin, and aromatics stuffed into the cavity for incredible depth of flavor.
This is the classic oven-roasted method most families return to year after year.
No deep fryer. No complicated wet brine requiring a giant bucket. Just a whole turkey, a generous herb butter, fresh aromatics, and the right roasting technique.
Whether you are a first-time host or have been cooking the holiday bird for decades, this recipe walks you through every step so nothing is left to chance.
The secret to juicy meat is simple: herb butter under the skin keeps the breast moist throughout the long roast, while a bed of vegetables and chicken broth in the pan creates steam that works from below.
You also get plenty of rich, flavorful drippings to turn into a gorgeous homemade turkey gravy with almost zero extra effort.
Plan to serve one pound of raw turkey per person for a generous meal with leftovers. A 14- to 16-pound bird typically feeds 12 to 14 people well.
If you love this classic roast, you might also enjoy this Dry Brine Turkey Recipe for an even deeper flavor and extra-crispy skin.
Why You’ll Love This Thanksgiving Turkey Recipe
This recipe is designed to be the only roast turkey guide you will ever need.
It uses straightforward ingredients you can find at any grocery store, yet the result looks and tastes like something from a professional kitchen.
- Incredibly juicy meat: Herb butter under the skin bastes the breast from the inside as the turkey roasts, so the most notoriously dry part of the bird stays tender and moist.
- Golden, crispy skin: Starting the turkey at a higher temperature then lowering the heat creates a deeply bronzed skin without drying out the meat beneath.
- Rich, complex flavor: Fresh rosemary, thyme, and sage combined with garlic and lemon infuse every bite with classic holiday flavor.
- No brining required: You do not need to plan days in advance. A dry overnight rest in the fridge is optional but not essential.
- Stress-free process: The step-by-step instructions here leave nothing to guesswork, making this approachable even if you have never roasted a turkey before.
- Leftover-friendly: Leftovers are just as delicious the next day and work beautifully in soups, sandwiches, and casseroles.
- Feeds a crowd: A 14- to 16-pound turkey easily serves 12 to 14 guests with plenty of seconds to go around.
For a comforting way to use up leftovers after the big day, check out this Turkey Soup Recipe.
Ingredients
The key to a spectacular thanksgiving turkey recipe is layering flavor at every stage: in the butter, in the cavity, and around the bird in the pan.
- 1 whole turkey (14 to 16 lbs / 6.4 to 7.3 kg), thawed if frozen, neck and giblets removed
- 1 cup (225 g) unsalted butter, softened to room temperature
- 6 cloves garlic, minced
- 2 tablespoons fresh rosemary, finely chopped (plus 2 sprigs for the cavity)
- 2 tablespoons fresh thyme, finely chopped (plus 2 sprigs for the cavity)
- 1 tablespoon fresh sage, finely chopped (plus 2 sprigs for the cavity)
- 2 teaspoons kosher salt (plus more for the cavity)
- 1 teaspoon black pepper (plus more for the cavity)
- 1 teaspoon smoked paprika
- 1 large yellow onion, quartered (half for the cavity, half for the pan)
- 1 lemon, quartered (for the cavity)
- 1 orange, quartered (for the cavity)
- 3 ribs celery, roughly chopped (for the pan)
- 2 large carrots, roughly chopped (for the pan)
- 4 cloves garlic, smashed (for the pan)
- 2 cups (480 ml) low-sodium chicken broth (for the pan)
- Kitchen twine (for trussing)
You might also like this Sausage Stuffing Recipe to serve on the side rather than inside the bird.
Kitchen Equipment Needed
Having the right equipment on hand before you start makes the whole process much smoother.
- Large roasting pan (at least 16 inches long with 2-inch sides)
- Roasting rack (to elevate the bird and allow hot air to circulate)
- Instant-read meat thermometer (non-negotiable for food safety and perfect doneness)
- Basting brush
- Turkey baster
- Sharp carving knife and carving fork
- Large cutting board
- Kitchen twine
- Aluminum foil
- Small mixing bowl (for the herb butter)
- Paper towels
Read Also: Turkey Gravy Recipe
Recommended Products for This Recipe
These are products I genuinely recommend based on quality and performance for making the best possible roast turkey.
1. Enamelware Large Roasting Pan with Rack
A properly sized roasting pan with a sturdy rack is the most important piece of equipment for this recipe. A thin, cheap pan can warp under the weight of a large bird and cause uneven cooking. A heavy-gauge pan distributes heat evenly and produces better drippings for gravy.
2. ThermoWorks Thermapen Instant-Read Thermometer
An accurate instant-read thermometer is the single best tool you can own for roasting turkey. It removes all guesswork, prevents overcooking, and ensures food safety every time. The Thermapen is the gold standard for home cooks and professional chefs alike.
3. High-Quality Kitchen Twine
Good kitchen twine holds your trussed turkey in a tight, compact shape, which ensures more even cooking and a tidier presentation on the platter. It also prevents the wing tips from burning during the long roast.
4. Fat Separator Measuring Cup
A fat separator makes it effortless to pour off the pure turkey drippings for gravy without the excess fat. This small tool produces noticeably better gravy and is one of those kitchen items you will wonder how you lived without.
5. Heavy-Duty Aluminum Foil
You will need foil to tent the turkey if the skin starts browning too quickly, and again while the turkey rests after roasting. A heavy-duty option holds its shape better and protects the bird more effectively than standard foil.
For another impressive holiday centerpiece idea, try this Prime Rib Recipe.
Step-by-Step Instructions
1. Thaw and Prep the Turkey Ahead of Time
- If your turkey is frozen, plan ahead. Allow 24 hours of thawing time in the refrigerator for every 5 pounds (2.3 kg) of turkey. A 15-pound turkey needs approximately 3 full days in the fridge.
- Once thawed, remove the turkey from the refrigerator 1 hour before roasting. Letting the turkey come closer to room temperature ensures it cooks more evenly, especially in the thick breast area.
- Remove the turkey from all packaging and remove the neck and giblets from the cavity. Set the neck aside if you plan to make gravy.
- Using paper towels, pat the turkey very dry inside and out. Dry skin is the key to crispy skin, so be thorough here. Pay attention to the area between the skin and the breast meat, too.
2. Make the Herb Butter
- In a small mixing bowl, combine the softened unsalted butter (1 cup / 225 g), minced garlic (6 cloves), finely chopped fresh rosemary (2 tablespoons), finely chopped fresh thyme (2 tablespoons), finely chopped fresh sage (1 tablespoon), kosher salt (2 teaspoons), black pepper (1 teaspoon), and smoked paprika (1 teaspoon).
- Use a fork or spatula to mix everything together until all the herbs and garlic are evenly distributed throughout the butter.
- Taste a tiny bit. The butter should be well-seasoned. This is your primary flavoring agent, so it needs to be bold.
- Set the herb butter aside at room temperature while you prepare the turkey. Keeping it soft makes it much easier to spread and work under the skin.
3. Season the Cavity
- Generously season the inside of the turkey cavity with kosher salt and black pepper. This is an often-skipped step that adds flavor from the inside out.
- Now fill the cavity with the aromatics: 2 lemon quarters, 2 orange quarters, 2 onion quarters, 2 rosemary sprigs, 2 thyme sprigs, and 2 sage sprigs. These aromatics do not need to cook through; they simply steam inside the bird and infuse the meat with fragrance.
- Do not pack the cavity too tightly. Leave a little room for hot air to circulate inside.
4. Apply the Herb Butter Under and Over the Skin
- Starting at the neck end of the turkey, gently slide your fingers beneath the skin over the breast meat. Work carefully to separate the skin from the meat without tearing the skin.
- Push roughly half of the herb butter underneath the skin, spreading it directly over the breast meat. Use your fingers from the outside of the skin to press and distribute the butter evenly across both breast halves.
- If you can reach the thigh area under the skin, push a little butter there as well. The thighs benefit from extra flavor, too.
- Rub the remaining herb butter all over the outside of the turkey: the breast, the drumsticks, the wings, and the back. Make sure every surface is well coated. This exterior butter is what creates that gorgeous golden-brown skin.
5. Truss the Turkey
- Trussing is the process of tying the turkey into a compact shape so it roasts evenly. Tuck the wing tips under the body of the bird so they do not burn.
- Cut a length of kitchen twine (about 3 feet / 90 cm). Cross the twine over the breast and loop it around both drumstick ends.
- Pull the twine snugly so the drumsticks are drawn close together and the cavity opening is mostly closed. Tie a tight knot to secure.
- A trussed turkey is more compact, which means the legs and breast cook at a more similar rate and the bird looks beautiful on the platter.
6. Prepare the Roasting Pan
- Preheat your oven to 425°F (220°C) with the oven rack in the lowest position. Remove any other racks so the turkey has full clearance.
- Scatter the roughly chopped celery (3 ribs), carrots (2 large), smashed garlic cloves (4), and remaining onion quarters into the bottom of the roasting pan.
- Pour the chicken broth (2 cups / 480 ml) into the pan along with the vegetables. This liquid keeps the drippings from burning and creates the base for your gravy.
- Set the roasting rack over the vegetables in the pan, and place the prepared turkey breast-side up on the rack.
7. Start the Roast at High Heat
- Slide the pan into the preheated 425°F (220°C) oven on the lowest rack.
- Roast at this higher temperature for 30 minutes. This initial blast of heat starts to render the fat under the skin and begins the browning process, setting you up for that deep golden color.
- Do not open the oven during these first 30 minutes.
8. Reduce Heat and Continue Roasting
- After 30 minutes, reduce the oven temperature to 325°F (165°C).
- Continue roasting the turkey, basting with the pan juices every 30 to 45 minutes. To baste: use your turkey baster to scoop up the juices and melted fat from the bottom of the pan, then drizzle it over the turkey skin. Always baste with the fat layer if possible, not just the thin broth, as fat is what crisps the skin.
- As a general rule, roast for approximately 15 minutes per pound (500 g) of turkey at 325°F after the initial high-heat period. A 15-pound turkey will need roughly 3 to 3.5 hours of total roasting time.
- If the breast skin is browning faster than you would like, tent a piece of aluminum foil loosely over the breast (not the whole bird) to slow the browning while the legs continue to cook.
9. Check for Doneness
- Begin checking the internal temperature with your instant-read thermometer about 45 minutes before the estimated finish time.
- Insert the thermometer into the thickest part of the thigh, not touching bone. The turkey is safe to pull from the oven when the thigh reads 160°F to 165°F (71°C to 74°C).
- Also check the thickest part of the breast. It should read at least 160°F (71°C).
- The temperature will continue to rise by about 5°F as the turkey rests, so pulling it at 160°F is perfectly safe and will result in juicier meat than waiting for 165°F in the oven.
- The juices should run clear (not pink) when you pierce the thigh.
10. Rest, Carve, and Serve
- Transfer the turkey to a large cutting board. Tent it loosely with aluminum foil.
- Let the turkey rest for a minimum of 20 minutes, and up to 45 minutes for a large bird. This rest is not optional. During this time, the muscle fibers relax and reabsorb the juices. Carving too early causes all those precious juices to pour out onto the cutting board.
- While the turkey rests, pour the pan drippings through a fine mesh strainer into a fat separator. Use these drippings to make your gravy.
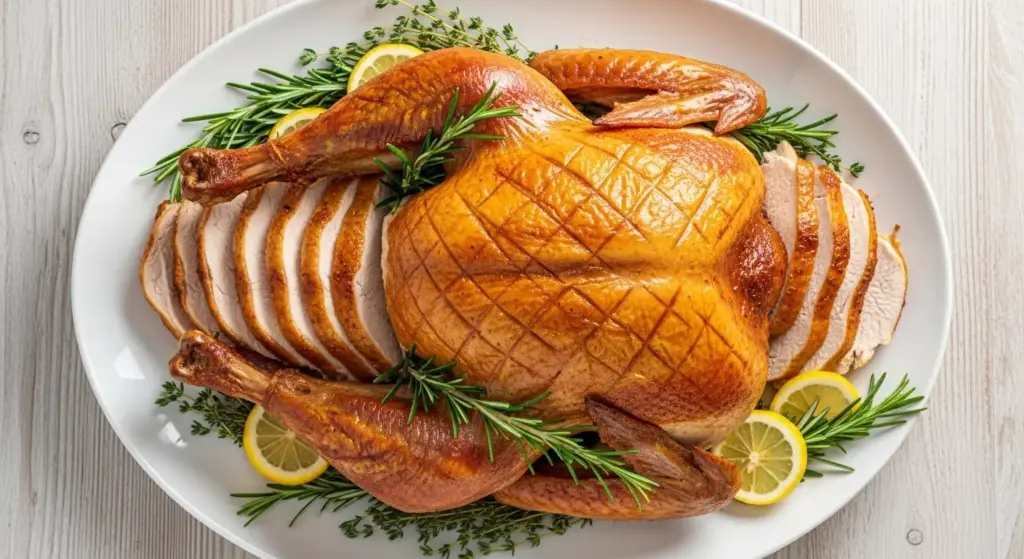
- After resting, remove the twine and the cavity aromatics. Carve the turkey starting with the drumsticks, then the thighs, and finally the breast, slicing against the grain for the most tender results.
For the perfect accompaniment, this Turkey Gravy Recipe uses all those beautiful pan drippings to make a rich, velvety gravy.
Tips for Success
A few extra notes can make the difference between a good turkey and a truly great one.
- Always use a thermometer. Cooking time guidelines are estimates. Ovens vary, turkeys vary, and the only reliable way to know your bird is done is to measure the internal temperature.
- Dry the skin thoroughly. Moisture on the skin turns to steam in the oven, which prevents browning. Pat the turkey completely dry before applying the butter for the crispiest results.
- Soften the butter fully. Cold butter tears the skin when you try to push it underneath. Room-temperature butter spreads easily and adheres to the skin better.
- Rest the turkey after roasting. This step is the most frequently skipped and the most important. A full 30 minutes of resting makes a dramatic difference in juiciness.
- Do not stuff the turkey. Stuffing inside the cavity requires the stuffing to reach 165°F, which almost always means overcooking the breast. Cook your stuffing separately to protect the bird.
- Baste with fat, not broth. Spooning the fat layer from the pan over the skin crisps it far more effectively than basting with the thin broth layer.
You might also love: Creamy Mashed Potatoes
Serving Suggestions
A classic Thanksgiving spread calls for sides that complement the rich, savory turkey without competing with it.
The best accompaniments balance the heartiness of the roast with some brightness and variety of texture.
- Cranberry Sauce offers a bright, tart counterpoint to the richness of the turkey
- Green Bean Casserole is a classic Thanksgiving table staple
- Sweet Potato Casserole brings sweetness and comfort to the plate
- Garlic Mashed Potatoes are the perfect vehicle for soaking up turkey gravy
- Sausage Stuffing baked separately in a dish comes out beautifully crispy on top
- Dinner Rolls are essential for mopping up every last bit of gravy
- Roasted Brussels Sprouts with Bacon add a savory, slightly caramelized element
- Scalloped Potatoes are an indulgent alternative or addition to mashed potatoes
- Classic Pumpkin Pie is the traditional sweet finish to the meal
- Classic Pecan Pie is a rich, sweet crowd-pleaser that pairs perfectly with turkey dinner
Read Also: Corn Soufflé Recipe
Variations to Try
Once you have mastered the classic version, there are several delicious directions you can take this recipe.
- Spatchcocked (butterflied) turkey: Remove the backbone and flatten the bird before roasting. It cooks in about half the time and develops incredibly crispy skin all over since the entire skin surface faces up in the oven.
- Citrus herb turkey: Double up on the citrus by adding lime quarters to the cavity alongside the lemon and orange. Add lemon zest to the herb butter for a brighter flavor profile.
- Garlic and white wine turkey: Deglaze the hot roasting pan with a cup of dry white wine before adding the chicken broth. The wine adds depth to the drippings and creates an especially complex pan sauce.
- Smoked paprika and chipotle turkey: Add a teaspoon of chipotle powder and an extra teaspoon of smoked paprika to the herb butter for a smoky, slightly spicy skin with Southwestern character.
- Brown butter turkey: Brown the butter in a saucepan until it turns golden and nutty before mixing in the herbs and garlic. Brown butter adds a deep, toasted richness to the skin that is absolutely extraordinary.
- Herb-brined turkey: For maximum flavor and guaranteed juiciness, try a Dry Brine Turkey version where the seasoned butter is applied 24 to 48 hours in advance and the bird is left uncovered in the fridge.
For a fun way to use your leftover turkey, this Turkey Tetrazzini Recipe is pure comfort food.
Storage and Reheating
Leftover Thanksgiving turkey is one of the great pleasures of the holiday, and it keeps well with proper storage.
- Refrigerator storage: Remove the turkey meat from the bones and store in airtight containers within 2 hours of serving. Turkey keeps well in the refrigerator for up to 4 days.
- Freezer storage: Sliced or shredded turkey can be frozen in freezer-safe bags or containers for up to 3 months. Press out as much air as possible to prevent freezer burn.
- Reheating sliced turkey: Place slices in a single layer in a baking dish. Add a few tablespoons of chicken broth or pan drippings, cover tightly with foil, and heat in a 325°F (165°C) oven for 15 to 20 minutes until warmed through. The broth prevents the meat from drying out.
- Reheating a large portion: Cover with foil and heat at 325°F (165°C) until the internal temperature reaches 165°F (74°C). Adding moisture to the pan is essential.
- Microwave option: For quick reheating, place turkey in a microwave-safe dish, add a splash of broth, and cover loosely. Heat in 60-second intervals, checking frequently to avoid overheating.
Another great: Turkey Wild Rice Soup Recipe
Nutritional Facts
Based on a 6-ounce (170 g) serving of roasted turkey (white and dark meat combined, without skin), from a turkey prepared with the herb butter in this recipe. Values are approximate.
| Nutrient | Per Serving |
|---|---|
| Calories | 280 kcal |
| Protein | 38 g |
| Total Fat | 13 g |
| Saturated Fat | 5 g |
| Cholesterol | 130 mg |
| Carbohydrates | 1 g |
| Fiber | 0 g |
| Sodium | 420 mg |
| Potassium | 370 mg |
| Vitamin B6 | 45% DV |
| Vitamin B12 | 20% DV |
| Zinc | 25% DV |
| Selenium | 60% DV |
Values will vary based on turkey size, cooking method, and the amount of skin consumed.
For a lighter post-holiday meal, try this Turkey Chili Recipe.
Health Benefits of Key Ingredients
Turkey is one of the most nutritious proteins you can serve at the table, and the supporting ingredients in this recipe add their own wellness benefits.
The combination of high-quality protein, essential vitamins, and beneficial plant compounds in this dish makes it one of the most genuinely nourishing holiday meals in the American food tradition.
- Turkey (whole bird): Turkey is an excellent source of complete protein, providing all essential amino acids. It is rich in B vitamins, particularly niacin (B3) and B6, which support energy metabolism and immune function. Dark meat contains slightly more iron and zinc than white meat.
- Garlic: Fresh garlic contains allicin, a sulfur compound with well-documented antimicrobial and anti-inflammatory properties. It also supports cardiovascular health and immune function.
- Fresh rosemary: Rosemary is rich in rosmarinic acid and carnosic acid, antioxidants that have been studied for their potential anti-inflammatory and brain-health benefits.
- Fresh thyme: Thyme contains thymol, a natural antiseptic with antimicrobial properties. It also provides vitamin C and vitamin A.
- Lemon: Lemon provides vitamin C, which supports immune function and helps the body absorb iron from the turkey more efficiently.
- Unsalted butter: Butter contributes fat-soluble vitamins A, D, E, and K, and the fats in butter help your body absorb those nutrients from the vegetables in the pan.
- Celery and carrots (in the roasting pan): Both are rich in antioxidants, fiber, and vitamins that contribute to the drippings and gravy, adding nutrition to the pan sauce.
Read Also: Collard Greens Recipe
Frequently Asked Questions
1. How long does it take to cook a Thanksgiving turkey?
The general rule is 15 minutes per pound (500 g) at 325°F (165°C) after an initial 30-minute blast at 425°F (220°C). A 15-pound turkey typically takes 3.5 to 4 hours total.
Always start checking the internal temperature about 45 minutes before the estimated finish time, as oven temperatures vary and turkeys cook differently depending on their shape and whether they started cold from the fridge.
2. What temperature should a Thanksgiving turkey be when done?
The turkey is safe and ready to rest when the thickest part of the thigh reads 160°F to 165°F (71°C to 74°C) on an instant-read thermometer.
Pull the turkey at 160°F, because the internal temperature will continue rising by several degrees during the resting period. Waiting until the thermometer reads 165°F in the oven risks an overcooked, dry bird.
3. Should I cover the turkey with foil while roasting?
You do not need to cover the entire turkey with foil throughout roasting. If the breast skin is browning too quickly before the thighs are cooked through, tent a piece of foil loosely over just the breast.
Covering the whole turkey from the start would steam it rather than roast it, which works against the goal of crispy skin. The foil tent is a targeted tool, not a blanket solution.
4. How do I keep my Thanksgiving turkey moist?
The herb butter under the skin is the most effective technique in this recipe for keeping the breast moist. Fat conducts heat gently and continuously bastes the meat from within during the roast.
Beyond that, do not overcook the bird, baste with the pan fat every 30 to 45 minutes, and most importantly, allow a proper resting period before carving. Skipping the rest is the single most common cause of dry turkey.
5. Can I make this recipe with a fresh turkey instead of frozen?
Absolutely. A fresh turkey actually has a slight edge in texture and convenience since you skip the multi-day thawing process.
Simply pat the fresh turkey dry, apply the herb butter, and proceed with the recipe from Step 3. Fresh turkeys are widely available in the weeks leading up to Thanksgiving at butcher shops and most grocery stores.
This Air Fryer Turkey Breast Recipe is a fantastic option for smaller gatherings or when you want the breast only without the fuss of a whole bird.
Final Thoughts
A perfect thanksgiving turkey recipe is one of those things that, once you nail it, you will come back to every single year without hesitation.
This classic roasted turkey gives you everything the holiday centerpiece should be: juicy, deeply flavorful, golden on the outside, and impressive enough to draw gasps when you carry it to the table.
The steps here are simple, the ingredients are familiar, and the method is reliable.
Give this recipe a try at your next holiday gathering, and share how it turned out in the comments below. Did you make any tweaks? Swap in different herbs? We would love to hear your experience, and your tips might help someone else have their best Thanksgiving yet.
Recommended:
- Turkey Pot Pie Recipe
- Turkey Barley Soup
- How to Make Bread Stuffing Balls 1940s Recipe
- Sweet Potato Pie Recipe
- Air Fryer Turkey Legs Recipe
- Air Fryer Turkey Wings Recipe
- Air Fryer Turkey Thighs Recipe
- Air Fryer Turkey Tenderloin Recipe
- Turkey Skillet Recipe
- Corn Casserole Recipe


