Baking your own ciabatta recipe at home feels like a genuine accomplishment, and once you pull those golden, flour-dusted loaves out of the oven, you’ll understand why.
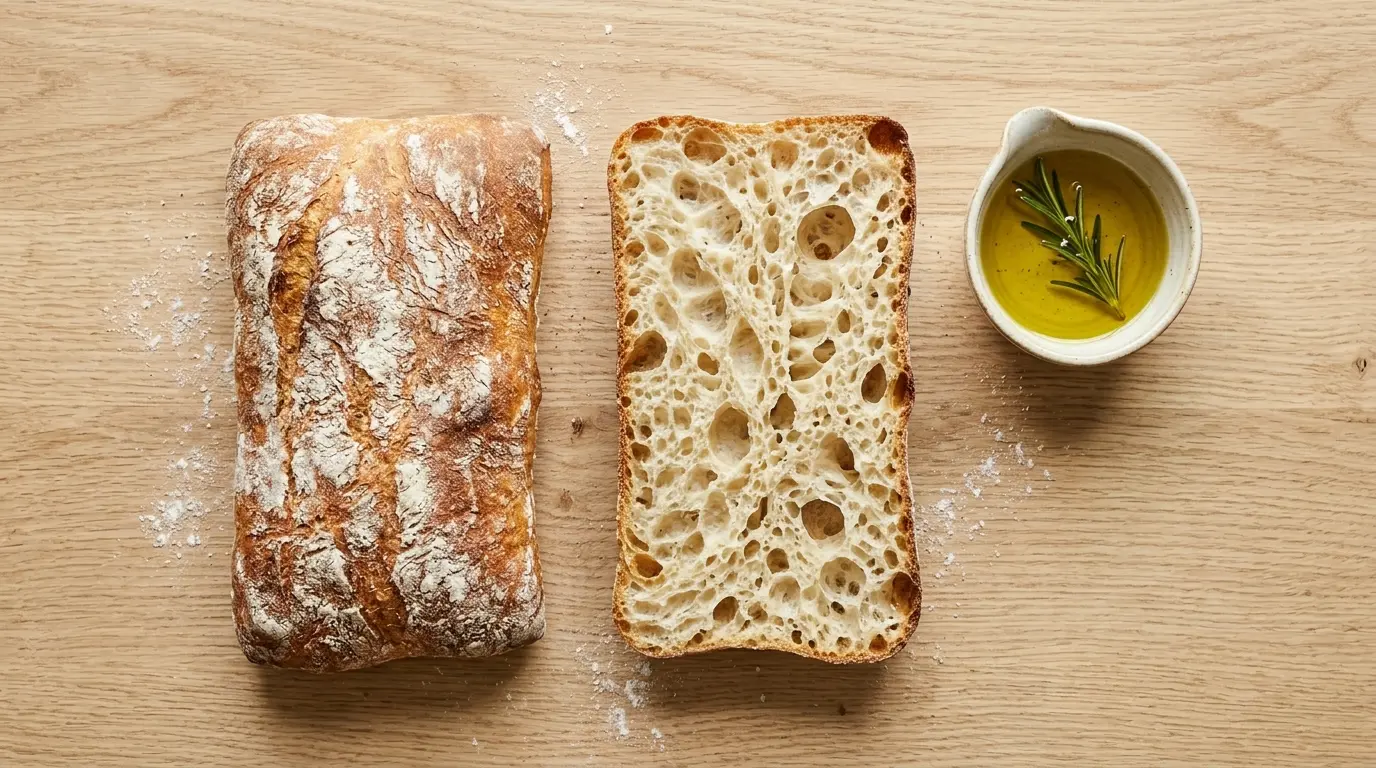
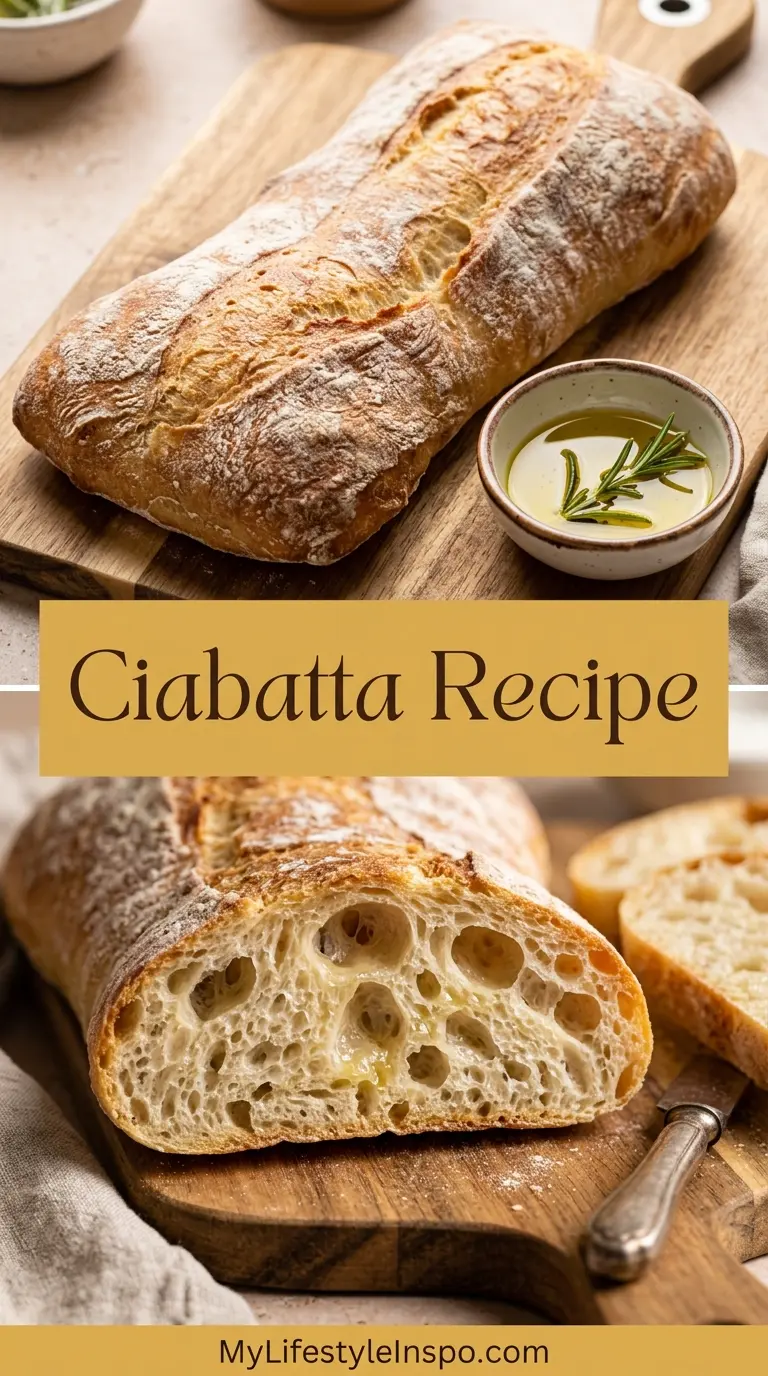
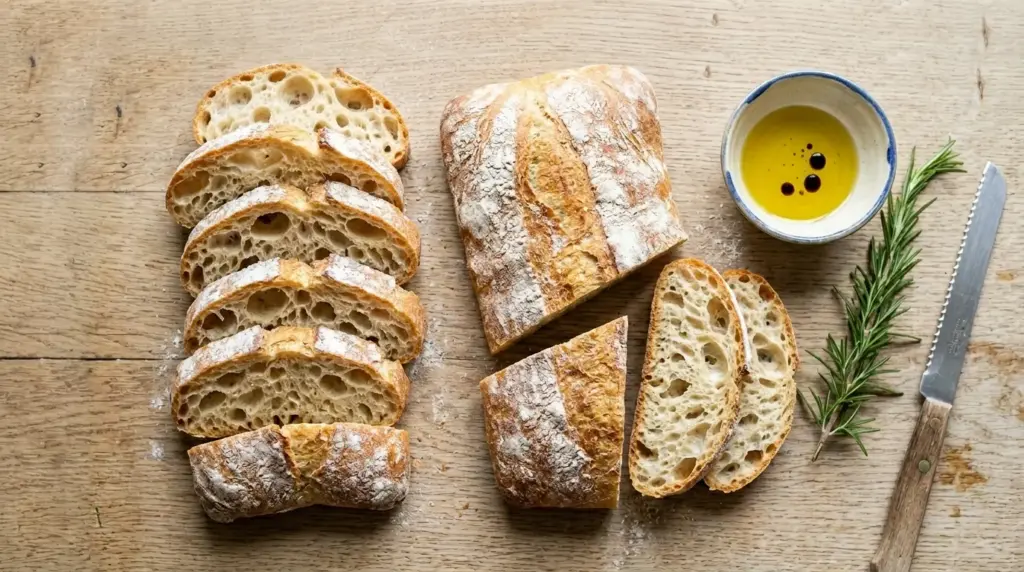
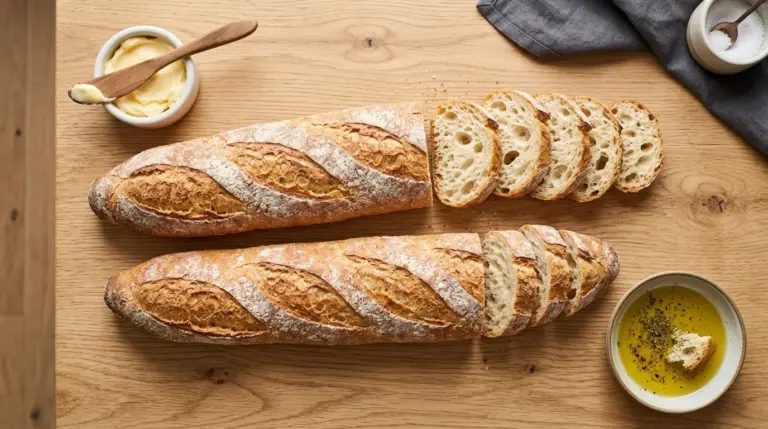
Ciabatta, which literally means “slipper” in Italian, is known for its signature flat, elongated shape, a wildly open and airy crumb, and a crust that cracks when you squeeze it just right. It’s the bread behind your favorite Italian sandwich, the perfect vessel for a bruschetta topping, and an ideal companion for soaking up soups and stews.
Originally invented in the Veneto region of northern Italy in 1982, ciabatta is defined by its extremely high-hydration dough, often 80% or more. That wet, sticky dough is exactly what creates those gorgeous, irregular holes inside.
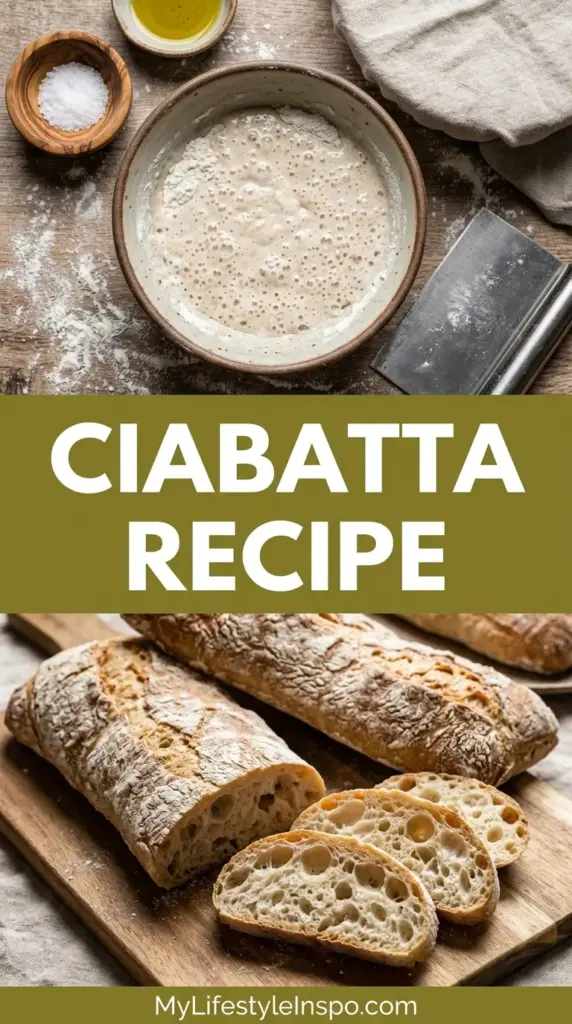
The key to authentic ciabatta is a preferment called a biga, which is simply a mixture of flour, water, and a tiny amount of yeast that ferments overnight. The biga adds complex flavor and helps develop the gluten structure that gives ciabatta its chewy, light texture.
This recipe walks you through the process step by step, so even if you’ve never made high-hydration bread before, you’ll end up with a loaf that impresses everyone at the table.
If you love baking Italian-style breads, you’ll also want to try this Italian Bread to round out your homemade bread collection.
Why You’ll Love This Ciabatta Recipe
Ciabatta is one of those breads where the effort genuinely pays off in flavor and texture that store-bought just can’t replicate.
The overnight biga gives the bread a depth of flavor that is subtly tangy and complex, far better than same-day breads can achieve.
The crumb is open and chewy, with large irregular air pockets throughout, which means it soaks up olive oil, marinara, and soups beautifully.
It has a paper-thin, crackly crust that shatters on the outside while staying soft and pillowy within.
The recipe itself uses just four core ingredients: flour, water, yeast, and salt. No butter, no eggs, no dairy.
It’s incredibly versatile. Slice it for sandwiches, toast it for bruschetta, cube it for panzanella, or simply tear it with your hands and dip it in olive oil.
The bake happens at high heat, which creates that beautiful oven spring and golden exterior that makes ciabatta look as impressive as it tastes.
Read Also: Rosemary Focaccia Recipe
Ingredients
You’ll be surprised by how few ingredients go into an authentic ciabatta. The quality of each one matters more than the quantity, so use the best bread flour and extra virgin olive oil you can find.
For the Biga (overnight starter):
- 1 cup (125 g) bread flour
- ½ cup (120 ml) water, at room temperature
- ¼ teaspoon (1 g) instant yeast
For the Ciabatta Dough:
- 2½ cups (315 g) bread flour, plus more for dusting
- 1 cup plus 2 tablespoons (270 ml) warm water (about 80°F / 27°C)
- 1½ teaspoons (5 g) instant yeast
- 1½ teaspoons (9 g) fine sea salt
- 2 tablespoons (30 ml) extra virgin olive oil
- All of the prepared biga
For another approachable Italian-style bake, check out this No Knead Bread Recipe that’s equally rewarding.
Kitchen Equipment Needed
Ciabatta dough is wet and sticky, so having the right tools makes the process much more manageable. You don’t need anything exotic, but a few key items will make a real difference.
- Stand mixer with dough hook (highly recommended for high-hydration dough)
- Large mixing bowls (one for the biga, one for the final dough)
- Bench scraper (essential for handling sticky dough)
- Baking stone or pizza stone (creates the ideal high-heat bake surface)
- Parchment paper
- Sheet pan or rimmed baking tray
- Instant-read thermometer (to check water temperature)
- Kitchen scale (bread baking is much more accurate by weight)
- Plastic wrap or a damp tea towel
- Wire cooling rack
Read Also: Artisan Bread Recipe
Recommended Products for This Recipe
These are products that will genuinely improve your ciabatta baking experience based on performance and quality.
1. KitchenAid Stand Mixer with Dough Hook
Ciabatta dough is extremely wet and sticky, making hand-kneading a real challenge. A stand mixer with a dough hook takes all the work out of developing the gluten and produces a smooth, extensible dough with ease. It’s the single biggest upgrade you can make for high-hydration bread baking.
2. Baking Stone or Pizza Stone
A preheated pizza stone mimics the floor of a traditional Italian bread oven, creating immediate bottom heat that causes a dramatic oven spring and a crisp, well-baked base. Without it, the bread can come out pale and dense on the bottom.
3. Digital Kitchen Scale
Bread baking, especially high-hydration bread, is far more reliable when measured by weight. A gram off in flour or water can meaningfully change your dough’s consistency. A simple digital scale removes all the guesswork.
4. Bench Scraper
A stainless steel bench scraper is the best tool for handling wet, sticky ciabatta dough. It lets you fold, divide, and shape the dough without deflating it or tearing the gluten structure you worked so hard to build.
5. High-Quality Extra Virgin Olive Oil
Ciabatta uses only a small amount of olive oil in the dough, but good oil makes its flavor presence felt. A grassy, fruity extra virgin olive oil also does wonders when drizzled over the finished loaf before serving.
This bake pairs wonderfully with a bubbling Minestrone Soup for a complete Italian dinner spread.
Step-by-Step Instructions
1. Make the Biga (At Least 12 Hours in Advance)
- In a medium bowl, combine 1 cup (125 g) of bread flour, ½ cup (120 ml) of room-temperature water, and ¼ teaspoon (1 g) of instant yeast.
- Stir until there are no dry flour streaks and the mixture forms a rough, shaggy mass. It will look lumpy and a little dry at this stage; that’s completely normal.
- Cover the bowl tightly with plastic wrap or a plate to seal in moisture.
- Leave the biga at room temperature for at least 12 hours and up to 24 hours. Overnight is ideal. By the time it’s ready, it should look bubbly, have increased slightly in size, and smell faintly yeasty and sour.
2. Prepare the Final Dough
- The next day, add the final dough ingredients to the bowl of your stand mixer or a large mixing bowl: 2½ cups (315 g) of bread flour, 1 cup plus 2 tablespoons (270 ml) of warm water (about 80°F / 27°C), 1½ teaspoons (5 g) of instant yeast, 1½ teaspoons (9 g) of fine sea salt, and 2 tablespoons (30 ml) of extra virgin olive oil.
- Add all of the prepared biga into the bowl as well. Break it into chunks with your hands or a spoon to help it incorporate more easily.
- If using a stand mixer: attach the dough hook and mix on low speed for 2 minutes to bring everything together, then increase to medium speed (speed 4 on a KitchenAid) and knead for 8 to 10 minutes. The dough should be very wet and sticky, almost like a thick batter, but it will start to pull away from the sides of the bowl and become glossy and elastic.
- If mixing by hand: stir vigorously with a wooden spoon or a sturdy spatula for about 5 minutes until well combined. The dough will not fully come together like a regular bread dough. That’s expected.
3. Perform Stretch-and-Fold Rises
- Lightly oil a large, clean bowl and scrape the dough into it.
- Cover loosely with plastic wrap and let rest for 30 minutes.
- After 30 minutes, perform your first stretch and fold: wet your hand, reach under one side of the dough, stretch it up gently as high as it will go without tearing, then fold it over the top of the dough mass. Rotate the bowl a quarter turn and repeat three more times so you’ve folded all four sides.
- Cover again and let rest for another 30 minutes.
- Repeat the stretch-and-fold process three more times for a total of four sets over 2 hours. Each round develops the gluten network and builds the dough’s strength.
- After the final stretch and fold, cover the bowl and let the dough rest undisturbed for an additional 30 to 60 minutes. The dough should be noticeably airy, jiggly, and full of bubbles by now.
4. Shape the Ciabatta Loaves
- Line a sheet pan with parchment paper and dust it generously with flour. Ciabatta dough will stick to everything, so be liberal with the flour here.
- Generously flour your work surface. Use a bench scraper to gently coax the dough out of the bowl onto the floured surface. Try not to deflate it. Treat it gently.
- Using the bench scraper, divide the dough into two roughly equal pieces. Each piece should weigh around 400 to 450 grams if you have a scale.
- Dust the tops of both pieces heavily with flour. Use the bench scraper and your hands to gently stretch each piece into a rectangle, roughly 10 inches by 4 inches (25 cm by 10 cm). The exact shape is not critical; ciabatta is supposed to look organic and rustic. The key is to keep as many bubbles intact as possible.
- Carefully transfer the shaped loaves to the parchment-lined sheet pan, spacing them at least 3 inches (7 cm) apart. They will spread slightly during proofing and baking.
5. Final Proof
- Dust the tops of the shaped loaves generously with flour. This flour coating is what gives ciabatta its characteristic flour-dusted appearance and prevents a skin from forming during proofing.
- Cover loosely with a clean kitchen towel or a piece of plastic wrap that’s been lightly oiled on the underside.
- Let the loaves proof at room temperature for 45 to 60 minutes. They won’t double in size like a regular bread, but they should puff slightly, spread a little, and feel airy and delicate to the touch. Do not press hard on them to test; a very gentle finger poke that leaves a slow-springing indentation is a good sign.
- While the loaves are proofing, place your baking stone or an upside-down sheet pan on the middle rack of your oven. If you have a broiler pan or a cast iron skillet, place it on the rack below as well. Preheat the oven to 450°F (230°C) and let it heat for at least 30 minutes so the stone or pan is fully saturated with heat.
6. Bake the Ciabatta
- When the oven is fully preheated and the loaves have finished proofing, prepare a cup of hot water for steam.
- Slide the parchment paper with both loaves onto the preheated baking stone or pan. Move quickly and confidently to avoid deflating the loaves.
- Pour the cup of hot water into the broiler pan or cast iron skillet on the lower rack to create a burst of steam. This steam is crucial: it delays the crust from forming, allowing the bread to achieve maximum oven spring during the first 5 minutes of baking. Close the oven door immediately.
- Bake at 450°F (230°C) for 20 to 25 minutes, rotating the pan once halfway through. The loaves are done when they are deep golden brown on top and sound hollow when you tap the bottom.
- For an extra-crisp crust, turn the oven off, crack the door open about an inch, and leave the loaves inside for a further 5 minutes.
7. Cool the Loaves
- Transfer the finished loaves to a wire cooling rack immediately.
- Resist the urge to cut into them right away. Ciabatta needs at least 30 to 45 minutes to cool fully. The internal crumb structure is still setting during this time, and slicing too early will result in a gummy interior.
- Once cooled, the crust will be crackly and thin, and the inside will be open, chewy, and perfectly pillowy.
You might also enjoy: Sourdough Focaccia
Tips for Success
High-hydration bread has a reputation for being tricky, but with these tips, you’ll avoid the most common mistakes and set yourself up for great results every time.
- Use a kitchen scale. Bread flour can be packed differently in a measuring cup, leading to wildly different hydration levels. Weighing your ingredients is the single best thing you can do for consistency.
- Don’t skip the biga. It’s what separates an authentic, complex-tasting ciabatta from a dull, same-day loaf. The 12-hour fermentation is where most of the flavor develops.
- Handle the dough gently. All those air pockets you worked to develop during the stretch-and-folds are fragile. Use a bench scraper and well-floured hands during shaping to keep as many intact as possible.
- Flour generously during shaping. This is not the time to worry about excess flour. The dough’s stickiness can deflate it if it sticks to your hands or the surface, so dust liberally.
- Preheat your baking surface. A cold pan will give you a pale, dense bottom. A fully preheated stone or pan creates that immediate heat transfer needed for a great oven spring.
- Add steam during baking. The burst of steam in the first minutes of baking is what gives ciabatta its open crumb and thin, crackly crust. Don’t skip this step.
- Cool completely before slicing. The gummy crumb that some people complain about from homemade ciabatta is almost always caused by cutting too soon. Patience here is rewarded.
Another fantastic flatbread to add to your repertoire is this Dutch Oven Bread.
Serving Suggestions
Ciabatta is one of the most versatile breads you can bake, and it shines in every role from simple snack to show-stopping centerpiece.
Slice the loaves horizontally and use them for hearty Italian sandwiches filled with prosciutto, fresh mozzarella, basil, and sun-dried tomatoes. The chewy crumb holds up to moist fillings without going soggy.
- Serve thick slices alongside a bowl of Lasagna Soup for dipping
- Toast slices under the broiler and top with a classic tomato-basil mixture for a simple Chicken Bruschetta variation
- Drizzle generously with high-quality extra virgin olive oil and a sprinkle of flaky sea salt for an elegant aperitivo snack
- Cut into cubes and toss into a traditional panzanella (Italian bread salad) with ripe tomatoes, cucumbers, and red onion
- Use day-old slices in a rich Savory Bread Pudding with cheese, herbs, and roasted vegetables
- Layer with roasted eggplant, fresh ricotta, and a drizzle of marinara for an open-faced melt
This bread is best enjoyed the day it’s made, but even day-old ciabatta sliced and toasted in the oven is absolutely delicious.
For another great Italian-style appetizer, try this Strawberry Bruschetta.
Variations to Try
Once you’ve mastered the classic version, it’s fun to play with flavors and mix-ins that complement ciabatta’s mild, yeasty character.
- Herb Ciabatta: Fold 2 tablespoons of finely chopped fresh rosemary and 2 tablespoons of chopped fresh thyme into the dough during the final stretch-and-fold session. The herbs perfume the bread beautifully and pair well with aged cheeses.
- Olive Ciabatta: Fold in ½ cup (about 75 g) of sliced Kalamata or green olives during the last fold. Make sure the olives are well drained and patted dry so they don’t add extra moisture to the already wet dough.
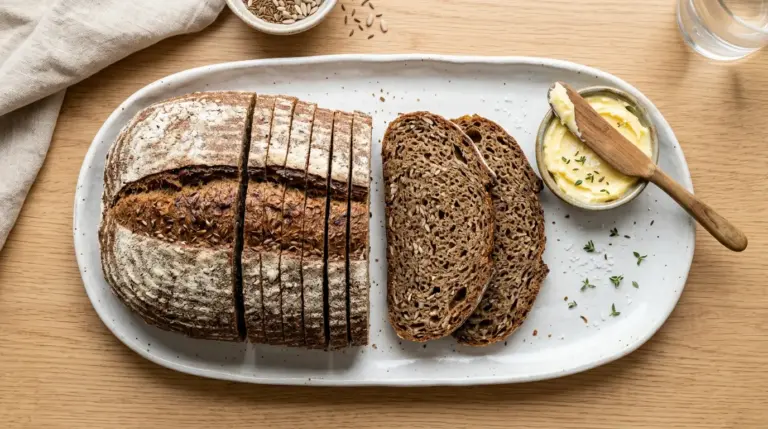
- Whole Wheat Ciabatta: Replace up to 30% of the bread flour with whole wheat flour for a nuttier flavor and a slightly denser crumb. Use 175 g of bread flour and 140 g of whole wheat flour in the final dough, and check out this Whole Wheat Bread for additional tips on working with whole wheat doughs.
- Roasted Garlic Ciabatta: Squeeze a full head of roasted garlic and fold the soft cloves into the dough during shaping. The garlic melts into the crumb and creates an irresistible savory flavor throughout.
- Cheese Ciabatta: Fold in ½ cup (50 g) of freshly grated Parmesan or Pecorino Romano during the final stretch-and-fold for a salty, savory loaf that’s incredible alongside Italian soups.
- Semolina Ciabatta: Replace 20% of the bread flour with fine semolina flour for a slightly golden crumb with a pleasant bite and a subtle corn-like sweetness.
Read Also: French Bread Recipe
Storage and Reheating
Ciabatta is best eaten the day it’s baked, but it can absolutely be stored and enjoyed later with just a bit of care.
- Room temperature: Once fully cooled, store the loaves in a paper bag or a cloth bread bag at room temperature. Avoid plastic bags; they trap moisture and cause the crust to go soft and chewy rather than crisp. Ciabatta will stay fresh at room temperature for up to 2 days.
- Freezing: Ciabatta freezes exceptionally well. Slice the loaves before freezing for maximum convenience. Wrap individual slices or halves tightly in plastic wrap, then place them in a zip-lock freezer bag. Frozen ciabatta keeps well for up to 3 months.
- Reheating from room temperature: Place slices directly in a toaster or under the broiler for 2 to 3 minutes per side until crispy and warmed through.
- Reheating from frozen: No need to thaw. Place frozen slices directly in a toaster or a 375°F (190°C) oven for 5 to 7 minutes until hot and crispy throughout.
- Reheating a whole loaf: Sprinkle the entire loaf lightly with water, then place it in a 350°F (175°C) oven for 8 to 10 minutes to refresh the crust and warm the crumb.
Another bread worth making in big batches and freezing is this Pull Apart Garlic Bread.
Nutritional Facts
The following nutritional values are approximate per slice (assuming each loaf is cut into 8 slices, based on a 2-loaf batch).
| Nutrient | Amount Per Slice |
|---|---|
| Calories | 135 kcal |
| Total Fat | 2 g |
| Saturated Fat | 0.3 g |
| Cholesterol | 0 mg |
| Sodium | 220 mg |
| Total Carbohydrates | 25 g |
| Dietary Fiber | 1 g |
| Total Sugars | 0 g |
| Protein | 4 g |
| Iron | 1.5 mg |
These values will vary depending on the exact size of your slices and any optional add-ins. Ciabatta made with bread flour is naturally low in fat and free of added sugar, making it a relatively clean bread choice.
For a heartier bread option with more fiber, this Rye Bread Recipe is an excellent companion bake.
Health Benefits of Key Ingredients
Ciabatta may be an indulgence, but its core ingredients do bring genuine nutritional value to the table.
Bread flour is higher in protein than all-purpose flour, which not only supports gluten development for that chewy texture but also contributes more protein per serving to your diet.
- Olive oil is a cornerstone of the Mediterranean diet and is rich in heart-healthy monounsaturated fats and polyphenol antioxidants that have been associated with reduced inflammation.
- The long fermentation (biga) breaks down some of the starches and gluten proteins in the flour, which may make the bread easier to digest than same-day commercial yeast breads.
- Bread flour provides complex carbohydrates for sustained energy, along with B vitamins like niacin, thiamine, and riboflavin that support energy metabolism.
- Sea salt in moderate quantities contributes essential minerals like sodium, chloride, and trace iodine, which support nerve and muscle function.
- Water makes up the majority of the dough and ensures the bread bakes with a moist, pliable crumb rather than a dry, crumbly one.
When enjoyed in reasonable portions, homemade ciabatta is a satisfying and wholesome addition to a balanced meal, especially when paired with vegetables, lean proteins, and good olive oil.
This Brioche Recipe is another enriched bread worth exploring if you enjoy baking from scratch.
Frequently Asked Questions
1. Can I make ciabatta without a stand mixer?
Yes, you can make ciabatta by hand, but it requires more effort. Since the dough is extremely wet and sticky, traditional kneading isn’t really possible. Instead, rely entirely on the stretch-and-fold method: wet your hand, stretch one side of the dough up, fold it over the center, rotate the bowl, and repeat. Do this for four sets over two hours. The result will be very similar to a mixer-made loaf, though the process requires some patience.
2. Why is my ciabatta dense without big holes?
The most common culprits are over-handling the dough during shaping, skipping the biga, or not using enough steam in the oven. All three issues prevent the bread from getting that open, airy crumb. Handle the dough as gently as possible, be generous with the steam, and never skip the overnight biga.
3. My dough is incredibly sticky. Is that normal?
Yes, completely normal. Ciabatta dough is one of the stickiest bread doughs you’ll ever work with, and that’s precisely what gives it its open texture. Resist the urge to add more flour to the dough itself. Instead, flour your hands, the work surface, and the top of the dough generously when you need to handle it, and use a bench scraper to do most of the shaping work.
4. Can I use all-purpose flour instead of bread flour?
You can, but the results will be slightly different. Bread flour has a higher protein content (around 12 to 14%) compared to all-purpose flour (10 to 12%), which means more gluten development and a chewier, more structured crumb. All-purpose flour will produce a softer, slightly less chewy loaf with a more closed crumb. If all-purpose is all you have, it will still taste great.
5. Can I freeze the dough instead of the baked bread?
You can freeze ciabatta dough, but the best window is after the biga fermentation and before the final proof. Shape the loaves and place them on a parchment-lined sheet, then freeze until solid before transferring to freezer bags. When ready to bake, move the frozen loaves to the refrigerator to thaw overnight, then let them come to room temperature and complete their final proof before baking as normal.
For another bread baking resource, try the Beer Bread Recipe for a quick, no-yeast alternative when you’re short on time.
Final Thoughts
Homemade ciabatta is one of those baking projects that feels ambitious until you’ve done it once, and then it becomes part of your regular rotation.
The overnight biga requires very little hands-on time, and the stretch-and-fold method is actually relaxing and satisfying once you get into the rhythm.
When you pull those golden, crackly loaves out of the oven and hear that hollow thud when you tap the bottom, you’ll understand why bread bakers love this recipe so much.
Tear off a piece while it’s still slightly warm, drizzle it with good olive oil, and enjoy the fruits of your patience.
If you make this ciabatta recipe, I’d love to hear how it turned out for you. Leave a comment below, share a photo, or tag us on social media. Happy baking!
Recommended:
- Italian Penicillin Soup
- Air Fryer Garlic Bread
- Sourdough Discard Focaccia
- Pasta Fagioli
- Spaghetti alla Carbonara
- Zuppa Toscana
- Italian Wedding Soup
- Marinara Sauce
- Baked Ziti
- Sourdough Sandwich Bread
