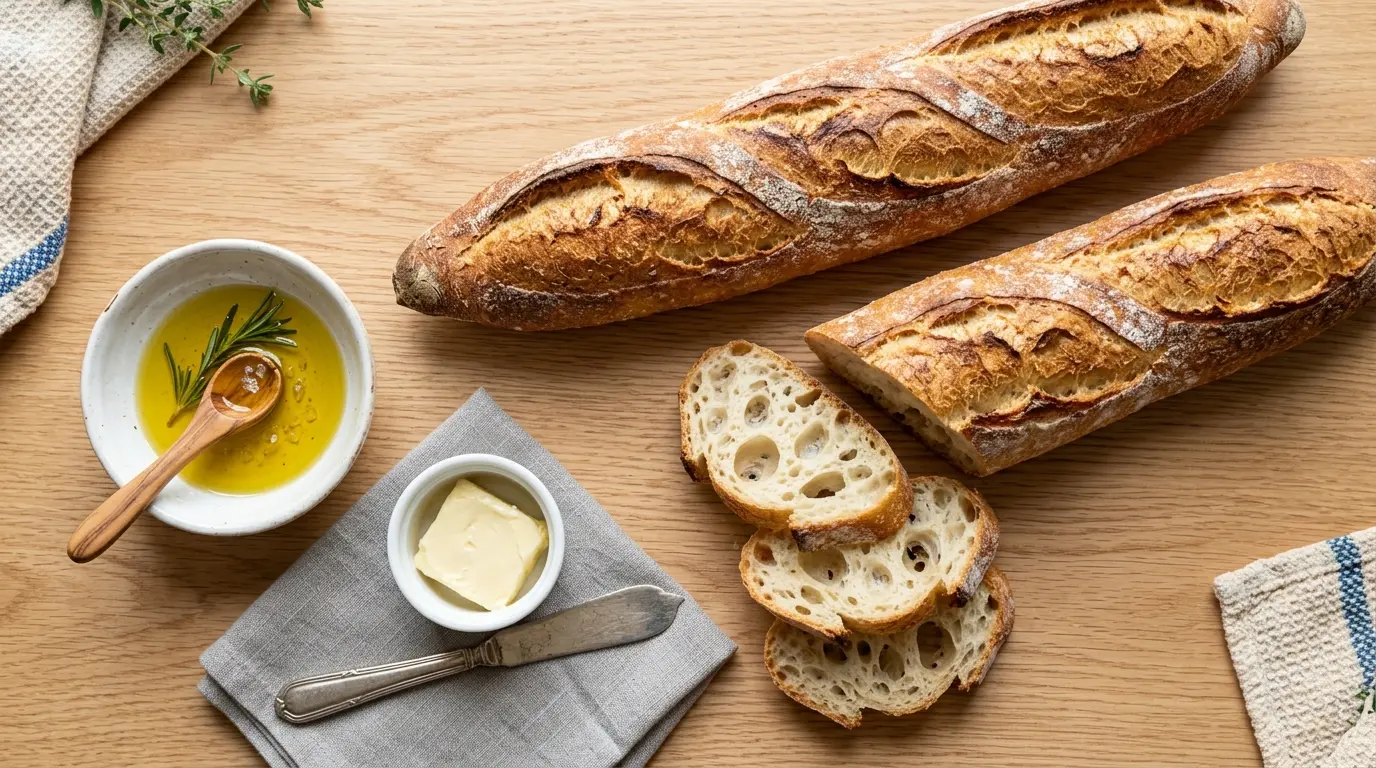
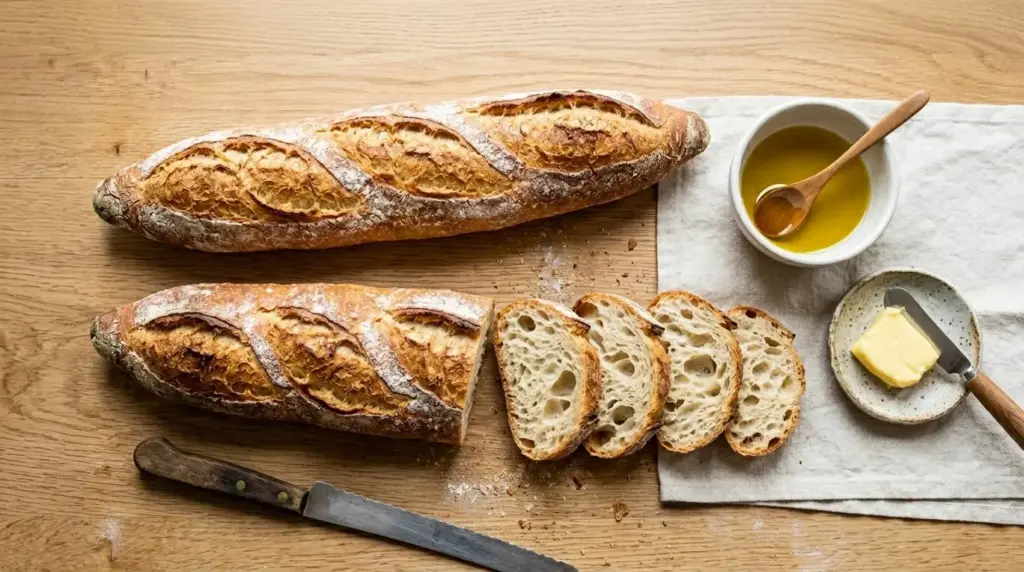
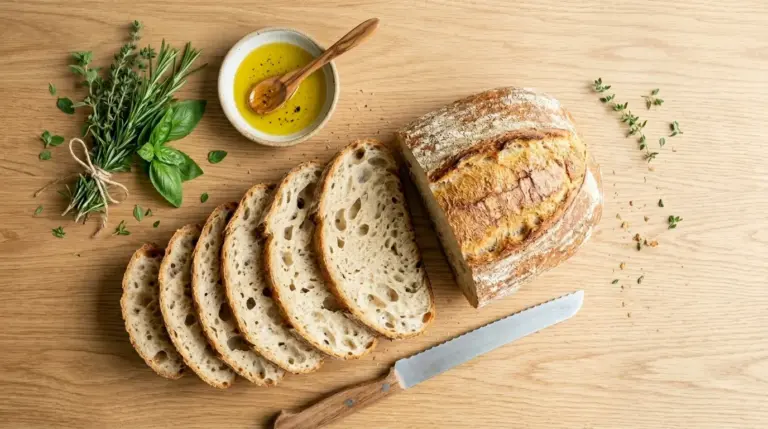
If you’ve ever pulled a warm loaf of French bread recipe from your own oven and watched that golden crust shatter at the first slice, you know it’s one of those simple cooking moments that feels genuinely special. This classic baguette-style loaf has just four core ingredients, flour, water, yeast, and salt, yet the result is bakery-quality bread with a crackling exterior and a soft, chewy crumb inside.
The magic isn’t in complicated technique. It’s in understanding a few key principles: proper hydration, an adequate rise, and steam during baking. Once you get those right, you’ll be making French bread that rivals anything from a boulangerie.
This recipe walks you through the whole process in clear, beginner-friendly steps. From mixing the dough to scoring and baking, every detail is covered so you can get it right the first time.
You might also enjoy making Artisan Bread the next time you’re in a bread-baking mood.

Why You’ll Love This French Bread Recipe
Homemade French bread gives you complete control over what goes into your loaf. No preservatives, no additives, just pure, simple ingredients that have been used for centuries.
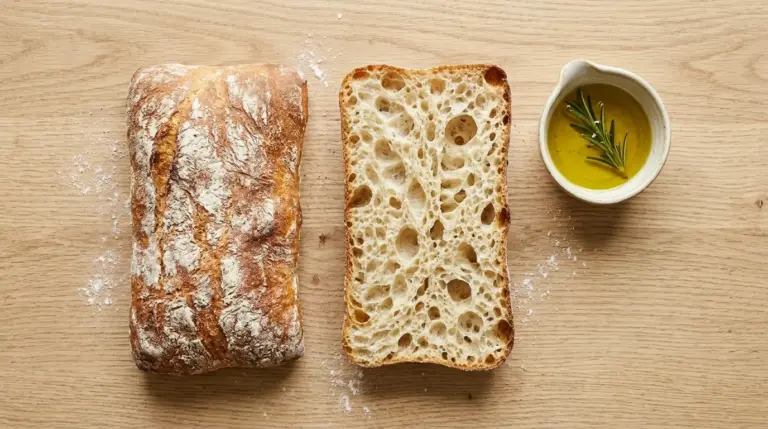
The texture contrast is what makes it so satisfying. That crust shatters beautifully when you tap it, and the interior is open, airy, and just slightly chewy.
It’s also incredibly versatile. You can serve it alongside soups and stews, use it to make bruschetta, slice it for sandwiches, or simply eat it warm with butter.
The process is a wonderful weekend project, but the active hands-on time is surprisingly short. Most of the work is done by the yeast while you go about your day.
It’s also a great way to build your baking confidence. Once you master this foundational recipe, techniques like shaping, scoring, and steam-baking become second nature.
- Four simple ingredients: Bread flour, water, yeast, and salt are all you need.
- Bakery-quality results at home: A Dutch oven or baking stone creates that signature crackly crust.
- Beginner-friendly: Each step is explained in detail so there’s no guesswork.
- Versatile: Works as a dinner side, sandwich base, bruschetta base, or snack with cheese.
- Freezer-friendly: Bake two loaves and freeze one for later.
- Customizable: Easy to adapt with herbs, garlic, or seeds.
For a delicious variation, check out this No-Knead Bread Recipe if you prefer a more hands-off method.
Ingredients
French bread uses a lean dough, meaning no butter, no eggs, no milk. That simplicity is what gives it its characteristic open crumb and crackly crust. Bread flour (rather than all-purpose) gives it more structure and chew because of its higher protein content.
- 4 cups (480g) bread flour, plus extra for dusting
- 1 1/2 teaspoons (4.5g) instant yeast (or active dry yeast)
- 1 1/2 teaspoons (9g) fine sea salt
- 1 1/3 cups (315ml) warm water (about 105-110°F / 40-43°C)
- 1 teaspoon (4g) granulated sugar (helps activate the yeast)
- 1 tablespoon (15ml) olive oil (for greasing the bowl)
For the steam (during baking):
- 1 cup (240ml) boiling water
For a variation with a richer dough, try this Brioche Recipe.
Kitchen Equipment Needed
The right tools make a significant difference in French bread baking. A baking stone or heavy baking sheet retains and distributes heat evenly, helping you achieve that signature crispy bottom crust. A bench scraper is incredibly useful for handling slightly sticky dough.
- Stand mixer with dough hook (or large mixing bowl for hand kneading)
- Bench scraper
- Baking stone or heavy baking sheet
- Bread lame or sharp serrated knife (for scoring)
- Kitchen scale (highly recommended for accuracy)
- Instant-read thermometer
- Large mixing bowl
- Plastic wrap or clean kitchen towel
- Sheet pan or roasting pan (for steam)
- Cooling rack
- Parchment paper
Read Also: Dutch Oven Bread Recipe
Recommended Products for This Recipe
These are products I genuinely recommend based on quality and how much they improve the bread-baking process. Each one solves a common pain point and makes the whole experience more enjoyable.
1. KitchenAid Stand Mixer with Dough Hook
Kneading French bread dough by hand takes about 10 minutes of real effort. A stand mixer with a dough hook does the job in 8 minutes with virtually zero effort on your part. The consistent kneading action also develops gluten more evenly than hand-kneading alone.
2. Baking Stone for Oven
A baking stone mimics the floor of a professional bread oven by radiating consistent, intense heat from below. This is what creates that crackly, golden bottom crust you see in bakery loaves. It also helps regulate the oven temperature for more even baking.
3. Bread Lame Scoring Tool
A bread lame is a thin, razor-sharp blade on a stick, and it makes scoring dough effortless and precise. Proper scoring lets the loaf expand in a controlled way during baking, creating that classic split along the top. A sharp chef’s knife works in a pinch, but a lame gives far cleaner cuts.
4. Digital Kitchen Scale
Measuring flour by weight is significantly more accurate than measuring by volume. A cup of flour can vary by 20 to 30 grams depending on how it’s scooped, and that variation can affect the dough’s hydration and texture. A scale removes the guesswork entirely.
This Rosemary Focaccia Recipe uses some of the same equipment and techniques if you want another great bread project.

Step-by-Step Instructions
1. Activate the Yeast
- In a small bowl or measuring cup, combine the warm water (105-110°F / 40-43°C) and the sugar. Stir briefly to dissolve.
- Sprinkle the instant yeast over the surface of the water. If using active dry yeast, stir it in gently.
- Let it sit undisturbed for 5-10 minutes. The mixture should become foamy and smell yeasty. This tells you the yeast is alive and active. If it doesn’t foam, your water may have been too hot (which kills yeast) or the yeast may be expired. Start over with fresh yeast.
- Note: If using instant yeast, you can technically skip this step and add the yeast directly to the flour. However, proofing it first is good practice, especially when you’re less familiar with a new brand of yeast.
2. Mix the Dough
- In the bowl of your stand mixer (or a large mixing bowl), whisk together the bread flour and fine sea salt. Make a small well in the center.
- Pour the yeast mixture into the well. If using a stand mixer, attach the dough hook.
- Mix on low speed (or stir with a wooden spoon) until the flour is fully incorporated and no dry streaks remain. This should take about 2-3 minutes.
- The dough will look a bit shaggy at first. That’s completely normal. Let it come together fully before moving to the next step.
3. Knead the Dough
- Increase the stand mixer to medium speed (speed 4 on a KitchenAid) and knead for 8-10 minutes. The dough should become smooth, elastic, and slightly tacky but not sticky. It should pull away cleanly from the sides of the bowl.
- If kneading by hand: Turn the dough out onto a lightly floured surface. Push it away from you with the heel of your hand, fold it back toward you, rotate it a quarter turn, and repeat. Do this rhythmically for 10-12 minutes.
- Perform the windowpane test to check doneness: Pinch off a small piece of dough, stretch it gently between your fingers. If it stretches thin enough to see light through without tearing, the gluten is well-developed and the dough is ready. If it tears immediately, knead for another 2-3 minutes.
- If the dough is too sticky during kneading, add flour one tablespoon at a time. Avoid adding too much, as this makes the bread dense.
4. First Rise (Bulk Fermentation)
- Drizzle the olive oil into a large clean bowl and use your hands or a paper towel to coat the inside evenly.
- Shape the dough into a ball and place it seam-side down in the oiled bowl.
- Cover the bowl tightly with plastic wrap or a clean kitchen towel. Place it somewhere warm and draft-free. The inside of your oven with just the light on works well (around 75-80°F / 24-27°C).
- Let the dough rise for 1 to 1.5 hours, or until it has doubled in size. Do not rush this step. Patience during the rise builds flavor and texture.
- You can also do a slow rise in the refrigerator overnight (8-12 hours). Remove it 1 hour before shaping to let it come to room temperature.
5. Shape the Loaves
- Lightly flour your work surface. Gently punch down the risen dough to release the gas, then turn it out onto the surface.
- Divide the dough into two equal pieces using your bench scraper. Each piece should weigh roughly the same.
- To shape each piece into a baguette: Flatten one piece of dough into a rough rectangle using your hands. Fold the top third down to the center, then fold the bottom third up over it (like folding a letter). Pinch the seam to seal it.
- Roll the log back and forth with your palms, working from the center outward, until you have a smooth cylinder about 14-16 inches (35-40cm) long. Taper the ends slightly by applying more pressure there.
- Repeat with the second piece of dough.
- Place each shaped loaf seam-side down on a piece of parchment paper or a lightly floured surface. Cover them loosely with plastic wrap or a towel.
6. Second Rise (Proofing)
- Let the shaped loaves rest and rise for 30-45 minutes at room temperature. They should look noticeably puffier but not doubled in size.
- While the loaves proof, place your baking stone (or a heavy inverted baking sheet) on the middle rack of your oven. Place an empty metal roasting pan or sheet pan on the bottom rack. Do not skip the pan on the bottom rack as this is what you’ll use to create steam.
- Preheat the oven to 450°F (230°C) for at least 30 minutes. A hot oven is critical for good oven spring and a crackly crust. Give it the full 30 minutes even if the oven says it has reached temperature.
7. Score the Loaves
- Just before baking, use your bread lame or a sharp serrated knife to score the top of each loaf. Make 3-4 diagonal slashes about 1/2 inch (1.25cm) deep at a 30-degree angle to the surface of the loaf.
- Score quickly and decisively. Hesitant cuts drag the dough rather than slicing cleanly.
- Scoring allows the bread to expand upward in a controlled direction during baking instead of cracking randomly along the sides.
8. Bake with Steam
- Carefully slide the parchment paper with the loaves onto your preheated baking stone or baking sheet.
- Immediately pour the boiling water into the empty pan on the bottom rack. Close the oven door quickly. The steam that forms during the first 10-15 minutes of baking is what keeps the crust flexible enough to rise before it sets and crisps.
- Bake for 10 minutes with steam, then carefully remove the pan of water from the oven (use oven mitts as the pan and water are very hot).
- Continue baking for another 15-20 minutes, until the bread is deep golden brown and sounds hollow when tapped on the bottom. An internal temperature of 200-205°F (93-96°C) is the most reliable indicator that the bread is fully baked.
9. Cool Before Slicing
- Transfer the loaves to a wire cooling rack immediately after baking. Do not leave them on the hot pan, as the residual heat will make the bottom soggy.
- Let the bread cool for at least 20-30 minutes before slicing. The interior continues to cook and set as it cools. Cutting into hot bread makes the inside gummy.
- You’ll hear the crust crackle as it cools. That’s the sound of a perfect loaf.
You might also love this Sourdough Discard Breadsticks Recipe for another satisfying bread project.
Tips for Success
Small adjustments make a big difference in French bread. These tips address the most common stumbling points and help you get consistent results every time.
- Use bread flour, not all-purpose: Bread flour has a higher protein content (around 12-14%), which creates more gluten structure. This gives the loaf its chewy texture and helps it hold its shape.
- Water temperature matters: Yeast dies above 120°F (49°C) and barely activates below 100°F (38°C). A kitchen thermometer removes the guesswork entirely.
- Don’t add too much flour: A slightly sticky dough is better than a dry one. Overly stiff dough bakes into dense, tough bread.
- Be patient with the rises: Rushing fermentation produces flat, flavorless bread. The yeast needs time to develop flavor compounds and gas.
- Score with confidence: Shallow, hesitant scores don’t allow the bread to expand properly. Aim for 1/2 inch (1.25cm) deep and commit to the motion.
- Steam is non-negotiable: Without steam in the first phase of baking, the crust sets too early and the loaf can’t expand fully. The boiling water pan method works very well for home ovens.
- Let it cool: Slicing too early compresses the crumb and makes the inside gummy. Thirty minutes of patience is worth it.
Read Also: Pull Apart Garlic Bread Recipe
Serving Suggestions
French bread is one of the most versatile things you can make. The crispy crust and mild, slightly tangy crumb make it a natural partner for bold flavors.
Slice it thick and serve it warm alongside a bowl of Creamy Tomato Soup for a classic combination. The bread is perfect for soaking up every last drop.
- With soup: French bread pairs beautifully with Minestrone Soup, French Onion Beef Short Rib Soup, and Lobster Bisque.
- Bruschetta base: Toast thin slices and top with the Classic Bruschetta for a crowd-pleasing appetizer.
- Garlic bread: Slice the loaf in half lengthwise, spread with garlic butter, and broil for 3-4 minutes. It’s even better than store-bought.
- Cheese board addition: Cut into thin slices and serve alongside soft cheeses, cured meats, and olives.
- Sandwiches: Split a loaf lengthwise for an incredible base for chicken salad, deli meats, or roasted vegetables.
- Dipping: Serve with high-quality olive oil and balsamic vinegar for a simple appetizer that disappears fast.
- Bread pudding base: Day-old French bread is the ideal base for Savory Bread Pudding.
Variations to Try
Once you’ve mastered the base recipe, these variations are easy to incorporate and dramatically change the flavor profile. Most just require adding ingredients to the dough during the mixing stage.
- Garlic Herb French Bread: Add 2 teaspoons of garlic powder, 1 teaspoon of dried rosemary, and 1 teaspoon of dried thyme to the flour before mixing. Brush with garlic butter immediately after baking.
- Seeded French Bread: Brush the scored loaves with water or egg wash, then sprinkle with sesame seeds, poppy seeds, or flaky sea salt before baking.
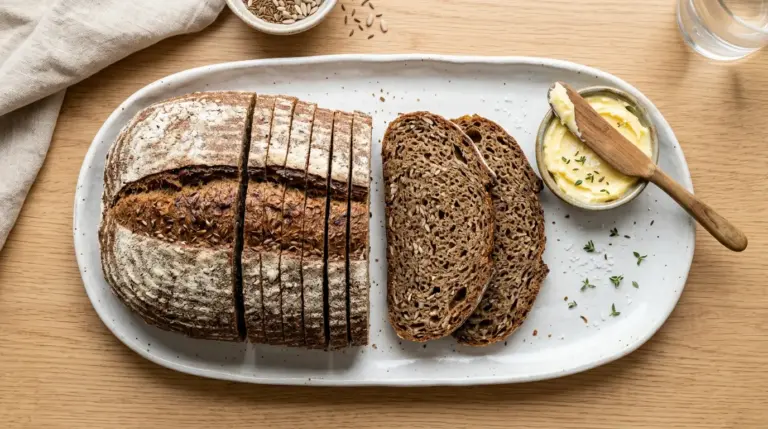
- Whole Wheat French Bread: Replace 1 cup (120g) of the bread flour with whole wheat flour for a nuttier flavor. You may need to add a tablespoon or two more water, as whole wheat absorbs more liquid.
- Sourdough French Bread: Replace the instant yeast with 150g (about 2/3 cup) of active sourdough starter. Reduce the water by 2 tablespoons. Extend the first rise to 4-6 hours or overnight.
- Cheesy French Bread: Fold 1/2 cup (60g) of finely grated Parmesan or Gruyere into the dough before the first rise, then sprinkle extra on top before baking.
For another delicious bread variation, try this Whole Wheat Bread Recipe.
Storage and Reheating
French bread is best on the day it’s baked, but it stores reasonably well for a couple of days and freezes beautifully.
- Room temperature: Store in a paper bag or loosely wrapped in a clean kitchen towel at room temperature for up to 2 days. Avoid plastic bags, which trap moisture and make the crust soft and chewy rather than crispy.
- Freezer: Wrap cooled loaves tightly in plastic wrap, then place in a zip-lock freezer bag. Freeze for up to 3 months. Thaw at room temperature for 2-3 hours or overnight.
- Reheating: To revive day-old bread, run the loaf under cold water for a few seconds to lightly dampen the crust, then bake at 375°F (190°C) for 8-10 minutes. The crust will crisp back up beautifully.
- Reheating from frozen: You can bake frozen French bread directly from the freezer (unwrapped) at 375°F (190°C) for 15-20 minutes. No need to thaw first.
- Sliced bread: If you’ve already cut into the loaf, press the cut side face-down on a cutting board to keep the interior from drying out.
Another great bread recipe: White Bread Recipe
Nutritional Facts
The following values are approximate and based on a single slice (about 1/12 of one loaf, or roughly 40g). Values will vary depending on the exact flour used and how thickly the bread is sliced.
| Nutrient | Per Slice (40g) |
|---|---|
| Calories | 110 |
| Total Fat | 0.5g |
| Saturated Fat | 0g |
| Cholesterol | 0mg |
| Sodium | 195mg |
| Total Carbohydrates | 22g |
| Dietary Fiber | 0.8g |
| Total Sugars | 0.3g |
| Protein | 4g |
| Iron | 1.2mg |
French bread is lower in fat than most enriched breads because it contains no butter, eggs, or milk. The calorie count per slice is also relatively modest, making it a reasonable choice when eaten in sensible portions.
For another bread option: Easy Sourdough Bread Recipe
Health Benefits of Key Ingredients
The simplicity of French bread means each ingredient pulls its weight, and a couple of them offer real nutritional value beyond just holding the loaf together.
Bread flour, the base of the recipe, is a good source of complex carbohydrates, which your body uses for sustained energy. It also provides a meaningful amount of protein and iron, especially in its unenriched or whole wheat variations.
- Bread flour: Provides 4 grams of protein per slice and is often enriched with iron, thiamine, riboflavin, niacin, and folate. These B vitamins support energy metabolism and red blood cell production.
- Yeast: Active yeast is a natural source of B vitamins, particularly B1 (thiamine) and B3 (niacin). It also contains small amounts of zinc, which supports immune function.
- Sea salt: While consumed in small quantities per slice, iodized salt contributes to thyroid health. Sea salt also contains trace minerals not found in heavily refined table salt.
- Water: Bread made with proper hydration has a more open, airy crumb. Adequate water content in the dough also helps with gluten development, which affects digestibility.
- Low in fat: Because this is a lean dough with no added butter or oil in the loaf itself, it’s significantly lower in saturated fat compared to brioche, croissants, or other enriched breads.
You might also enjoy this Sourdough Starter Recipe if you want to move into naturally leavened baking.
Frequently Asked Questions
1. Can I use all-purpose flour instead of bread flour?
Yes, you can substitute all-purpose flour in a 1:1 ratio. The result will still be good, but the texture will be slightly softer and less chewy because all-purpose flour has a lower protein content (around 10-11% versus 12-14% for bread flour). If you can, bread flour is worth using for the best results.
2. Why didn’t my bread get a crackly crust?
The most common reason is a lack of steam during the first phase of baking. Steam keeps the surface of the dough moist and pliable long enough for the loaf to rise before the crust sets. Make sure your boiling water pan is in place and that you close the oven door quickly after loading the bread to trap as much steam as possible.
3. My dough is really sticky. What should I do?
A slightly sticky dough is normal and actually desirable for French bread. The moisture content is what helps create an open, airy crumb. That said, if the dough is sticking heavily to everything and is unworkable, add flour one tablespoon at a time during kneading. Flouring your hands and the work surface lightly also helps without actually incorporating extra flour into the dough.
4. Can I make French bread dough ahead of time?
Absolutely. After the first mix, cover the dough tightly and refrigerate it for up to 24 hours instead of doing the first rise at room temperature. The cold slows the yeast activity dramatically, giving you a slow fermentation that actually develops more complex flavor. Take it out of the fridge, shape the loaves, and let them proof at room temperature for about 1.5 hours before baking.
5. How do I know when the bread is fully baked?
The most reliable method is an instant-read thermometer inserted into the center of the loaf. French bread is done at 200-205°F (93-96°C). You can also tap the bottom of the loaf with your knuckle. A fully baked loaf sounds hollow, like tapping on a drum. A dull thud means it needs more time.
Read Also: Dinner Rolls Recipe
Final Thoughts
Homemade French bread is one of those things that feels far more impressive than it actually is. The ingredient list is minimal, the technique is learnable, and the result is a beautiful, restaurant-worthy loaf that fills your kitchen with one of the best smells imaginable.
Once you’ve made it once, you’ll want to make it again. The process becomes intuitive quickly, and you’ll start tweaking things like hydration, fermentation time, and shaping to suit your preferences.
Give this French bread recipe a try this weekend. If you do, leave a comment below and let me know how it turned out. I’d love to hear what you served it with or any creative variations you tried!
Recommended:
- Air Fryer Garlic Bread Recipe
- Easy Garlic Bread Recipe
- Cheesy Garlic Bread Recipe
- Irish Soda Bread Recipe
- Beer Bread Recipe
- Sourdough Sandwich Bread Recipe
- Soft Dinner Rolls Recipe
- Easy French Toast Recipe
- Classic French Toast Recipe
- Homemade Bagel Recipe