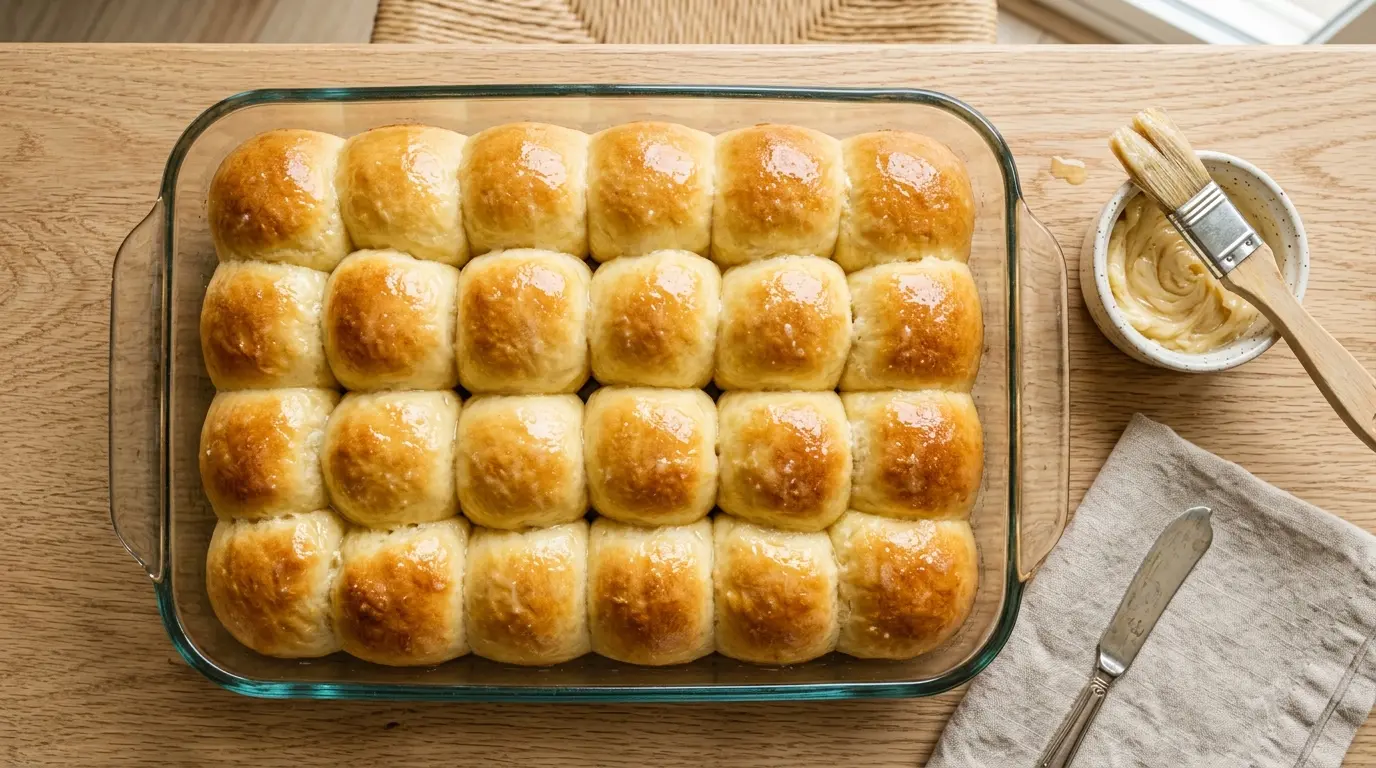
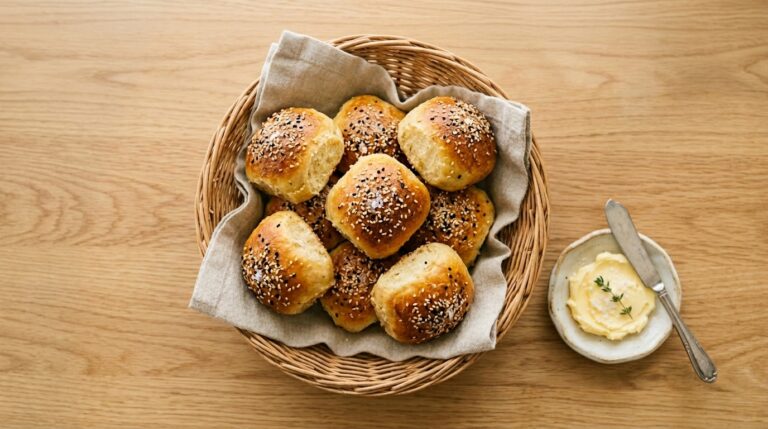
If you’ve ever pulled a pan of golden, pillowy rolls from the oven and watched everyone reach for them before they even had a chance to cool, you already know the magic of a great soft dinner rolls recipe.
These rolls are everything you want in a homemade bread: a featherlight crumb, a slightly golden top that glistens with butter, and that gentle, milky sweetness that makes them impossible to stop at just one.
The secret to truly soft dinner rolls lies in three things: enriched dough (meaning dough that includes butter, eggs, and milk), proper yeast activation, and a gentle hand during kneading. Each of these steps builds on the last, and once you understand why they matter, you’ll be able to make these rolls confidently every single time.
This recipe uses warm whole milk and melted butter to create a tender, rich dough that bakes up with a fine, soft crumb. Eggs add structure and a beautiful golden color, while a small amount of sugar feeds the yeast and gives the rolls a delicate sweetness that pairs beautifully with savory meals.
This is the kind of recipe you’ll bookmark and return to for every holiday table, Sunday dinner, and in-between occasion. Let’s get to it.
You might also enjoy: Sourdough Discard Dinner Rolls

Why You’ll Love This Soft Dinner Rolls Recipe
These rolls come together with simple, everyday ingredients you likely already have on hand.
No bread machine required, and no complicated techniques to master. If you can stir, knead, and wait, you can make these rolls.
They’re genuinely better than anything from a store bag. The texture is pillowy and tender, the crust is thin and golden, and that fresh-baked smell alone is worth every minute of effort.
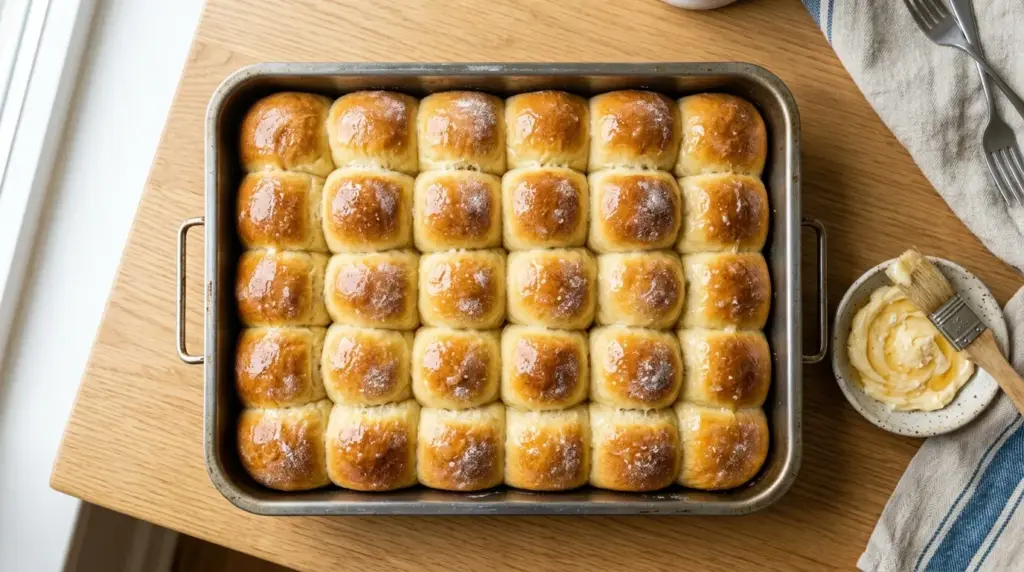
They bake in a 9×13 pan in snug rows, so they rise up against each other as they proof, giving them their signature soft sides and tall, fluffy tops.
The recipe is also very forgiving. If your kitchen is a little cool, the dough just takes a bit longer to rise. No roll is ruined by an extra 20 minutes of rest.
Here are a few more reasons to love this recipe:
- They freeze beautifully. Bake a double batch and store extras for busy weeknights.
- They’re endlessly versatile. Serve them with dinner, use them for sliders, or enjoy with honey butter and jam at breakfast.
- Kids absolutely love them. Soft, mild, and slightly sweet, these rolls appeal to even picky eaters.
- The dough is beginner-friendly. No special stand mixer required, though it certainly helps.
- They reheat perfectly. A quick 5 minutes in the oven and they taste freshly baked.
Read Also: Dinner Rolls Recipe
Ingredients
This recipe uses enriched dough ingredients that work together to produce that signature soft, fluffy texture. Here’s what each one does: the warm milk hydrates and activates the yeast, butter adds richness and tenderness, eggs contribute structure and a golden color, and sugar feeds the yeast while keeping the crumb moist.
- 1 cup (240 ml) whole milk, warmed to 110°F (43°C)
- 2 1/4 tsp (7 g / 1 packet) active dry yeast
- 3 tbsp (38 g) granulated sugar, divided
- 3 cups (360 g) all-purpose flour, plus more for dusting
- 1 tsp (6 g) fine salt
- 1 large egg, room temperature
- 3 tbsp (42 g) unsalted butter, melted and slightly cooled
- 2 tbsp (28 g) unsalted butter, softened, for brushing after baking
- 1 tbsp (14 g) unsalted butter, melted, for brushing before baking (optional)
These rolls pair beautifully with Honey Butter slathered on warm for serving.
Kitchen Equipment Needed
You don’t need a lot of specialized equipment to make these rolls, but a few key tools make the process much smoother and more consistent.
- Stand mixer with dough hook (or large mixing bowl if kneading by hand)
- Digital kitchen thermometer (for checking milk temperature)
- 9×13 inch baking pan
- Large mixing bowl
- Small mixing bowl
- Measuring cups and spoons
- Kitchen scale (recommended for accuracy)
- Plastic wrap or damp kitchen towel (for covering dough during rise)
- Bench scraper or sharp knife (for dividing dough)
- Pastry brush (for buttering the tops)
- Wire cooling rack
Read Also: Pull Apart Garlic Bread Recipe
Recommended Products for This Recipe
These are products I genuinely recommend based on performance and quality. Each one solves a common pain point when making homemade dinner rolls.
1. KitchenAid Stand Mixer with Dough Hook
A stand mixer takes all the effort out of kneading and produces a perfectly developed dough in about 8 minutes. It’s especially helpful for enriched doughs like this one, which can be slightly sticky at first. The dough hook mimics hand kneading beautifully without wearing out your arms.
2. ThermoPop Instant Read Digital Thermometer
Getting the milk temperature right is the single most important step for successful rolls. Too hot and you kill the yeast; too cold and it won’t activate. An instant-read thermometer takes the guesswork out of this and gives you a precise reading in seconds.
3. USA Pan 9×13 Rectangular Baking Pan
This pan produces even heat distribution and has a nonstick coating that makes cleanup easy. The heavier gauge prevents warping, which is key for getting evenly baked rolls across the entire pan.
4. Kerrygold Pure Irish Butter
The quality of butter in these rolls genuinely matters. European-style butters like Kerrygold have a higher fat content than standard American butter, which translates to a richer, more tender crumb and a more flavorful finish.
Another cozy bread recipe to try: Brioche Recipe

Step-by-Step Instructions
Step 1: Activate the Yeast
- Pour the warm milk (110°F / 43°C) into a small bowl or the bowl of your stand mixer.
- Add 1 teaspoon of the granulated sugar and sprinkle the active dry yeast over the surface of the milk.
- Give it a very gentle stir to combine, then leave it undisturbed for 5 to 10 minutes.
- After this time, the mixture should look foamy and smell faintly yeasty. This foam tells you the yeast is alive and ready to leaven your dough.
- If there is no foam after 10 minutes, your milk was likely too hot (which killed the yeast) or too cold (which didn’t activate it). Discard and start again with fresh yeast and milk at the correct temperature.
Step 2: Mix the Dough
- Add the remaining sugar, the egg, and the melted butter to the yeast mixture.
- Whisk briefly to combine everything.
- Add 2 cups (240 g) of the flour and the salt to the bowl.
- If using a stand mixer, attach the dough hook and mix on low speed until the flour is absorbed, about 1 to 2 minutes.
- Gradually add the remaining 1 cup (120 g) of flour, a few tablespoons at a time, mixing between additions.
- Continue until a shaggy dough forms that begins to pull away from the sides of the bowl.
- If mixing by hand, stir with a wooden spoon until the dough comes together, then turn it out onto a lightly floured surface and knead by hand.
Step 3: Knead the Dough
- If using a stand mixer, increase the speed to medium and knead for 7 to 8 minutes. The dough is ready when it is smooth, slightly tacky, and elastic, pulling away cleanly from the sides of the bowl and passing the windowpane test (you can stretch a small piece thin enough to see light through without it tearing).
- If kneading by hand, knead on a lightly floured surface for 8 to 10 minutes, using the heel of your hand to push the dough away, then fold it back on itself and rotate.
- Resist the urge to add too much extra flour. A slightly tacky dough produces softer rolls than a dry, stiff dough.
- The dough is properly kneaded when it springs back slowly when poked with a finger.
Step 4: First Rise (Bulk Fermentation)
- Shape the dough into a smooth ball by tucking the edges underneath.
- Place the dough ball into a lightly greased large bowl, turning it once so all sides are coated.
- Cover the bowl tightly with plastic wrap or a damp kitchen towel.
- Place in a warm, draft-free spot, such as an oven that has been turned off but has a small pan of hot water placed on the bottom rack (this creates a warm, slightly humid environment).
- Let the dough rise for 1 to 1.5 hours, or until it has doubled in size.
- If your kitchen is on the cooler side, this can take up to 2 hours. Be patient and wait for the dough to fully double rather than relying on the timer alone.
Step 5: Divide and Shape the Rolls
- Lightly grease your 9×13 inch baking pan with butter or nonstick spray.
- Punch down the risen dough gently to release the gas bubbles.
- Turn the dough out onto a lightly floured surface.
- Using a bench scraper or sharp knife, divide the dough into 15 equal pieces. The easiest method is to first cut the dough in half, then divide each half, working toward equal portions. A kitchen scale set to grams helps ensure uniformity.
- To shape each roll, flatten a piece of dough into a small disk, then fold the edges toward the center, pinching them together at the bottom to create surface tension on the top.
- Roll the shaped dough under your cupped palm in a circular motion against the work surface to form a tight, smooth ball.
- Place each shaped roll seam-side down in the prepared pan, arranging them in a 3×5 grid so they are just touching.
Step 6: Second Rise (Proofing)
- Cover the pan loosely with plastic wrap or a clean kitchen towel.
- Let the rolls rise again in a warm spot for 45 minutes to 1 hour, or until they have puffed up noticeably and are touching each other snugly.
- You’ll know they are ready when they look pillowy and spring back very slowly when lightly pressed with your finger.
- During this time, preheat your oven to 375°F (190°C) so it is fully up to temperature when the rolls are ready to bake.
Step 7: Optional Pre-Bake Butter Brush
- Just before placing the rolls in the oven, you can brush the tops lightly with 1 tablespoon of melted butter. This adds a gentle golden sheen and a touch of extra richness.
- This step is optional but highly recommended if you prefer a golden, slightly glossy top.
Step 8: Bake the Rolls
- Place the pan on the center rack of the preheated 375°F (190°C) oven.
- Bake for 18 to 22 minutes, until the tops are light golden brown. The rolls should have an internal temperature of 190°F (88°C) when fully baked.
- Avoid opening the oven door during the first 15 minutes, as temperature fluctuations can affect the rise and texture.
- The rolls will have puffed up beautifully and risen to fill the pan.
Step 9: Butter the Tops and Serve
- Remove the pan from the oven and immediately brush the tops generously with the softened butter.
- The butter will melt on contact with the hot rolls, soaking in slightly and giving the tops a beautiful sheen and rich flavor.
- Let the rolls cool in the pan for at least 5 minutes before serving.
- They are best served warm, pulled apart directly from the pan.
This recipe pairs wonderfully alongside Slow Cooker Pot Roast for a complete, comforting meal.
Tips for Success
Getting consistently perfect rolls every time comes down to a few specific habits and techniques. These tips address the most common mistakes home bakers make and give you the knowledge to troubleshoot if something doesn’t go exactly as planned.
- Measure flour correctly. Scoop your measuring cup into the flour bag and you’ll end up with too much flour, which leads to dense rolls. Instead, spoon flour into the cup and level it off with a knife. Or better yet, use a kitchen scale.
- Don’t rush the rise times. Both rises matter. The first develops flavor, and the second builds the airy structure. Rushing either one results in dense, heavy rolls.
- Use room temperature eggs. A cold egg can lower the temperature of your dough, which slows yeast activity. To quickly bring eggs to room temperature, place them in a bowl of warm water for 5 minutes.
- Check your yeast before you start. Old or improperly stored yeast may not activate. Active dry yeast should always be proofed in warm liquid before using, which is built into this recipe’s first step.
- Avoid adding too much flour. Enriched doughs feel stickier than lean bread doughs because of the butter and egg. Trust the recipe and resist adding more flour than needed.
- Tent the pan with foil if the tops brown too quickly. If after 15 minutes the tops look very dark but the rolls aren’t cooked through, loosely lay a sheet of aluminum foil over the pan to protect the tops while the interior finishes baking.
- Brush butter while hot. Adding the finishing butter while the rolls are fresh from the oven helps it absorb slightly into the surface rather than just sitting on top.
Another wonderfully soft and enriched bread to try: Challah Recipe
Serving Suggestions
Warm dinner rolls are one of the most versatile things you can put on a table. They complement both casual weeknight dinners and the most elaborate holiday spreads.
Whether you’re setting the table for a simple soup night or a full Thanksgiving feast, these rolls belong right in the center of it.
Here are some of my favorite ways to serve them:
- Alongside Turkey Gravy and roasted meats for a classic Sunday dinner spread
- With a generous smear of honey butter or strawberry jam for breakfast or brunch
- Split and used as slider buns for pulled pork, fried chicken, or holiday ham
- Next to a big bowl of creamy soup, perfect for dipping and soaking up every last drop
- As part of a Thanksgiving table with Cranberry Sauce, stuffing, and all the sides
- Toasted the next day with butter for a simple, satisfying snack
Variations to Try
Once you’ve mastered the base recipe, you can customize these rolls with different flavors and add-ins to suit whatever you’re serving.
These variations all start from the same foundational dough, so you don’t need to learn a new recipe, just adjust a few ingredients.
- Garlic herb rolls: Add 1 teaspoon of garlic powder and 1 tablespoon of finely chopped fresh rosemary or thyme to the dough during mixing, then brush with garlic butter after baking.
- Honey wheat rolls: Substitute 1 cup of the all-purpose flour with whole wheat flour, and replace the granulated sugar with 2 tablespoons of honey for a heartier, slightly earthier roll.
- Cheddar rolls: Fold 1/2 cup (55 g) of freshly shredded sharp cheddar cheese into the dough after kneading, then sprinkle more on top before baking.
- Sweet roll variation: Increase the sugar to 1/4 cup (50 g) and add 1 teaspoon of vanilla extract to the dough for a slightly sweeter, softer roll that works beautifully for brunch.
- Everything bagel rolls: Brush with melted butter before baking and generously top with everything bagel seasoning for a savory, seedy crust.
- Cloverleaf rolls: Instead of single balls, divide each portion of dough into three smaller pieces and place three mini balls into each cup of a greased muffin tin for a classic cloverleaf shape.
Read Also: Sourdough Discard Rolls Recipe
Storage and Reheating
These rolls keep well and reheat beautifully, making them just as good the next day as they were fresh from the oven.
Proper storage prevents the rolls from drying out and preserves that soft, pillowy texture.
- Room temperature: Store cooled rolls in an airtight container or zip-top bag at room temperature for up to 3 days. Keep them out of direct sunlight.
- Refrigerator: Refrigerating rolls is not ideal as it causes the starch to crystallize faster, making them stale more quickly. If you must refrigerate, wrap tightly and reheat well before serving.
- Freezer: Cool the rolls completely, then freeze in an airtight container or freezer bag for up to 3 months. Thaw overnight at room temperature before reheating.
- To reheat individual rolls: Wrap in a damp paper towel and microwave for 15 to 20 seconds.
- To reheat a full pan: Cover the pan loosely with foil and warm in a 300°F (150°C) oven for 8 to 10 minutes.
- From frozen: Thaw at room temperature, then warm in the oven wrapped in foil at 300°F (150°C) for 10 to 12 minutes.
For another bread recipe that stores equally well, check out: Monkey Bread Recipe
Nutritional Facts
The following is an estimate based on 1 roll from a batch of 15.
| Nutrient | Amount per Serving |
|---|---|
| Calories | 145 kcal |
| Total Carbohydrates | 22 g |
| Protein | 4 g |
| Total Fat | 4.5 g |
| Saturated Fat | 2.5 g |
| Cholesterol | 22 mg |
| Sodium | 160 mg |
| Fiber | 0.7 g |
| Sugar | 3 g |
Nutritional values are estimates and may vary based on exact ingredient brands and serving sizes.
For another enriched bread recipe, take a look at this Brioche French Toast Recipe
Health Benefits of Key Ingredients
While dinner rolls are a comfort food rather than a health food, the core ingredients do offer some real nutritional value, especially when made from scratch with whole ingredients.
Understanding what’s in your food helps you make informed choices about how and when to enjoy it.
Here are the health benefits of the key ingredients in this recipe:
- Whole milk: Provides calcium for bone health, vitamin D, vitamin B12, and high-quality protein. The fat content also aids in the absorption of fat-soluble vitamins.
- Eggs: An excellent source of complete protein, eggs also supply choline (important for brain health), selenium, vitamin D, and B vitamins including riboflavin and B12.
- All-purpose flour: Provides carbohydrates as the body’s primary energy source, along with small amounts of iron, B vitamins, and plant-based protein.
- Butter: Contains fat-soluble vitamins A, D, E, and K2, as well as conjugated linoleic acid (CLA), a fatty acid with potential anti-inflammatory properties when consumed in moderation.
- Yeast: Active dry yeast is a source of B vitamins, protein, and trace minerals. It also produces carbon dioxide during fermentation, which gives the rolls their airy, light structure.
Read Also: Homemade Biscuit Recipe
Frequently Asked Questions
1. Can I use instant yeast instead of active dry yeast?
Yes, you can substitute instant yeast (also called rapid-rise or fast-acting yeast) in a 1:1 ratio. Instant yeast does not need to be proofed in warm liquid first, so you can add it directly to the flour. Your rise times may be slightly shorter, often by 15 to 20 minutes per rise, so keep an eye on the dough rather than relying solely on the clock.
2. Why didn’t my rolls rise?
The most common culprit is yeast that failed to activate. This happens when the milk is too hot (above 120°F / 49°C kills yeast), too cold (below 100°F / 38°C won’t activate it), or when the yeast is old and no longer viable. Always check the expiration date on your yeast, and use a thermometer to verify milk temperature.
3. Can I make the dough ahead of time?
Absolutely. After the first rise, punch down the dough, shape the rolls, place them in the greased pan, and cover tightly with plastic wrap. Refrigerate overnight (up to 12 hours). The next day, let the rolls sit at room temperature for 45 to 60 minutes to warm up and complete their second rise before baking.
4. Can I make this recipe without a stand mixer?
Yes. Mix the dough by hand using a wooden spoon, then knead on a lightly floured surface for 8 to 10 minutes. It takes more effort but produces equally good results. The dough is ready when it is smooth, elastic, and springs back slowly when poked.
5. My rolls came out dense. What went wrong?
Dense rolls are typically caused by one of three things: yeast that didn’t fully activate, not enough kneading (under-developed gluten leads to poor structure), or rushing the rise times. Make sure both rise periods are complete and the dough has truly doubled before proceeding. Dense rolls can also result from adding too much flour, so go easy on the dusting.
Read Also: Air Fryer Garlic Bread Recipe
Final Thoughts
Making homemade soft dinner rolls from scratch is one of those kitchen experiences that never gets old. The process is satisfying, the result is delicious, and the reaction from everyone at the table makes every minute of effort worth it.
Once you’ve made these once, they’ll become a staple in your home. You’ll find yourself reaching for this recipe before holidays, Sunday dinners, and any occasion that calls for something warm and special on the table.
Give this soft dinner rolls recipe a try and see for yourself just how much better homemade rolls are. If you make them, I’d love to hear how they turned out. Drop a comment below, share a photo, or let me know your favorite way to serve them!
Recommended:
- Dinner Rolls Recipe
- Sourdough Discard Cinnamon Rolls Recipe
- Buttermilk Biscuit Recipe
- Rosemary Focaccia Recipe
- Cornbread Stuffing Recipe
- Sausage Stuffing Recipe
- Cheesy Garlic Bread Recipe
- Pumpkin Roll Recipe
- Dutch Oven Sourdough Bread Recipe
- Croissant Recipe