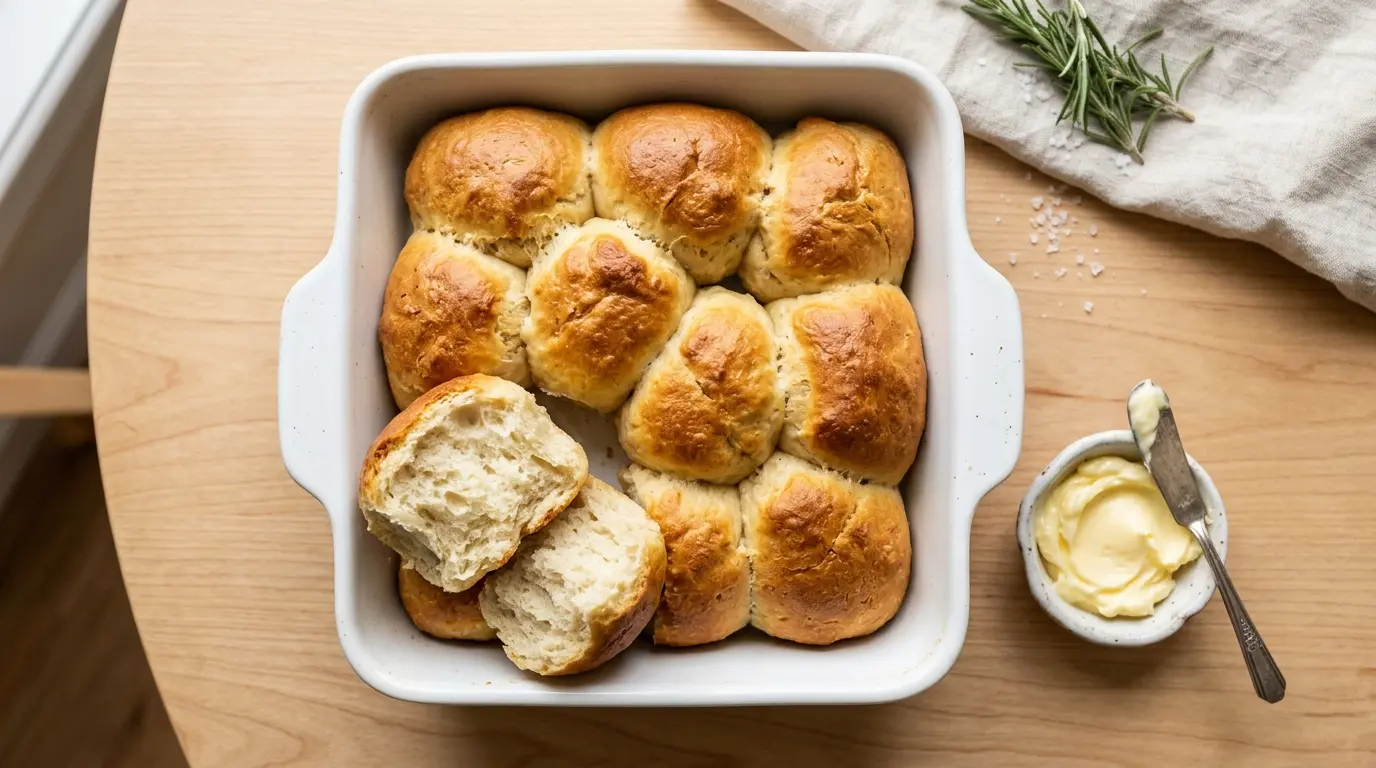
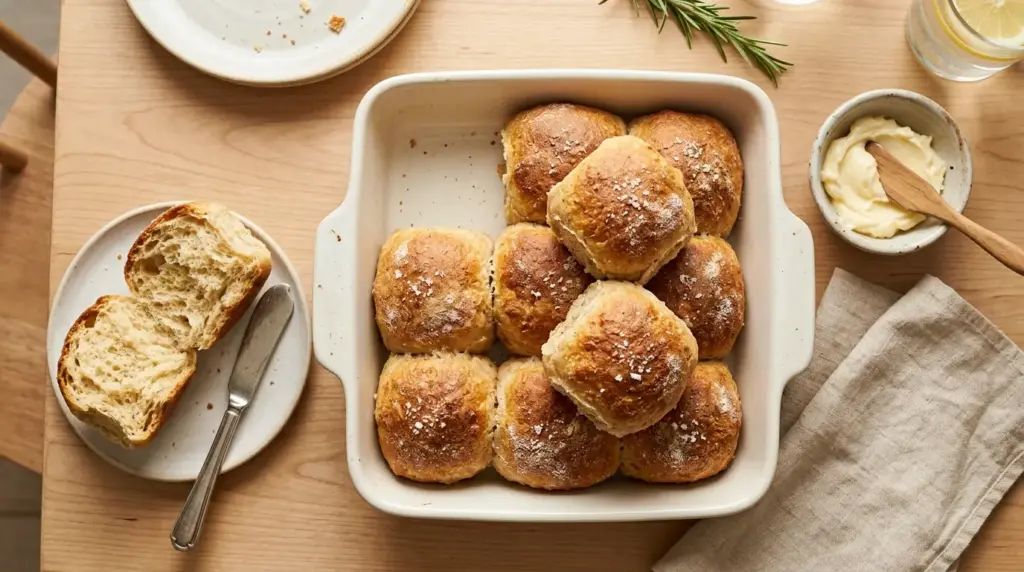
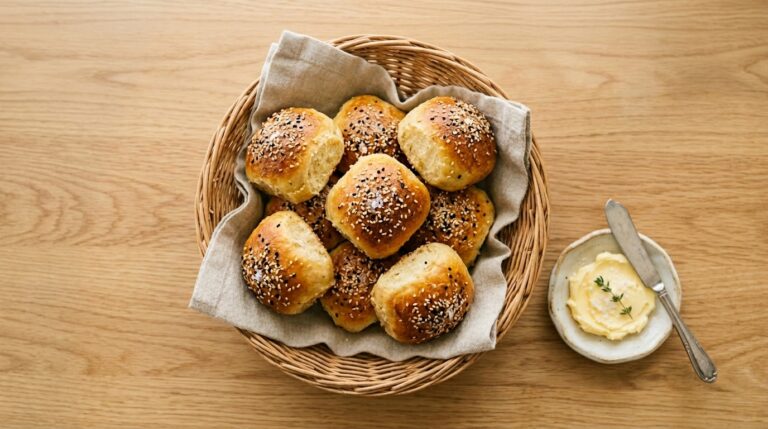
If you’ve been missing soft, pillowy dinner rolls since going gluten free, this Gluten Free Dinner Rolls Recipe is about to become your new go to.
These rolls come out golden on the outside and tender on the inside, with that classic yeasty flavor you remember from regular bread.
No weird aftertaste, no dense gummy texture. Just warm, fluffy rolls fresh from the oven.
I’ve made these more times than I can count, tweaking the ratios until they finally matched the texture of traditional rolls. The trick is in the blend of flours and a little extra moisture, which keeps gluten free dough from drying out and crumbling.
You don’t need any fancy equipment or hard to find ingredients either. Just a good gluten free flour blend, a few pantry staples, and a little patience while the dough rises.
By the end of this post, you’ll know exactly how to make a batch of soft, golden dinner rolls that everyone at the table will reach for, gluten free or not.
These are perfect for holiday dinners, Sunday suppers, or just because you’re craving warm bread with butter.
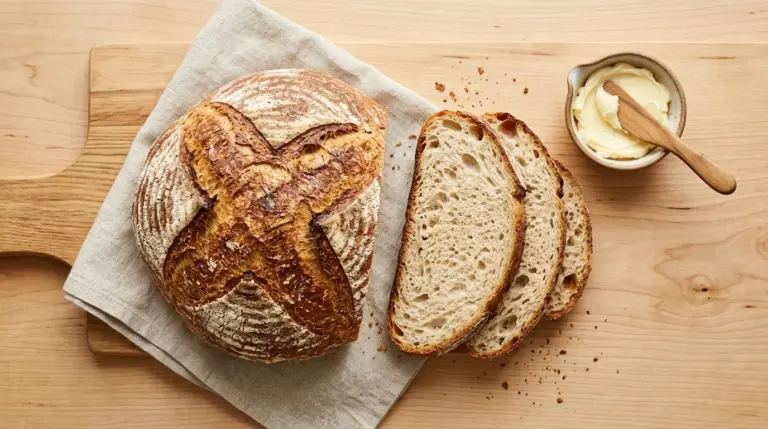
If you love bread recipes made without traditional flour, you might also enjoy this gluten free banana bread, which uses a similar approach to keep things moist and tender.
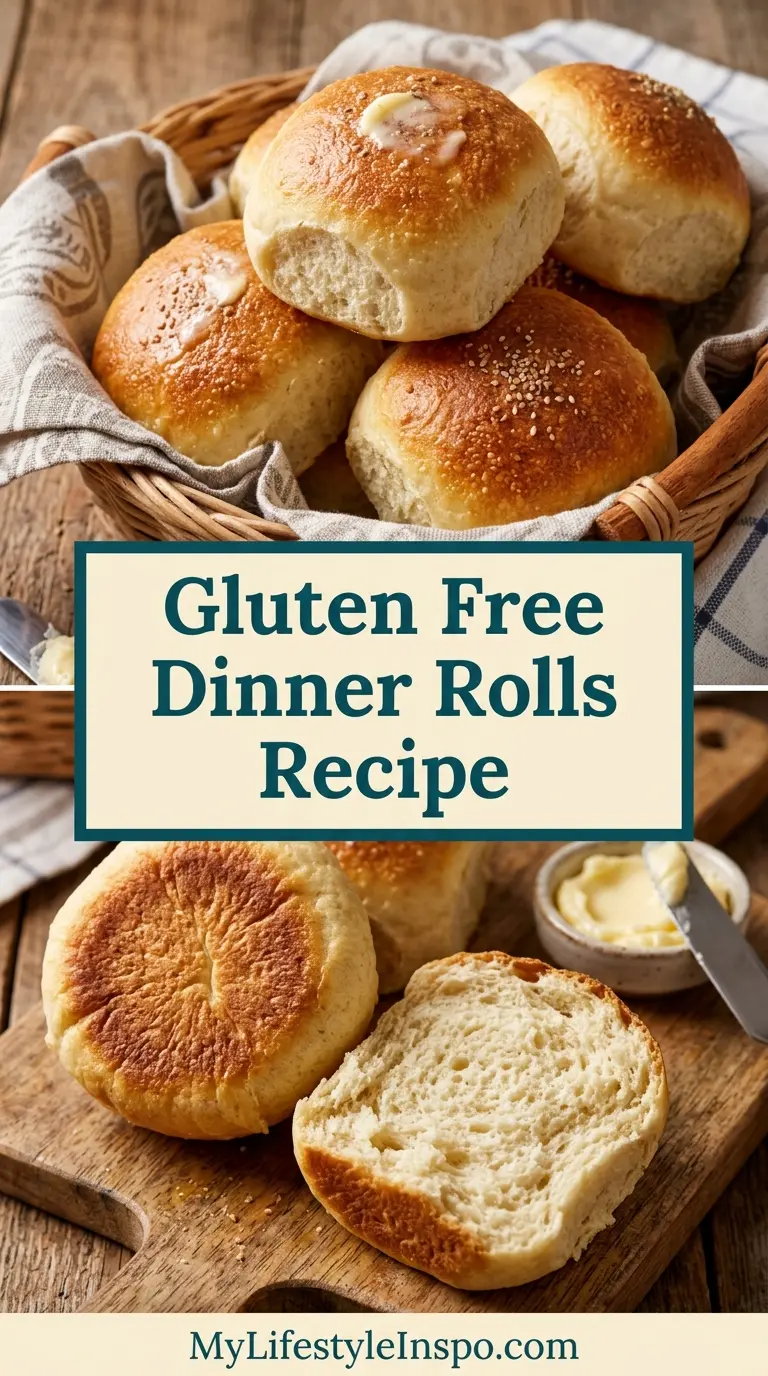
Why You’ll Love This Gluten Free Dinner Rolls Recipe
These rolls are soft, slightly sweet, and have that pull apart texture that makes dinner rolls so addictive.
They’re made with simple ingredients you can find at most grocery stores, no special trip to a specialty shop required.
The dough comes together in one bowl, which means less cleanup and less stress.
Here’s what makes this recipe a winner:
- Soft and fluffy texture that rivals traditional wheat rolls
- Simple ingredient list with no hard to find specialty items
- One bowl mixing method for easy prep and cleanup
- Freezer friendly so you can make a double batch and save some for later
- Great for beginners since the steps are straightforward and forgiving
- Versatile flavor that pairs with almost any meal, from holiday dinners to weeknight soups
You might also enjoy: Sweet Dinner Rolls
Ingredients
This recipe uses a gluten free all purpose flour blend that already contains xanthan gum, which helps mimic the elasticity that regular gluten provides.
If your blend doesn’t include xanthan gum, you’ll want to add it separately, otherwise the rolls may turn out crumbly instead of soft and chewy.
Here’s everything you’ll need:
- 3 cups (420g) gluten free all purpose flour blend (with xanthan gum)
- 1/4 cup (50g) granulated sugar
- 2 1/4 teaspoons (1 packet) active dry yeast
- 1 teaspoon salt
- 1 cup (240ml) whole milk, warmed to about 110°F (43°C)
- 1/3 cup (75g) unsalted butter, melted and slightly cooled
- 2 large eggs, room temperature
- 1 teaspoon apple cider vinegar
- Extra melted butter, for brushing on top
Read Also: 4 Ingredient Gluten Free Bread
Kitchen Equipment Needed
You don’t need any special gadgets for this recipe, but a few good tools make the process smoother.
A stand mixer is especially helpful since gluten free dough tends to be sticky and benefits from thorough mixing.
Here’s what I recommend having on hand:
- Stand mixer with a paddle attachment
- Large mixing bowl
- Measuring cups and spoons
- 9×13 inch baking dish
- Kitchen thermometer for checking milk temperature
- Plastic wrap or a clean kitchen towel
- Pastry brush for buttering the tops
This pairs beautifully with 4 Ingredient Gluten Free Bread if you want to expand your gluten free baking repertoire.
Recommended Products for This Recipe
These are a few products I personally recommend based on quality and how much easier they make the baking process, especially when working with gluten free dough.
1. KitchenAid Stand Mixer
A stand mixer takes the guesswork out of mixing sticky gluten free dough. It saves your arms from a serious workout and ensures the ingredients are evenly combined every time.
2. Digital Kitchen Thermometer
Getting your milk to the right temperature matters a lot when working with yeast. Too hot and it kills the yeast, too cold and your rolls won’t rise properly.
3. Glass 9×13 Baking Dish
A sturdy glass baking dish heats evenly and lets you keep an eye on the bottoms of your rolls as they bake. It’s also great for storing leftovers in the fridge.
4. Gluten Free All Purpose Flour Blend
A good quality blend makes all the difference in texture. This one is specifically formulated to mimic the elasticity of wheat flour in baked goods.
For another bake that benefits from a reliable flour blend, check out this gluten free pumpkin bread.

Step-by-Step Instructions
1. Activate the Yeast
- Warm the milk to about 110°F (43°C). It should feel warm to the touch but not hot.
- Pour the warmed milk into a large mixing bowl.
- Sprinkle the yeast over the milk and add 1 tablespoon of the sugar.
- Let the mixture sit for 5 to 10 minutes, until it becomes foamy on top.
- If the mixture doesn’t foam, your yeast may be expired, so it’s best to start over with fresh yeast.
2. Mix the Wet Ingredients
- Add the melted butter to the yeast mixture once it has cooled slightly so it doesn’t cook the eggs.
- Crack in the eggs and add the apple cider vinegar.
- Whisk everything together until well combined and slightly frothy.
3. Combine the Dry Ingredients
- In a separate bowl, whisk together the gluten free flour blend, remaining sugar, and salt.
- Make sure the flour is well aerated and free of any clumps before adding it to the wet mixture.
4. Form the Dough
- Gradually add the dry ingredient mixture to the wet ingredients, mixing on low speed with a stand mixer or by hand with a sturdy spoon.
- Mix until everything is fully incorporated and the dough is thick and slightly sticky.
- The dough will not look like traditional bread dough. It will be softer and more like a thick batter, which is normal for gluten free baking.
5. Let the Dough Rise
- Cover the bowl with plastic wrap or a damp kitchen towel.
- Place the bowl in a warm spot, such as near a window or on top of the stove if the oven is preheating.
- Let the dough rise for about 1 hour, or until it has roughly doubled in size.
6. Shape the Rolls
- Lightly grease a 9×13 inch baking dish with butter or nonstick spray.
- Using wet hands or a greased ice cream scoop, divide the dough into 12 equal portions.
- Gently shape each portion into a ball and place it in the baking dish, leaving a little space between each roll.
7. Second Rise
- Cover the shaped rolls loosely with plastic wrap or a towel.
- Let them rise again for about 30 to 45 minutes, until they look puffy and have grown noticeably in size.
- While the rolls rise, preheat your oven to 375°F (190°C).
8. Bake the Rolls
- Once the oven is preheated and the rolls have risen, remove the covering.
- Bake the rolls for 20 to 25 minutes, or until the tops are golden brown and a toothpick inserted into the center comes out clean.
- If the tops are browning too quickly, loosely tent the dish with foil for the remaining bake time.
9. Brush and Serve
- As soon as the rolls come out of the oven, brush the tops generously with melted butter.
- Let the rolls cool in the dish for about 10 minutes before serving.
- Serve warm for the best texture and flavor.
For another comforting bake to add to your rotation, try this gluten free dairy free bread.
Tips for Success
Gluten free baking can feel a little different from traditional baking, but a few small adjustments make a big difference.
Paying attention to dough texture and rise times will help you get consistent results every time.
Keep these tips in mind:
- Use a kitchen scale for the flour if possible, since gluten free flours can vary in weight by volume.
- Don’t skip the resting times. Gluten free dough needs that time to develop structure.
- Keep the dough slightly sticky. Adding too much flour will make the rolls dense.
- Store unused dough portions covered so they don’t dry out before shaping.
- If your kitchen is cold, place the rising bowl in an oven that’s been turned off but still slightly warm from preheating.
Another favorite: Dinner Rolls Recipe
Serving Suggestions
These rolls are wonderfully versatile and work with just about any meal.
They’re especially good for soaking up sauces, gravies, and soups.
Here are some ideas for serving them:
- Alongside a bowl of Chicken Noodle Soup
- With a pat of honey butter for a sweet breakfast treat
- As sliders with leftover holiday turkey or ham
- Served warm with a holiday roast and gravy
- Paired with a big bowl of chili for game day
Variations to Try
Once you’ve mastered the base recipe, there’s plenty of room to play around with flavors and add ins.
These variations keep things interesting without changing the basic method.
Try one of these next time:
- Garlic Herb Rolls: Add minced garlic and chopped fresh herbs like rosemary or thyme to the dough.
- Cheesy Rolls: Fold shredded cheddar or parmesan into the dough before shaping.
- Cinnamon Sugar Rolls: Brush with melted butter and sprinkle with cinnamon sugar before baking for a sweet twist.
- Seeded Rolls: Top the rolls with sesame or poppy seeds before baking for added crunch.
- Dairy Free Version: Swap the milk for a dairy free alternative and use dairy free butter throughout.
Read Also: Sourdough Discard Dinner Rolls
Storage and Reheating
These rolls store well, which makes them great for meal prep or holiday baking ahead of time.
Proper storage keeps them soft instead of letting them dry out or get gummy.
Here’s how to store and reheat them:
- Store leftover rolls in an airtight container at room temperature for up to 2 days.
- For longer storage, refrigerate for up to 5 days in a sealed container.
- To freeze, wrap rolls individually in plastic wrap, then place in a freezer bag for up to 3 months.
- Reheat in the microwave for 10 to 15 seconds, or in a 300°F (150°C) oven for about 5 minutes wrapped in foil.
- Thaw frozen rolls overnight in the fridge before reheating for best texture.
This method works wonderfully for garlic naan bread as well, since both benefit from a quick reheat to bring back that fresh baked softness.
Nutritional Facts
Here’s an approximate breakdown per roll, based on a batch of 12 rolls. Actual values may vary depending on the specific flour blend and ingredients used.
- Calories: 180
- Carbohydrates: 26g
- Protein: 3g
- Fat: 7g
- Saturated Fat: 4g
- Sodium: 210mg
- Fiber: 1g
- Sugar: 4g
For another hearty meal to pair these rolls with, try this Chili Recipe.
Health Benefits of Key Ingredients
While dinner rolls are certainly a treat, a few of the ingredients here offer some nutritional benefits worth mentioning.
Knowing what’s in your food can make enjoying it feel a little more balanced.
A few highlights:
- Eggs provide protein and important vitamins like B12, which support energy levels.
- Milk offers calcium and vitamin D, both important for bone health.
- Butter in moderation provides fat soluble vitamins like A and E.
- Gluten free flour blends often include rice flour and starches that are easier to digest for those with sensitivities.
- Yeast is a natural source of B vitamins and can support gut health in fermented forms.
For more gluten free baking inspiration, check out this gluten free cornbread.
Frequently Asked Questions
1. Can I make this recipe dairy free?
Yes, you can substitute the whole milk with a dairy free alternative like almond or oat milk. Use a dairy free butter substitute as well for both the dough and brushing the tops.
2. Why is my gluten free dough so sticky?
Gluten free dough is naturally stickier than traditional wheat dough because it lacks gluten’s elastic structure. This is normal, and adding more flour to compensate will usually make the rolls dense instead of fixing the stickiness.
3. Can I make the dough ahead of time?
You can prepare the dough through the first rise, then refrigerate it overnight. Let it come to room temperature before shaping and continuing with the second rise.
4. What if I don’t have a stand mixer?
You can mix this dough by hand using a sturdy wooden spoon or spatula. It will take a bit more effort since the dough is thick, but it works just fine.
5. Why didn’t my rolls rise as much as expected?
This is usually due to either expired yeast or milk that wasn’t warm enough to activate it properly. Always check that your milk is around 110°F (43°C) and that your yeast foams up during the activation step.
For another soup that pairs beautifully with warm rolls, try this Creamy Chicken Wild Rice Soup.
Final Thoughts
I hope this Gluten Free Dinner Rolls Recipe brings a little extra comfort to your table.
There’s nothing better than pulling apart a warm, soft roll and slathering it with butter.
Give this recipe a try at your next family dinner or holiday gathering.
I’d love to hear how they turn out for you, so feel free to leave a comment below or share a photo if you make them.
Recommended:
- Sweet Dinner Rolls
- Easy Naan Bread
- Easy Sourdough Bread
- Gluten Free Cheesecake
- Gluten Free Chicken Piccata
- Wild Rice Soup
- White Chili
- Honey Mustard Chicken Sheet Pan Dinner
- Gluten Free Pancake Recipe