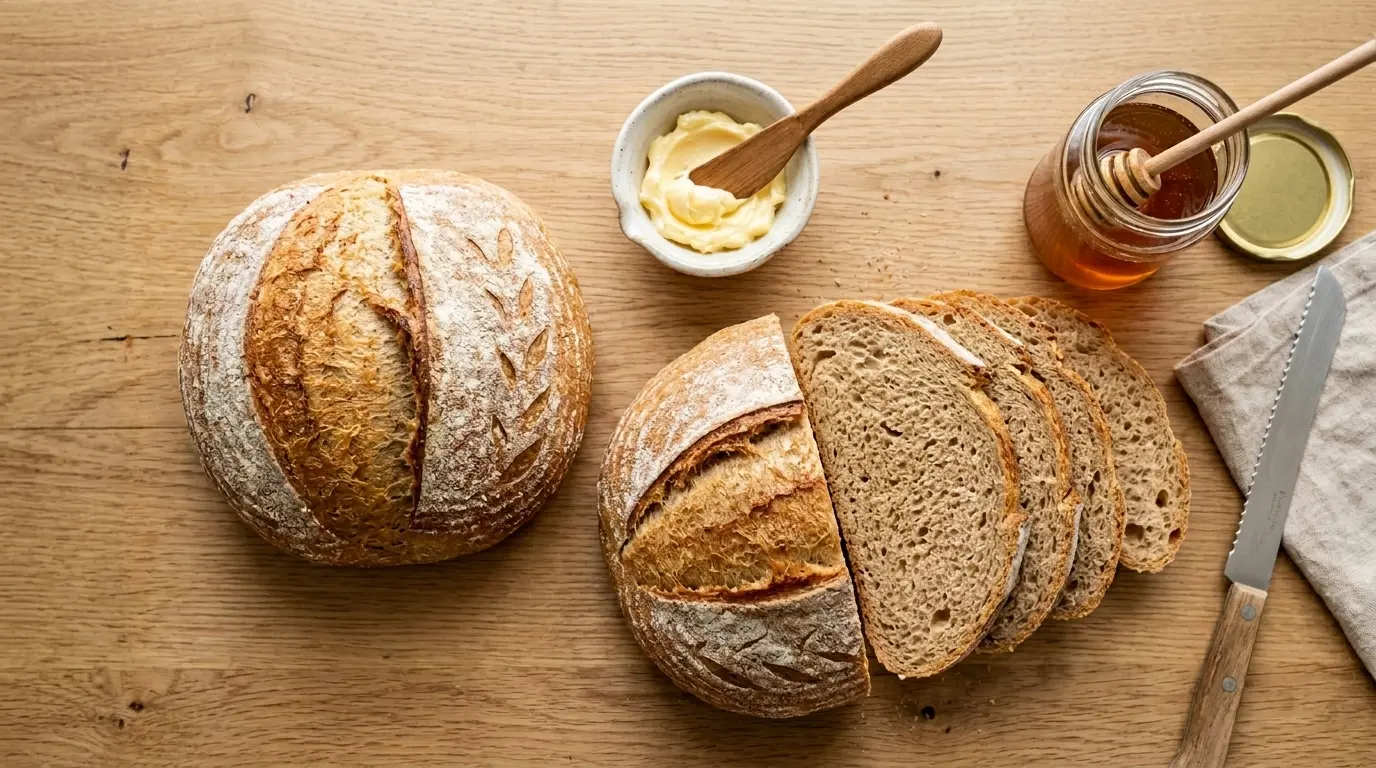
If you have ever pulled a warm loaf of whole wheat bread from the oven, you already know the feeling. That golden crust, the nutty aroma, the soft and pillowy crumb that holds together beautifully for sandwiches, toast, or a simple slather of butter.
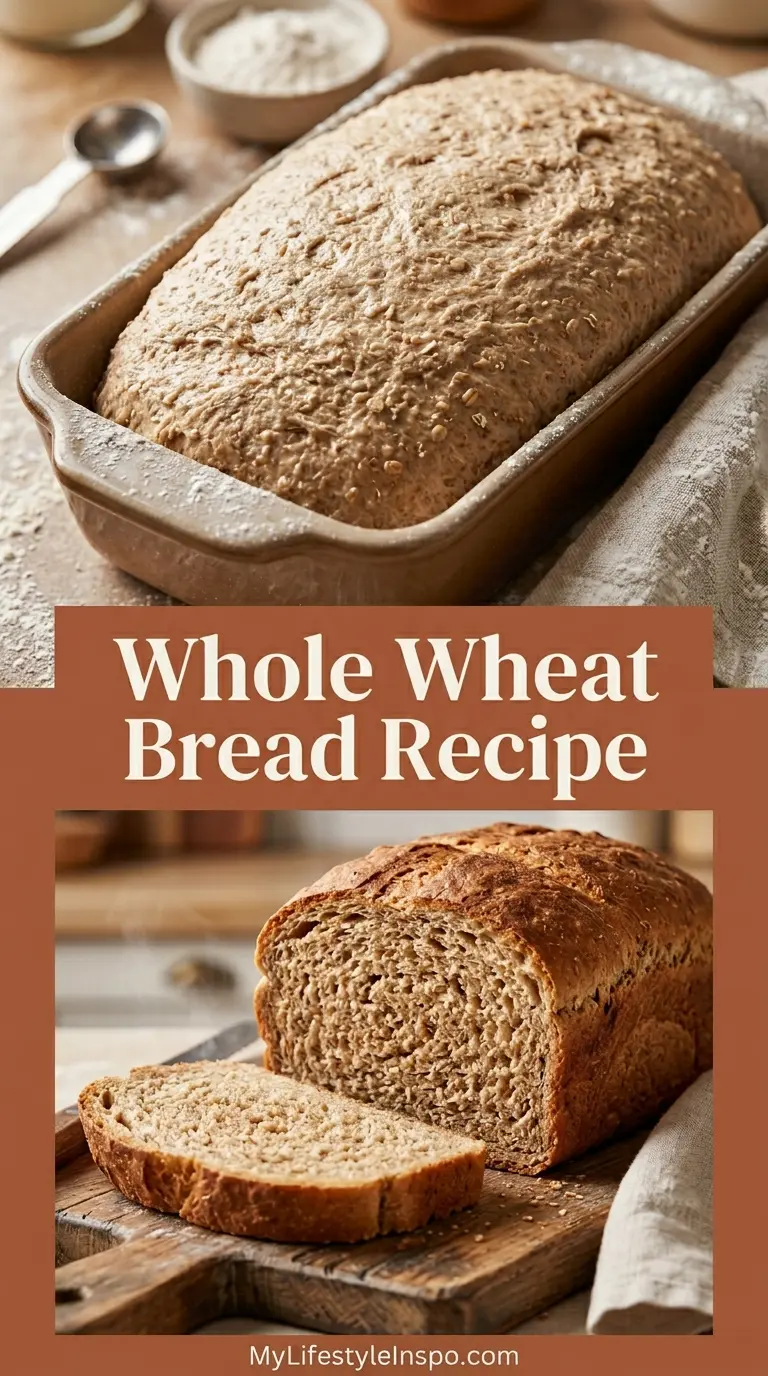
This whole wheat bread recipe uses 100% whole wheat flour as the star, balanced with a touch of honey for natural sweetness and oil to keep every slice moist and tender. The secret to getting a light, soft loaf instead of a dense, heavy one is understanding how to treat whole wheat flour properly. Because whole wheat flour contains the bran and germ, it absorbs more liquid and can weigh down the dough. Giving the dough time to fully hydrate before kneading, and not over-flouring, makes all the difference.
This recipe is beginner-friendly, made with pantry staples, and produces two beautiful loaves that are perfect for everyday use.
You might also enjoy: Whole Wheat Sourdough Bread
Why You’ll Love This Whole Wheat Bread Recipe
This is the kind of bread you make once and then can’t stop making. It is genuinely satisfying to bake, and the results are far better than anything from a supermarket shelf.
The loaves stay soft for days, making them ideal for weekday sandwiches and weekend toast alike. Because you control every ingredient, you get bread with no preservatives, no artificial additives, and no mystery oils.
Whole wheat flour brings a natural, slightly nutty depth of flavor that plain white bread simply cannot match. That earthy character pairs beautifully with both sweet and savory toppings.
The honey in this recipe does double duty. It feeds the yeast during proofing and adds just the right amount of subtle sweetness without making the bread taste like dessert.
This recipe is also very forgiving. Once you understand the basic process, you can easily adapt it to your schedule, slowing the rise in the refrigerator overnight if needed.
Here is why this recipe stands out:
- Soft and tender crumb that does not crumble when you slice it
- Naturally sweetened with honey instead of refined sugar
- No special equipment needed beyond a standard loaf pan and a mixing bowl
- Two loaves per batch, so you can freeze one for later
- 100% whole wheat with no white flour required for a great rise
- Ready in about 3 hours from start to finish, with most of that being hands-off rise time
Read Also: No Knead Bread Recipe
Ingredients
This recipe uses straightforward ingredients that work in harmony to create a well-risen, flavorful loaf. The warm water temperature is key: too hot and it kills the yeast, too cold and the yeast will not activate. Aim for 105-115°F (40-46°C).
- 3 cups (720 ml) warm water (105-115°F / 40-46°C)
- 2 1/4 teaspoons (7 g) active dry yeast (one standard packet)
- 1/3 cup (113 g) honey
- 3 tablespoons (45 ml) neutral oil (such as vegetable or canola oil)
- 1 tablespoon (18 g) fine salt
- 6 cups (720 g) whole wheat flour, plus more for kneading
- 1 tablespoon (15 ml) neutral oil or softened butter, for greasing the pans
For your baking pans, lightly grease two standard 9×5 inch loaf pans to ensure the loaves release cleanly after baking.
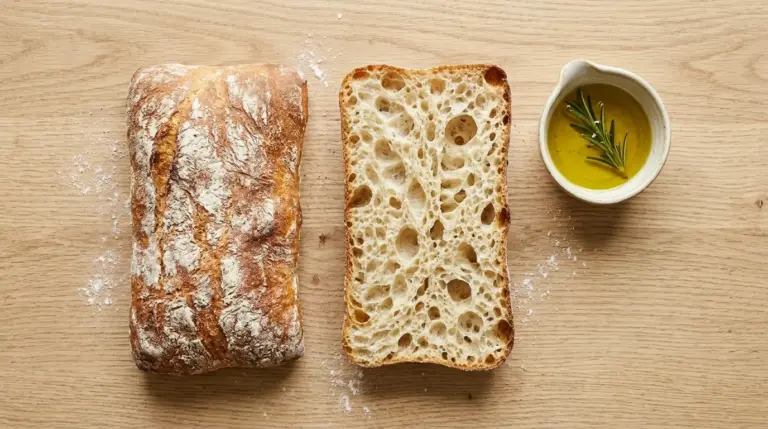
Read Also: Artisan Bread Recipe
Kitchen Equipment Needed
You do not need a stand mixer for this recipe, though it makes kneading easier. A large mixing bowl, a wooden spoon, and a little elbow grease are all that is required.
- Large mixing bowl
- Measuring cups and spoons
- Instant-read thermometer (for checking water temperature)
- 9×5 inch loaf pans (2 needed)
- Kitchen scale (optional but recommended for accuracy)
- Stand mixer with dough hook (optional)
- Wooden spoon or rubber spatula
- Clean kitchen towel or plastic wrap
- Wire cooling rack
- Bread knife or serrated knife
You might also enjoy: Dutch Oven Bread Recipe
Recommended Products for This Recipe
These are products selected based on quality and performance that will genuinely elevate your bread-baking experience.
1. KitchenAid Stand Mixer with Dough Hook
Kneading whole wheat dough by hand for 8-10 minutes is perfectly doable, but a stand mixer with a dough hook takes the effort out of it entirely. The KitchenAid is a workhorse that handles thick, hearty whole wheat dough with ease. It is a lasting investment if you plan to bake bread regularly.
2. Wilton Aluminum Loaf Pans (Set of 2)
Aluminum loaf pans conduct heat evenly, which means your bread bakes through without the crust overbrowning before the inside is done. A set of two is essential since this recipe makes two loaves. The durable construction holds up batch after batch.
3. Bob’s Red Mill Stone Ground Whole Wheat Flour
The quality of your whole wheat flour directly affects the flavor and texture of your bread. Bob’s Red Mill stone ground whole wheat flour retains more of the natural oils and nutrients from the wheat germ, giving your loaf a richer, nuttier flavor than standard supermarket flour.
4. OXO Instant-Read Thermometer
Getting your water temperature right is one of the most important steps in bread baking. An instant-read thermometer removes all guesswork so your yeast activates properly every single time. The OXO model is accurate, easy to read, and built to last.
This recipe also works beautifully as the base for Sourdough Sandwich Bread if you want to experiment with a tangier loaf down the line.
Step-by-Step Instructions
1. Proof the Yeast
- Pour 3 cups (720 ml) of warm water (105-115°F / 40-46°C) into a large mixing bowl.
- Add 2 1/4 teaspoons (7 g) of active dry yeast to the warm water.
- Add 1/3 cup (113 g) of honey and stir gently to combine.
- Let the mixture sit undisturbed for 5-10 minutes. You are looking for it to become foamy and bubbly on the surface. This tells you the yeast is alive and active.
- If the mixture does not foam after 10 minutes, your water was likely too hot or too cold, or your yeast is old. Start over with fresh yeast and properly tempered water.
2. Add Oil and Salt
- Once your yeast mixture is nicely foamy, add 3 tablespoons (45 ml) of neutral oil to the bowl.
- Add 1 tablespoon (18 g) of fine salt.
- Stir everything together until the oil and salt are incorporated into the yeast mixture.
- Do not add the salt directly onto the dry yeast at any point, as salt can inhibit yeast activity.
3. Mix In the Flour
- Add the whole wheat flour to the bowl one cup at a time, stirring after each addition with a wooden spoon or rubber spatula.
- Continue adding flour until the dough comes together and pulls away from the sides of the bowl. You want the dough to be tacky but not sticky. It should not leave large amounts of dough on your fingers when you press it, but it should feel slightly moist.
- If you are using a stand mixer, switch to the dough hook at this point and let it run on medium-low speed.
4. Knead the Dough
- Turn the dough out onto a lightly floured surface. Dust your hands and the work surface with a small amount of whole wheat flour.
- Knead the dough by pushing it away from you with the heel of your hand, folding it back toward you, rotating a quarter turn, and repeating.
- Knead for 8-10 minutes by hand, or 6-8 minutes on medium speed in a stand mixer with the dough hook.
- The dough is ready when it is smooth, slightly tacky, and elastic. When you stretch a small piece, it should be able to stretch thin without immediately tearing. This is called the “windowpane test.”
- Resist the urge to keep adding flour. A slightly sticky dough produces a softer, more tender loaf.
5. First Rise
- Lightly oil the large mixing bowl (or use a clean bowl) and place the kneaded dough inside.
- Turn the dough once so all sides are lightly coated in oil. This prevents the surface from drying out during the rise.
- Cover the bowl tightly with a clean kitchen towel or plastic wrap.
- Place the bowl in a warm, draft-free spot. A good trick is to turn your oven on to the lowest setting for 2 minutes, then turn it off and place the covered dough inside the warm (but off) oven.
- Let the dough rise until it has doubled in size, about 1 to 1 1/2 hours.
6. Shape the Loaves
- Lightly grease two 9×5 inch (23×13 cm) loaf pans with oil or softened butter.
- Once the dough has doubled, gently punch it down to release the gas. Turn it out onto a lightly floured surface.
- Divide the dough into two equal pieces. A kitchen scale is helpful here: each piece should weigh roughly the same.
- For each piece, flatten the dough into a rough rectangle about as wide as your loaf pan.
- Roll the dough tightly toward you like a jelly roll, pressing out any air bubbles as you go.
- Pinch the seam closed along the bottom and place the loaf seam-side down into a prepared loaf pan.
- Repeat with the second piece of dough.
7. Second Rise
- Cover each loaf pan loosely with a clean kitchen towel or lightly greased plastic wrap.
- Place the pans in a warm spot and let the dough rise again until it crowns about 1 inch (2.5 cm) above the rim of the pans. This usually takes 45-60 minutes.
- Do not skip this second rise. It is what gives the bread its final height and open, tender crumb.
- While the loaves are on their second rise, preheat your oven to 350°F (175°C).
8. Bake the Bread
- Once the loaves have risen properly and your oven is fully preheated, place both pans in the center of the oven.
- Bake for 30-35 minutes. The loaves are done when they are deep golden brown on top and sound hollow when you tap the bottom of a loaf.
- For extra certainty, an instant-read thermometer inserted into the center of the loaf should read 190-200°F (88-93°C) when the bread is fully baked.
- Do not under-bake. A slightly pale loaf may feel done on the outside but be gummy inside.
9. Cool Completely
- Remove the loaves from the oven and let them rest in the pans for 5 minutes.
- Then turn the loaves out onto a wire cooling rack.
- Resist cutting into the bread for at least 30 minutes. The interior continues to set as it cools, and cutting too early results in a gummy texture.
- Once fully cooled, the bread is ready to slice and enjoy.
For more ideas on baking bread without kneading, check out this No Knead Bread Recipe for a low-effort alternative.
Tips for Success
Even the most straightforward bread recipe has a few points where things can go wrong. Keep these tips in mind for the best results every time.
- Check your yeast first. If your yeast does not foam in the first step, do not continue. Old or dead yeast produces a dense, flat loaf.
- Do not add too much flour. It is the single most common mistake in bread baking. The dough should feel tacky, not dry.
- Use a thermometer. Both for the water temperature and for checking doneness inside the loaf.
- Give the dough enough time. A longer, slower rise produces better flavor and texture than a rushed one.
- Cover the dough properly. A dry surface during rising can form a skin that inhibits the rise.
- Let it cool before slicing. Hot bread slices poorly and the texture will seem gummy even if the bread is fully baked.
Read Also: Beer Bread Recipe
Serving Suggestions
Homemade whole wheat bread is endlessly versatile. It is just as good plain as it is dressed up.
Spread a thick layer of Cinnamon Butter on a warm slice straight from the oven for a simple, cozy treat.
Here are more ways to enjoy it:
- Pair a slice alongside a bowl of Chicken Noodle Soup for the ultimate comfort meal
- Use thick slices to make Classic French Toast for a hearty, wholesome breakfast
- Top toasted slices with Easy Hummus and sliced cucumbers for a quick, nutritious lunch
- Serve alongside Red Lentil Soup for a warming, protein-rich dinner
- Use slices to build the best Classic Egg Salad sandwich you have ever had
- Toast and top with Avocado Toast for a satisfying breakfast or snack
- Pair with a rich bowl of Creamy Tomato Soup for a classic combination
Another favorite: Minestrone Soup
Variations to Try
Once you have mastered the base recipe, you can start experimenting with mix-ins and flour ratios. All variations below use the same method as the main recipe.
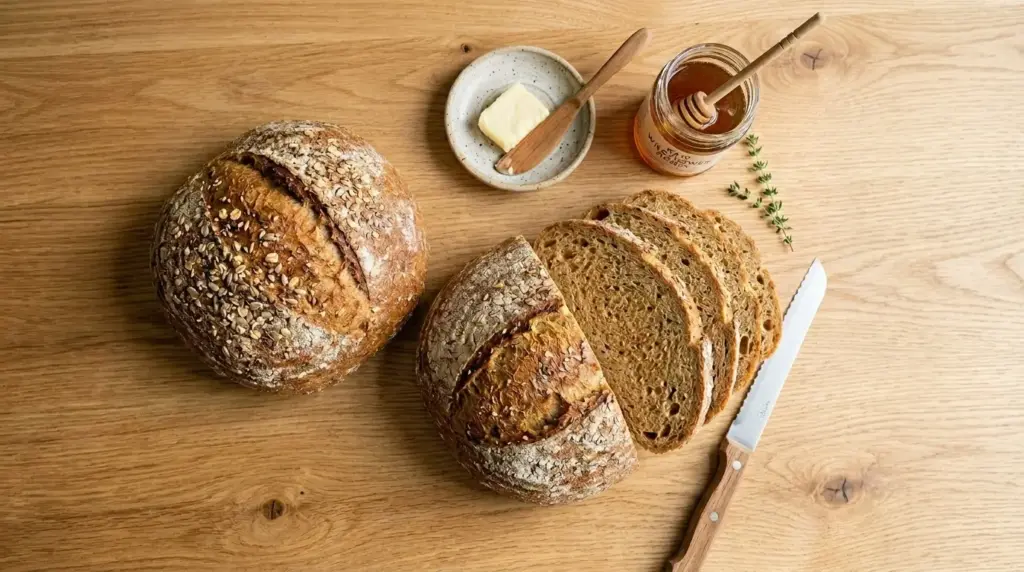
- Honey Oat Whole Wheat Bread: Add 1/2 cup (45 g) of rolled oats to the dough and sprinkle extra oats on top of the loaves before the second rise for a lovely texture and visual
- Seeded Whole Wheat Bread: Press a mixture of sesame seeds, sunflower seeds, and flax seeds onto the top of each shaped loaf before the second rise
- Whole Wheat Sandwich Bread (Lighter Crumb): Swap 2 cups of the whole wheat flour for bread flour to produce a slightly lighter crumb that is ideal for deli-style sandwiches
- Cinnamon Raisin Whole Wheat Bread: Flatten the dough during shaping, sprinkle with 1 teaspoon cinnamon and 1 cup raisins, then roll tightly before placing in the pan
- Herb and Olive Oil Whole Wheat Bread: Replace the honey with 2 tablespoons of olive oil and add 1 tablespoon of dried rosemary or thyme to the dough
You might also enjoy: Rosemary Focaccia
Storage and Reheating
Proper storage keeps your homemade whole wheat bread fresh and prevents it from going stale prematurely. Because there are no preservatives, it will not last as long as store-bought bread, but it tastes so much better.
- Room temperature: Store cooled loaves in an airtight bag or wrapped tightly in plastic wrap at room temperature for up to 3-4 days. Do not refrigerate, as the refrigerator actually speeds up staling in bread.
- Freezer: Slice the cooled loaf before freezing so you can pull out individual slices as needed. Wrap tightly in plastic wrap, then place in a freezer-safe bag. Freeze for up to 3 months.
- Thawing: Let frozen slices thaw on the counter for about 30 minutes, or pop them directly into the toaster from frozen.
- Reheating a whole loaf: Wrap the loaf in foil and heat in a 300°F (150°C) oven for 10-15 minutes to refresh the crust and crumb.
- Refreshing stale slices: A quick 10-15 seconds in the microwave with a damp paper towel over the slice will restore softness in a pinch.
Read Also: Irish Soda Bread Recipe
Nutritional Facts
The following values are approximate per slice, based on cutting each loaf into 12 slices (24 total slices from this recipe).
| Nutrient | Amount Per Slice |
|---|---|
| Calories | 130 kcal |
| Total Fat | 2.5 g |
| Saturated Fat | 0.4 g |
| Carbohydrates | 25 g |
| Dietary Fiber | 3 g |
| Sugars | 4 g |
| Protein | 4 g |
| Sodium | 240 mg |
| Potassium | 120 mg |
| Iron | 1.2 mg |
These values will vary depending on the specific brands used and how thick you slice the bread.
This bread pairs well with a bowl of Lentil Soup for a balanced, fiber-rich meal.
Health Benefits of Key Ingredients
Whole wheat bread is genuinely nutritious, especially when made at home without additives or excess sugar.
Whole wheat flour is one of the most nutrient-dense flours available, containing the bran, endosperm, and germ of the wheat kernel. This means it retains significantly more fiber, B vitamins, iron, magnesium, and zinc than refined white flour.
Here are some highlights:
- Whole wheat flour provides 3+ grams of dietary fiber per slice, which supports digestive health, helps regulate blood sugar, and contributes to lasting fullness
- Honey contains natural antioxidants and has a slightly lower glycemic index compared to refined sugar, making it a better choice for a natural sweetener in bread
- Neutral oil provides heart-healthy unsaturated fats that help keep the bread moist and support the absorption of fat-soluble vitamins
- Yeast is a natural source of B vitamins including niacin, riboflavin, and folate, all of which support energy metabolism
- Water is the foundation of the dough and carries minerals from the flour throughout every bite, helping with hydration and overall texture
Read Also: Healthy Banana Bread Recipe
Frequently Asked Questions
1. Can I use instant yeast instead of active dry yeast?
Yes, you can substitute instant yeast in the same quantity (2 1/4 teaspoons). The main difference is that instant yeast does not need to be proofed in water first. You can add it directly to the flour with the other dry ingredients, then add the warm water mixture. Your rise times may also be slightly shorter with instant yeast.
2. Why is my whole wheat bread so dense?
Dense whole wheat bread is usually caused by one of a few things. The yeast may not have been properly activated, the dough may have been over-floured during kneading, or the dough may not have been given enough time to rise. Make sure your water temperature is in the correct range, that your yeast foams before you proceed, and that you are patient with both rise times.
3. Can I make this recipe with a bread machine?
Absolutely. Add the ingredients in the order recommended by your bread machine manufacturer, which is typically wet ingredients first, then dry, with yeast last. Select the whole wheat setting for best results. The machine handles kneading and rising automatically.
4. Can I substitute olive oil for the neutral oil?
Yes, olive oil works in this recipe. It will add a very mild, savory undertone to the bread that pairs particularly well if you are making the herb variation. Use the same amount as called for in the recipe. Extra-virgin olive oil has the most noticeable flavor, so use light or regular olive oil if you want a more neutral result.
5. How do I know when the dough has risen enough?
For the first rise, the dough should double in size. You can do the poke test: gently poke the dough with a floured finger about half an inch deep. If the indent springs back slowly and only partially, the dough is ready. If it springs back immediately, it needs more time. If it does not spring back at all, the dough has over-proofed and should be shaped and baked right away.
You might also enjoy: Brioche Recipe
Final Thoughts
Homemade whole wheat bread is one of those simple baking projects that rewards you far beyond the effort it requires.
Once you pull a golden loaf from the oven and smell that deep, nutty aroma filling your kitchen, you will understand why so many home bakers never go back to store-bought.
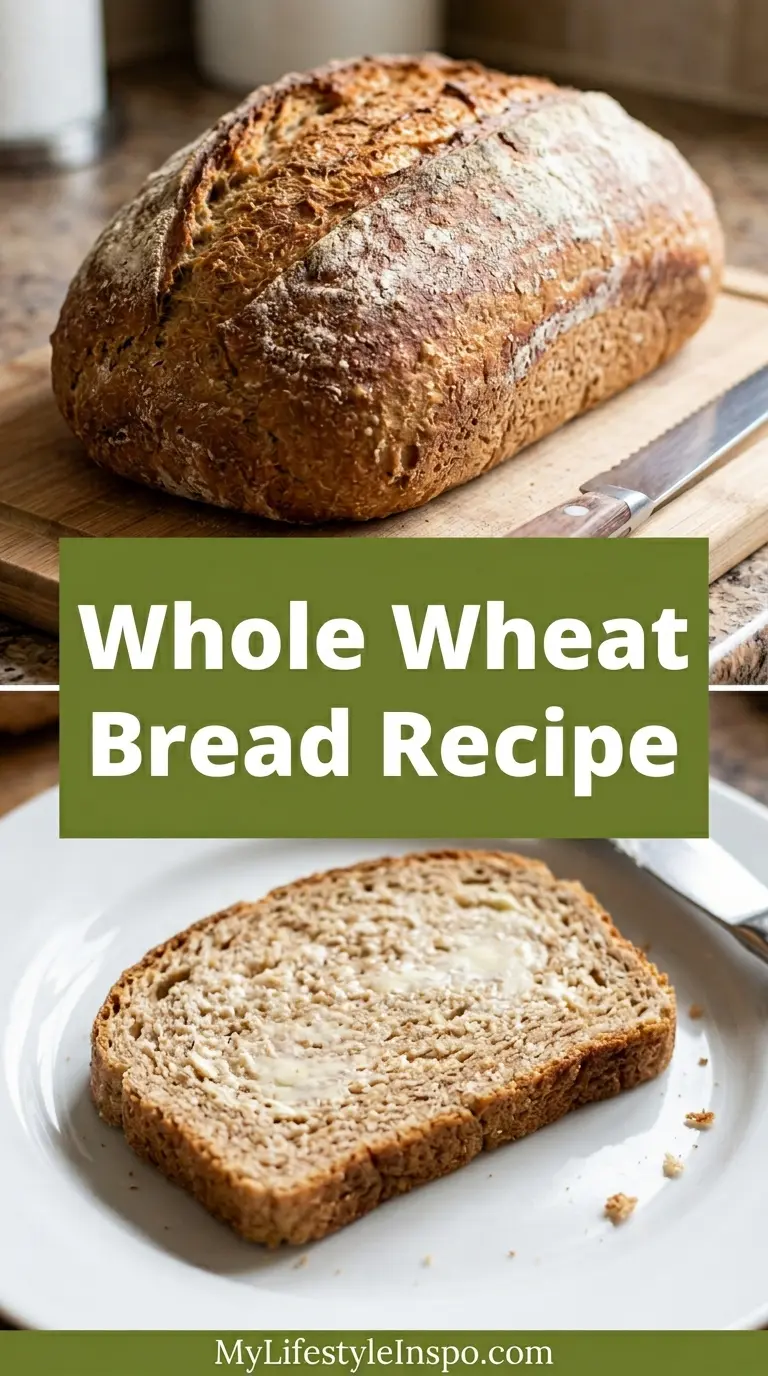
This recipe is consistent, beginner-friendly, and produces soft, flavorful loaves that hold up beautifully for sandwiches, toast, or simply eating warm with a pat of butter.
Give this whole wheat bread recipe a try this weekend. If you do, we would love to hear how it goes. Drop a comment below and let us know your favorite way to enjoy it, or share a photo if you made any of the variations.
Recommended:
- Artisan Bread Recipe
- Dutch Oven Sourdough Bread
- Challah
- Soft Dinner Rolls
- Sweet Dinner Rolls
- Pull Apart Garlic Bread
- Air Fryer Garlic Bread
- Monkey Bread
- Chocolate Chip Bread
- Sweet Potato Bread
