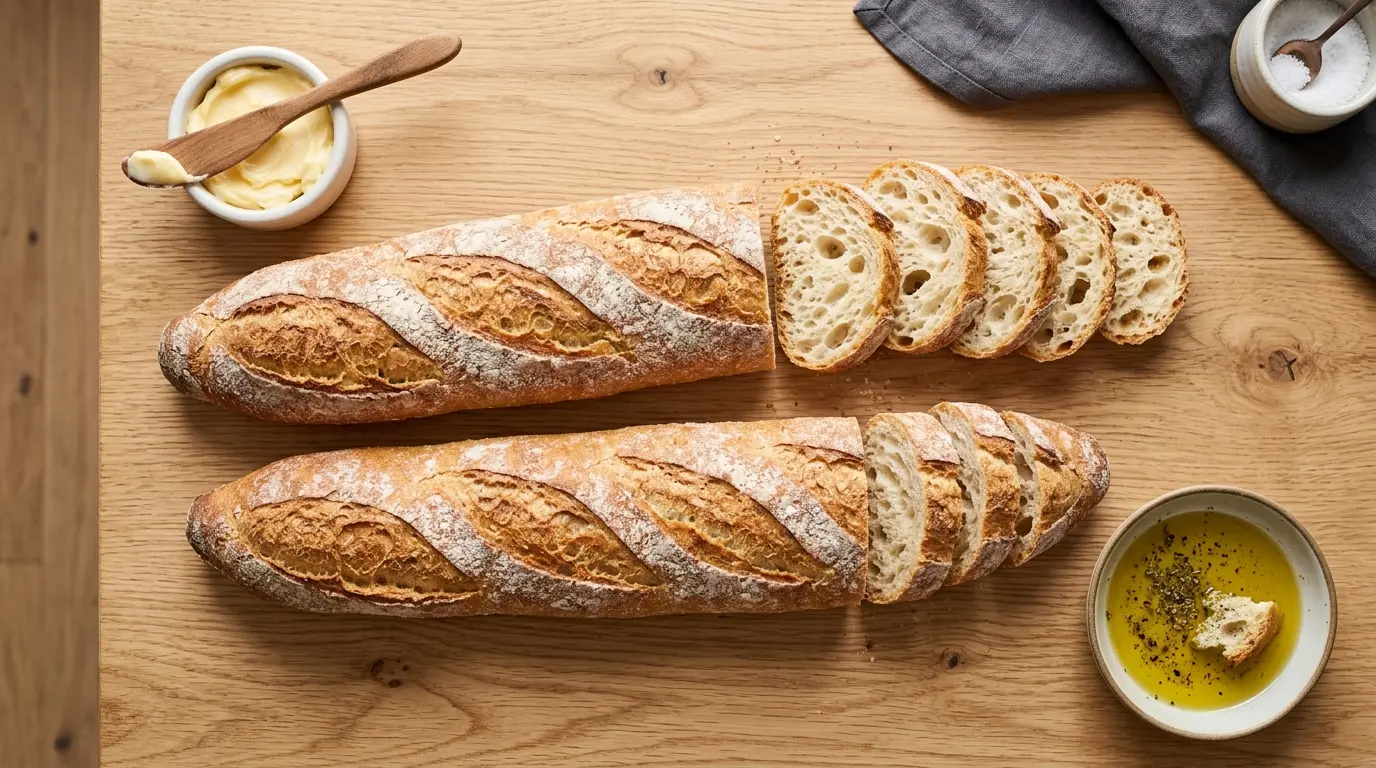
A good Baguette Recipe is one of those kitchen projects that feels intimidating until you actually try it. Once that first golden loaf comes out of your oven, you will wonder why you waited so long to bake it yourself.
This recipe walks you through every single step, from mixing the dough to getting that signature crackly crust everyone loves. No fancy bakery equipment or professional training required.
With just a handful of simple ingredients, you can create bread that rivals what you would find in a French boulangerie. The smell alone, as it bakes and fills your kitchen, makes this recipe worth the effort.
We will also cover the small details that make a big difference, like why steam matters and how to shape the dough so it holds its form. By the end, you will have the confidence to make this Baguette Recipe a regular part of your baking routine.
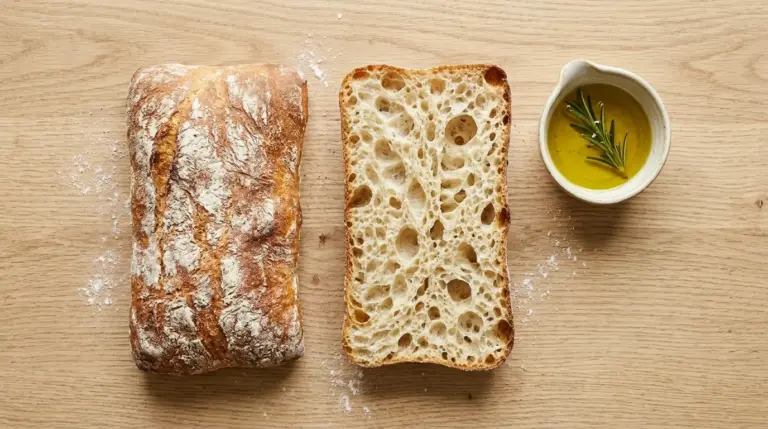
If you love the idea of homemade French style loaves, you will also want to try this French Bread Recipe, which uses a similar technique but yields a slightly softer, fluffier crumb.

Why You’ll Love This Baguette Recipe
This recipe gives you everything you want from a French bakery without leaving your kitchen. The crust shatters with each bite, while the inside stays soft, chewy, and full of air pockets.
It only requires pantry staples, so there is no need for a special grocery run. The dough also does most of the heavy lifting while you go about your day.
Here is why this recipe works so well:
- Only a handful of basic ingredients needed: flour, water, yeast, salt, and a touch of sugar
- No advanced bread baking experience required
- Crackly, deep golden crust with a soft, airy interior
- Perfect for sandwiches, soups, cheese boards, or simply with butter
- Freezes beautifully, so you can always have fresh bread on hand
- Fills your kitchen with that unmistakable bakery aroma while it bakes
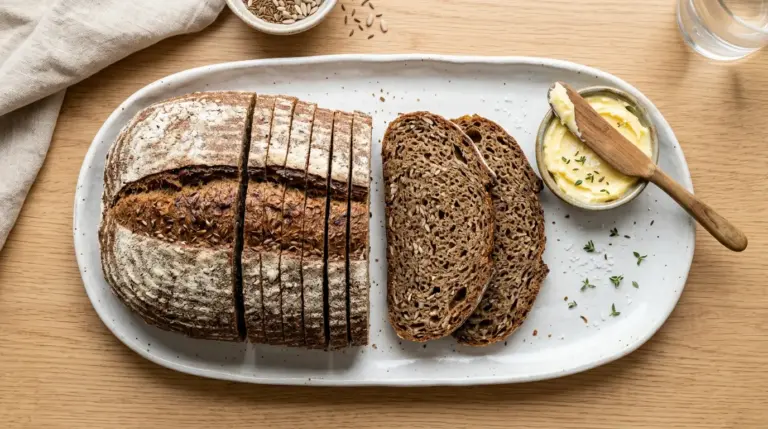
Another favorite around here: Artisan Bread Recipe
Ingredients
Here is everything you need to make this Baguette Recipe. Measuring by weight with a kitchen scale gives the most consistent results, but cup measurements work perfectly fine too.
- 4 cups (500g) bread flour, plus extra for dusting
- 1 1/2 cups (360ml) warm water, about 110°F (43°C)
- 2 1/4 teaspoons (1 packet) active dry yeast
- 2 teaspoons (12g) fine sea salt
- 1 teaspoon (4g) granulated sugar
- Cornmeal or semolina flour, for dusting the baking sheet
Read Also: No Knead Bread Recipe
Kitchen Equipment Needed
You do not need a professional bakery setup to make great baguettes at home. A few key tools make the entire process smoother and help you achieve that signature crust.
- Large mixing bowl
- Stand mixer with dough hook attachment (optional but helpful)
- Digital kitchen scale for accurate measuring
- Baking stone or heavy baking sheet
- Bread lame or sharp razor blade for scoring
- Linen proofing couche or clean kitchen towels
- Spray bottle filled with water
- Wire cooling rack
If you enjoy experimenting with crusty, rustic loaves, this method pairs nicely with the technique used in Dutch Oven Bread Recipe, which traps steam in a different way for an equally impressive crust.
Recommended Products for This Recipe
These are a few products worth considering if you plan on making this Baguette Recipe more than once. They are recommended based on quality, durability, and how much of a difference they make in the final loaf.
1. Baking Stone for Bread and Pizza
A baking stone holds onto heat and releases it evenly, which helps the bottom of your baguettes bake through without burning while the top develops a deep golden color. It mimics the intense, steady heat of a professional deck oven far better than a regular baking sheet. Preheating it for a full hour before baking makes a noticeable difference in crust quality.
2. Bread Lame for Scoring Dough
A sharp bread lame allows you to make clean, confident slashes in the dough without dragging or deflating it. Those slashes control how the bread expands in the oven and create the classic “ears” you see on bakery baguettes. A dull knife or kitchen scissors simply cannot replicate the same effect.
3. Linen Proofing Couche
A couche is a heavy, floured linen cloth that supports the shaped dough during its final rise, helping the loaves hold their long, narrow shape instead of spreading out flat. It also wicks away just enough moisture from the dough’s surface to encourage a crisper crust. This is one of those small upgrades that makes a surprisingly big visual difference.
4. Digital Kitchen Scale
Bread baking rewards precision, and a digital scale takes the guesswork out of measuring flour and water. Even small inconsistencies in flour amounts can change the hydration of your dough and affect the final texture. Once you start weighing your ingredients, you will notice your results become far more consistent from bake to bake.
You might also enjoy: Rosemary Focaccia Recipe

Step-by-Step Instructions
1. Activate the Yeast
- In a small bowl or measuring cup, combine the warm water (110°F/43°C) with the sugar and stir until the sugar dissolves.
- Sprinkle the active dry yeast evenly over the surface of the water.
- Let the mixture sit undisturbed for 5 to 10 minutes, until it becomes foamy and fragrant.
- If the mixture does not foam after 10 minutes, the yeast may be inactive or the water may have been too hot or too cold. Start again with fresh yeast and water between 105°F and 115°F.
2. Mix and Knead the Dough
- In a large mixing bowl, whisk together the bread flour and salt so the salt is evenly distributed throughout the flour.
- Pour the activated yeast mixture into the bowl with the flour and salt.
- Stir with a wooden spoon or sturdy spatula until a rough, shaggy dough forms and there is no dry flour left at the bottom of the bowl.
- Turn the dough out onto a lightly floured surface and knead by hand for 8 to 10 minutes, or use a stand mixer fitted with a dough hook on medium speed for 6 to 8 minutes.
- The dough is ready when it becomes smooth, elastic, and slightly tacky but no longer overly sticky. It should spring back slowly when poked with a finger.
- If the dough feels too wet, add bread flour one tablespoon at a time. If it feels too dry and stiff, add water one teaspoon at a time.
3. Let the Dough Rise (First Fermentation)
- Shape the kneaded dough into a smooth ball.
- Place it in a large, lightly oiled bowl, turning it once so the entire surface is coated.
- Cover the bowl tightly with plastic wrap or a damp kitchen towel.
- Let the dough rise in a warm spot, ideally around 75°F to 80°F (24°C to 27°C), for 1.5 to 2 hours, or until it has doubled in size.
- For deeper flavor, you can refrigerate the covered dough overnight, for 8 to 12 hours, after the first hour at room temperature. Let it sit at room temperature for 30 minutes before shaping if you do this.
4. Divide and Shape the Baguettes
- Gently turn the risen dough out onto a lightly floured work surface, taking care not to deflate it too much.
- Divide the dough into 2 or 3 equal pieces, depending on how long you want your baguettes to be.
- Working with one piece at a time, gently pat it into a rough rectangle.
- Fold the top third of the dough down toward the center, then fold the bottom third up over it, pressing gently to seal the seam, similar to folding a letter.
- Starting from the center, use both hands to roll and stretch the dough into a long, even log about 14 to 16 inches long, tapering the ends slightly so they are narrower than the middle.
- Place each shaped loaf seam side down onto a parchment lined baking sheet that has been dusted with cornmeal or semolina flour, leaving a few inches of space between each loaf.
5. Proof the Shaped Loaves (Second Rise)
- Cover the shaped loaves loosely with a clean kitchen towel or a floured couche, making sure the cloth does not stick to the dough.
- Let the loaves rise at room temperature for 45 to 60 minutes, until they look noticeably puffier and have grown by about half their original size.
- About 20 minutes before baking, place an empty metal baking pan or cast iron skillet on the bottom rack of your oven and preheat the oven to 475°F (245°C), along with your baking stone if you are using one.
6. Score the Baguettes
- Once the loaves have finished proofing, uncover them carefully.
- Using a bread lame or a very sharp razor blade, make 3 to 4 diagonal slashes along the top of each loaf, each about 1/4 inch deep.
- Hold the blade at a slight angle, almost flat against the dough, so each cut lifts slightly to form an “ear” as it bakes.
- Slashes should overlap slightly, running the length of the loaf in one direction.
7. Bake with Steam
- Just before baking, lightly mist the tops of the loaves with water using a spray bottle.
- Working quickly, slide the baking sheet (or transfer the loaves onto the preheated baking stone) into the oven.
- Immediately pour about 1 cup of hot water, or toss a handful of ice cubes, into the preheated pan on the bottom rack to create a burst of steam, then shut the oven door right away.
- Bake for 22 to 28 minutes, until the crust is a deep golden brown and the loaves sound hollow when you tap the bottom.
- If the loaves are browning too quickly, you can loosely tent them with foil for the final few minutes of baking.
8. Cool Before Slicing
- Carefully transfer the baked baguettes to a wire cooling rack.
- Let them cool for at least 20 to 30 minutes before slicing.
- This resting time allows the interior crumb to finish setting, so you get clean slices instead of a gummy center.
- Baguettes are best enjoyed the same day they are baked, while the crust is at its crispiest.
Read Also: Italian Bread Recipe
Tips for Success
Bread baking is part science and part feel, and a few small habits can make a big difference in your results. Pay attention to your dough at each stage rather than just the clock.
- Weigh your flour and water with a kitchen scale for the most consistent dough every time
- Do not skip the steam step, since it is key to a crisp, shiny crust
- Score the dough quickly and confidently in one smooth motion to avoid deflating it
- If your kitchen is cold, let the dough rise in the oven with just the light on for gentle warmth
- Resist the urge to add too much flour during kneading, since a slightly tacky dough leads to a more open crumb
- Tap the bottom of the loaf to check for doneness. It should sound hollow, not dense
If you enjoyed shaping this dough, you will probably love working with Ciabatta Recipe, which uses a wetter dough and a similarly hands on approach.
Serving Suggestions

Fresh baguette is one of those breads that works with almost everything, from simple butter to an entire spread of dishes. Slice it warm, or let it cool completely first for the cleanest cuts.
- Sliced and served warm with butter and a drizzle of honey
- Cut into thick slices for dipping into soups and stews
- Sliced thin and toasted for homemade crostini or bruschetta toppings
- Served alongside a cheese board with olives and cured meats
- Torn into chunks for sopping up pasta sauces
- Sliced and layered into sandwiches with deli meats, cheese, and vegetables
Another favorite: Classic Bruschetta
Variations to Try
Once you have the basic method down, this recipe becomes a great base for experimenting with different flavors and textures. Small tweaks to the dough can completely change the character of the finished loaf.
- Whole wheat baguette: Replace up to half of the bread flour with whole wheat flour for a heartier, nuttier loaf
- Herb and garlic baguette: Knead in 1 tablespoon of dried herbs and 2 cloves of minced garlic during the mixing stage
- Seeded baguette: Brush the loaves with water before baking and sprinkle with sesame seeds, poppy seeds, or oats
- Demi-baguettes: Divide the dough into 4 pieces instead of 2 or 3 for shorter, snack sized loaves
- Sourdough style baguette: Replace the yeast with 1 cup of active sourdough starter and adjust the water slightly for a tangier flavor
For another bread that lends itself well to flavor variations, check out White Bread Recipe.
Storage and Reheating
Baguettes are at their absolute best within a few hours of baking, but a little care can help them stay enjoyable for a couple of days. The biggest enemy of a good baguette is plastic, which softens the crust quickly.
- Store at room temperature in a paper bag or wrapped loosely in a clean kitchen towel for up to 1 day
- Avoid storing in plastic bags, since this traps moisture and ruins the crisp crust
- To freeze, wrap cooled baguettes tightly in foil, then place in a freezer safe bag for up to 3 months
- Thaw frozen baguettes at room temperature for 1 to 2 hours before reheating
- Refresh day old or thawed baguettes by wrapping in foil and warming in a 350°F (175°C) oven for 10 to 15 minutes
- For a crisper crust after reheating, unwrap the foil for the last 2 to 3 minutes of warming
Read Also: Pull Apart Garlic Bread Recipe
Nutritional Facts
These values are approximate and based on one recipe yielding 2 baguettes, sliced into 8 pieces each, for a total of 16 slices.
- Calories: about 140 per slice
- Carbohydrates: about 28g
- Protein: about 4g
- Fat: about 0.5g
- Fiber: about 1g
- Sodium: about 290mg
- Sugar: less than 1g
If you are looking for something to pair with this bread for a complete meal, Easy Tomato Soup Recipe is a simple, comforting option that comes together quickly.
Health Benefits of Key Ingredients
While baguette is mainly a treat for the senses, a few of its core ingredients do offer some nutritional value. Understanding what each one brings to the table can help you appreciate this simple bread even more.
- Bread flour: Provides complex carbohydrates for sustained energy, along with small amounts of iron and B vitamins from fortified flour
- Yeast: A natural source of B vitamins, including thiamine and riboflavin, which support energy metabolism
- Salt: Helps regulate fluid balance in the body when consumed in moderate amounts, in addition to strengthening gluten structure in the dough
- Water: Essential for digestion and helps the body absorb nutrients from the rest of your meal
Another comforting recipe worth trying: Classic French Toast Recipe
Frequently Asked Questions
1. Why didn’t my baguette get a crispy crust?
A crispy crust depends heavily on steam during the first few minutes of baking. If your oven did not have enough steam, or if the door was open too long while adding water, the crust may turn out softer than expected.
Make sure your steam pan is fully preheated and work quickly when adding water or ice.
2. Can I make the dough ahead of time?
Yes, this dough works very well with an overnight rise in the refrigerator. After the first hour of rising at room temperature, cover the bowl tightly and refrigerate for 8 to 12 hours.
Let the dough sit at room temperature for about 30 minutes before shaping.
3. What is the best flour for baguettes?
Bread flour is recommended because its higher protein content helps develop strong gluten, which gives the dough the structure it needs to hold its shape. All purpose flour can work in a pinch, but the crumb may be slightly less chewy.
If you do use all purpose flour, the dough may also feel a bit softer during shaping.
4. Why do you score the dough before baking?
Scoring controls how the bread expands as it bakes, directing the dough to open along the slashes rather than splitting randomly. It also creates the classic “ears” that are a hallmark of a well made baguette.
Without scoring, the crust can crack unpredictably in the oven.
5. Can I freeze the baked baguettes?
Absolutely. Let the baguettes cool completely, then wrap them tightly in foil and place them in a freezer safe bag for up to 3 months.
Thaw at room temperature, then reheat in a warm oven to bring back that fresh baked texture.
For another soup that pairs beautifully with crusty bread, try Minestrone Soup Recipe.
Final Thoughts
Baking your own baguettes at home is one of those small kitchen wins that feels much bigger than it actually is. There is real satisfaction in pulling a golden, crackling loaf out of your own oven.
This Baguette Recipe is forgiving enough for a first attempt, yet rewarding enough to become a regular weekend ritual. Once you get the hang of the shaping and scoring, it only gets easier from there.
Give this recipe a try this weekend, and let your kitchen fill with that incredible fresh bread smell. If you make it, I would love to hear how it turned out, so feel free to share your results or leave a comment below.
Recommended:
- Whole Wheat Bread Recipe
- Rye Bread Recipe
- Air Fryer Garlic Bread Recipe
- Chicken Bruschetta Recipe
- Creamy Tomato Soup Recipe
- Classic Chicken Salad Recipe
- Baked Mac And Cheese Recipe
- Wild Rice Soup Recipe
- Seafood Chowder Recipe
- Garlic Mashed Potatoes Recipe
