A classic yellow cake recipe is the kind of recipe every home baker needs in their back pocket. It’s the cake that shows up at birthday parties, potlucks, and Sunday dinners, and somehow always gets devoured before anything else on the table.
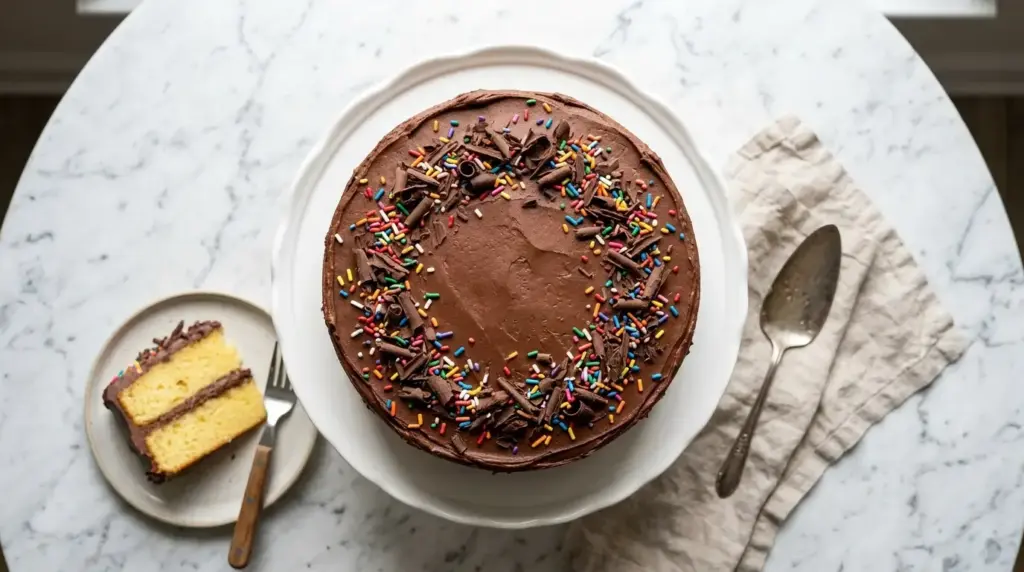
What makes a yellow cake distinctly yellow? The answer is egg yolks. Unlike white cake, which uses only egg whites, a classic yellow cake uses whole eggs, and that’s what gives it that warm golden color and richer flavor. Paired with real butter and a touch of vanilla, the result is a tender, moist crumb that holds up beautifully under a thick swipe of chocolate buttercream or vanilla frosting.
This recipe follows the tried-and-true creaming method, which is the gold standard for layer cakes. Creaming butter and sugar together until light and fluffy is what creates that soft, velvety texture you expect from a bakery-style cake.
You might also enjoy this Classic Vanilla Cake Recipe if you love simple, elegant layer cakes.
Why You’ll Love This Classic Yellow Cake Recipe
This cake checks every box for what a homemade layer cake should be.
It has a tender, buttery crumb that stays moist for days, not just a few hours after baking.
The flavor is rich but not overpowering, making it the perfect canvas for any frosting you love.
It’s made entirely from scratch with pantry staples, so you don’t need a box mix to get professional-looking results.
The recipe scales well, so you can make a two-layer 9-inch cake for a celebration or a simple single-layer sheet cake for an everyday treat.
- Buttery, rich flavor from real butter and whole eggs
- Fluffy, tender crumb thanks to the creaming method
- Pairs with any frosting including chocolate, vanilla, or cream cheese
- Simple pantry ingredients with no specialty items required
- Stays moist for days when stored properly
- Great for all occasions from birthdays to casual weekend baking
For another show-stopping layer cake, check out this Best Carrot Cake Recipe.
Ingredients
Classic yellow cake uses simple, high-quality ingredients that each play a specific role in the final texture and flavor. Make sure your butter and eggs are at room temperature before you begin. Cold butter won’t cream properly, and cold eggs can cause the batter to curdle.
- 2 1/2 cups (315g) all-purpose flour
- 2 1/2 teaspoons baking powder
- 1/2 teaspoon fine salt
- 1 cup (225g) unsalted butter, room temperature
- 1 3/4 cups (350g) granulated sugar
- 4 large eggs, room temperature
- 2 teaspoons pure vanilla extract
- 1 cup (240ml) whole milk, room temperature
For the Chocolate Buttercream Frosting (optional but classic):
- 1 cup (225g) unsalted butter, room temperature
- 3 cups (360g) powdered sugar, sifted
- 1/2 cup (50g) Dutch-process cocoa powder
- 1/4 cup (60ml) heavy cream
- 1 teaspoon pure vanilla extract
- Pinch of salt
Read Also: Vanilla Buttercream Frosting Recipe
Kitchen Equipment Needed
Having the right tools makes the difference between a cake that bakes evenly and one that comes out dense or sunken in the middle. You don’t need anything fancy, but a few key pieces of equipment will help significantly.
- 2 x 9-inch round cake pans
- Stand mixer or hand electric mixer
- Large mixing bowl
- Medium mixing bowl
- Wire cooling rack
- Offset spatula for frosting
- Cake turntable (optional but helpful for frosting)
- Sifter or fine-mesh strainer
- Rubber spatula
- Measuring cups and spoons
Another great recipe that uses similar tools: Angel Food Cake Recipe.
Recommended Products for This Recipe
These are products I recommend based on quality and performance that will genuinely help you make a better cake at home.
1. KitchenAid Stand Mixer
A good stand mixer transforms cake baking. The KitchenAid creams butter and sugar to perfection and handles thick batters without straining. Having a stand mixer frees your hands to measure and prep other ingredients simultaneously, making the whole process more efficient.
2. Nordic Ware Natural Aluminum 9-Inch Cake Pan (Set of 2)
These pans are favored by professional bakers for good reason. The natural aluminum heats evenly, so your cake layers come out with a flat, even top and no dark or overbaked edges. They’re also lightweight and warp-resistant, which matters when you’re stacking layers.
3. Ateco Offset Spatula
Getting that smooth, professional-looking frosting finish is nearly impossible without an offset spatula. The angled blade keeps your hand away from the surface of the cake and gives you much better control than a straight knife. This is the single most useful tool for frosting a layer cake.
4. Nielsen-Massey Pure Vanilla Extract
The vanilla in this recipe is a background note that ties everything together, and using a high-quality pure extract makes a noticeable difference in the final flavor. Nielsen-Massey is consistently recommended by professional bakers and has a clean, rich vanilla flavor without any artificial aftertaste.
5. Wilton Cake Turntable
If you plan to frost layer cakes regularly, a turntable is worth every penny. It allows you to rotate the cake smoothly while applying frosting, resulting in even coverage and clean edges. It also makes crumb-coating much easier.
Another great baking recipe worth trying: Moist Chocolate Cake Recipe.
Step-by-Step Instructions
1. Preheat Your Oven and Prepare the Pans
- Preheat your oven to 350°F (175°C). Make sure your oven rack is positioned in the center of the oven for even baking.
- Grease the inside of both 9-inch round cake pans generously with softened butter or non-stick baking spray, making sure to coat the sides as well as the bottom.
- Cut two circles of parchment paper to fit the bottom of each pan. Press them into the greased pans.
- Lightly grease the top of the parchment paper as well. This double-greasing method ensures the cake releases cleanly every time.
- Set the prepared pans aside while you make the batter.
2. Whisk the Dry Ingredients
- In a medium bowl, add 2 1/2 cups (315g) of all-purpose flour.
- Add 2 1/2 teaspoons of baking powder and 1/2 teaspoon of fine salt to the flour.
- Whisk the dry ingredients together for about 30 seconds until they are fully combined and evenly distributed. This step replaces sifting and ensures the baking powder is not concentrated in any one spot, which would cause uneven rising.
- Set this dry ingredient bowl aside.
3. Cream the Butter and Sugar
- Place 1 cup (225g) of room-temperature unsalted butter in the bowl of your stand mixer fitted with the paddle attachment (or in a large bowl if using a hand mixer).
- Add 1 3/4 cups (350g) of granulated sugar to the butter.
- Beat on medium-high speed for 4 to 5 full minutes, stopping to scrape down the sides of the bowl once or twice during this time.
- You are looking for the mixture to turn noticeably pale, almost white, and to look very fluffy and airy. This step is critical because you are incorporating air into the fat, which gives the cake its lift and light texture. Do not rush this step.
4. Add the Eggs One at a Time
- Reduce the mixer speed to medium-low.
- Crack one large egg into a small bowl first (to catch any shell fragments), then add it to the butter-sugar mixture.
- Mix until the egg is just incorporated, about 20 to 30 seconds, before adding the next egg.
- Repeat with the remaining 3 eggs, adding them one at a time and waiting for each to be incorporated before the next goes in.
- After all 4 eggs are added, add the 2 teaspoons of pure vanilla extract and mix for another 15 seconds.
- The batter may look slightly curdled or broken at this stage. This is normal and will come together once the dry ingredients are added.
5. Alternate Adding Dry Ingredients and Milk
- With the mixer on its lowest speed, add one-third of the flour mixture to the batter. Mix just until the flour is no longer visible.
- Pour in half of the 1 cup (240ml) of whole milk. Mix gently until combined.
- Add another third of the flour mixture and mix until just combined.
- Pour in the remaining half of the milk and mix until combined.
- Finish by adding the final third of the flour mixture. Mix on low speed until everything is just combined and no streaks of flour remain.
- Remove the bowl from the mixer and use a rubber spatula to scrape the bottom and sides of the bowl, folding the batter gently to make sure everything is evenly mixed. Do not overmix at this stage, as overmixing develops gluten and will make the cake tough.
6. Divide the Batter and Bake
- Using a large spoon or rubber spatula, divide the batter evenly between the two prepared cake pans. For the most precise results, use a kitchen scale and weigh each pan to ensure they have equal amounts.
- Use the back of a spoon or an offset spatula to gently smooth the batter into an even layer across each pan.
- Place both pans in the center of the preheated oven. If they don’t fit side by side on one rack, place them on the same rack with a few inches between them, not directly above each other.
- Bake for 30 to 35 minutes, or until a toothpick inserted into the center of the cake comes out clean or with just a few moist crumbs (not wet batter).
- Begin checking at the 28-minute mark to avoid overbaking.
7. Cool the Cakes
- Remove the pans from the oven and place them on a wire cooling rack.
- Allow the cakes to cool in their pans for exactly 15 minutes. Do not skip this resting time; it allows the cake to firm up slightly so it doesn’t fall apart when you remove it.
- After 15 minutes, run a thin knife or offset spatula around the inside edge of each pan to loosen the cake.
- Invert the pan onto the wire rack, then peel off and discard the parchment paper.
- Turn the cakes right-side up and allow them to cool completely to room temperature before frosting, at least 1 to 2 hours. Frosting a warm cake will cause the frosting to melt and slide off.
8. Make the Chocolate Buttercream (Optional)
- While the cakes cool, make the frosting. Place 1 cup (225g) of room-temperature butter in the stand mixer bowl with the paddle attachment.
- Beat the butter on medium speed for 2 to 3 minutes until smooth and creamy.
- Sift together 3 cups (360g) of powdered sugar and 1/2 cup (50g) of Dutch-process cocoa powder directly into the mixer bowl.
- Add a pinch of salt and 1 teaspoon of vanilla extract.
- Start mixing on the lowest speed to prevent a powdered sugar cloud, then increase to medium speed once the mixture starts coming together.
- Add 1/4 cup (60ml) of heavy cream and beat on medium-high for 2 to 3 minutes until the frosting is light and fluffy.
- Taste and adjust sweetness or cocoa level as needed.
9. Assemble and Frost the Cake
- Place one cooled cake layer, flat-side up, on your serving plate or cake board.
- Using an offset spatula, spread an even layer of frosting across the top, about 1/2 inch (1.25cm) thick, spreading all the way to the edges.
- Carefully place the second cake layer on top, flat-side down (so the flat surface faces up for a more even top).
- Apply a thin, even layer of frosting all over the top and sides of the cake. This is called the crumb coat. It seals in the crumbs so they don’t show through the final layer of frosting.
- Refrigerate the crumb-coated cake for 20 minutes to set the first layer.
- After chilling, apply the final layer of frosting generously to the top and sides, smoothing it with your offset spatula. If you have a cake turntable, slowly rotate the cake while pressing the spatula lightly against the sides for a smooth finish.
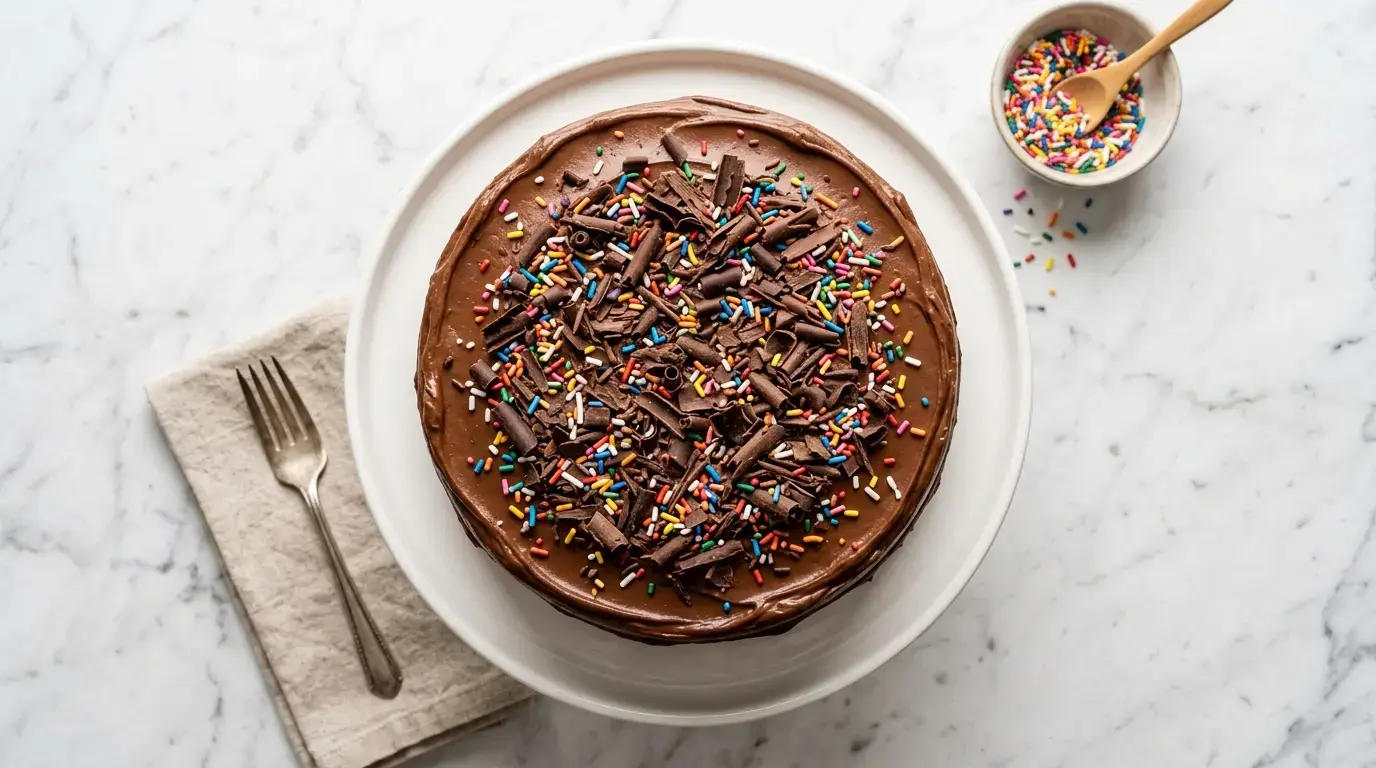
- Decorate as desired with sprinkles, chocolate shavings, or fresh fruit.
Read Also: Boston Cream Pie Recipe
Tips for Success
These small details make the difference between a good cake and a great one. Pay attention to a few key steps and your results will be consistently excellent.
- Use room temperature ingredients. Cold butter won’t cream properly and cold eggs can break the emulsion in the batter. Pull your butter, eggs, and milk out of the refrigerator 1 to 2 hours before baking.
- Don’t skip the parchment paper. Even with greased pans, cakes can stick. Parchment paper is a guarantee that your layers will release cleanly.
- Measure flour correctly. Spoon the flour into your measuring cup and level it off with a straight edge. Scooping directly with the cup packs in too much flour and results in a dense, dry cake.
- Cream the butter and sugar long enough. This is the most important step in the recipe. Set a timer for 5 minutes and let the mixer run. The mixture should be visibly pale and fluffy before you move on.
- Don’t overmix after adding flour. Overmixing develops gluten, which makes cakes tough and dense. Mix just until no flour streaks remain.
- Check for doneness early. Ovens vary. Start checking your cake at the 28-minute mark with a toothpick.
- Cool completely before frosting. A warm cake will melt your frosting and make a mess. Patience pays off here.
For another classic baking project, try this Checkerboard Cake Recipe.
Serving Suggestions
This classic yellow cake is wonderfully versatile and pairs beautifully with a wide range of accompaniments. It’s elegant enough for a birthday celebration and casual enough for an afternoon slice with coffee.
The most classic pairing is thick chocolate buttercream, which is what most people picture when they think of a yellow birthday cake. The rich, slightly bitter chocolate balances the sweet, buttery cake perfectly.
- Chocolate buttercream frosting for a classic birthday cake combination
- Vanilla buttercream for a lighter, simpler finish
- A generous dollop of freshly whipped cream and fresh fruit alongside each slice
- A drizzle of warm Caramel Sauce over each slice before serving
- Alongside a scoop of vanilla or strawberry ice cream
- Served warm with a drizzle of Strawberry Sauce
- Topped with Vanilla Pudding and crushed cookies for a simple trifle-style dessert
Variations to Try
Once you’ve mastered the base recipe, there are so many delicious directions you can take it. The yellow cake batter is incredibly adaptable.
Here are some popular and delicious variations to experiment with:
- Lemon Yellow Cake: Add 2 tablespoons of fresh lemon zest to the batter with the sugar, and replace 2 tablespoons of the milk with fresh lemon juice. Pair with lemon buttercream.
- Yellow Bundt Cake: Pour the batter into a greased and floured Bundt pan and bake for 50 to 60 minutes. Dust with powdered sugar or drizzle with a simple glaze.
- Yellow Sheet Cake: Pour the entire batter into a greased 9×13-inch baking pan and bake for 30 to 35 minutes. Perfect for feeding a crowd.
- Yellow Cake with Cream Cheese Frosting: Swap the chocolate buttercream for a tangy cream cheese frosting for a great flavor contrast. Take inspiration from this Carrot Cake with Cream Cheese Frosting Recipe.
- Tres Leches Yellow Cake: Bake the cake as a single layer, poke holes all over the top, and soak it with the classic three-milk mixture from a Tres Leches Cake Recipe.
- Yellow Cake Pops: Crumble leftover cake, mix with frosting, roll into balls, and dip in chocolate. Follow the technique in this Cake Pop Recipe.
- Almond Yellow Cake: Replace 1 teaspoon of vanilla extract with 1 teaspoon of almond extract for a subtle nutty flavor.
Storage and Reheating
Proper storage keeps your yellow cake moist and fresh for several days. The way you store it depends on the frosting you’ve used and how long you plan to keep it.
- Room temperature (unfrosted): Wrap the cooled cake layers tightly in plastic wrap. Store at room temperature for up to 2 days.
- Room temperature (frosted): If frosted with buttercream, the cake can sit at room temperature under a cake dome for up to 3 days. Keep it away from direct sunlight and heat.
- Refrigerator: Frosted cakes can be stored in the refrigerator for up to 5 days. Cover loosely with plastic wrap or store under a cake dome to prevent the cake from drying out in the fridge.
- Freezer (unfrosted layers): Wrap individual cake layers tightly in plastic wrap, then in aluminum foil. Freeze for up to 3 months. Thaw overnight in the refrigerator before frosting and serving.
- Freezer (frosted slices): Place individual slices on a baking sheet and freeze until solid, about 1 hour. Then wrap each slice in plastic wrap and store in a freezer-safe bag for up to 2 months.
- Reheating: Individual slices can be microwaved for 10 to 15 seconds to take the chill off and bring back a fresh-from-the-oven softness.
You might also enjoy: Classic Pineapple Upside Down Cake Recipe
Nutritional Facts
The following nutritional information is an estimate per serving, based on 12 servings of the cake with chocolate buttercream frosting. Actual values will vary depending on exact ingredients and portion sizes.
| Nutrient | Amount per Serving |
|---|---|
| Calories | approximately 560 kcal |
| Total Fat | 28g |
| Saturated Fat | 17g |
| Cholesterol | 125mg |
| Sodium | 210mg |
| Total Carbohydrates | 74g |
| Dietary Fiber | 1g |
| Total Sugars | 55g |
| Protein | 5g |
Nutrition is calculated for the full two-layer cake with chocolate buttercream frosting, divided into 12 slices. Without frosting, calorie count drops to approximately 310 kcal per slice.
Another recipe: Easy Vanilla Cake Recipe
Health Benefits of Key Ingredients
This cake is absolutely a treat, but some of its key ingredients do carry genuine nutritional value worth noting.
Eggs are one of the most nutrient-dense foods available, and this recipe uses four whole eggs. They provide high-quality protein, choline, which is essential for brain function, and a range of fat-soluble vitamins including A, D, E, and K.
Real butter, used in both the cake and frosting, contains fat-soluble vitamins and conjugated linoleic acid. In moderation, as part of a balanced diet, dairy fat is not the dietary villain it was once considered to be.
- Eggs: Rich in protein, healthy fats, choline, and vitamins A, D, E, and K
- Whole milk: Provides calcium, vitamin D, phosphorus, and protein for bone health
- Unsalted butter: Contains fat-soluble vitamins and butyric acid, which supports gut health
- All-purpose flour: Provides carbohydrates for energy and small amounts of iron and B vitamins
- Cocoa powder (in frosting): Dutch-process cocoa is rich in flavonoids and magnesium and has been associated with heart health benefits in several studies
Read Also: Easy Chocolate Cake Recipe
Frequently Asked Questions
1. What is the difference between yellow cake and white cake?
The main difference is the eggs. Yellow cake uses whole eggs, meaning both the yolks and whites, while white cake uses only egg whites. The egg yolks are what give yellow cake its golden color and richer, more buttery flavor. White cake has a lighter color and a slightly more delicate, neutral flavor.
2. Can I use salted butter instead of unsalted?
You can, but it’s not recommended as the primary choice. Salted butter contains an inconsistent amount of salt depending on the brand, which makes it harder to control the salt level in your cake. If salted butter is all you have, omit the added salt from the recipe and proceed as normal.
3. Why did my cake sink in the middle?
A sunken cake is usually caused by one of three things: underbaking (the center wasn’t fully set when removed from the oven), opening the oven door too early during baking (which causes a sudden drop in temperature), or overmixing the batter after the flour was added (which can cause structural issues). Make sure to bake until a toothpick comes out clean and avoid opening the oven before the 25-minute mark.
4. Can I make this cake ahead of time?
Yes. The unfrosted cake layers can be baked up to 2 days ahead and stored at room temperature, tightly wrapped in plastic wrap. The frosting can also be made up to 3 days ahead and stored in the refrigerator in an airtight container. Let the frosting come to room temperature and re-beat it briefly before using. Assemble and frost the cake the day you plan to serve it for the best results.
5. Can I make this recipe into cupcakes?
Absolutely. Line a standard 12-cup muffin tin with paper liners and fill each about two-thirds full with batter. Bake at 350°F (175°C) for 18 to 22 minutes, or until a toothpick inserted in the center comes out clean. This recipe makes approximately 24 standard-size cupcakes. Let them cool completely before frosting.
For another beloved dessert: Mug Cake Recipe
Final Thoughts
A homemade classic yellow cake recipe is one of those timeless baking achievements that never goes out of style. It’s the kind of cake that makes people feel genuinely celebrated, whether it’s for a birthday, a holiday, or no reason at all.
The process is simple once you understand the key steps, namely creaming the butter and sugar properly, alternating wet and dry ingredients, and being patient enough to let the layers cool before frosting. Nail those three things, and you’ll have a cake worth bragging about.
Go ahead and give this classic yellow cake a try at your next gathering. Your friends and family will love it, and we’d love to hear how it turned out. Drop a comment below with your frosting choice or any fun variations you tried!
Recommended:
- Classic Vanilla Cake Recipe
- Easy Vanilla Cake Recipe
- Vanilla Buttercream Frosting Recipe
- Angel Food Cake Recipe
- Eggnog Cake Recipe
- Hot Fudge Cake Recipe
- Fruit Cocktail Cake Recipe
- Banana Pudding Recipe
- Chocolate Pudding Recipe
- German Chocolate Cake Bars Recipe


