If you’re searching for the perfect funfetti cake recipe, you’ve landed in exactly the right place. This is the cake that turns any ordinary Tuesday into a reason to celebrate, a showstopper for birthdays, or the crowd-pleasing dessert that disappears first at every potluck.
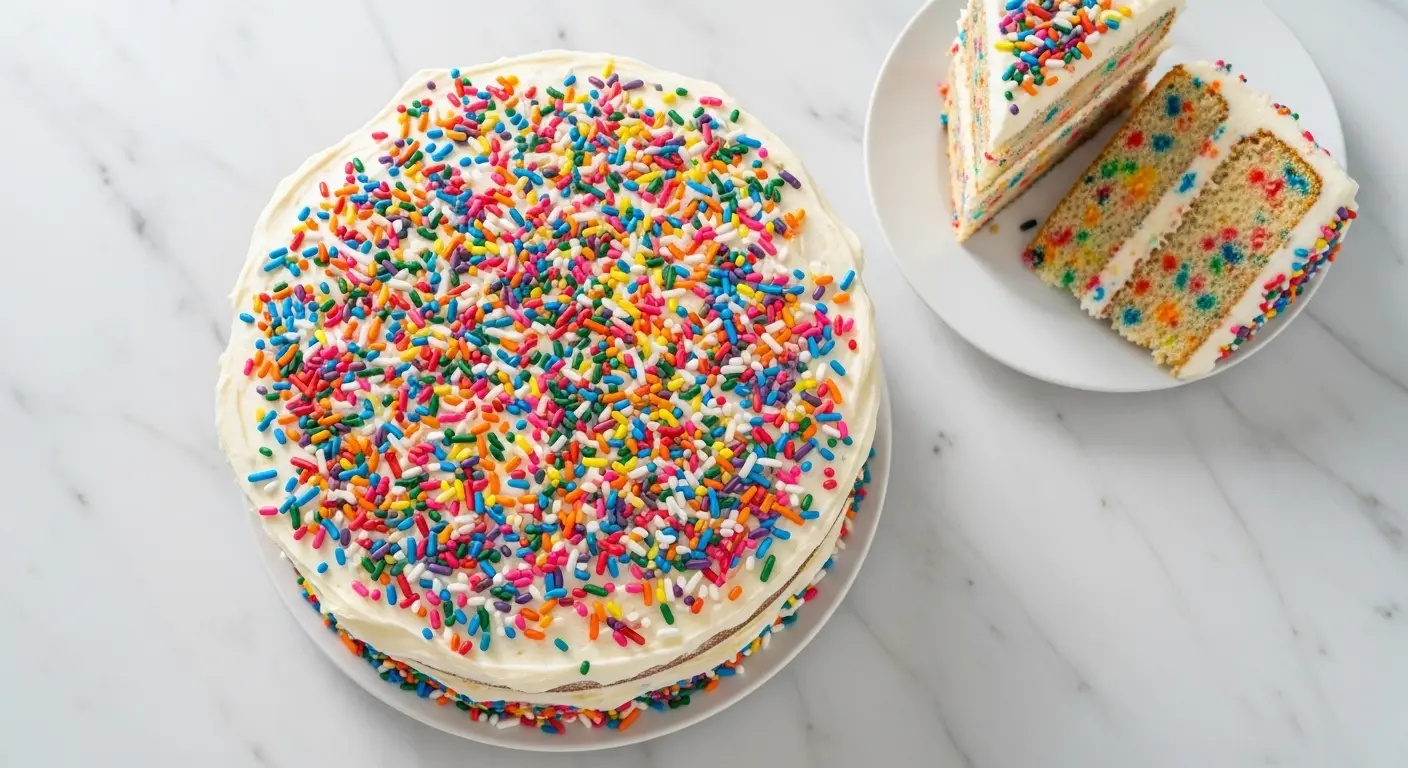
What makes funfetti so special isn’t just the rainbow sprinkles. It’s the combination of a light, tender vanilla cake base with those colorful confetti-style jimmies baked right into the batter, giving every slice a whimsical, festive look from the inside out.
This from-scratch version skips the boxed mix entirely. You’ll get a cake that’s noticeably more moist, more flavorful, and more impressive than anything that comes out of a box.
The secret is using cake flour instead of all-purpose flour (it creates a softer, finer crumb), room-temperature ingredients for smooth batter, and a generous hand with the vanilla and almond extract for that signature funfetti flavor.
Topped with a fluffy vanilla buttercream frosting and even more sprinkles on the outside, this cake is pure joy in every single bite.
You might also enjoy this Classic Yellow Cake, which uses a very similar base and is just as crowd-pleasing.
Why You’ll Love This Funfetti Cake Recipe
This cake truly has it all, and once you make it from scratch, you won’t go back to the box.
The texture is incredibly light and tender thanks to cake flour and the creaming method, which creates tiny air pockets for a pillowy crumb.
The flavor goes far beyond plain vanilla, with a hint of almond extract that gives it that nostalgic bakery-style taste most people can’t quite put their finger on.
It’s endlessly versatile. You can make it as a two-layer round cake, a sheet cake, or even cupcakes using the very same batter.
The sprinkles don’t just sit on top. They’re baked into every layer, so every slice is as colorful and festive as the last.
It’s beginner-friendly. Every step is laid out in detail, so even if this is one of your first cakes from scratch, you’ll nail it.
- The vanilla buttercream frosting is silky, not too sweet, and pipes beautifully if you want to go all out on the decorating
- Room-temperature ingredients are key and make the whole process significantly easier
- The almond extract is subtle but transformative; don’t skip it
- Rainbow jimmies (the elongated rod-shaped sprinkles) hold their shape and color better than nonpareils when baked
- This cake stores beautifully and can be made a day ahead
- It scales easily into cupcakes (yields about 24 standard cupcakes)
Read Also: Strawberry Cake Recipe
Ingredients
You’ll need pantry staples for this recipe, with a few key upgrades that make a real difference. Cake flour, for instance, has a lower protein content than all-purpose flour, which means a softer, more delicate crumb. And using real butter (not margarine) gives the cake richness and the frosting an unbeatable flavor.
For the Cake:
- 2 ¾ cups (330g) cake flour, sifted
- 2 ½ teaspoons baking powder
- ½ teaspoon fine sea salt
- 1 cup (225g) unsalted butter, softened to room temperature
- 1 ¾ cups (350g) granulated sugar
- 4 large eggs, room temperature
- 2 teaspoons pure vanilla extract
- ½ teaspoon almond extract
- 1 cup (240ml) whole milk, room temperature
- ¾ cup (135g) rainbow jimmies sprinkles
For the Vanilla Buttercream Frosting:
- 1 ½ cups (340g) unsalted butter, softened to room temperature
- 5 cups (600g) powdered sugar, sifted
- 3-4 tablespoons heavy cream
- 2 teaspoons pure vanilla extract
- Pinch of fine sea salt
- Additional sprinkles for decorating
For another beautiful cake with a similar frosting, try this Lemon Cake Recipe that uses the same buttercream base.
Kitchen Equipment Needed
Having the right tools makes this cake significantly easier to assemble and frost. A stand mixer or hand mixer is essentially non-negotiable here; creaming butter and sugar by hand simply won’t give you the same light, airy texture.
- Stand mixer or electric hand mixer
- Two 9-inch round cake pans
- Parchment paper
- Large mixing bowls
- Rubber spatula
- Wire cooling rack
- Offset spatula for frosting
- Cake turntable (optional but very helpful)
- Sifter or fine mesh sieve
- Measuring cups and spoons
- Bench scraper for smooth frosting edges
Read Also: Vanilla Buttercream Frosting Recipe
Recommended Products for This Recipe
These are products I genuinely recommend based on quality and the difference they make in the final result.
1. KitchenAid Tilt-Head Stand Mixer
A stand mixer makes creaming the butter and sugar effortless and gets you to that light, pale, fluffy texture that’s critical for a tender cake. Hand mixing simply doesn’t achieve the same result. It’s one of the best investments you can make if you bake regularly.
2. Wilton 9-Inch Round Cake Pans
Even, non-stick round cake pans make a real difference in how evenly your cake bakes and how cleanly it releases. Warped or thin pans cause uneven browning and sticking. A quality set of two 9-inch pans is something you’ll use for every layer cake you ever make.
3. Ateco Offset Spatula
A good offset spatula is the single best tool for frosting a layer cake smoothly. The angled blade lets you spread frosting without dragging your knuckles through it. It also helps lift and transfer cake layers cleanly.
4. Nielsen-Massey Pure Vanilla Extract
Using a high-quality pure vanilla extract makes a noticeable difference in flavor compared to imitation vanilla. Nielsen-Massey is one of the most widely trusted brands by professional bakers and is absolutely worth the upgrade for a recipe where vanilla is a star ingredient.
5. Cake Flour (Swan’s Down or King Arthur)
Cake flour is lower in protein than all-purpose flour, which directly translates to a softer, more tender crumb. If you’ve ever wondered why bakery cakes feel so much lighter than homemade ones, this is a big part of the answer.
This pairs beautifully with our Red Velvet Cake Recipe if you want to expand your layer cake skills using similar techniques and tools.
Step-by-Step Instructions
1. Prepare Your Pans and Preheat the Oven
- Preheat your oven to 350°F (175°C). Make sure the oven rack is positioned in the center for the most even baking.
- Grease two 9-inch round cake pans generously with softened butter or non-stick cooking spray, making sure to coat the sides as well.
- Cut two circles of parchment paper to fit the bottom of each pan. Press them in and lightly grease the parchment paper as well. This double-insurance step ensures your cake layers release cleanly every time.
- Set the prepared pans aside.
2. Sift the Dry Ingredients
- In a large bowl, sift together the cake flour, baking powder, and fine sea salt.
- Sifting is important here because it aerates the flour and removes any lumps, which contributes to a lighter cake texture.
- Whisk the sifted ingredients together briefly to make sure they’re evenly combined, then set aside.
3. Cream the Butter and Sugar
- In the bowl of your stand mixer (or a large bowl using a hand mixer), add the softened unsalted butter.
- Beat on medium speed for about 2 minutes until the butter is smooth and slightly fluffy.
- With the mixer running on medium speed, gradually add the granulated sugar. Add it in about 3 batches, letting each addition incorporate before adding the next.
- Once all the sugar is in, increase the speed to medium-high and beat for a full 4 to 5 minutes, scraping down the sides of the bowl halfway through. The mixture should become very pale (almost white), fluffy, and significantly increased in volume. This step is critical; rushing it will result in a denser cake.
4. Add the Eggs, Vanilla, and Almond Extract
- With the mixer on medium-low speed, add the eggs one at a time. Wait for each egg to fully incorporate before adding the next, about 30 seconds per egg.
- Add the pure vanilla extract and the almond extract. The almond extract is the flavor secret in this recipe; it gives funfetti cake that bakery-style, nostalgic taste.
- Scrape down the sides and bottom of the bowl and mix briefly to ensure everything is combined evenly.
5. Alternate Adding the Dry Ingredients and Milk
- With the mixer on the lowest speed (or mixing by hand with a spatula), begin alternating the dry ingredients and the whole milk. This technique prevents overmixing and keeps the batter smooth.
- Start with about one-third of the flour mixture. Mix just until the flour is mostly incorporated, then add half of the milk. Mix briefly.
- Add another third of the flour, then the remaining milk. Mix briefly.
- Finish with the remaining flour mixture and mix just until the last streaks of flour disappear. Do not overmix at this stage, as overmixing develops gluten and creates a tough, dense cake.
- Scrape down the sides and bottom of the bowl one final time and give a few gentle folds with the spatula to make sure everything is combined.
6. Fold in the Sprinkles
- Add the rainbow jimmies (the elongated rod-shaped sprinkles) to the batter.
- Using a rubber spatula, gently fold them in with 8 to 10 slow, sweeping strokes. Do not use the mixer at this stage.
- Be careful not to overmix, as overworking the sprinkles can cause them to bleed their color into the batter and turn it gray.
7. Divide the Batter and Bake
- Divide the batter evenly between the two prepared cake pans. A kitchen scale is the most accurate way to do this; each pan should weigh approximately the same.
- Smooth the tops lightly with an offset spatula or the back of a spoon.
- Place both pans on the center rack of the preheated oven. If your oven is small, you can bake them on separate racks, but rotate the pans halfway through baking.
- Bake for 28 to 33 minutes, or until a toothpick inserted into the center of the cake comes out clean or with just a few moist crumbs. The tops should look set and spring back lightly when touched.
- Avoid opening the oven door during the first 25 minutes of baking, as the sudden temperature change can cause the cake to sink in the center.
8. Cool the Cake Layers
- Remove the cake pans from the oven and place them on a wire cooling rack.
- Let the cakes cool in their pans for exactly 10 minutes. Any shorter and the cakes may crumble; any longer and steam can make the bottoms slightly soggy.
- After 10 minutes, run a butter knife around the edge of each cake to loosen it, then invert the pans onto the wire rack. Peel off the parchment paper gently.
- Allow the cake layers to cool completely before frosting, at least 1 to 2 hours at room temperature. Frosting warm cake will melt the buttercream and make a mess.
9. Make the Vanilla Buttercream Frosting
- In the bowl of your stand mixer fitted with the paddle attachment (or using a hand mixer), beat the softened unsalted butter on medium-high speed for 3 to 4 minutes until it’s very pale, fluffy, and almost white in color.
- Reduce the speed to low and gradually add the sifted powdered sugar, about 1 cup at a time, letting it fully incorporate before adding more. Adding it slowly prevents a cloud of powdered sugar from escaping the bowl.
- Once all the powdered sugar is in, add the pure vanilla extract, a pinch of fine sea salt, and 3 tablespoons of heavy cream.
- Increase the speed to medium-high and beat for another 3 to 4 minutes until the frosting is very light, fluffy, and smooth. If it’s too stiff, add the remaining tablespoon of heavy cream. If it’s too loose, add a small amount of additional powdered sugar.
- Scrape down the sides and give one final mix to ensure the frosting is completely smooth and uniform.
10. Assemble and Frost the Cake
- Place one cooled cake layer on a cake board, flat plate, or cake stand. If the cake has domed on top, you can level it with a serrated knife for a cleaner, more professional look.
- Spread a generous layer of vanilla buttercream (about 1 to 1.5 cups) evenly over the top of the first layer using an offset spatula. Spread it all the way to the edges.
- Carefully place the second cake layer on top, flat side up for a level top.
- Apply a thin layer of frosting all over the top and sides of the cake. This is called the crumb coat; it seals in loose crumbs so they don’t show up in the final layer of frosting. Refrigerate for 20 to 30 minutes to set.
- After chilling, apply the remaining frosting in a thicker, final layer. Use the offset spatula and a bench scraper (or the back of a large spoon) to smooth the sides and top.
- Press additional sprinkles onto the sides of the cake or sprinkle them generously over the top. The cake is ready to serve immediately or can be refrigerated until needed.
This technique is nearly identical to how you’d frost a Chocolate Cake, so it’s a great foundation skill to have.
Tips for Success
Getting a funfetti cake right is all about a few specific techniques. These tips address the most common problems people run into when baking layer cakes from scratch.
- Use room-temperature ingredients. Cold butter won’t cream properly, cold eggs can cause the batter to curdle, and cold milk won’t incorporate smoothly. Pull everything out of the fridge at least 1 hour before you start.
- Don’t skip the creaming time. Full 4 to 5 minutes of creaming butter and sugar at medium-high speed isn’t optional; it creates the structure for a light cake. Set a timer if needed.
- Use jimmies, not nonpareils. Round nonpareil sprinkles (the tiny ball-shaped ones) bleed their color into the batter much more aggressively. Elongated jimmies stay colorful and distinct.
- Fold sprinkles in last and gently. Fewer strokes means less color bleeding. Ten slow folds is enough.
- Don’t overmix once the flour goes in. Mix just until the dry ingredients disappear; the batter will look slightly lumpy and that’s fine.
For a version made even simpler, try using our tips alongside a Mug Cake Recipe when you only want a single serving.
Serving Suggestions

Funfetti cake is the ultimate celebration dessert. It’s festive, colorful, and universally loved, making it a natural fit for parties, birthdays, and casual gatherings.
Serve it as the centerpiece at any birthday party with candles pressed into the frosting and extra sprinkles scattered around the cake stand.
Pair a slice with a scoop of Vanilla Bean Ice Cream for the ultimate celebration dessert duo.
- Serve alongside Cake Pops at a party for a matching funfetti dessert table
- Pair with a glass of cold milk for the most classic, nostalgic combination
- Serve with fresh sliced strawberries and whipped cream for a lighter, summery presentation
- Cut into small squares and plate on dessert trays for easy grabbing at large gatherings
- Use the same batter to make cupcakes for individual servings that are easy to transport
Another great option to serve alongside this at parties: Chocolate Buttercream Frosting piped onto vanilla cupcakes for a two-tone dessert spread.
Variations to Try
Once you’ve mastered the base funfetti cake recipe, there are so many easy ways to customize it. The base batter is incredibly flexible.
Here are some popular and delicious variations:
- Funfetti sheet cake: Pour the batter into a greased 9×13-inch pan and bake for 30 to 35 minutes. Frost directly in the pan for easy serving.
- Funfetti cupcakes: Divide the batter among 24 lined muffin cups (fill them about two-thirds full) and bake at 350°F (175°C) for 18 to 22 minutes.
- Funfetti layer cake with cream cheese frosting: Swap out the vanilla buttercream for a tangy Cream Cheese Frosting for a slightly less sweet, more balanced flavor.
- Lemon funfetti cake: Add 1 tablespoon of lemon zest and 2 tablespoons of fresh lemon juice to the batter for a bright, citrusy variation.
- Chocolate funfetti cake: Fold in ½ cup of mini chocolate chips along with the sprinkles for a chocolate-studded version.
- Funfetti poke cake: Bake as a sheet cake, poke holes throughout, and pour sweetened condensed milk over the top before frosting. It makes the cake incredibly moist.
- Three-layer funfetti cake: Use this same recipe and divide the batter among three 8-inch pans, reducing bake time to 22 to 26 minutes.
Read Also: Checkerboard Cake Recipe
Storage and Reheating
This funfetti cake keeps beautifully for several days, making it a great make-ahead option for parties or gatherings.
Here’s how to store it properly:
- Room temperature (unfrosted layers): Wrap the cooled cake layers tightly in plastic wrap and store at room temperature for up to 2 days.
- Room temperature (frosted cake): A fully frosted cake can be covered with a cake dome or an overturned bowl and kept at room temperature for up to 2 days.
- Refrigerator: Store the frosted cake in the refrigerator, loosely covered with plastic wrap or in a cake box, for up to 5 days. Let it come to room temperature for 30 to 45 minutes before serving, as cold cake can taste slightly dense.
- Freezer (cake layers): Wrap unfrosted cake layers individually in plastic wrap, then in aluminum foil. Freeze for up to 2 months. Thaw overnight in the refrigerator.
- Freezer (frosted slices): Individual frosted slices can be frozen on a baking sheet until solid, then wrapped in plastic wrap and stored in a freezer bag for up to 1 month.
This Pound Cake Recipe uses very similar storage methods if you’re looking for a denser, longer-lasting alternative.
Nutritional Facts
The following values are approximate and based on one slice of a two-layer funfetti cake with vanilla buttercream, assuming the cake is cut into 12 slices.
| Nutrient | Per Slice |
|---|---|
| Calories | ~580 kcal |
| Total Fat | 28g |
| Saturated Fat | 17g |
| Cholesterol | 115mg |
| Sodium | 180mg |
| Total Carbohydrates | 79g |
| Dietary Fiber | 0.5g |
| Total Sugars | 60g |
| Protein | 5g |
Note: Nutritional values are estimates and may vary based on specific ingredients used and slice size.
The Angel Food Cake Recipe is a great lower-calorie alternative if you’re looking for a lighter celebration cake.
Health Benefits of Key Ingredients
Funfetti cake is a celebratory dessert rather than a health food, but a few of its core ingredients do offer some nutritional value worth noting.
Eggs, for instance, are one of the most nutrient-dense foods you can include in baking. They provide high-quality protein, B vitamins (particularly B12 and riboflavin), and healthy fats that support brain function.
- Eggs: A single large egg provides about 6 grams of protein and contains lutein and zeaxanthin, antioxidants that support eye health
- Butter: Contains fat-soluble vitamins A, D, E, and K2, and when consumed in moderate amounts as part of a balanced diet, it adds richness and satisfaction to food
- Whole milk: Provides calcium, phosphorus, and vitamin D, all important for bone health; using whole milk also contributes to the moist, tender texture of this cake
- Vanilla extract: Pure vanilla contains small amounts of antioxidants and has been shown in some studies to have mild anti-inflammatory properties; it also significantly enhances the perceived sweetness of baked goods, meaning you can enjoy the same level of flavor satisfaction
- Almond extract: Made from bitter almonds or peach pits, almond extract contains trace amounts of benzaldehyde, the compound responsible for its distinctive aroma, and adds depth of flavor that goes a long way with just a small amount
This is one of those desserts worth savoring slowly. Enjoying it alongside a Fruit Salad Recipe can also add some fresh, nutrient-dense balance to a celebration spread.
Frequently Asked Questions
1. Can I use all-purpose flour instead of cake flour?
You can substitute all-purpose flour if needed, but the texture of the cake will be slightly denser and chewier. If you don’t have cake flour on hand, you can make a DIY version: for every cup of cake flour called for, measure 1 cup of all-purpose flour, remove 2 tablespoons, and replace them with 2 tablespoons of cornstarch. Sift the mixture well before using.
2. Why did my sprinkles bleed color into the batter?
This usually happens when the sprinkles are stirred in too vigorously or for too long, or when nonpareil-style sprinkles (the tiny round balls) are used instead of jimmies (the elongated rods). Use rainbow jimmies and fold them in with 8 to 10 gentle strokes using a rubber spatula, nothing more.
3. Can I make this cake ahead of time?
Absolutely. You can bake and cool the cake layers up to 2 days in advance, wrapping them tightly in plastic wrap and storing them at room temperature. The buttercream frosting can be made 3 to 5 days in advance and stored in an airtight container in the refrigerator. Re-whip the frosting briefly before using. Fully assembled and frosted, the cake keeps well refrigerated for up to 5 days.
4. Can I make this funfetti cake as a three-layer cake?
Yes. Use the same batter and divide it evenly among three 8-inch round cake pans. Reduce the baking time to approximately 22 to 26 minutes, checking for doneness with a toothpick at the 22-minute mark. You’ll also want to make about 1.5 times the frosting recipe to have enough for three layers.
5. My cake sank in the middle. What went wrong?
A sunken center is almost always caused by one of a few things: the oven door was opened too early during baking, the batter was overmixed after the flour was added (which weakens the structure), the oven temperature was too low, or the cake was underbaked. Use an oven thermometer to verify your oven’s accuracy and avoid opening the oven before the 25-minute mark.
Read Also: Pastry Cream Recipe
Final Thoughts
This funfetti cake recipe is proof that from-scratch baking is absolutely worth the effort. Every layer is soft, moist, and bursting with colorful sprinkles, and the vanilla buttercream ties it all together with just the right sweetness.
Whether it’s a birthday, a celebration, or just a day that calls for something special, this cake never fails to bring smiles.
Give it a try and let me know how it turns out in the comments below! I’d love to hear your variations, your kids’ reactions, and any tweaks you made to make this recipe your own.
Recommended:
- Lemon Chiffon Cake Recipe
- Sour Cream Coffee Cake Recipe
- Tres Leches Cake Recipe
- German Chocolate Cake Bars Recipe
- Carrot Cake with Cream Cheese Frosting Recipe
- Cannoli Poke Cake Recipe
- Harvey Wallbanger Cake Recipe
- Classic Pineapple Upside Down Cake Recipe
- Eggnog Cake Recipe
- Best Carrot Cake Recipe


