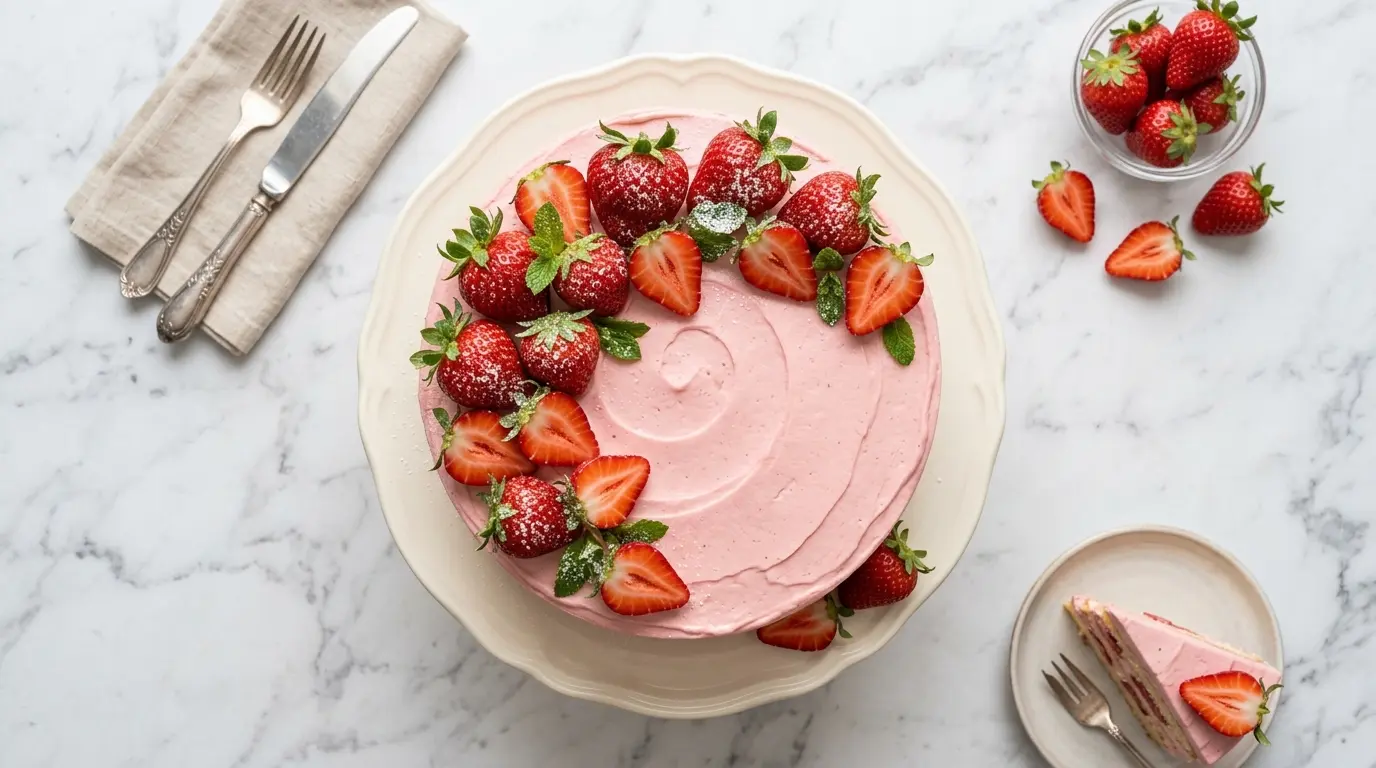
A classic strawberry cake recipe is one of those desserts that never goes out of style. It’s bright and cheerful, stacked with real strawberry flavor, and topped with a silky frosting that makes every slice feel like a celebration.
What sets this recipe apart from box-mix versions is the use of fresh strawberries throughout. The cake layers get their gorgeous pink hue and deep berry flavor from a concentrated strawberry puree that’s folded right into the batter. No artificial flavoring, no fake color.
This is the kind of cake you’ll want to make for birthdays, baby showers, Easter brunch, or any ordinary weekend when you just feel like baking something beautiful.
It comes together more easily than you might think. Even if you’re fairly new to baking layered cakes, the step-by-step instructions below will walk you through every detail.
You might also love this Lemon Cake Recipe for another light and fruity layer cake option.
Why You’ll Love This Strawberry Cake Recipe
This strawberry cake recipe checks every box you could want in a homemade layer cake.
The crumb is tender and soft, thanks to the combination of buttermilk and fresh strawberry puree in the batter. These two ingredients keep the layers moist even after a day in the fridge.
The color is naturally beautiful. You don’t need food dye to get that soft blush pink, and the natural strawberry flavor throughout the cake is far more satisfying than anything artificial.
The frosting is creamy, not too sweet, and pairs perfectly with the fruity layers. A classic vanilla buttercream or cream cheese frosting both work wonderfully here.
It’s a showstopper dessert that genuinely impresses guests without requiring professional baking skills.
- Made with real fresh strawberries for authentic flavor
- Soft, moist layers that hold up beautifully when stacked
- Naturally pink from strawberry puree with no artificial dye needed
- Pairs perfectly with vanilla buttercream or cream cheese frosting
- Crowd-pleasing for birthdays, holidays, and special occasions
- Can be made ahead and stored for several days without losing quality
For another impressive fruit-based cake, check out this Lemon Chiffon Cake Recipe.
Ingredients
This recipe uses simple, high-quality ingredients that work together to create a deeply flavorful and moist cake. The fresh strawberry puree is the star, and the buttermilk adds that signature tender crumb.
- 2 cups (280g) fresh strawberries, hulled and roughly chopped (for puree)
- 2 1/2 cups (315g) all-purpose flour
- 2 1/2 tsp baking powder
- 1/2 tsp baking soda
- 1/2 tsp fine salt
- 1 cup (225g / 2 sticks) unsalted butter, softened to room temperature
- 1 3/4 cups (350g) granulated sugar
- 4 large eggs, room temperature
- 2 tsp pure vanilla extract
- 1/2 cup (120ml) full-fat buttermilk, room temperature
- 3 tbsp strawberry gelatin powder (such as Jell-O Strawberry Gelatin) for color and flavor boost
For the Vanilla Buttercream Frosting:
- 1 1/2 cups (340g / 3 sticks) unsalted butter, softened
- 5 cups (600g) powdered sugar, sifted
- 3-4 tbsp heavy cream
- 2 tsp pure vanilla extract
- Pinch of salt
- 2-3 tbsp reserved strawberry puree (for tinting the frosting, optional)
For Garnish:
- 1 cup (140g) fresh strawberries, halved or whole
For a tangy twist, this cake is also wonderful with Cream Cheese Frosting instead of buttercream.
Kitchen Equipment Needed
Having the right tools on hand makes the baking process smoother and helps you get consistent results, especially when it comes to mixing the batter and achieving even cake layers.
- Two 9-inch (23cm) round cake pans
- Stand mixer or hand electric mixer
- Blender or food processor for making strawberry puree
- Large mixing bowls
- Rubber spatula
- Fine mesh sieve or strainer
- Measuring cups and spoons
- Kitchen scale (recommended for accuracy)
- Parchment paper
- Wire cooling racks
- Offset spatula for frosting
- Cake turntable (optional but helpful for smooth frosting)
- Toothpick or cake tester
Read Also: Vanilla Buttercream Frosting Recipe
Recommended Products for This Recipe
These are hand-picked products based on quality and performance that can genuinely make a difference when baking this strawberry cake.
1. Fat Daddio’s 9-Inch Round Cake Pan Set
These anodized aluminum pans distribute heat evenly, which means your cake layers bake uniformly without domed centers or dry edges. They’re lightweight, non-reactive, and trusted by both home bakers and professionals. A reliable pan is truly the foundation of a beautiful layer cake.
2. KitchenAid Stand Mixer
Creaming butter and sugar together properly is one of the most critical steps in this recipe, and a stand mixer makes it effortless. The KitchenAid’s consistent motor ensures the batter gets the right aeration without being overworked. It also frees up your hands to prep other parts of the recipe simultaneously.
3. Wilton Cake Turntable
Frosting a layer cake becomes dramatically easier on a spinning turntable. It helps you apply even pressure with your offset spatula to achieve smooth sides and a professional finish. Even beginners see an immediate improvement in their cake decorating results with this tool.
4. Ateco Offset Spatula
An offset spatula gives you the control and leverage needed to spread frosting smoothly across flat surfaces and along the sides of a cake. The angled blade keeps your hand away from the frosting, making it much easier to achieve a clean, professional look.
5. Nielsen-Massey Pure Vanilla Extract
Since vanilla is one of the primary flavor notes in both the cake and the frosting, using a high-quality extract makes a noticeable difference. Nielsen-Massey is a favorite among professional bakers for its rich, complex vanilla flavor that doesn’t taste harsh or artificial.
For another beautiful dessert to serve alongside this cake, try this Fruit Tart Recipe.
Step-by-Step Instructions
Step 1: Make the Strawberry Puree
- Place your hulled and chopped fresh strawberries into a blender or food processor.
- Blend until completely smooth, about 30 to 45 seconds.
- Pour the puree through a fine mesh sieve or strainer set over a bowl, pressing with the back of a spoon to push through as much liquid as possible while discarding the seeds.
- You should end up with approximately 3/4 cup (180ml) of smooth strawberry puree.
- Set aside 2-3 tablespoons of the puree in a separate small bowl if you plan to tint your frosting pink.
- Use the remaining puree (about 1/2 cup / 120ml) in the cake batter.
Step 2: Preheat the Oven and Prepare the Pans
- Preheat your oven to 350°F (175°C). Make sure your oven rack is in the center position.
- Lightly grease both 9-inch (23cm) round cake pans with softened butter or non-stick cooking spray, making sure to coat the sides and bottom evenly.
- Cut two circles of parchment paper to fit the bottoms of the pans, press them in, and lightly grease the parchment paper as well.
- This double-layer of greasing with parchment ensures the cakes release cleanly and don’t stick.
Step 3: Mix the Dry Ingredients
- In a large bowl, whisk together the all-purpose flour, baking powder, baking soda, and salt until well combined.
- Add the strawberry gelatin powder to the dry ingredients and whisk again until evenly distributed throughout the flour mixture.
- The gelatin powder serves two purposes: it deepens the strawberry flavor and helps the cake hold that gorgeous pink color during baking.
- Set the bowl of dry ingredients aside.
Step 4: Cream the Butter and Sugar
- In the bowl of your stand mixer fitted with the paddle attachment (or a large bowl if using a hand mixer), add the softened unsalted butter.
- Beat the butter on medium speed for about 2 minutes until it looks pale and creamy.
- Add the granulated sugar in two or three additions, beating on medium-high speed for a full 4 to 5 minutes total, scraping down the sides of the bowl as needed.
- The mixture should look very light, fluffy, and almost white in color. This step is crucial as it incorporates air into the batter, which creates a lighter crumb.
- Do not rush this step.
Step 5: Add the Eggs and Vanilla
- With the mixer on medium-low speed, add the eggs one at a time, allowing each egg to fully incorporate before adding the next.
- After each egg is added, scrape down the sides of the bowl with a rubber spatula before adding the next one.
- Add the pure vanilla extract and mix for 30 seconds until combined.
- The mixture may look slightly curdled at this stage; that is completely normal and will come together once the dry ingredients are added.
Step 6: Combine the Wet and Dry Ingredients
- In a small bowl or measuring cup, stir together the buttermilk and the 1/2 cup (120ml) of strawberry puree until combined.
- With the mixer on low speed, add about one-third of the dry ingredient mixture to the butter mixture and mix just until incorporated.
- Add half of the strawberry-buttermilk mixture and mix on low speed until just combined.
- Add another third of the dry ingredients, mix briefly, then add the remaining strawberry-buttermilk mixture.
- Finish with the final third of the dry ingredients, mixing until just combined. Do not overmix at this stage.
- Fold the batter a few times by hand with a rubber spatula to make sure there are no pockets of flour at the bottom of the bowl.
Step 7: Divide and Bake
- Divide the batter evenly between the two prepared cake pans, using a kitchen scale for accuracy if you have one. Each pan should have approximately the same amount.
- Use an offset spatula or the back of a spoon to spread the batter gently to the edges of each pan and level the tops.
- Place both pans in the preheated oven on the center rack. If they don’t both fit on one rack, stagger them on two racks and rotate halfway through baking.
- Bake for 28 to 33 minutes, or until a toothpick inserted into the center of each layer comes out clean or with just a few moist crumbs.
- The edges of the cake will have pulled slightly away from the sides of the pan when done.
Step 8: Cool the Cake Layers
- Remove the pans from the oven and place them on wire cooling racks.
- Let the cakes cool in their pans for exactly 15 minutes. This resting period allows the cakes to firm up so they don’t break when you release them.
- Run a thin knife or small offset spatula around the edges of each pan to loosen the cake.
- Invert each pan onto a wire rack, peel off the parchment paper, and flip the layers right-side up.
- Allow the layers to cool completely to room temperature, which takes at least 1 hour. Do not frost a warm cake.
Step 9: Make the Vanilla Buttercream Frosting
- In the clean bowl of your stand mixer fitted with the paddle attachment, beat the softened unsalted butter on medium-high speed for 3 to 4 minutes until very pale, creamy, and fluffy.
- Reduce the speed to low and add the sifted powdered sugar one cup at a time, mixing briefly after each addition to prevent a sugar cloud.
- Once all the powdered sugar is incorporated, add the vanilla extract and a pinch of salt.
- Add the heavy cream one tablespoon at a time, mixing on medium-high speed until the frosting is smooth, creamy, and spreadable. Use 3 tablespoons for a stiffer frosting, 4 tablespoons for something softer.
- If you’d like a soft pink frosting, beat in the reserved 2-3 tablespoons of strawberry puree at this stage, one tablespoon at a time, until you reach your desired shade.
Step 10: Assemble and Frost the Cake
- Place the first cooled cake layer on a cake board, cake stand, or serving plate. If using a turntable, set it on there now.
- Scoop about 1 cup of frosting onto the top of the first layer and spread it into an even layer all the way to the edges using an offset spatula.
- Carefully place the second cake layer on top, pressing down gently to help it adhere.
- Apply a thin crumb coat of frosting all over the top and sides of the assembled cake. This thin layer seals in the crumbs.
- Refrigerate the crumb-coated cake for 20 to 30 minutes until the thin layer of frosting is firm to the touch.
- Apply the final layer of frosting, using smooth, even strokes with the offset spatula. Work on the sides first, then the top.
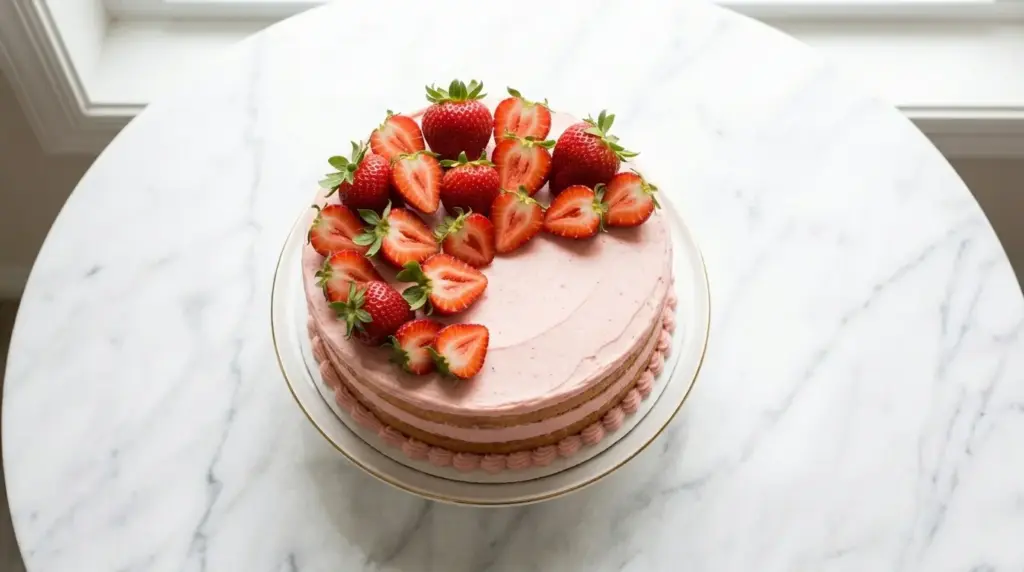
- Garnish with fresh halved or whole strawberries on top just before serving.
This beautiful layered cake pairs wonderfully with a drizzle of Fresh Strawberry Sauce poured tableside for extra indulgence.
Tips for Success
A few smart techniques can take this cake from good to exceptional. These tips address the most common mistakes home bakers make when working with fresh fruit in cake batter.
- Use room temperature ingredients throughout. Cold butter won’t cream properly, and cold eggs can cause the batter to curdle. Set everything out at least 30 minutes before you start baking.
- Don’t skip straining the strawberry puree. Seed bits in the batter can create an uneven texture. A smooth, seedless puree blends seamlessly into the crumb.
- Measure flour correctly. Spoon the flour into your measuring cup and level it off with a knife rather than scooping directly from the bag. Scooping packs in too much flour and leads to dense, dry layers.
- Don’t overmix the batter once the flour is added. Overmixing develops too much gluten, which makes the cake tough instead of tender. Mix just until no streaks of flour remain.
- Cool completely before frosting. Even slightly warm cake layers will melt your buttercream on contact, leading to a sliding, messy mess. Patience pays off here.
- Refrigerate after the crumb coat. This step is non-negotiable for a clean, smooth finish on the final frost.
- Use a serrated knife if you need to level the layers. If your cake layers domed during baking, trim the tops level before stacking for a more professional-looking finished cake.
Read Also: Chocolate Buttercream Frosting Recipe
Serving Suggestions
This strawberry cake is beautiful all on its own, but a few thoughtful pairings can make serving it even more special.
Serve each slice with a generous spoonful of homemade Strawberry Sauce spooned over the top or pooled on the plate beside it. The extra berry sauce amplifies the fresh strawberry flavor in every bite.
- Pair with a scoop of Vanilla Bean Ice Cream for a classic combination
- Serve alongside fresh whipped cream for a lighter accompaniment
- Add a side of Fruit Salad for a colorful dessert table spread
- Drizzle individual slices with a spoonful of Pastry Cream for an elegant plated dessert
- Accompany with a pot of hot tea or sparkling lemonade for a spring or summer gathering
Variations to Try
Once you’ve made the classic version, the base recipe is remarkably versatile. Here are some popular ways to put your own spin on this strawberry cake.
- Strawberry lemon cake: Add 2 teaspoons of fresh lemon zest to the batter and a tablespoon of fresh lemon juice to the frosting. The citrus sharpens the strawberry flavor and makes it taste even more vibrant.
- Strawberry chocolate cake: Use Chocolate Ganache as a filling between the layers and frost the outside with chocolate buttercream for a dramatic flavor contrast.
- Strawberry cream cheese layer cake: Swap the vanilla buttercream for a tangy cream cheese frosting throughout. This variation pairs especially well with a fresh strawberry filling between the layers.
- Three-layer cake: Divide the batter among three 8-inch pans instead of two 9-inch pans for a taller, more dramatic presentation. Reduce the baking time to about 22 to 25 minutes.
- Strawberry sheet cake: Pour the entire batter into a greased 9×13-inch (23x33cm) baking pan and bake for 35 to 40 minutes. Frost directly in the pan for an easy, casual version that’s perfect for potlucks.
- Gluten-free version: Substitute a high-quality 1:1 gluten-free flour blend for the all-purpose flour.
For more inspiration, check out this Angel Food Cake Recipe as a lighter base for strawberry-topped desserts.
Storage and Reheating
Proper storage keeps this cake tasting fresh and ensures the frosting holds its shape for days after baking.
- At room temperature: The frosted cake can be stored in an airtight cake dome or loosely tented with plastic wrap at room temperature for up to 2 days, as long as the environment isn’t too warm.
- Refrigerator: For longer storage, cover the cake loosely with plastic wrap (you can use toothpicks to hold the wrap away from the frosting) and refrigerate for up to 5 days.
- Freezer: Individual slices can be frozen on a parchment-lined baking sheet until firm, then wrapped tightly in plastic wrap and stored in a freezer-safe bag for up to 2 months.
- Thawing: Thaw frozen slices in the refrigerator overnight or at room temperature for about an hour before serving.
- Bringing to room temperature: For the best flavor and texture, remove refrigerated cake slices about 30 minutes before serving. Cold cake can taste denser and less flavorful than cake at room temperature.
- Do not reheat this cake in a microwave, as it will dry out the crumb and melt the frosting.
Read Also: Red Velvet Cake Recipe
Nutritional Facts
The following nutritional information is an estimate per slice based on the cake being divided into 12 equal portions. Actual values will vary depending on the specific brands and exact quantities used.
| Nutrient | Per Slice (1/12 of cake) |
|---|---|
| Calories | approximately 520 kcal |
| Total Fat | 26g |
| Saturated Fat | 16g |
| Cholesterol | 110mg |
| Sodium | 220mg |
| Total Carbohydrates | 68g |
| Dietary Fiber | 1g |
| Total Sugars | 50g |
| Protein | 5g |
These values include both the cake layers and a generous amount of vanilla buttercream frosting. Using a lighter cream cheese frosting will reduce the calorie and fat content slightly.
You might also enjoy: Tres Leches Cake
Health Benefits of Key Ingredients
While this is clearly a dessert and best enjoyed in moderation, a few of the ingredients do bring genuine nutritional value to the table.
The star ingredient, fresh strawberries, is genuinely one of the most nutrient-dense fruits you can use in baking.
- Fresh strawberries are rich in vitamin C, manganese, and antioxidants called anthocyanins, which have been studied for their anti-inflammatory properties. One cup of strawberries contains more vitamin C than an orange.
- Eggs contribute high-quality protein and essential vitamins including B12, D, and choline, which supports brain health. They’re also responsible for the structure and richness of the cake’s crumb.
- Buttermilk adds calcium and phosphorus to the recipe, and its natural acidity reacts with the baking soda to create a lighter, more tender crumb.
- Butter provides fat-soluble vitamins A, D, E, and K, and contributes to the satisfying richness and mouthfeel of both the cake and the frosting.
For another fruit-forward dessert with fresh ingredients, try this Strawberry Cheesecake Recipe.
Frequently Asked Questions
1. Can I use frozen strawberries instead of fresh?
Yes, you can use frozen strawberries to make the puree, but you should thaw them completely first and drain off any excess liquid before blending. Fresh strawberries tend to produce a more vibrant color and slightly brighter flavor, but frozen strawberries work well when fresh are not in season.
2. Can I make this cake ahead of time?
Absolutely. The cake layers can be baked up to 2 days in advance, wrapped tightly in plastic wrap, and stored at room temperature or in the refrigerator. The fully assembled and frosted cake can be made 1 day ahead and refrigerated. Just bring it to room temperature for about 30 minutes before serving.
3. Can I skip the strawberry gelatin powder?
You can skip it, but the gelatin powder does two jobs: it deepens the strawberry flavor and helps preserve that beautiful pink color during baking. Without it, the cake will still taste like strawberries, but the color may be a bit more muted and beige after baking. If you prefer to skip it, consider adding an extra tablespoon or two of strawberry puree instead.
4. Why did my cake layers turn out dense or gummy?
The most common causes are overmixing the batter after adding the flour, using cold ingredients (especially butter and eggs), or measuring the flour incorrectly. Make sure all ingredients are at room temperature, spoon and level your flour rather than scooping it, and stop mixing as soon as the dry ingredients are incorporated.
5. Can I make this recipe into cupcakes?
Yes, this batter works beautifully as cupcakes. Line a standard 12-cup muffin tin with cupcake liners, fill each about two-thirds full, and bake at 350°F (175°C) for 18 to 22 minutes. Let cool completely before frosting. This recipe will yield approximately 24 cupcakes.
Read Also: Classic Yellow Cake Recipe
Final Thoughts
This strawberry cake recipe is the kind of dessert that earns a permanent spot in your baking repertoire. It’s made with real ingredients, delivers genuine strawberry flavor in every bite, and looks absolutely stunning on any table.
Give it a try for your next celebration, or honestly, just for the joy of baking something this good on a lazy weekend.
If you make this recipe, I’d love to hear how it turned out! Drop a comment below to share your experience or any fun variations you tried. And if you loved it, please share this recipe with a friend who deserves a slice of something sweet.
Recommended:
- Lemon Cake Recipe
- Chocolate Cake Recipe
- Pound Cake Recipe
- Best Carrot Cake Recipe
- Carrot Cake with Cream Cheese Frosting
- Checkerboard Cake Recipe
- Mug Cake Recipe
- Strawberry Shortbread Cookies
- Strawberry Bruschetta Recipe
- Lemon Curd Recipe


