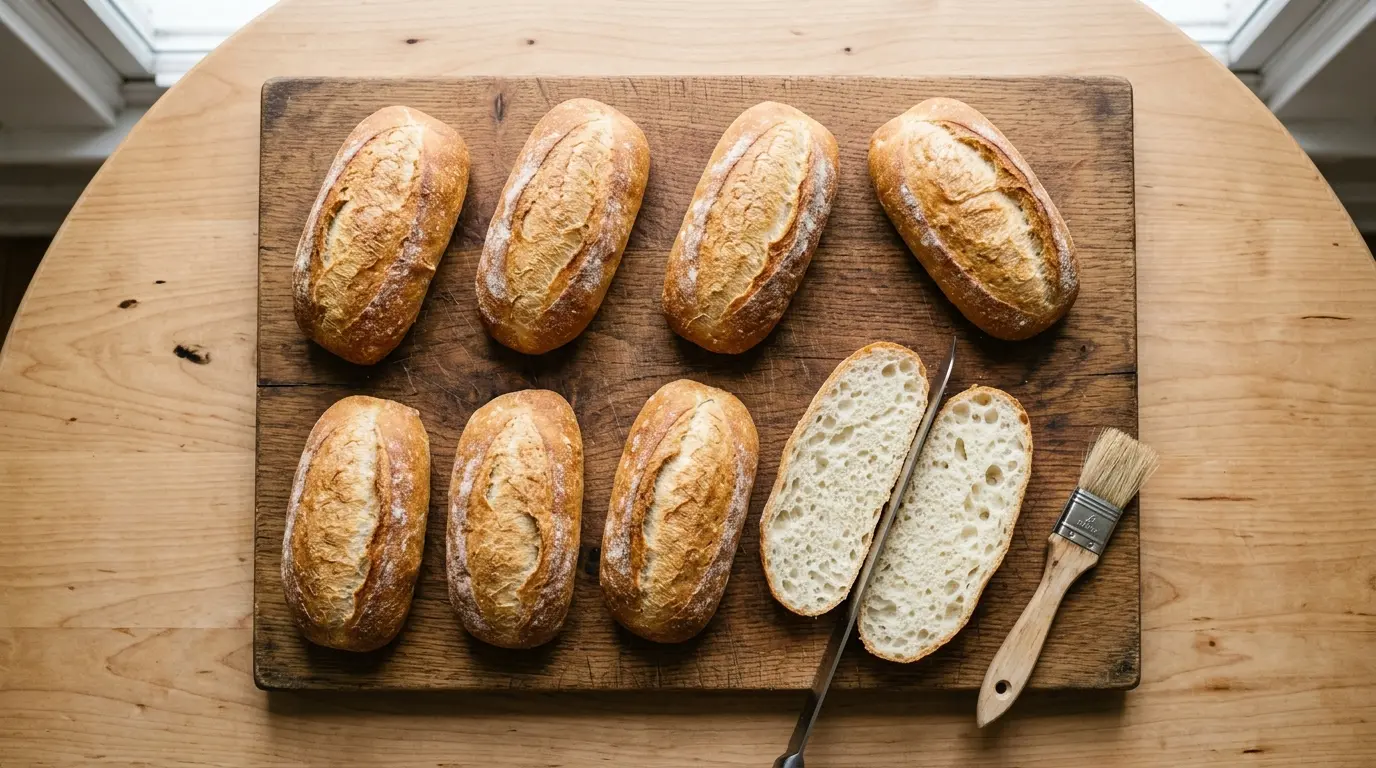
If you have ever bitten into a sandwich only to have the bread fall apart before you finish, you already know how much the roll matters. A good hoagie roll recipe solves that problem in the most satisfying way possible.
These rolls are soft on the inside, slightly chewy with a thin crisp crust, and sturdy enough to hold all your favorite fillings without going soggy.
Making them from scratch sounds intimidating, but it is genuinely one of the most rewarding baking projects you can take on.
The ingredients are simple pantry staples. The technique is straightforward. And the results are miles ahead of anything you can pick up at the grocery store.
Once you taste a fresh-baked hoagie roll, still warm from the oven, you will understand why so many home bakers never go back to buying them.
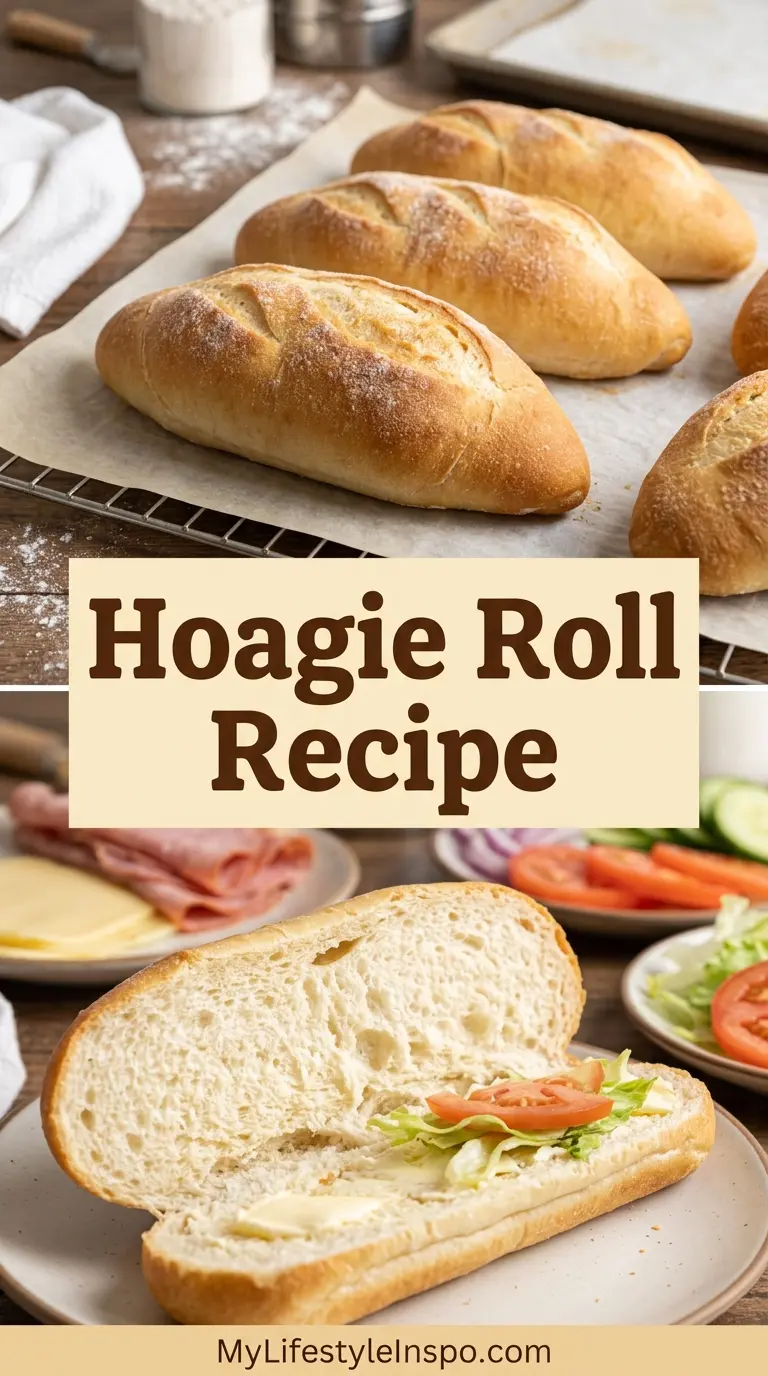
Why You’ll Love This Hoagie Roll Recipe
Homemade hoagie rolls have a texture that commercial bread simply cannot replicate. The inside is pillowy and slightly open-crumbed, while the outside develops a thin, delicate crust that gives just a bit of resistance before yielding.
They are incredibly versatile. Use them for Italian beef, meatball subs, pulled pork, cheesesteaks, or even just a classic turkey and cheese.
This recipe is approachable for bakers at any level. If you can measure ingredients and work with yeast dough, you can make these rolls.
They freeze beautifully, so you can bake a full batch and always have a great roll ready to go.
The dough comes together in one bowl and requires no special equipment beyond a stand mixer (though you can knead by hand if needed).
- Soft, chewy crumb with just the right amount of structure
- Thin golden crust that holds up to saucy fillings
- Made with pantry staples in under 3 hours (including rise time)
- Yields 8 generously sized rolls, perfect for feeding a crowd
- Freezer-friendly for meal prep
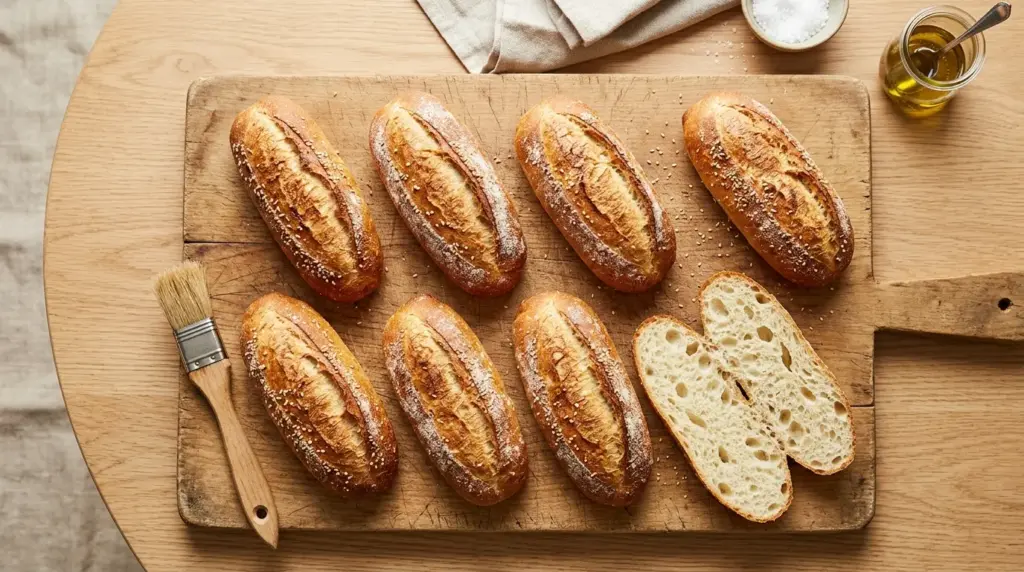
- Completely customizable with sesame seeds, poppy seeds, or a garlic butter brush
If you love baking bread from scratch, you will also enjoy this Soft Dinner Rolls Recipe for another pillowy, crowd-pleasing option.
Ingredients
The ingredients for hoagie rolls are classic bread-baking staples, but a few specific choices make a big difference in the final result. Bread flour gives you that chewy, structured crumb because of its higher protein content compared to all-purpose flour. The small amount of sugar feeds the yeast and adds just a hint of sweetness that balances the savory crust. Butter keeps the crumb tender and rich without making it too soft to hold fillings.
- 4 cups (480g) bread flour, plus extra for dusting
- 2 1/4 teaspoons (7g / 1 packet) active dry yeast or instant yeast
- 1 1/2 teaspoons (9g) fine salt
- 1 tablespoon (12g) granulated sugar
- 2 tablespoons (28g) unsalted butter, softened
- 1 1/4 cups (300ml) warm water (105-110°F / 40-43°C)
- 1 tablespoon (15ml) olive oil (for greasing the bowl)
- 1 egg, beaten (for egg wash)
- 1 tablespoon (15ml) water (to mix with egg for egg wash)
- Optional: sesame seeds or poppy seeds for topping
You might also enjoy this Sandwich Bread Recipe for a versatile everyday loaf that uses a similar dough method.
Kitchen Equipment Needed
Having the right tools set up before you start makes the whole process smoother. A stand mixer with a dough hook is the easiest way to develop the gluten in this dough, but a large bowl and some elbow grease work just as well. A bench scraper is especially helpful for dividing the dough into even portions without tearing.
- Stand mixer with dough hook (or large mixing bowl for hand kneading)
- Large baking sheet (half sheet pan, 18×13 inches)
- Bench scraper or dough cutter
- Kitchen scale (for accurate measurements)
- Instant-read thermometer (for checking water temperature and bread doneness)
- Pastry brush (for applying egg wash)
- Plastic wrap or a clean kitchen towel (for covering dough during rise)
- Parchment paper
- Cooling rack
Read Also: Potato Rolls Recipe
Recommended Products for This Recipe
These are products I genuinely recommend based on quality and performance, each chosen to help you get the best results with your hoagie rolls.
1. KitchenAid Stand Mixer with Dough Hook
A stand mixer transforms hoagie roll baking from a workout into an enjoyable process. The dough hook develops gluten evenly without overworking the dough, giving you that ideal chewy-yet-tender texture. It is an investment that pays off across hundreds of recipes.
2. OXO Good Grips Bench Scraper
Dividing dough into equal portions is much easier with a sturdy bench scraper. It also keeps your work surface clean and helps with shaping, preventing the dough from sticking and tearing. This is one of those small tools that makes a noticeable difference in your results.
3. Digital Instant-Read Thermometer
Getting your water temperature right is critical for yeast activation. An instant-read thermometer also lets you check bread doneness precisely, so you never have to guess whether your rolls are baked through. It is an indispensable tool for any bread baker.
4. USA Pan Half Sheet Baking Pan
A heavy-duty aluminum baking sheet promotes even heat distribution, which means all your rolls bake at the same rate. Thin, flimsy pans cause uneven browning and can lead to burnt bottoms. This pan is a staple in professional and home kitchens alike.
5. King Arthur Bread Flour
Bread flour with a higher protein content (around 12-13%) is the key to that chewy, structured crumb in hoagie rolls. All-purpose flour will work in a pinch, but bread flour gives you results that are noticeably superior. King Arthur is consistently reliable and easy to find.
This recipe also calls for similar techniques to a Pretzel Rolls Recipe if you want another fun roll variation to try.

Step-by-Step Instructions
1. Activate the Yeast
- If using active dry yeast, combine the warm water (105-110°F / 40-43°C) and sugar in the bowl of your stand mixer or a large mixing bowl. Stir gently to dissolve the sugar.
- Sprinkle the yeast over the water and give it a quick stir.
- Let the mixture sit for 5-10 minutes. You are looking for the yeast to become foamy and bubbly, which tells you it is active and alive.
- If the yeast does not foam after 10 minutes, it may be old or your water was too hot or too cold. Start over with fresh yeast and check your water temperature carefully.
- Note: If using instant yeast, you can skip this proofing step and add the yeast directly to the flour with the other dry ingredients. Add the warm water when the recipe calls for it.
2. Mix the Dough
- Add the bread flour and salt to the yeast mixture. If you are using a stand mixer, add the softened butter as well.
- If hand kneading, hold off on the butter for now and incorporate it after the dough comes together initially.
- Attach the dough hook to your stand mixer and mix on low speed (speed 2) for about 2 minutes, until the dough begins to come together into a shaggy mass.
- Increase the speed to medium (speed 4) and mix for 6-8 minutes. The dough should pull away cleanly from the sides of the bowl, feel smooth and slightly tacky (not sticky), and pass the windowpane test: stretch a small piece between your fingers and it should stretch thin without tearing.
- If kneading by hand, turn the dough onto a lightly floured surface and knead for 10-12 minutes, working in the softened butter about halfway through kneading. Push the dough away from you with the heel of your hand, fold it back toward you, rotate it a quarter turn, and repeat.
3. First Rise (Bulk Fermentation)
- Lightly coat a large bowl with the tablespoon of olive oil, rubbing it around the sides and bottom.
- Shape the dough into a smooth ball and place it in the oiled bowl, turning it once so all sides are lightly coated with oil.
- Cover the bowl tightly with plastic wrap or a damp kitchen towel.
- Place the bowl in a warm, draft-free spot. An oven with just the light on works perfectly, or a spot near a warm stove.
- Let the dough rise for 1 to 1.5 hours, until it has doubled in size. Do not rush this step; the rise time develops flavor and texture.
4. Divide and Shape the Rolls
- Once the dough has doubled, turn it out onto a lightly floured work surface. Gently press it down to deflate any large air bubbles, but do not punch it aggressively.
- Using a bench scraper or a sharp knife, divide the dough into 8 equal pieces. For accuracy, weigh the total dough and divide by 8. Each piece should weigh approximately 100-110g (3.5-4 oz).
- To shape each roll, flatten one piece of dough into a rough rectangle with your hands.
- Fold the long sides inward toward the center, overlapping slightly, like a letter.
- Then roll the dough away from you with light pressure, creating a log shape about 6-7 inches (15-18cm) long.
- Pinch the seam firmly along the bottom to seal it completely.
- Gently taper the ends by rolling them lightly with your palms to create the classic hoagie roll torpedo shape.
- Repeat with all 8 pieces.
5. Second Rise (Proof)
- Line your large baking sheet with parchment paper.
- Place the shaped rolls on the prepared pan, seam-side down, spacing them about 2 inches (5cm) apart.
- Cover loosely with plastic wrap that has been lightly sprayed with cooking spray, or a clean kitchen towel.
- Let the rolls rise for 45-60 minutes, until they are noticeably puffed and look pillowy. They will not quite double in size this time, but they should look visibly larger and feel airy when gently poked.
- About 20 minutes before the end of the second rise, preheat your oven to 400°F (200°C). Place a rack in the center of the oven.
6. Apply Egg Wash and Score
- In a small bowl, whisk together the beaten egg and 1 tablespoon of water to make your egg wash.
- Using a pastry brush, gently brush the surface of each roll with a thin, even layer of egg wash. Be careful not to press too hard, as you do not want to deflate the risen dough.
- If using sesame seeds or poppy seeds, sprinkle them over the egg-washed rolls now.
- Using a sharp knife, a razor blade lame, or a pair of kitchen scissors, score the top of each roll. A single straight slash down the length of the roll, about 1/4 inch (6mm) deep, is the classic hoagie roll look. This controls where the roll opens up during baking and gives it that characteristic appearance.
7. Bake the Rolls
- Place the baking sheet in the preheated 400°F (200°C) oven.
- Bake for 18-22 minutes, rotating the pan once at the halfway point for even browning.
- The rolls are done when they are deep golden brown on the outside and sound hollow when you tap the bottom.
- For absolute certainty, insert an instant-read thermometer into the thickest part of a roll. The internal temperature should read 190-200°F (88-93°C).
- Be careful not to underbake; a pale roll will have a gummy, dense interior.
8. Cool Before Cutting
- Transfer the baked rolls to a cooling rack immediately after removing them from the oven. This prevents the bottoms from steaming and going soft.
- Allow the rolls to cool for at least 15-20 minutes before slicing. Cutting into hot bread traps steam inside and can make the crumb gummy.
- Once cooled to warm room temperature, the rolls are ready to slice and fill.
For another great sandwich foundation, check out this Sourdough Sandwich Bread Recipe for a tangy, complex alternative.
Tips for Success
Getting consistently great hoagie rolls comes down to a few key details that are easy to overlook the first time around. Water temperature is the most common pitfall: too hot kills the yeast, too cold means slow or no rise. Use a thermometer rather than guessing. Another important detail is not to add too much flour while shaping; a slightly tacky dough makes softer rolls than a stiff one.
- Check your yeast: Always proof active dry yeast before mixing. If it does not foam within 10 minutes, start over with fresh yeast.
- Weigh your flour: Scooping flour with a cup measure packs it down and can add up to 20% more flour than intended. A kitchen scale gives you consistent results every time.
- Do not skip the second rise: The proof after shaping is what gives the rolls their light, open crumb. Rushing it leads to dense, bready rolls.
- Score confidently: A hesitant, shallow score tears the dough instead of cutting it cleanly. Use a sharp blade and make one decisive stroke.
- Rotate your pan: Ovens have hot spots. Rotating the pan halfway through baking ensures all rolls brown evenly.
- Steam for a crispier crust: Place a small oven-safe pan of boiling water on the bottom rack while baking. The steam creates a crispier, more bakery-style crust.
- Cool completely before storing: Storing warm rolls traps moisture and makes them soft and sticky. Let them cool fully on a rack first.
Read Also: Dinner Rolls Recipe
Serving Suggestions
Hoagie rolls are the perfect vehicle for so many fillings. The sturdy crumb and thin crust mean they can handle saucy, juicy, or heavily loaded fillings without falling apart. Warm them briefly in a 300°F (150°C) oven for 5 minutes before filling if you want that fresh-baked warmth.
- Fill with thinly sliced Italian meats, provolone, lettuce, tomato, onion, and oil and vinegar for a classic Italian sub
- Load with slow-cooked Pulled Pork and a drizzle of barbecue sauce for a crowd-pleasing sandwich
- Make a Philly cheesesteak using this Authentic Philly Cheese Steak recipe
- Fill with Italian Meatballs and marinara for a classic meatball sub
- Use for a crispy Spicy Chicken Sandwich with pickles and aioli
- Serve alongside Creamy Coleslaw and Potato Salad for a deli-style spread
Variations to Try
The basic hoagie roll dough is a wonderful starting point, and it is easy to customize with a few simple tweaks. A touch of whole wheat flour adds a nutty depth; swapping up to one third of the bread flour for whole wheat works well without making the rolls too dense. For a richer flavor, replace the water with warm whole milk and increase the butter to 3 tablespoons.
- Garlic herb rolls: Add 1 teaspoon garlic powder and 1 teaspoon dried Italian seasoning to the dough. Brush with garlic butter fresh out of the oven.
- Sesame seed hoagie rolls: Coat the tops generously with sesame seeds before baking for a classic deli look and subtle nutty flavor.
- Whole wheat hoagie rolls: Replace 1 cup (120g) of bread flour with whole wheat flour for a heartier, nuttier roll with more fiber.
- Soft milk rolls: Substitute warm whole milk for the water and add an extra tablespoon of butter for an even softer, richer crumb, similar to a Buttermilk Bread Recipe.
- Cheesy hoagie rolls: Fold in 1/2 cup (50g) of finely grated Parmesan cheese during the last minute of mixing for a savory, golden-crusted roll.
- Mini slider rolls: Divide the dough into 16 pieces instead of 8 and bake for 14-16 minutes for smaller, party-friendly versions.
Another great bread to try alongside these rolls is this No Knead Bread Recipe for a hands-off, beginner-friendly baking experience.
Storage and Reheating
Hoagie rolls store and reheat beautifully, making them ideal for batch baking. The key is to cool them completely before storing; any residual warmth creates condensation inside the storage bag, which leads to soggy or sticky rolls.
- Room temperature: Store fully cooled rolls in a zip-top bag or airtight container at room temperature for up to 2 days.
- Freezer: Wrap each roll individually in plastic wrap, then place them in a freezer bag. Freeze for up to 3 months.
- Thawing: Remove frozen rolls from the freezer and let them thaw at room temperature for 1-2 hours, or unwrap and microwave on a damp paper towel for 30-45 seconds until soft.
- Reheating: For the best texture, place thawed rolls in a 300°F (150°C) oven for 5-8 minutes. This refreshes the crust and warms the interior without drying them out.
- Do not refrigerate: Refrigerating bread accelerates staling. The freezer is always the better choice for longer storage.
Read Also: Artisan Bread Recipe
Nutritional Facts
The following values are approximate per roll (1 of 8), based on the recipe as written without optional toppings.
| Nutrient | Amount Per Roll |
|---|---|
| Calories | 255 kcal |
| Total Fat | 4g |
| Saturated Fat | 2g |
| Cholesterol | 33mg |
| Sodium | 440mg |
| Total Carbohydrates | 46g |
| Dietary Fiber | 1.5g |
| Sugars | 1.5g |
| Protein | 8g |
These values will vary depending on the specific brands of ingredients used and any optional add-ins or toppings. Using whole wheat flour in place of some bread flour increases the fiber content.
You might also enjoy these Sweet Dinner Rolls for a slightly indulgent variation on classic rolls.
Health Benefits of Key Ingredients
While hoagie rolls are an indulgence, the ingredients in this recipe are simple and recognizable. No preservatives, no additives, and no unpronounceable ingredients.
Bread flour provides protein that supports muscle maintenance and repair. The gluten structure it creates also helps slow down digestion slightly compared to highly processed white breads. Butter, used in a small amount here, contains fat-soluble vitamins A, D, E, and K, which support immune function and bone health. Olive oil, used lightly in this recipe for greasing, is rich in monounsaturated fats associated with heart health.
- Bread flour: Higher protein content (12-13%) compared to all-purpose flour, contributing to better structure and satiety
- Olive oil: Contains oleic acid, a monounsaturated fat linked to reduced inflammation
- Eggs (in the egg wash): Rich in choline, which supports brain health and liver function
- Butter: Provides fat-soluble vitamins and adds richness that makes small amounts satisfying
- Yeast: A natural leavener that contributes B vitamins, including thiamine, riboflavin, and niacin
- Water: The primary liquid in the dough; proper hydration supports gluten development and a moist crumb
Read Also: Multigrain Bread Recipe
Frequently Asked Questions
1. Can I use all-purpose flour instead of bread flour?
Yes, you can substitute all-purpose flour in this hoagie roll recipe, and the rolls will still taste great. However, the texture will be slightly softer and less chewy because all-purpose flour has a lower protein content (around 10-11%) compared to bread flour (12-13%).
If using all-purpose flour, you may need to reduce the water by 1-2 tablespoons, as it absorbs liquid differently. For the best possible result, stick with bread flour when you can.
2. How do I know when the dough has risen enough?
The dough should roughly double in size during the first rise. A reliable test is the “poke test”: gently press your finger about 1/2 inch into the dough. If the indentation springs back slowly and only partially fills in, the dough is ready.
If it springs back immediately, the dough needs more time. If the indentation does not spring back at all, the dough may be over-proofed, which can result in rolls that collapse in the oven.
3. My rolls turned out dense. What went wrong?
Dense rolls are almost always caused by one of three things: yeast that was not properly activated, insufficient kneading, or not enough rise time. First, always verify your yeast is active before mixing the full dough.
Second, make sure you knead long enough (6-8 minutes in a stand mixer or 10-12 by hand) to develop the gluten network. Third, resist the urge to rush the rise; the dough needs the full time to develop its structure and flavor.
4. Can I make the dough ahead of time?
Absolutely. After the first rise, punch down the dough, wrap it tightly in plastic wrap, and refrigerate it for up to 24 hours. A slow, cold rise actually develops more flavor.
When you are ready to bake, remove the dough from the refrigerator and let it sit at room temperature for 30-45 minutes, then shape, allow the second rise, and bake as directed.
5. How do I get a crispier crust on my hoagie rolls?
The single most effective technique is adding steam to your oven during the first 10 minutes of baking. Place an empty oven-safe pan on the bottom rack while the oven preheats, then carefully pour about 1 cup of boiling water into it just before closing the oven door.
The steam keeps the surface of the rolls moist long enough for the crust to set with a satisfying crispness rather than becoming tough or thick. Removing the rolls from the pan onto a rack immediately after baking also helps the crust stay crisp rather than softening as it cools.
For another delicious bread you can make at home, try this Italian Bread Recipe for a classic, crusty loaf.
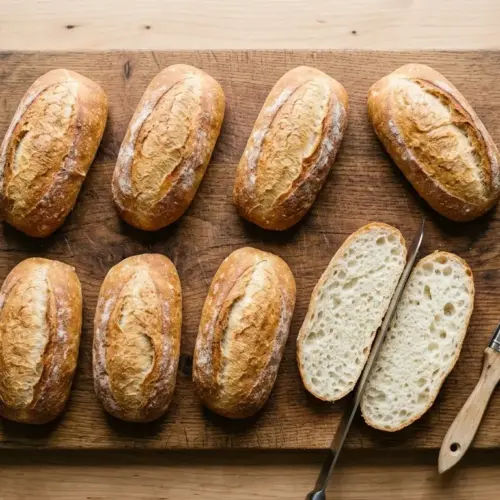
Classic Hoagie Rolls

Equipment
- Stand mixer with dough hook - or large mixing bowl for hand kneading
- Large baking sheet - half sheet pan, 18×13 inches
- Bench scraper or dough cutter
- Kitchen scale - for accurate measurements
- Instant-read thermometer - for checking water temperature and bread doneness
- Pastry brush - for applying egg wash
- Plastic wrap or clean kitchen towel - for covering dough during rise
- Parchment paper
- Cooling rack
Ingredients
- 4 cups bread flour - 480g, plus extra for dusting
- 2 1/4 teaspoons active dry or instant yeast - 7g / 1 packet
- 1 1/2 teaspoons fine salt - 9g
- 1 tablespoon granulated sugar - 12g
- 2 tablespoons unsalted butter - 28g, softened
- 1 1/4 cups warm water - 300ml, 105-110°F / 40-43°C
- 1 tablespoon olive oil - 15ml, for greasing the bowl
- 1 egg - beaten, for egg wash
- 1 tablespoon water - 15ml, to mix with egg for egg wash
- sesame seeds - optional, for topping
- poppy seeds - optional, for topping
Instructions
- Combine warm water and sugar in the mixer bowl, then sprinkle yeast over and let sit for 5-10 minutes until foamy.
- Add bread flour, salt, and softened butter to the yeast mixture. Mix with dough hook on low for 2 minutes, then medium for 6-8 minutes until dough is smooth and passes the windowpane test.
- Shape dough into a ball, place in an oiled bowl, cover, and let rise in a warm place for 1 to 1.5 hours until doubled in size.
- Turn dough onto a lightly floured surface, divide into 8 equal pieces (about 100-110g each), shape each into a log about 6-7 inches long, and place seam-side down on a parchment-lined baking sheet.
- Cover rolls loosely and let rise for 45-60 minutes until puffed and pillowy. Meanwhile, preheat oven to 400°F (200°C).
- Brush each roll with egg wash, sprinkle with seeds if using, and score the top with a sharp knife or lame.
- Bake for 18-22 minutes until deep golden brown and internal temperature reaches 190-200°F (88-93°C). Rotate pan halfway through.
- Transfer rolls to a cooling rack and cool for at least 15-20 minutes before slicing.
Notes
- Water temperature matters: Too hot kills the yeast; too cold means slow or no rise. Use a thermometer for accuracy. The ideal range is 105-110°F (40-43°C).
- Check your yeast: Always proof active dry yeast before mixing. If it does not foam within 10 minutes, start over with fresh yeast.
- Weigh your flour: Scooping flour with a cup measure packs it down and can add up to 20% more flour. A kitchen scale gives you consistent results every time.
- Do not skip the second rise: The proof after shaping gives the rolls their light, open crumb. Rushing it leads to dense, bready rolls.
- Score confidently: A hesitant, shallow score tears the dough instead of cutting it cleanly. Use a sharp blade and make one decisive stroke.
- Steam for crispier crust: Place a small oven-safe pan of boiling water on the bottom rack while baking for a crispier, more bakery-style crust.
- Freezing instructions: Wrap each cooled roll individually in plastic wrap, then place in a freezer bag for up to 3 months. Thaw at room temperature for 1-2 hours.
- Reheating: For best texture, place thawed rolls in a 300°F (150°C) oven for 5-8 minutes. This refreshes the crust without drying them out.
- Do not refrigerate: Refrigerating bread accelerates staling. The freezer is always the better choice for longer storage.
- Don’t underbake: Pale rolls will have a gummy, dense interior. They should be deep golden brown and sound hollow when tapped on the bottom.
Final Thoughts
Making your own hoagie rolls is one of those kitchen projects that feels a little ambitious until you do it once, and then you wonder why you waited so long.
The process is straightforward, the ingredients are simple, and the reward is a batch of warm, fresh rolls that genuinely elevate every sandwich you put them to.
The next time you are planning a cookout, a weeknight sub night, or a game-day spread, skip the grocery store bread aisle and pull out this recipe instead.
Your sandwiches will never be the same, and your family or guests will notice.
Give this hoagie roll recipe a try and let me know in the comments how it went. I would love to hear what fillings you used, what variations you tried, and any tips of your own that made the process easier. Sharing photos always makes my day too!
Recommended:
- Whole Wheat Bread Recipe
- French Bread Recipe
- Ciabatta Recipe
- Classic Baguette Recipe
- Brioche Recipe
- Homemade Bagel Recipe
- New York Style Bagel Recipe
- Everything Bagel Recipe
- Buffalo Chicken Sandwich Recipe
- Classic Sloppy Joe Recipe



