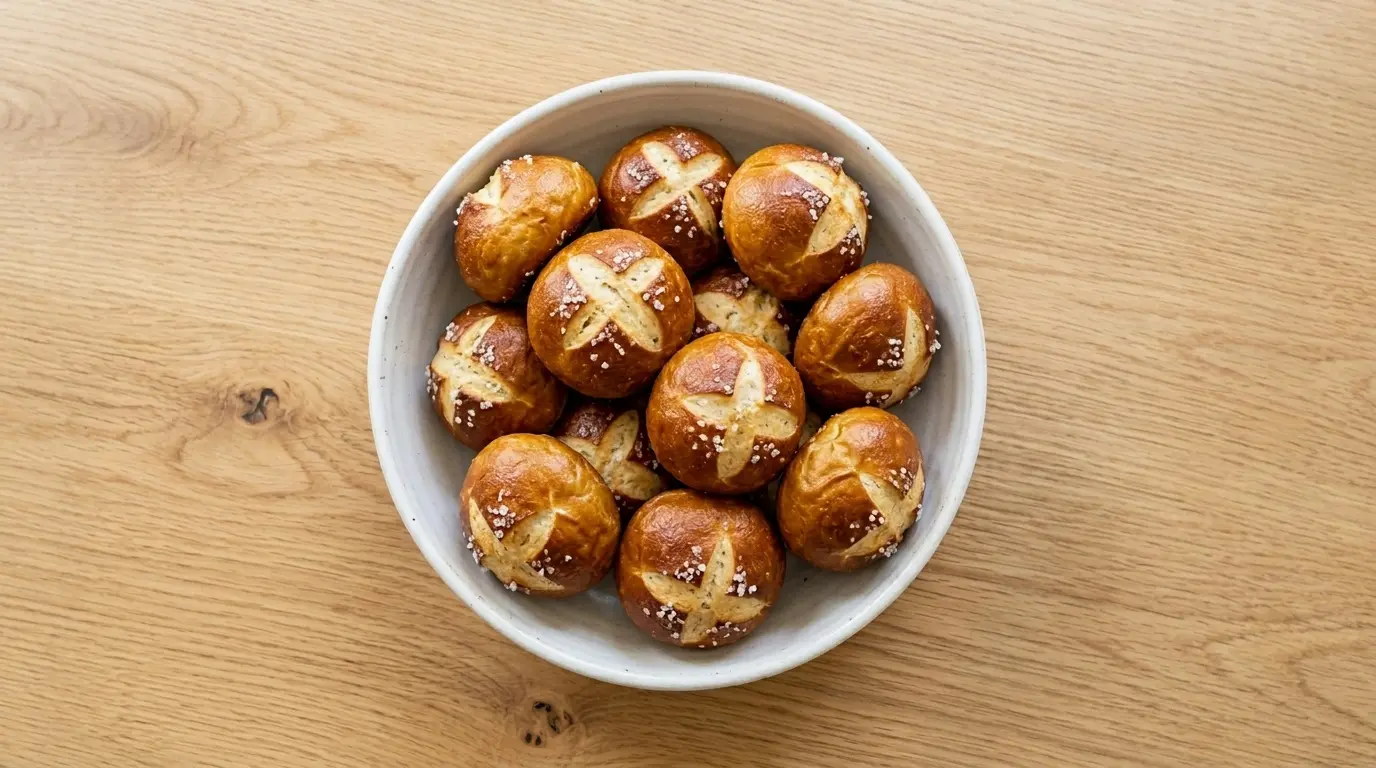
A warm pretzel roll splits open to reveal a soft, pillowy crumb wrapped in a deep mahogany crust, with that unmistakable salty, malty flavor only a baking soda bath can create.
This pretzel rolls recipe walks you through every step, from activating the yeast to that final golden bake, so you end up with bakery quality rolls right from your own kitchen.
These rolls have all the signature pretzel tang and chew, but they’re shaped like dinner rolls, which makes them perfect for sandwiches, burger buns, or just slathered with butter. Once you taste that deep brown crust against the tender interior, you’ll understand why so many home bakers consider this one of the most rewarding bread recipes to master.
The secret lies in dipping the shaped dough in a hot baking soda bath right before baking. This brief alkaline dip raises the pH on the surface of the dough, which speeds up browning and gives the crust its classic chew and pretzel flavor.
If you already keep a sourdough starter going, you might also enjoy trying Sourdough Discard Pretzels for a tangier twist on this same baking soda bath technique.

Why You’ll Love This Pretzel Rolls Recipe
This pretzel rolls recipe takes the classic mall pretzel flavor and turns it into a versatile bread roll you’ll want to make on repeat.
It’s simpler than it looks, and it doesn’t call for any special equipment or hard to find ingredients.
Here’s what makes this recipe a keeper:
- Bakery style flavor and texture without a trip to a specialty shop
- Soft, chewy interior with a deep golden brown crust
- Great for burgers, sandwiches, or served warm with a smear of butter
- Freezer friendly, so you can make a big batch and save some for later
- Beginner friendly, with clear shaping instructions for every step
- Customizable toppings, from classic coarse salt to cheese or everything seasoning
Another favorite roll recipe to try is our Potato Rolls, which uses a similar soft, enriched dough.
Ingredients
Here’s everything you need to make a batch of 9 pretzel rolls. The dough comes together with pantry staples, while a couple of specialty extras give the rolls their signature bakery flavor.
For the dough:
- 1½ cups warm water (360 ml), about 110°F (43°C)
- 1 packet, or 2¼ teaspoons (7g), Active Dry Yeast
- 2 tablespoons (25g) light brown sugar
- 3 tablespoons (42g) unsalted butter, melted and slightly cooled
- 4 cups (480g) bread flour, plus more for dusting
- 2 teaspoons (12g) fine sea salt
- 1 tablespoon (15ml) Diastatic Malt Syrup, optional, for extra flavor and color
For the baking soda bath:
- 10 cups (2.4L) water
- ⅔ cup (150g) baking soda
- 1 tablespoon (15g) brown sugar
For topping:
- 1 large egg, beaten with 1 tablespoon water
- 2 to 3 tablespoons Coarse Pretzel Salt
Read Also: Cheese Sauce Recipe
Kitchen Equipment Needed
You don’t need anything fancy to make these pretzel rolls, just a few basics that make the whole process easier and more consistent.
You’ll need:
- Stand Mixer with Dough Hook, or a large mixing bowl and wooden spoon for hand kneading
- Large 8 quart stockpot for the baking soda bath
- Half Sheet Pan, lined with parchment paper
- Slotted spoon or skimmer for lifting the rolls from the bath
- Pastry brush for the egg wash
- Kitchen Scale for accurate flour measurements
- Instant Read Thermometer to check water temperature and doneness
- Wire cooling rack
If you enjoy working with yeasted dough, you’ll probably like our No Knead Bread too, which skips the kneading step entirely for an easier weekend bake.
Recommended Products for This Recipe
These are a few products we genuinely recommend based on quality and performance, chosen specifically to help this pretzel rolls recipe turn out perfectly every time.
1. KitchenAid Stand Mixer
A stand mixer with a dough hook takes nearly all the effort out of kneading, which matters because pretzel dough is fairly stiff and can be tiring to work by hand. It also kneads more evenly than most people can manage on their own, which gives the dough better gluten structure and a more consistent chew.
2. Coarse Pretzel Salt
Regular table salt dissolves too quickly and doesn’t give that signature crunchy bite on top of a finished pretzel roll. Coarse pretzel salt is specifically sized to stick to the egg wash and stay crunchy through baking, which is exactly the texture you want on top.
3. Diastatic Malt Powder
A small amount of diastatic malt powder or syrup mimics the deep, slightly sweet flavor found in professional bakery pretzels. It also helps the crust brown more evenly, since the enzymes in malt encourage better caramelization in the oven.
4. USA Pan Half Sheet Pan
A heavy gauge aluminum half sheet pan conducts heat evenly, which prevents the bottoms of the rolls from scorching while the tops are still pale. It’s also sturdy enough to handle the hot baking soda bath without warping over time.
5. Instant Read Digital Thermometer
Checking your water temperature before adding yeast helps avoid the most common pretzel roll mistake, which is killing the yeast with water that’s too hot. The same thermometer also lets you confirm the rolls are fully baked through by checking the internal temperature.
Another bread worth trying next is our Artisan Bread, which uses a similarly simple list of ingredients.

Step-by-Step Instructions
1. Activate the Yeast
- Pour the warm water, 110°F (43°C), into the bowl of your stand mixer or a large mixing bowl.
- Sprinkle the active dry yeast and brown sugar over the water and stir gently to combine.
- Let the mixture sit for 5 to 10 minutes, until it turns foamy on top.
- If the mixture doesn’t foam, the yeast may be expired or the water may have been too hot or too cold, so start over with a fresh packet of yeast.
2. Mix and Knead the Dough
- Add the melted butter, diastatic malt syrup if using, and fine sea salt to the yeast mixture.
- Add the bread flour one cup at a time, mixing on low speed with the dough hook between additions.
- Once the flour is fully incorporated, increase the speed slightly and knead for 7 to 8 minutes, until the dough is smooth, elastic, and pulls cleanly away from the sides of the bowl.
- If kneading by hand, turn the dough out onto a lightly floured surface and knead for 10 to 12 minutes, until smooth.
- The finished dough should feel slightly tacky but not sticky to the touch.
3. Let the Dough Rise
- Lightly oil a large bowl and place the dough inside, turning once to coat it in oil.
- Cover the bowl with plastic wrap or a clean kitchen towel.
- Set the bowl in a warm, draft free spot and let the dough rise for 60 to 75 minutes, until it has doubled in size.
- Test that it’s ready by pressing two fingers into the dough. If the indentation stays, the dough has risen enough.
4. Divide and Shape the Rolls
- Punch down the risen dough gently to release the air.
- Turn the dough out onto a lightly floured surface and divide it into 9 equal pieces, using a kitchen scale for accuracy if you have one.
- Working with one piece at a time, cup your hand around the dough and roll it in small circles against the counter until it forms a tight, smooth ball.
- Place each shaped roll onto a parchment lined baking sheet, spacing them about 2 inches apart.
5. Let the Rolls Rise Again
- Cover the shaped rolls loosely with plastic wrap or a clean towel.
- Let them rest at room temperature for 20 to 30 minutes, until slightly puffy.
- While the rolls rest, preheat your oven to 425°F (220°C) and prepare the baking soda bath.
6. Prepare the Baking Soda Bath
- In a large stockpot, bring the 10 cups of water to a rolling boil.
- Carefully add the baking soda and the tablespoon of brown sugar, stirring to dissolve. The mixture will bubble up vigorously, so add it slowly.
- Reduce the heat slightly so the water maintains a gentle, steady boil rather than a violent one.
7. Bathe the Rolls
- Using a slotted spoon, carefully lower 2 to 3 rolls into the bath at a time, making sure not to overcrowd the pot.
- Let each roll simmer for 20 to 30 seconds, then flip it over and simmer for another 20 to 30 seconds on the other side.
- Lift the rolls out with the slotted spoon, letting excess liquid drip off, then return them to the parchment lined baking sheet.
- Repeat with the remaining rolls, working in small batches until all of them have been through the bath.
8. Score, Egg Wash, and Salt
- Using a sharp paring knife or a razor blade, cut a shallow X into the top of each roll, about ¼ inch (0.5 cm) deep.
- Brush each roll generously with the egg wash, using a pastry brush to make sure the entire surface is coated.
- Sprinkle the coarse pretzel salt evenly over the tops while the egg wash is still wet, so it sticks during baking.
9. Bake the Pretzel Rolls
- Place the baking sheet in the preheated 425°F (220°C) oven.
- Bake for 14 to 16 minutes, rotating the pan halfway through, until the rolls are a deep golden brown all over.
- Check that the internal temperature reads at least 190°F (88°C) with an instant read thermometer to confirm they’re fully baked.
10. Cool and Serve
- Transfer the baked rolls to a wire cooling rack.
- Let them cool for at least 10 minutes before slicing or serving, since the interior is still setting as it cools.
- Serve warm with butter, mustard, or your favorite dip.
Read Also: Homemade Bagel Recipe
Tips for Success
Getting consistent pretzel rolls comes down to a handful of small details that make a big difference in the final result.
Keep these tips in mind:
- Weigh your flour instead of scooping it, since too much flour leads to dense, dry rolls
- Don’t skip the baking soda bath, since it’s what gives the rolls their signature flavor and color, not just the egg wash
- Work quickly once the bath is ready, since the rolls can lose their shape if they sit in hot water too long
- Keep the bath at a gentle simmer rather than a rolling boil, so the rolls keep their shape
- Let the dough finish both rises fully, since underproofed dough won’t develop the same chew
This same gentle proofing process is something we also rely on for our Brioche, which depends on a slow, full rise for its soft texture.
Serving Suggestions
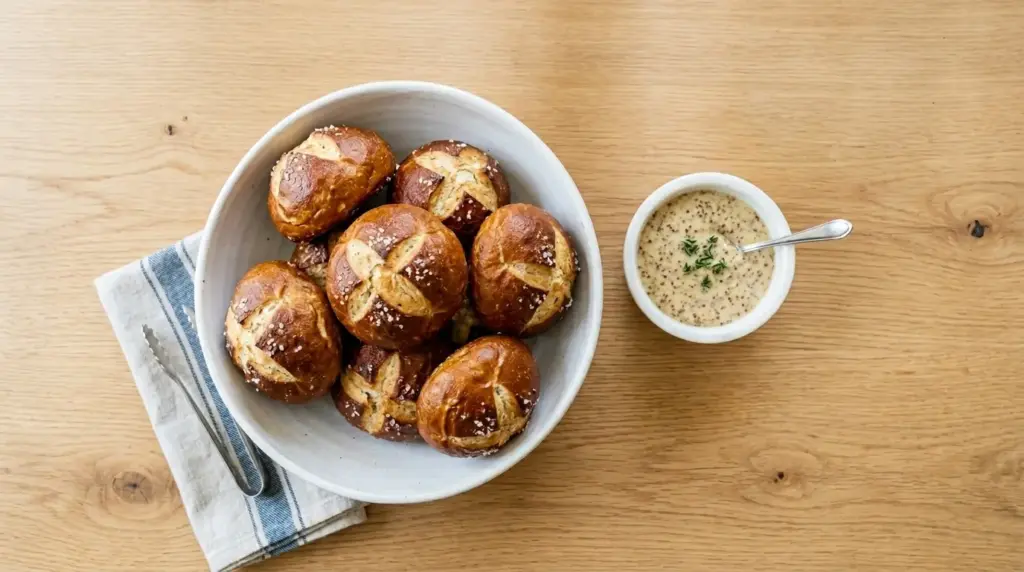
Pretzel rolls are flexible enough to show up at breakfast, lunch, or as a snack on game day.
They work just as well sliced for sandwiches as they do served whole alongside a bowl of soup.
Try serving them with:
- A warm bowl of Beer Cheese Soup for dipping
- Sliced deli meat and cheese, turned into a hearty sandwich
- A side of grainy mustard or honey mustard for dunking
- Soft butter and flaky salt for a simple breakfast option
- Sliced and toasted, then topped with eggs for brunch
Another favorite for game day spreads is our Buffalo Chicken Dip, which pairs perfectly with warm pretzel rolls for dunking.
Variations to Try
Once you’ve mastered the base recipe, there’s plenty of room to make these pretzel rolls your own.
A few small swaps in topping or shape can completely change the character of the finished roll.
Some variations worth trying:
- Sprinkle everything bagel seasoning instead of coarse salt for a savory, herby twist
- Stuff a cube of cheddar cheese into the center of each roll before shaping for a melty surprise inside
- Brush with melted butter and roll in cinnamon sugar right after baking for a sweet version
- Add finely chopped jalapeños and shredded cheese to the dough for a spicy, cheesy roll
- Mix in roasted garlic and chopped herbs for a savory, aromatic variation
If you love playing with toppings, our Everything Bagel Recipe is another great way to use that same seasoning blend.
Storage and Reheating
These pretzel rolls are best the day they’re baked, but they hold up well with a little planning.
Proper storage keeps the crust from getting soggy and the inside from drying out.
Here’s how to store and reheat them:
- Store cooled rolls in an airtight container or zip top bag at room temperature for up to 2 days
- Refrigerate for up to 5 days if you need them to last a bit longer
- Freeze baked and cooled rolls in a freezer safe bag for up to 3 months
- Reheat in a 350°F (175°C) oven for 5 to 7 minutes to restore the crisp crust
- Avoid the microwave, since it makes the crust soft and chewy in the wrong way
Our Italian Bread follows a similar storage timeline, since both breads rely on a crisp crust that’s best refreshed in the oven.
Nutritional Facts
These values are estimated per roll, based on a batch of 9 rolls, and will vary slightly depending on exact ingredients and portion sizes.
Approximate nutrition per roll:
- Calories: 220
- Carbohydrates: 38g
- Protein: 7g
- Fat: 5g
- Saturated Fat: 3g
- Sodium: 540mg
- Fiber: 1g
- Sugar: 2g
For comparison, our Whole Wheat Bread offers a similar serving size with a bit more fiber per slice.
Health Benefits of Key Ingredients
While pretzel rolls are very much a treat, a few of the ingredients do offer some nutritional upside worth knowing about.
Understanding what each ingredient brings to the table can help you feel good about enjoying them in moderation.
A few highlights:
- Bread flour provides protein and carbohydrates that supply steady energy
- Yeast is a natural source of B vitamins, which support metabolism
- Butter contributes small amounts of fat soluble vitamins like A and D
- Eggs in the wash add a small protein boost and help the rolls develop their golden color
- Baking soda itself contributes no calories and simply alters the surface chemistry of the dough
Our Multigrain Bread Recipe is a good option if you’re looking for a heartier, fiber rich bread to round out your baking rotation.
Frequently Asked Questions
1. Can I make pretzel rolls without a stand mixer?
Yes, you can absolutely knead this dough by hand. It will take about 10 to 12 minutes of kneading on a floured surface to reach the same smooth, elastic texture a stand mixer would give you.
2. Why do pretzel rolls need a baking soda bath?
The baking soda bath raises the pH on the surface of the dough, which speeds up browning and creates that classic chewy, slightly tangy pretzel crust. Skipping this step would leave you with rolls that taste more like plain dinner rolls than true pretzel rolls.
3. Can I use all purpose flour instead of bread flour?
All purpose flour will work in a pinch, though the rolls will be slightly less chewy since bread flour has a higher protein content. If that’s all you have on hand, the recipe will still turn out well.
4. Can I make the dough ahead of time?
Yes, you can let the dough complete its first rise, then refrigerate it overnight before shaping. Let it sit at room temperature for about 30 minutes before dividing and shaping, since cold dough is harder to work with.
5. Why did my pretzel rolls turn out pale instead of deep brown?
This usually means the baking soda bath wasn’t hot enough or the rolls didn’t spend enough time in it. Make sure the water is at a steady simmer and each roll gets a full 20 to 30 seconds per side.
This same troubleshooting logic applies to our Soft Dinner Rolls, where oven temperature plays a similarly big role in the final color of the crust.

Pretzel Rolls

Equipment
- Stand mixer with dough hook - or a large mixing bowl and wooden spoon for hand kneading
- Large 8 quart Stockpot - for the baking soda bath
- Half Sheet Pan - lined with parchment paper
- Slotted Spoon or Skimmer - for lifting the rolls from the bath
- Pastry brush - for the egg wash
- Kitchen scale - for accurate flour measurements (optional)
- Instant-read thermometer - to check water temperature and doneness (optional)
- Wire cooling rack
Ingredients
- 1.5 cups Warm Water - 360 ml, about 110°F (43°C)
- 2.25 teaspoons Active Dry Yeast - 1 packet, 7g
- 2 tablespoons Light Brown Sugar - 25g
- 3 tablespoons Unsalted Butter - 42g, melted and slightly cooled
- 4 cups Bread Flour - 480g, plus more for dusting
- 2 teaspoons Fine Sea Salt - 12g
- 1 tablespoon Diastatic Malt Syrup - 15 ml, optional, for extra flavor and color
For the Baking Soda Bath
- 10 cups Water - 2.4L
- 0.67 cup Baking Soda - 150g
- 1 tablespoon Brown Sugar - 15g
For Topping
- 1 large Egg - beaten with 1 tablespoon water
- 2 tablespoons Coarse Pretzel Salt - to 3 tablespoons
Instructions
- Activate the yeast by combining warm water, active dry yeast, and brown sugar. Let sit for 5-10 minutes until foamy.
- Mix and knead the dough by adding melted butter, malt syrup if using, sea salt, and bread flour. Knead for 7-8 minutes until smooth and elastic.
- Let the dough rise in a lightly oiled bowl for 60-75 minutes until doubled in size.
- Divide and shape the dough into 9 equal pieces, rolling each into a tight, smooth ball.
- Let the shaped rolls rest for 20-30 minutes until slightly puffy while preheating the oven to 425°F (220°C).
- Prepare the baking soda bath by bringing water to a boil, then adding baking soda and brown sugar, stirring to dissolve.
- Bathe the rolls in small batches, simmering each for 20-30 seconds per side, then return to the baking sheet.
- Score the top of each roll, brush with egg wash, and sprinkle generously with coarse pretzel salt.
- Bake at 425°F (220°C) for 14-16 minutes until deep golden brown, rotating the pan halfway through.
- Cool the rolls on a wire rack for at least 10 minutes before slicing or serving.
Notes
- Weigh your flour instead of scooping it, since too much flour leads to dense, dry rolls.
- Don’t skip the baking soda bath, since it’s what gives the rolls their signature flavor and color.
- Work quickly once the bath is ready, since the rolls can lose their shape if they sit in hot water too long.
- Keep the bath at a gentle simmer rather than a rolling boil, so the rolls keep their shape.
- Let the dough finish both rises fully, since underproofed dough won’t develop the same chew.
- Store cooled rolls in an airtight container at room temperature for up to 2 days.
- Freeze baked and cooled rolls in a freezer safe bag for up to 3 months.
- Reheat in a 350°F (175°C) oven for 5-7 minutes to restore the crisp crust.
- Avoid the microwave, since it makes the crust soft and chewy in the wrong way.
- Try variations like adding everything bagel seasoning, stuffing with cheddar cheese, or brushing with cinnamon sugar after baking.
Final Thoughts
Homemade pretzel rolls are one of those bakes that feel impressive but are genuinely simple once you understand the process.
The combination of a soft, chewy interior and that deep, salty crust makes them worth the extra step of the baking soda bath.
Give this pretzel rolls recipe a try this weekend, and don’t be surprised if it becomes a regular in your baking rotation.
If you make a batch, we’d love to hear how they turned out. Drop a comment below or share a photo, and pass this recipe along to a friend who loves fresh bread as much as you do.
Recommended:
- White Bread
- Ciabatta
- Classic Baguette
- Rosemary Focaccia
- New York Style Bagel
- Sourdough Bagel
- Dinner Rolls
- Cheese Ball
- Easy Naan Bread



