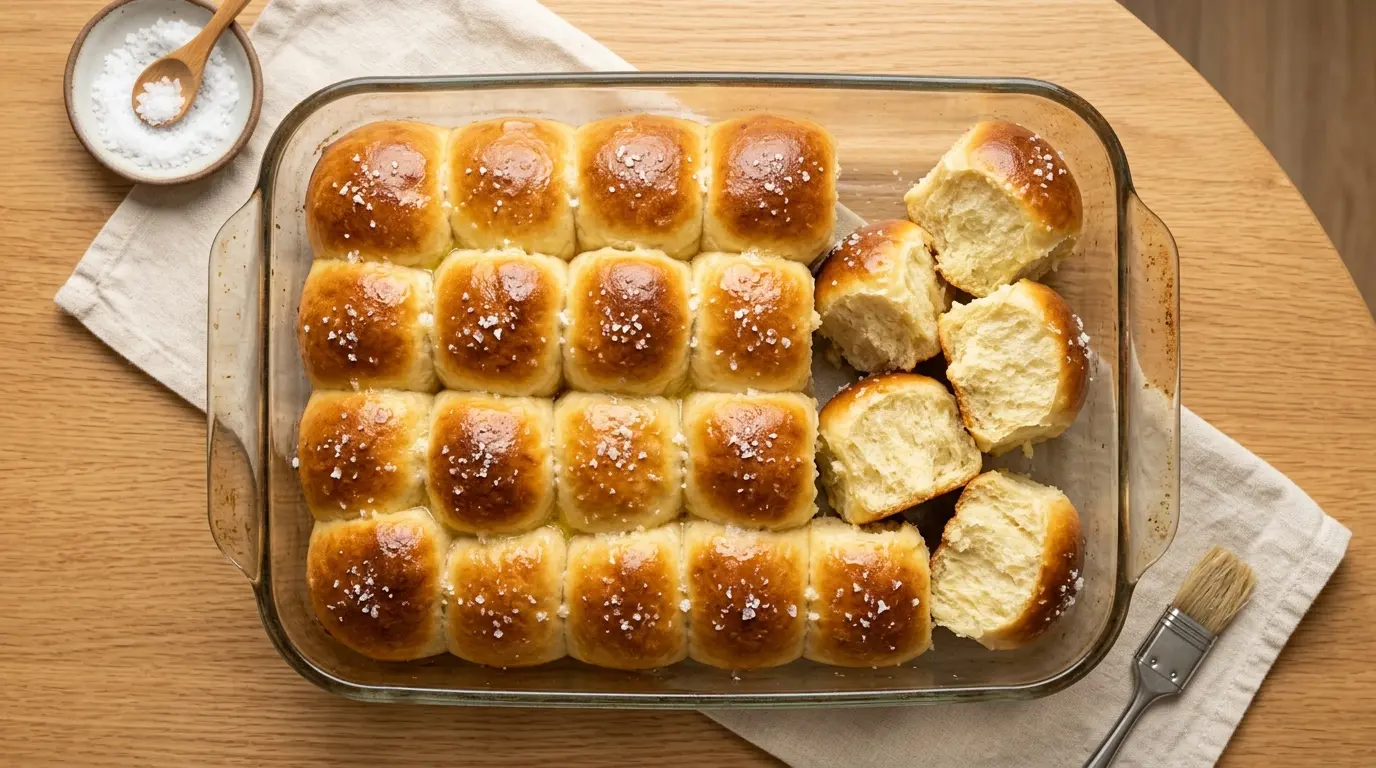
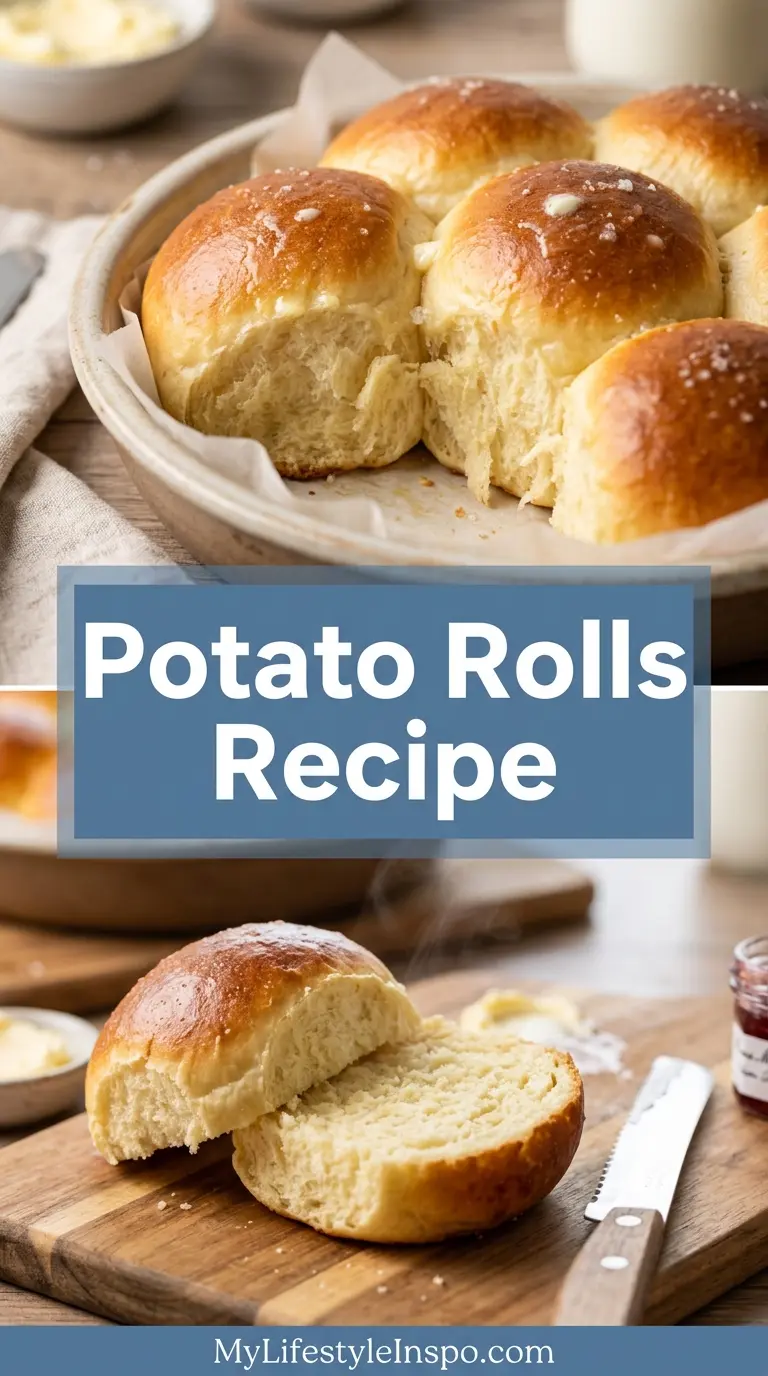
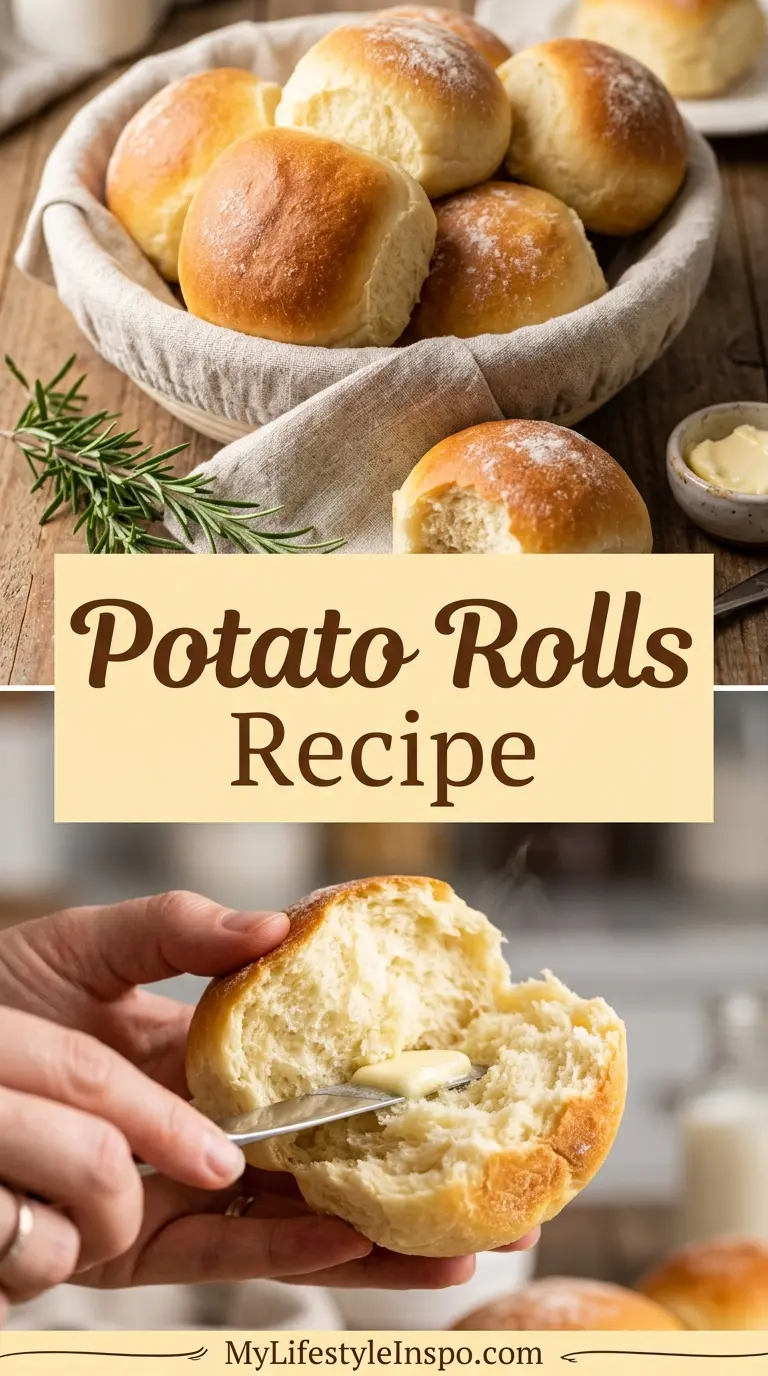
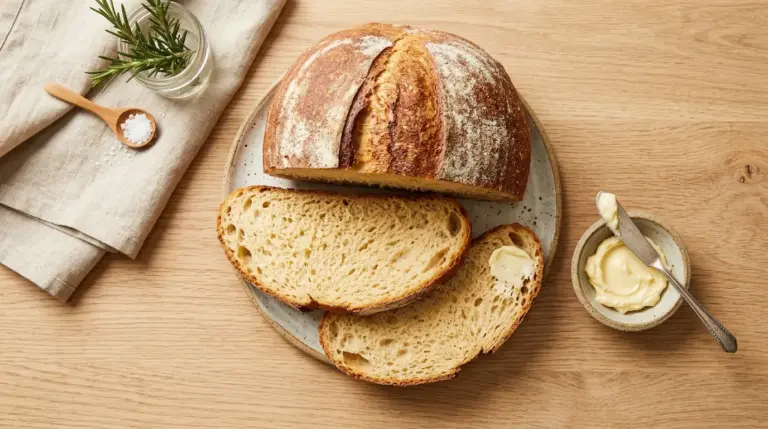
If you’ve been searching for the perfect potato rolls recipe, you’ve just found it. These rolls are everything a homemade bread should be: tender, slightly sweet, cloud-soft, and rich with buttery flavor that you simply can’t get from store-bought versions.
What makes potato rolls so special is the mashed potato folded right into the dough. The starch from the potato locks in moisture, keeps the crumb incredibly soft for days, and gives each roll a subtle, comforting sweetness that pairs beautifully with everything from a holiday turkey to a simple bowl of soup.
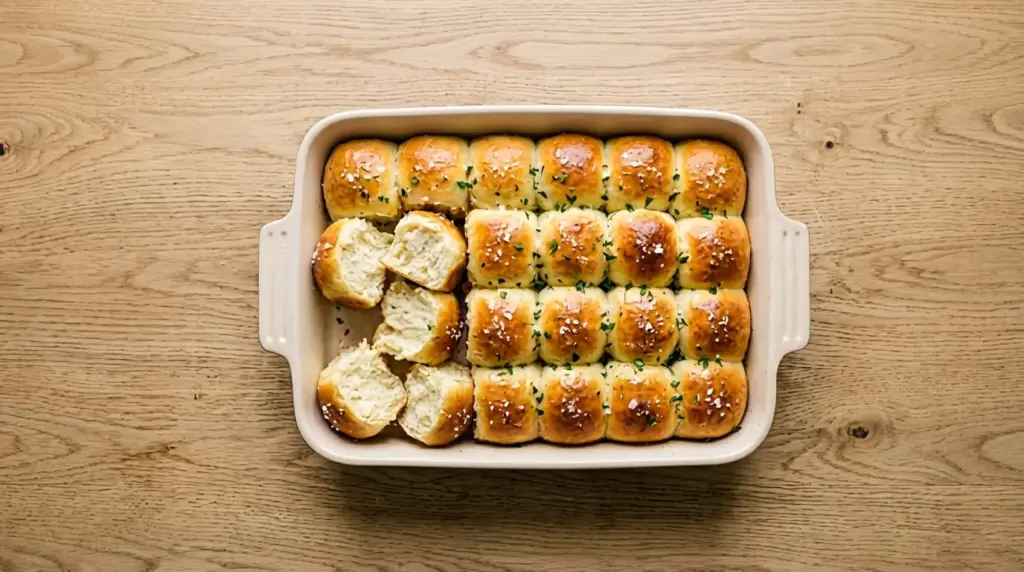
This recipe uses classic techniques and everyday ingredients, and the result is a batch of 24 golden, pillowy rolls that will disappear from the table in minutes.
If you love making homemade rolls from scratch, you’ll also want to check out this Dinner Rolls Recipe for another irresistible pull-apart classic.
Why You’ll Love This Potato Rolls Recipe
Potato rolls have a devoted fan base for very good reason: they stay soft longer than almost any other homemade roll you’ll bake.
Most dinner rolls start to harden by day two, but the potato in this dough acts as a natural moisture barrier, keeping the crumb tender and pillowy for up to four days at room temperature. That makes them fantastic for meal prepping or baking ahead for a big gathering.
They’re also remarkably forgiving to work with, even if you’re newer to yeast bread baking. The potato starch makes the dough smooth, slightly sticky, and easy to shape without much effort.
- The mashed potato adds moisture, tenderness, and a naturally soft crumb that lasts for days.
- The dough comes together with pantry staples you likely already have on hand.
- These rolls are endlessly versatile: serve them as dinner rolls, slider buns, or sandwich bread.
- They bake up beautifully golden with a gorgeous shine from the butter brushed on top.
- This recipe makes a generous batch of 24 rolls, perfect for feeding a crowd at Thanksgiving, Easter, or Sunday dinners.
- The dough can be made the night before and refrigerated, making fresh-baked rolls completely stress-free.
You might also enjoy making these Soft Dinner Rolls if you’re looking for another classic that’s just as delicious alongside any meal.
Ingredients
These potato rolls use simple, wholesome ingredients that work together to create that signature soft, pillowy texture. Using instant potato flakes (rather than freshly mashed potatoes) is a practical shortcut that most recipes endorse because the result is virtually identical and removes one extra cooking step.
- 1 cup (240 ml) whole milk
- 1/2 cup (113 g) unsalted butter, cut into cubes, plus extra for brushing
- 1/2 cup (100 g) granulated sugar
- 1 cup (60 g) instant potato flakes (or 1 cup of plain mashed potatoes, cooled)
- 1 1/2 teaspoons salt
- 2 1/4 teaspoons (1 packet / 7 g) active dry yeast
- 1/2 cup (120 ml) warm water (105-110°F / 40-43°C)
- 2 large eggs, room temperature
- 5 to 6 cups (625 to 750 g) all-purpose flour, plus more for dusting
Read Also: Sweet Dinner Rolls Recipe
Kitchen Equipment Needed
You don’t need any fancy gear to make these rolls, but having the right tools will make the process smoother and more enjoyable.
- Stand mixer with dough hook attachment (or a large mixing bowl and sturdy spoon for hand mixing)
- Large baking dish, 9×13 inch (or two 9-inch round cake pans)
- Small saucepan
- Measuring cups and spoons
- Kitchen thermometer (to check yeast water and milk temperature)
- Plastic wrap or a clean kitchen towel
- Pastry brush (for buttering the tops)
- Wire cooling rack
This recipe pairs beautifully with a drizzle of Sausage Gravy for a hearty, comforting breakfast spread.
Recommended Products for This Recipe
These are a few products that can make a real difference in your baking results, chosen for quality and performance.
1. KitchenAid Stand Mixer with Dough Hook
A stand mixer transforms yeast dough baking from a workout into a pleasure. The dough hook kneads the potato roll dough thoroughly and evenly, developing the gluten structure that gives these rolls their lift and chew. It’s a worthwhile investment for anyone who bakes regularly.
2. Instant Potato Flakes (Bob’s Red Mill or Similar)
High-quality instant potato flakes dissolve cleanly into the dough without any lumps, giving a smooth, even texture to every roll. Avoid flavored varieties and look for plain, unseasoned flakes so you control the salt and flavor yourself.
3. OXO Non-Stick 9×13 Baking Pan
A good-quality baking pan ensures even heat distribution, which means your rolls brown consistently on the bottom without over-baking at the edges. The non-stick surface also makes clean-up quick and easy.
4. Instant Read Kitchen Thermometer
Getting the water temperature right when activating yeast is the single most common reason rolls fail. An instant-read thermometer takes the guesswork out of it completely, and it doubles as a useful tool for any baking or cooking project.
Another crowd-pleasing bake to add to your repertoire is this beautiful Challah Recipe that’s braided, golden, and absolutely show-stopping.
Step-by-Step Instructions
Step 1: Activate the Yeast
- Measure 1/2 cup (120 ml) of warm water into a small bowl. Use a kitchen thermometer to confirm it reads between 105-110°F (40-43°C). Water that is too hot will kill the yeast; water that is too cool won’t activate it properly.
- Sprinkle 2 1/4 teaspoons of active dry yeast over the warm water.
- Add a pinch of sugar (about 1/4 teaspoon) to help feed the yeast and speed up activation.
- Stir gently and let the mixture sit undisturbed for 5 to 10 minutes. It should become foamy and bubbly on top. If it does not foam, the yeast is no longer active and should be replaced before proceeding.
Step 2: Scald the Milk and Melt the Butter
- Pour 1 cup (240 ml) of whole milk into a small saucepan and set it over medium heat.
- Watch the milk closely as it heats. You want to scald it, not boil it. Scalding means heating until small bubbles appear around the edges of the pan and a thin “skin” begins to form on the surface. This takes about 3 to 4 minutes.
- Remove the pan from the heat immediately and add the 1/2 cup (113 g) of cubed unsalted butter, 1/2 cup (100 g) of sugar, 1 cup (60 g) of instant potato flakes, and 1 1/2 teaspoons of salt directly to the hot milk.
- Stir well until the butter is fully melted and everything is combined. The mixture will look thick and smooth.
- Allow the milk mixture to cool until it reads between 110-120°F (43-49°C) on a thermometer. This is important: if it’s too hot when you add it to the yeast, it will kill the yeast.
Step 3: Combine the Wet Ingredients
- Transfer the cooled milk and potato mixture to the bowl of your stand mixer (or a large mixing bowl if mixing by hand).
- Add the foamy yeast mixture and stir to combine.
- Crack in 2 large eggs, making sure they are at room temperature for better incorporation.
- Mix briefly with a spatula or wooden spoon until everything is loosely combined before adding the flour.
Step 4: Add the Flour and Knead the Dough
- Begin adding the all-purpose flour, one cup at a time, mixing on low speed with the dough hook after each addition.
- Start with 5 cups (625 g) of flour and assess the dough. It should start to pull away from the sides of the bowl but remain slightly sticky to the touch. This is the correct consistency for soft potato rolls.
- Add additional flour a few tablespoons at a time if the dough is too sticky to manage, but resist adding more than necessary. Over-flouring is the most common reason rolls turn out dense.
- Once the dough comes together, knead it on medium speed for 6 to 8 minutes (or by hand on a lightly floured surface for 10 minutes). The dough is ready when it’s smooth, elastic, and springs back slightly when you poke it.
Step 5: First Rise (Bulk Fermentation)
- Lightly grease a large bowl with oil or nonstick spray.
- Transfer the dough into the bowl and turn it once to coat all sides with the oil.
- Cover the bowl tightly with plastic wrap or a clean kitchen towel.
- Place the bowl somewhere warm and draft-free. A great trick is to place it in a cold oven with just the oven light on, which creates a gentle warmth. Alternatively, set it near (not on) a warm stove.
- Let the dough rise for 1 to 1.5 hours, or until it has doubled in size. The timing will vary based on the temperature of your kitchen.
Step 6: Shape the Rolls
- Lightly grease a 9×13 inch (23×33 cm) baking dish. Alternatively, use two 9-inch (23 cm) round cake pans.
- Punch down the risen dough gently with your fist to release the gas.
- Turn the dough out onto a lightly floured surface.
- Divide the dough into 24 equal pieces. For consistency, use a kitchen scale and aim for about 50-55 grams per piece.
- To shape each roll, take one piece of dough and cup your hand over it on the countertop. Use a circular motion, pressing lightly, to roll it into a smooth ball with a taut surface on top. This technique is called “rounding” and creates rolls with good structure.
- Place the shaped rolls into the prepared baking dish, spacing them just slightly apart so they will rise and touch each other during the second rise, creating that classic pull-apart effect.
Step 7: Second Rise (Proofing)
- Cover the pan loosely with plastic wrap that has been lightly spritzed with cooking spray (so it doesn’t stick to the dough as the rolls rise).
- Let the rolls proof at room temperature for 45 minutes to 1 hour, until they have puffed up noticeably and are touching each other.
- While the rolls are proofing, preheat your oven to 375°F (190°C) so it is fully heated by the time the rolls are ready.
Step 8: Bake the Rolls
- Uncover the rolls carefully and slide the pan into the center rack of the preheated oven.
- Bake for 18 to 22 minutes, until the tops are deep golden brown and the rolls sound hollow when tapped.
- About 3 to 4 minutes before the rolls are done, brush the tops generously with 2 to 3 tablespoons of melted unsalted butter. This gives them a gorgeous, glossy finish and deepens their color.
- Remove the rolls from the oven and let them cool in the pan for 5 minutes before serving. They’re at their absolute best served warm.
For another wonderful homemade bread to add to your baking rotation, try this Brioche Recipe, which has a similar richness and buttery depth.
Tips for Success
Getting the best results with this potato rolls recipe comes down to a handful of simple techniques that experienced bread bakers swear by.
- Check your yeast first. Always proof your yeast in warm water before adding it to the rest of the ingredients. If it doesn’t foam, replace it. Old or dead yeast is the number one reason rolls don’t rise.
- Temperature is everything. Use a thermometer to check both the yeast water (105-110°F / 40-43°C) and the milk mixture before combining them. Too hot kills yeast; too cool slows or stops fermentation.
- Don’t over-flour the dough. Soft rolls require soft dough. The dough should feel slightly tacky, not dry. Adding too much flour will result in denser, heavier rolls.
- Let the second rise happen fully. Rolls that haven’t proofed long enough will be dense and small. They should look noticeably puffed and pillowy before going into the oven.
- Brush butter at the end of baking. Adding butter too early causes it to over-brown. Apply it in the last 3 to 4 minutes of baking for a golden, buttery finish without burning.
- Room-temperature eggs matter. Cold eggs can cool down the dough mixture and slow yeast activity. Take them out of the fridge 30 minutes before you start.
Read Also: Sourdough Discard Dinner Rolls Recipe
Serving Suggestions
These potato rolls are one of the most versatile baked goods you can have on your table, suited to everything from weeknight dinners to holiday feasts.
Serve them warm alongside a hearty bowl of Ham and Potato Soup for a cozy, comfort-food pairing that couldn’t be more satisfying.
- Split the rolls and fill them with pulled pork, BBQ Sauce, and coleslaw for incredible sliders at your next cookout.
- Serve alongside a holiday turkey, roast chicken, or prime rib with a generous pot of gravy for soaking.
- Use as soft sandwich buns for chicken salad, egg salad, or a classic burger with Burger Sauce.
- Pair with a simple salad and soup for a weeknight dinner that feels special without much effort.
- Serve with softened butter and a drizzle of honey as a simple but deeply satisfying breakfast treat.
- Slice leftover rolls in half and toast them the next morning for a breakfast that rivals any bakery.
Variations to Try
Once you’ve mastered the basic potato rolls recipe, it’s easy to customize them with simple additions that take the flavor in new directions.
- Garlic herb rolls: Add 2 teaspoons of garlic powder and 1 tablespoon of finely chopped fresh rosemary or thyme to the dough in step 4. Brush the tops with garlic butter instead of plain butter right before serving.
- Cheesy potato rolls: Fold in 1 cup (100 g) of shredded sharp cheddar cheese during the final stages of kneading. The cheese melts into the dough and creates irresistibly savory rolls.
- Sweet honey potato rolls: Reduce the sugar to 1/4 cup and replace the butter glaze with a honey butter glaze: mix 2 tablespoons of melted butter with 1 tablespoon of honey and brush it over the rolls as soon as they come out of the oven.
- Overnight potato rolls: After shaping the rolls in step 6, cover them tightly and refrigerate overnight (up to 12 hours). The next morning, let them come to room temperature and rise for about 1 hour, then bake as directed.
- Potato rolls with instant mashed potatoes: Swap the potato flakes for a cup of cooled, plain leftover mashed potatoes. The flavor is slightly richer and the rolls are even more moist.
For a festive, pull-apart bread experience that the whole table will love, this Monkey Bread Recipe is absolutely worth trying next.
Storage and Reheating
One of the best things about potato rolls is how well they keep compared to most homemade breads, thanks to the moisture-retaining potato.
- Room temperature: Store the cooled rolls in an airtight container or zip-top bag at room temperature for up to 4 days. They stay remarkably soft due to the potato in the dough.
- Freezer: For longer storage, arrange the fully cooled rolls in a single layer on a baking sheet and freeze until solid, about 2 hours. Transfer to a freezer-safe bag and freeze for up to 2 months.
- Reheating from room temperature: Wrap individual rolls in a damp paper towel and microwave for 15 to 20 seconds until warm and soft again.
- Reheating from frozen: Thaw frozen rolls at room temperature for 1 to 2 hours, then reheat in a 325°F (160°C) oven for 8 to 10 minutes, or microwave them wrapped in a damp paper towel for 30 to 40 seconds.
- Make-ahead baking tip: You can bake the rolls, let them cool completely, and freeze them weeks ahead of a holiday dinner. Reheat in a 325°F oven covered with foil for 10 to 12 minutes, then uncover for 2 to 3 minutes to refresh the tops.
You might also enjoy making this Pull Apart Garlic Bread for a cheesy, garlicky side that’s always a hit.
Nutritional Facts
The following values are approximate per roll, based on a batch of 24 rolls:
| Nutrient | Per Roll (Approx.) |
|---|---|
| Calories | 195 kcal |
| Total Fat | 5 g |
| Saturated Fat | 3 g |
| Cholesterol | 28 mg |
| Sodium | 160 mg |
| Total Carbohydrates | 32 g |
| Dietary Fiber | 1 g |
| Sugars | 5 g |
| Protein | 5 g |
Nutritional values will vary depending on exact ingredient brands, roll size, and any variations you make to the recipe. Values are calculated using whole milk and unsalted butter as listed in the ingredients.
Another comforting potato dish worth exploring is this classic Potato Salad Recipe, which makes the perfect companion at any cookout or picnic.
Health Benefits of Key Ingredients
While these rolls are certainly an indulgence, a few of their key ingredients do bring some genuine nutritional value to the table.
These rolls aren’t just comforting to eat; some of their star ingredients offer real, everyday nutritional benefits worth knowing about.
- Potatoes are an excellent source of vitamin C, potassium, and vitamin B6. They provide complex carbohydrates for sustained energy and are naturally gluten-free in their pure form.
- Eggs contribute high-quality protein and important nutrients including choline (essential for brain health), B vitamins, and fat-soluble vitamins A, D, E, and K.
- Milk provides calcium, phosphorus, and vitamin D, all of which are important for bone strength and density. Whole milk also adds beneficial fats that keep you feeling satisfied.
- Butter in moderate amounts contributes fat-soluble vitamins A and E, and the short-chain fatty acids in butter may support gut health.
- All-purpose flour provides carbohydrates as the primary energy source and contributes small amounts of iron, B vitamins, and dietary fiber when not over-processed.
For another potato-focused dish that highlights the versatility of this nutritious vegetable, this Garlic Mashed Potatoes Recipe is creamy, rich, and endlessly satisfying.
Frequently Asked Questions
1. Can I use real mashed potatoes instead of instant potato flakes?
Yes, absolutely. Leftover plain mashed potatoes work beautifully in this recipe. Use 1 cup of cooled, unseasoned mashed potatoes in place of the instant flakes. Make sure they aren’t too watery or heavily seasoned, as that can affect the flavor and texture of the dough. Plain, thick mashed potatoes give the richest, most authentic flavor.
2. Why didn’t my rolls rise?
The most common culprits are inactive yeast or incorrect liquid temperatures. If your yeast doesn’t foam within 10 minutes of proofing, it needs to be replaced. If your milk mixture was too hot when you added it to the yeast, it may have killed the culture. Always use a thermometer to check temperatures before combining liquids. A cold kitchen can also significantly slow the rise, so find a warm, draft-free spot for proofing.
3. How far ahead can I make potato rolls?
You can make these rolls up to two months ahead by baking them fully, cooling completely, and freezing in an airtight bag. For same-day freshness, you can also shape the rolls the night before, refrigerate covered, and let them come to room temperature before proofing and baking the next day. Either method works well for holiday prep.
4. Can I make these potato rolls without a stand mixer?
Yes, you can mix and knead by hand. Combine the wet ingredients in a large bowl, then add the flour gradually, stirring with a wooden spoon or Danish dough whisk until it becomes too stiff to stir. Turn the dough onto a lightly floured surface and knead by hand for 10 to 12 minutes, until smooth and elastic. It takes more effort, but the results are just as good.
5. Can I make this recipe gluten-free?
Standard potato rolls are not gluten-free because they rely on all-purpose flour for structure. To make a gluten-free version, use a high-quality gluten-free bread flour blend (1:1 ratio) and add 1 teaspoon of xanthan gum if it isn’t already included in the blend. The texture will be slightly different but still soft and delicious. You might also love this Gluten Free Dinner Rolls Recipe which was developed specifically for gluten-free baking.
Final Thoughts
This potato rolls recipe is the kind of bake you’ll come back to again and again, for big holiday tables and quiet Sunday dinners alike.
The combination of mashed potato, rich butter, and a touch of sweetness creates rolls that are truly unforgettable: soft, pillowy, golden, and deeply satisfying in every bite.
If you try this recipe, we’d love to hear how it went! Drop a comment below to share your experience, or tag us in your photos so we can see your beautiful batch. Happy baking!
Recommended:
- Pumpkin Roll Recipe
- Keto Dinner Rolls Recipe
- Buttermilk Bread Recipe
- Sandwich Bread Recipe
- Homemade Biscuit Recipe
- Buttermilk Biscuit Recipe
- Sourdough Discard Rolls Recipe
- Creamy Mashed Potatoes Recipe
- Roasted Potatoes Recipe
- Cheesy Garlic Bread Recipe
