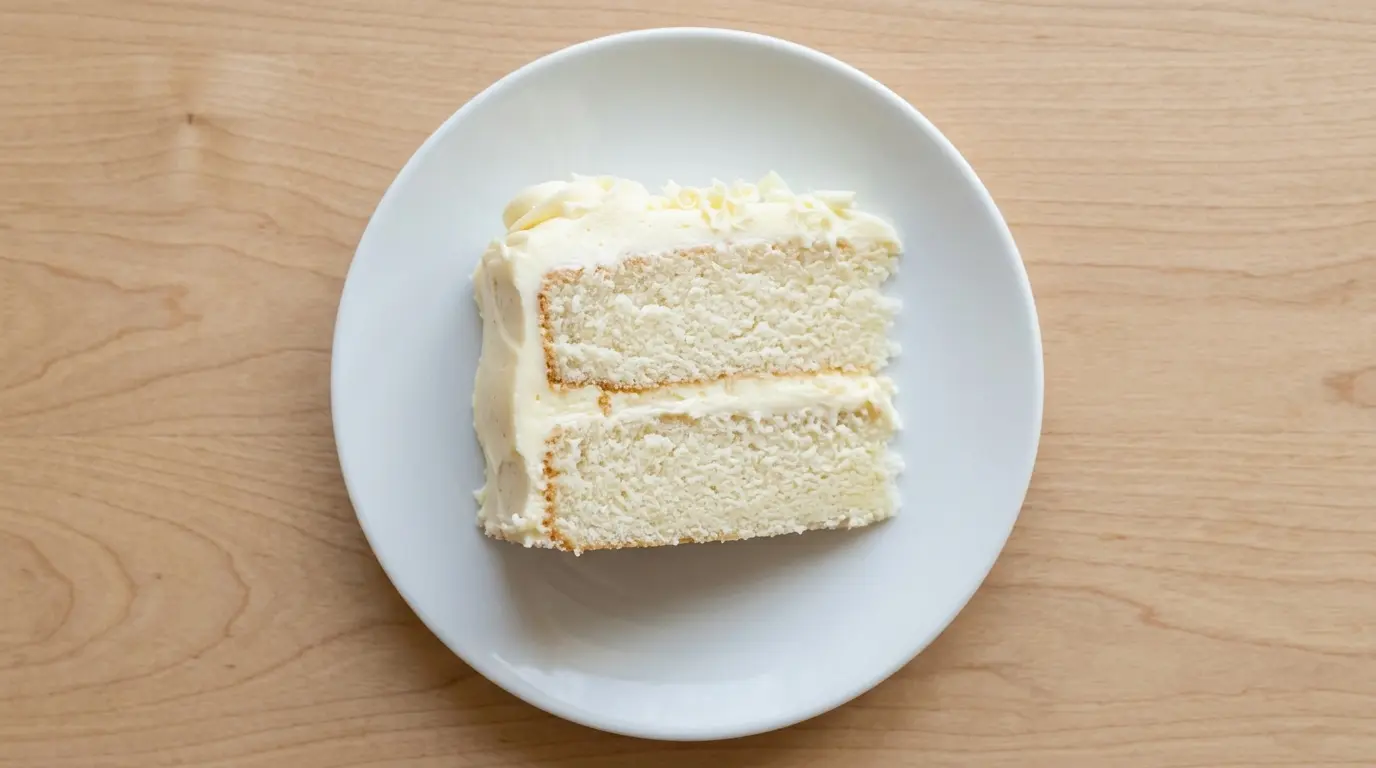
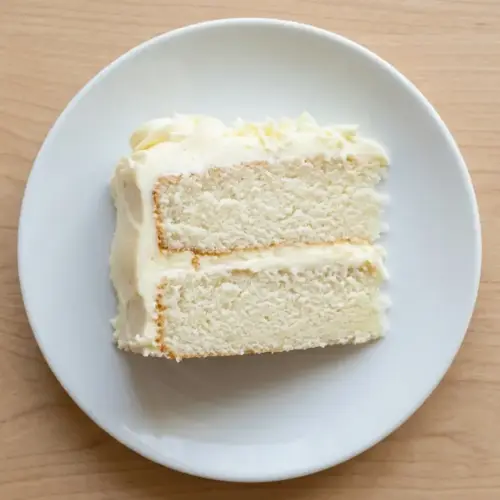
If you’ve never made a white velvet cake recipe before, you’re in for a real treat. This cake is the elegant, snow-white cousin of the classic red velvet, and it delivers the same tender, impossibly soft crumb, without a drop of food coloring.
The secret to its velvety texture lies in buttermilk, cake flour, and egg whites, a trio of ingredients that work together to create a cake that practically melts on your tongue.
It’s lighter than a standard white cake, more flavorful than a plain vanilla cake, and just sophisticated enough to feel special for any occasion.
The traditional frosting pairing is a silky cream cheese frosting or classic ermine (flour-based) buttercream, both of which complement the subtle tang of the buttermilk beautifully.
This recipe walks you through every step of the process, from mixing the batter using the reverse creaming method to frosting and serving a stunning two-layer cake that looks like it came straight from a bakery.
For more elegant layer cakes to add to your repertoire, you might also love this Red Velvet Cake that started the velvet cake tradition.
Why You’ll Love This White Velvet Cake Recipe
White velvet cake is one of those recipes that looks impressive but is surprisingly approachable for home bakers of all skill levels.
The reverse creaming method used here results in a tighter, finer crumb than traditional creaming, and it also means less doming, so your layers stack beautifully without needing to be trimmed.
Because it uses egg whites only (no yolks), the cake bakes up pure white inside and out, making it a stunning base for any frosting or decoration you choose.
The buttermilk adds a gentle tang that makes the cake taste more complex and interesting than a plain white cake, without being overpowering.
It works equally well for birthday cakes, wedding cakes, or an elegant weekend bake you just want to enjoy with a cup of tea.
Here’s a quick look at why this cake earns a permanent spot in your baking rotation:
- Pure white crumb that looks stunning when sliced
- Ultra-moist and tender texture thanks to buttermilk and cake flour
- Fine, even crumb that layers and stacks with minimal fuss
- Subtle tang that makes every bite interesting
- Pairs with virtually any frosting, from cream cheese to ermine buttercream
- Perfect for celebrations, birthdays, and special occasions
- No food coloring needed for a striking, elegant appearance
- Can be customized easily with fillings like lemon curd or raspberry jam
You might also enjoy this Lemon Velvet Cake Recipe for a bright, citrusy twist on the same soft, velvety base.
Ingredients
This white velvet cake uses straightforward pantry staples, but the ratios and a few key specialty items are what make it special. Cake flour and buttermilk are non-negotiable for that signature texture, so avoid substituting them if you can help it.
For the Cake:
- 2 1/2 cups (300g) cake flour
- 1 1/2 cups (300g) granulated sugar
- 1 tablespoon baking powder
- 1/2 teaspoon baking soda
- 1/2 teaspoon salt
- 1/2 cup (115g) unsalted butter, softened to room temperature
- 1 cup (240ml) buttermilk, room temperature, divided
- 1/4 cup (60ml) neutral oil (vegetable or canola)
- 4 large egg whites, room temperature
- 2 teaspoons pure vanilla extract
- 1/2 teaspoon almond extract
- 1 teaspoon white vinegar
For the Cream Cheese Frosting:
- 8 oz (225g) full-fat cream cheese, softened
- 1/2 cup (115g) unsalted butter, softened
- 3 1/2 cups (420g) powdered sugar, sifted
- 1 teaspoon pure vanilla extract
- 1-2 tablespoons heavy cream (to adjust consistency)
Read Also: Cream Cheese Frosting Recipe
Kitchen Equipment Needed
Having the right tools makes this cake much easier to execute, especially when it comes to achieving that smooth, even crumb and a level stack.
- Stand mixer with paddle attachment (or a hand mixer)
- Two 8-inch (20cm) round cake pans, at least 2 inches deep
- Parchment paper rounds
- Large mixing bowls
- Small mixing bowl
- Kitchen scale (recommended for accuracy)
- Whisk
- Rubber spatula
- Offset spatula for frosting
- Wire cooling racks
- Cake turntable (optional but helpful for frosting)
- Sieve or fine mesh strainer for sifting
- Measuring cups and spoons
For a buttery, cloud-like cake crumb every time, try this Vanilla Buttercream Frosting Recipe as an alternative frosting option.
Recommended Products for This Recipe
These are products chosen based on quality and the genuine difference they make in the final outcome of your white velvet cake.
1. King Arthur Cake Flour
Cake flour has a lower protein content than all-purpose flour, which is precisely what gives white velvet cake its signature delicate crumb. King Arthur’s cake flour is finely milled and bleached to perfection, ensuring your cake comes out soft, white, and tender every single time.
2. Nielsen-Massey Pure Vanilla Extract
When a cake relies heavily on vanilla for flavor, the quality of your extract matters. Nielsen-Massey uses a cold extraction process that preserves the full, complex flavor of vanilla beans, giving your white velvet cake a rich, bakery-quality taste you can’t get from imitation extracts.
3. Fat Daddio’s Round Cake Pans
Even, straight-sided cake layers start with the right pans. Fat Daddio’s anodized aluminum pans distribute heat evenly, prevent hot spots, and release cakes cleanly every time. The 8-inch size is perfect for this recipe and gives you tall, impressive layers.
4. Ateco Offset Spatula
A good offset spatula is the difference between a lumpy frosting job and a smooth, professional finish. The angled blade lets you spread frosting evenly across the top and sides of your cake without your hand getting in the way.
5. Wilton Cake Decorating Turntable
A turntable makes frosting a layer cake so much easier, especially if you want smooth sides. Being able to rotate the cake as you work means you can apply consistent pressure and get a polished result without awkwardly repositioning your board.
Another favorite for special occasions: Pink Velvet Cake Recipe
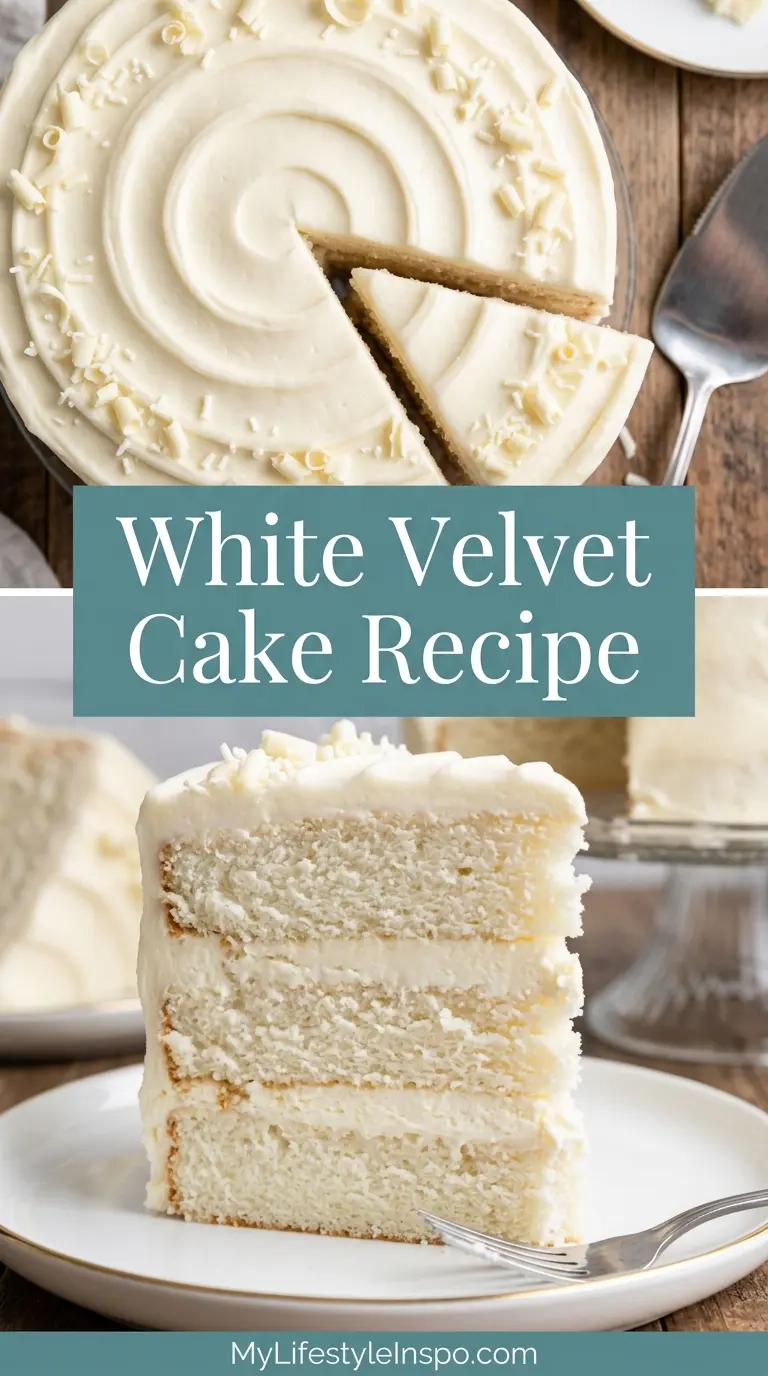
Step-by-Step Instructions
Step 1: Prepare Your Pans and Preheat the Oven
- Preheat your oven to 335°F (168°C). A slightly lower temperature than 350°F helps the cake bake evenly without doming.
- Grease two 8-inch round cake pans thoroughly with butter or baking spray, making sure to coat the sides as well as the bottom.
- Line the bottom of each pan with a round of parchment paper, then lightly grease the parchment as well.
- Set the prepared pans aside while you mix the batter.
Step 2: Mix the Dry Ingredients
- In the bowl of your stand mixer (or a large mixing bowl if using a hand mixer), combine the cake flour, granulated sugar, baking powder, baking soda, and salt.
- Whisk these dry ingredients together by hand for about 30 seconds to distribute them evenly before you turn on the mixer.
- This pre-whisking step ensures there are no clumps of leavening that could cause uneven rising in your finished cake.
Step 3: Incorporate the Butter (Reverse Creaming Method)
- Add the softened butter to the dry ingredient mixture in the mixer bowl.
- Mix on low speed with the paddle attachment until the mixture resembles coarse, damp sand. This should take about 1 to 2 minutes.
- The butter coats the flour particles, which limits gluten development and is the key reason white velvet cake has such a fine, tight crumb.
- Make sure the butter is truly at room temperature. Cold butter won’t incorporate properly, and melted butter will make the batter greasy.
Step 4: Prepare the Wet Ingredients
- In a separate medium bowl or large measuring cup, combine 3/4 cup (180ml) of the buttermilk, the neutral oil, vanilla extract, almond extract, and white vinegar.
- In a small bowl, whisk the 4 egg whites until they are frothy and slightly aerated. You are not whipping them to stiff peaks, just loosening them up so they incorporate smoothly.
- Add the frothy egg whites to the buttermilk mixture and stir gently to combine.
Step 5: Combine Wet and Dry Ingredients (First Addition)
- With the mixer running on low speed, slowly pour the remaining 1/4 cup (60ml) of buttermilk (not the full wet mixture) into the butter-flour mixture.
- Once added, increase the speed to medium and mix for about 1 minute. The batter will start to come together and look slightly thick.
- This initial buttermilk addition helps build the batter’s structure before the full wet ingredients go in.
Step 6: Add the Full Wet Ingredient Mixture
- With the mixer on low speed, gradually pour in the buttermilk and egg white mixture in a slow, steady stream.
- Once all the liquid has been added, scrape down the bottom and sides of the bowl with a rubber spatula to make sure nothing is hiding underneath.
- Increase the speed to medium and beat the batter for a full 2 minutes. This step is important and slightly different from most cake recipes. The extended beating helps build structure in this reverse-creamed batter. Do not skip or shorten it.
- After 2 minutes, stop the mixer, scrape down the bowl again, and give it a brief final mix to incorporate any remaining residue.
Step 7: Divide and Bake
- Divide the batter evenly between the two prepared cake pans. Use a kitchen scale for the most accurate split (roughly 650-700g per pan).
- Tap each pan gently on the counter a few times to release any large air bubbles.
- Place both pans on the center rack of your preheated oven. If your oven runs hot or has uneven heat, rotate the pans halfway through baking.
- Bake for 28 to 35 minutes, until the tops are set and a toothpick inserted in the center comes out clean with no wet batter (a few moist crumbs are fine).
- The cake should just barely begin to pull away from the edges of the pan when it’s done.
Step 8: Cool the Cakes
- Remove the pans from the oven and place them on wire cooling racks.
- Allow the cakes to cool in the pans for 15 minutes before attempting to remove them.
- Run a thin spatula or butter knife around the edges to loosen, then invert each layer onto the wire rack.
- Peel off the parchment paper and allow the cakes to cool completely at room temperature before frosting. This takes at least 1 hour. Frosting a warm cake will cause the frosting to melt and slide.
Step 9: Make the Cream Cheese Frosting
- In the bowl of your stand mixer fitted with the paddle attachment, beat the softened cream cheese and softened butter together on medium-high speed until the mixture is completely smooth and fluffy, about 2 minutes.
- Reduce the speed to low and gradually add the sifted powdered sugar, about 1 cup at a time, mixing well between each addition to prevent a sugar cloud.
- Add the vanilla extract and 1 tablespoon of heavy cream. Increase the speed to medium-high and beat for another 1 to 2 minutes until the frosting is light and spreadable.
- If the frosting seems too thick, add another tablespoon of cream. If it seems too loose, add a bit more powdered sugar. The frosting should hold its shape but spread easily.
Step 10: Assemble and Frost the Cake
- Place the first cooled cake layer on your serving plate or cake board, flat side down.
- Add a generous amount of cream cheese frosting to the top of the first layer, about 3/4 to 1 cup, and spread it evenly to the edges using your offset spatula.
- Carefully place the second cake layer on top, flat side up. Having the flat side facing up gives you an even surface to frost.
- Apply a thin crumb coat of frosting all over the outside of the cake. This is a very thin layer that seals in any loose crumbs. Refrigerate the crumb-coated cake for 15 to 20 minutes to set.
- Apply the final, thicker layer of frosting to the top and sides of the cake, smoothing as you go. Use a cake turntable if you have one for the smoothest result.
- Decorate as desired with sprinkles, white chocolate shavings, or fresh fruit.
Read Also: White Cake Recipe
Tips for Success
A few small adjustments can make a noticeable difference in your finished white velvet cake, especially if this is your first time using the reverse creaming method.
- Use room temperature ingredients. Cold butter, cold eggs, and cold buttermilk don’t incorporate properly and can cause a dense, uneven crumb. Pull everything out of the fridge at least 1 hour before baking.
- Measure flour correctly. Spoon the flour into your measuring cup and level it off. Scooping directly from the bag packs in extra flour and leads to a dry, heavy cake. Even better, use a kitchen scale.
- Don’t skip the full 2-minute mix. This is the step most people are tempted to rush. The extended beating is what gives the batter its smooth, emulsified texture and the cake its fine crumb.
- Don’t open the oven early. Wait until at least the 25-minute mark before checking the cake. Opening the oven door too early can cause the layers to sink in the middle.
- Cool completely before frosting. Even slightly warm cake layers will cause the frosting to melt. If you’re short on time, pop the layers in the fridge for 30 minutes to speed up cooling.
- Use a crumb coat. This thin first layer of frosting traps any crumbs and gives you a clean, professional finish on the final coat.
Another elegant layer cake to try: Italian Cream Cake Recipe
Serving Suggestions
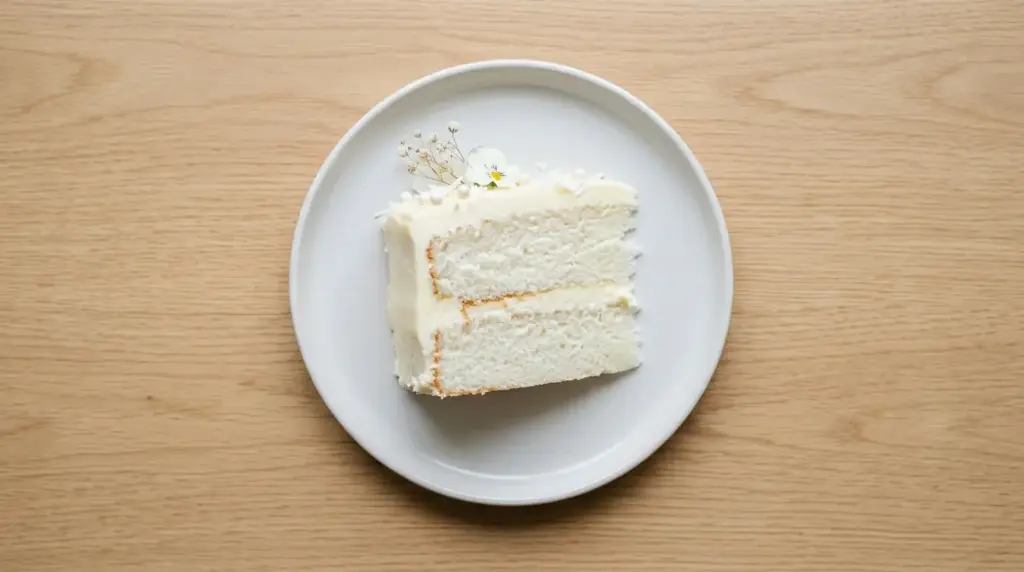
White velvet cake is a naturally elegant dessert that pairs well with a range of accompaniments, from fresh fruit to dessert sauces and complementary drinks.
Serve it at room temperature for the best flavor and texture. Cold cake straight from the fridge tends to taste denser and drier than it actually is. Pull it out 30 to 45 minutes before slicing.
Here are some great ways to serve and accompany your white velvet cake:
- Pair with a cup of coffee or a latte for a classic afternoon treat
- Serve alongside a scoop of Vanilla Bean Ice Cream for a show-stopping dessert plate
- Top individual slices with a drizzle of Fresh Strawberry Sauce for a beautiful color contrast
- Add a spoonful of Lemon Curd between the layers or alongside slices for a bright, citrusy element
- Serve at birthday parties, bridal showers, or baby showers where a classic, crowd-pleasing cake is always a hit
- Pair with hot tea, champagne, or sparkling water for a more refined dessert experience
Variations to Try
Once you’ve mastered the classic white velvet cake, there are so many directions you can take it. The base batter is incredibly versatile and holds up beautifully with added flavors and different frosting pairings.
- Lemon White Velvet Cake: Add 2 teaspoons of fresh lemon zest to the batter and swap the almond extract for lemon extract. Pair with a lemon buttercream or fill with lemon curd.
- Funfetti White Velvet Cake: Fold 1/3 cup of rainbow sprinkles into the finished batter just before pouring into pans. Use only jimmies (the long, cylindrical kind) since confetti sprinkles bleed color into the batter.
- Coconut White Velvet Cake: Replace 1/4 cup of the buttermilk with full-fat coconut milk and fold in 1/2 cup of sweetened shredded coconut. Frost with a coconut buttercream.
- Raspberry Jam Filled: Spread a thin layer of raspberry jam over the cream cheese frosting on the bottom layer before stacking. The bright berry flavor is a beautiful contrast to the creamy frosting.
- Ermine Frosting (Traditional): Swap the cream cheese frosting for a classic ermine buttercream made from a cooked flour-and-milk base beaten into softened butter. Less sweet than American buttercream and the most traditional pairing for velvet cakes.
If you love the purple version of this classic, the Purple Velvet Cake Recipe is a stunning option for special occasions.
Storage and Reheating
Proper storage keeps your white velvet cake moist and fresh for several days after baking, so you can make it ahead or enjoy leftovers without any drop in quality.
- Room temperature: Store the frosted cake in a cake dome or under an inverted large bowl at room temperature for up to 2 days in a cool, dry environment. The cream cheese frosting is stable at room temperature for up to 8 hours, but for longer storage, refrigerate.
- Refrigerator: Store tightly covered or in an airtight container in the fridge for up to 5 days. Bring slices to room temperature for 30 minutes before serving for the best texture and flavor.
- Freezer (unfrosted layers): Wrap each cooled cake layer tightly in plastic wrap, then in a layer of aluminum foil. Freeze for up to 3 months. Thaw overnight in the refrigerator before frosting.
- Freezer (frosted slices): Place individual slices on a parchment-lined tray and freeze uncovered until solid (about 1 hour), then transfer to a zip-lock bag. Freeze for up to 2 months. Thaw in the fridge overnight.
- Reheating: White velvet cake is best served at room temperature and does not need to be reheated. If refrigerated, simply allow slices to sit at room temperature for 30 to 45 minutes before enjoying.
For more delicious baked treats to try next, check out this Coconut Cake Recipe.
Nutritional Facts
The following nutritional information is an estimate for one slice of white velvet cake with cream cheese frosting, based on the recipe yielding 12 servings.
| Nutrient | Per Serving (1 slice) |
|---|---|
| Calories | ~480 kcal |
| Total Fat | 22g |
| Saturated Fat | 12g |
| Cholesterol | 55mg |
| Sodium | 260mg |
| Total Carbohydrates | 67g |
| Dietary Fiber | 0.5g |
| Sugars | 50g |
| Protein | 5g |
| Calcium | 80mg |
| Iron | 0.8mg |
Nutritional values are estimates only and will vary based on exact ingredients used, portion sizes, and frosting amounts.
Another gorgeous cake worth bookmarking: Orange Velvet Cake Recipe
Health Benefits of Key Ingredients
While white velvet cake is certainly an indulgent treat, a couple of its key ingredients do bring some genuine nutritional value to the table.
Enjoy this cake as part of a balanced diet, and take comfort in knowing that a few of these ingredients are doing more than just making it taste good.
- Buttermilk: Lower in fat than regular milk, buttermilk is a good source of calcium, potassium, and vitamin B12. Its probiotic cultures (in traditionally fermented versions) may also support gut health and digestion.
- Egg whites: Pure protein with virtually no fat or cholesterol, egg whites provide structure to the cake while keeping the calorie contribution lean. They also contain riboflavin (vitamin B2) and selenium.
- Butter: A source of fat-soluble vitamins A, D, E, and K, butter in moderate amounts contributes to the cake’s richness and helps the body absorb these essential nutrients.
- Cream cheese (in frosting): Contains calcium, vitamin A, and small amounts of riboflavin, contributing to bone health and immune function.
- Vanilla extract: Real vanilla contains vanillin, a compound with antioxidant properties. Small amounts in baked goods won’t drastically change nutrition, but quality vanilla is always worth using.
- Cake flour: While refined, cake flour’s lower protein content reduces gluten development, making it easier to digest than denser, high-protein flour options.
Read Also: Angel Food Cake Recipe
Frequently Asked Questions
1. What is the difference between white velvet cake and regular white cake?
White velvet cake and white cake are closely related, but the key difference is texture. White velvet cake uses the reverse creaming method, which coats the flour in butter before any liquid is added. This limits gluten development and creates an exceptionally fine, tight, silky crumb. Standard white cake recipes typically use the traditional creaming method (butter and sugar first), which results in a slightly coarser, more open crumb.
Buttermilk is also a signature ingredient in white velvet cake, adding a subtle tang and contributing to the overall tenderness.
2. Can I use all-purpose flour instead of cake flour?
You can substitute all-purpose flour in a pinch, but the texture will be noticeably different. All-purpose flour has a higher protein content, which leads to more gluten development and a chewier, denser crumb.
If you don’t have cake flour, a common substitute is: for every 1 cup of cake flour, use 3/4 cup plus 2 tablespoons of all-purpose flour combined with 2 tablespoons of cornstarch. Sift this mixture together before using.
3. Can I make white velvet cake without buttermilk?
Buttermilk is one of the defining ingredients in white velvet cake, so replacing it will affect the final result. If you genuinely can’t find buttermilk, you can make a quick substitute by adding 1 tablespoon of white vinegar or lemon juice to 1 cup of regular whole milk. Stir and let it sit for 5 minutes until it curdles slightly. Full-fat plain yogurt thinned with a little milk to a similar consistency also works reasonably well.
4. Why did my cake dome or crack in the middle?
Doming and cracking are usually caused by an oven that is too hot. The outside of the cake sets and forms a crust before the inside has a chance to finish rising, forcing the top to crack upward. Try reducing your oven temperature by 10 to 15 degrees and baking a few minutes longer.
Overmixing can also cause cracking, as too much gluten development creates a tight structure that tears under pressure.
5. Can I make this recipe as cupcakes?
Yes, this batter works beautifully as cupcakes. Line a standard muffin tin with cupcake liners and fill each about 2/3 full. Bake at 335°F (168°C) for 18 to 22 minutes, until a toothpick inserted in the center comes out clean.
This recipe makes approximately 24 cupcakes. Allow them to cool completely before frosting with the cream cheese frosting using a piping bag fitted with your favorite tip.
Also try this delicious Funfetti Cake Recipe for a festive, colorful cake option.
White Velvet Cake

Equipment
- Stand mixer with paddle attachment
- Hand Mixer - alternative to stand mixer
- 8-inch Round Cake Pans - two pans, at least 2 inches deep
- Parchment Paper Rounds
- Large mixing bowls
- Small mixing bowl
- Kitchen scale - recommended for accuracy
- Whisk
- Rubber spatula
- Offset spatula - for frosting
- Wire cooling racks
- cake turntable - optional but helpful for frosting
- Sieve or Fine Mesh Strainer - for sifting
- Measuring cups and spoons
Ingredients
- 2 1/2 cups cake flour - 300g
- 1 1/2 cups granulated sugar - 300g
- 1 tablespoon baking powder
- 1/2 teaspoon baking soda
- 1/2 teaspoon salt
- 1/2 cup unsalted butter - 115g, softened to room temperature
- 1 cup buttermilk - 240ml, room temperature, divided (3/4 cup + 1/4 cup)
- 1/4 cup neutral oil - 60ml, vegetable or canola
- 4 large egg whites - room temperature
- 2 teaspoons pure vanilla extract
- 1/2 teaspoon almond extract
- 1 teaspoon white vinegar
For the Cream Cheese Frosting
- 8 oz cream cheese - 225g, full-fat, softened
- 1/2 cup unsalted butter - 115g, softened
- 3 1/2 cups powdered sugar - 420g, sifted
- 1 teaspoon pure vanilla extract
- 1-2 tablespoons heavy cream - to adjust consistency
Instructions
- Preheat oven to 335°F (168°C). Grease two 8-inch round cake pans with butter or baking spray, line bottoms with parchment paper, and grease the parchment.
- In stand mixer bowl, whisk together cake flour, granulated sugar, baking powder, baking soda, and salt until evenly distributed.
- Add softened butter and mix on low with paddle attachment until mixture resembles coarse, damp sand, about 1-2 minutes.
- In a separate bowl, combine 3/4 cup buttermilk, oil, vanilla, almond extract, and vinegar. Whisk egg whites until frothy and stir into buttermilk mixture.
- With mixer on low, pour remaining 1/4 cup buttermilk into butter-flour mixture. Increase to medium and mix for 1 minute until batter thickens.
- Gradually pour in buttermilk-egg white mixture with mixer on low. Scrape bowl, increase to medium, and beat for 2 full minutes. Scrape and mix briefly.
- Divide batter evenly between prepared pans (about 650-700g each). Tap pans on counter to release air bubbles. Bake 28-35 minutes until toothpick comes clean.
- Cool cakes in pans on wire racks for 15 minutes. Run a thin spatula around edges, invert onto racks, peel off parchment, and cool completely (at least 1 hour).
- Beat softened cream cheese and butter on medium-high until smooth and fluffy, about 2 minutes. Gradually add sifted powdered sugar, then vanilla and heavy cream. Beat until light and spreadable.
- Place first cake layer flat side down. Spread 3/4-1 cup frosting evenly to edges. Top with second layer, flat side up. Apply thin crumb coat, refrigerate 15-20 minutes, then apply final frosting layer.
Notes
- Room temperature ingredients are essential – cold butter, eggs, or buttermilk won’t incorporate properly and will result in a dense, uneven crumb. Pull everything out of the fridge at least 1 hour before baking.
- Measure flour correctly – spoon flour into your measuring cup and level it off rather than scooping directly from the bag. For best accuracy, use a kitchen scale (300g cake flour).
- Don’t skip the 2-minute beating – this is critical for developing structure in reverse-creamed batters. It creates the smooth, emulsified texture and fine crumb that defines velvet cake.
- Avoid opening the oven early – wait until at least the 25-minute mark to check the cake. Opening the door too early can cause the layers to sink in the middle.
- Cool completely before frosting – even slightly warm cake layers will cause the frosting to melt and slide. If short on time, pop the layers in the fridge for 30 minutes to speed up cooling.
- Use a crumb coat – this thin first layer of frosting traps crumbs and gives you a clean, professional finish on the final coat. Refrigerate 15-20 minutes to set.
- Substituting all-purpose flour – if you don’t have cake flour, substitute with 3/4 cup + 2 tablespoons all-purpose flour combined with 2 tablespoons cornstarch per 1 cup needed. Sift together before using.
- Buttermilk substitute – add 1 tablespoon white vinegar or lemon juice to 1 cup whole milk and let sit for 5 minutes until curdled slightly. Full-fat plain yogurt thinned with milk also works.
- Storage – store frosted cake at room temperature for up to 2 days in a cake dome, or refrigerate tightly covered for up to 5 days. Unfrosted layers can be frozen for up to 3 months.
- Bring to room temperature before serving – cold cake tastes denser and drier than it actually is. Pull it out 30-45 minutes before slicing for the best texture and flavor.
Final Thoughts
White velvet cake doesn’t get nearly enough attention considering how incredible it is. The snow-white crumb, the pillowy soft texture, and that barely-there tang from the buttermilk make it one of the most satisfying cakes you can bake from scratch.
It’s the kind of cake that works for every occasion, from a dressed-up birthday celebration to a quiet Sunday afternoon treat you make just because you can.
Give this white velvet cake recipe a try, and don’t be surprised if it becomes your new go-to for any occasion that calls for something a little special.
If you make this cake, leave a comment below to share how it turned out. Have a favorite variation or frosting pairing? I’d love to hear about it!
Recommended:
- Pink Velvet Cake Recipe
- Purple Velvet Cake Recipe
- Lemon Velvet Cake Recipe
- Marble Cake Recipe
- Classic Yellow Cake Recipe
- Lemon Chiffon Cake Recipe
- Strawberry Cake Recipe
- Chocolate Buttercream Frosting Recipe
- Pastry Cream Recipe
- Checkerboard Cake Recipe



