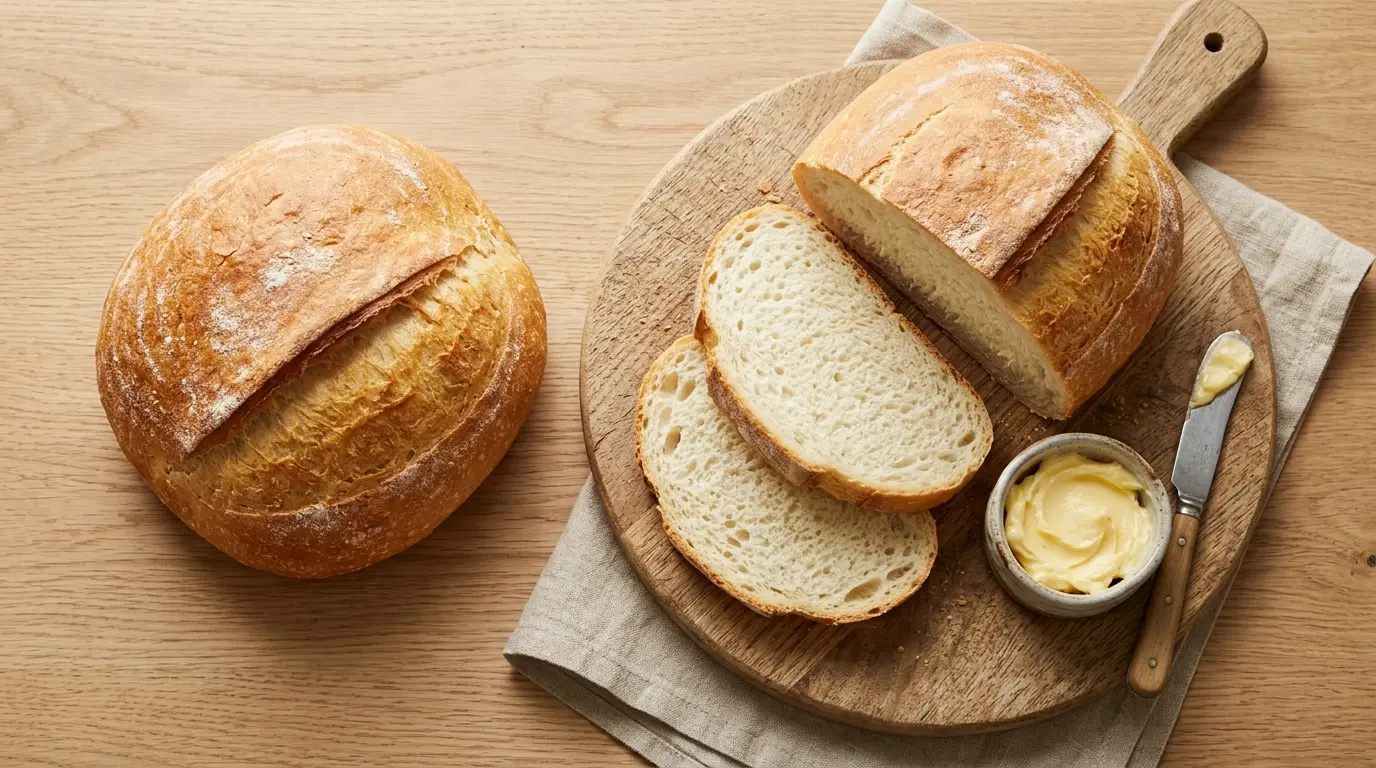
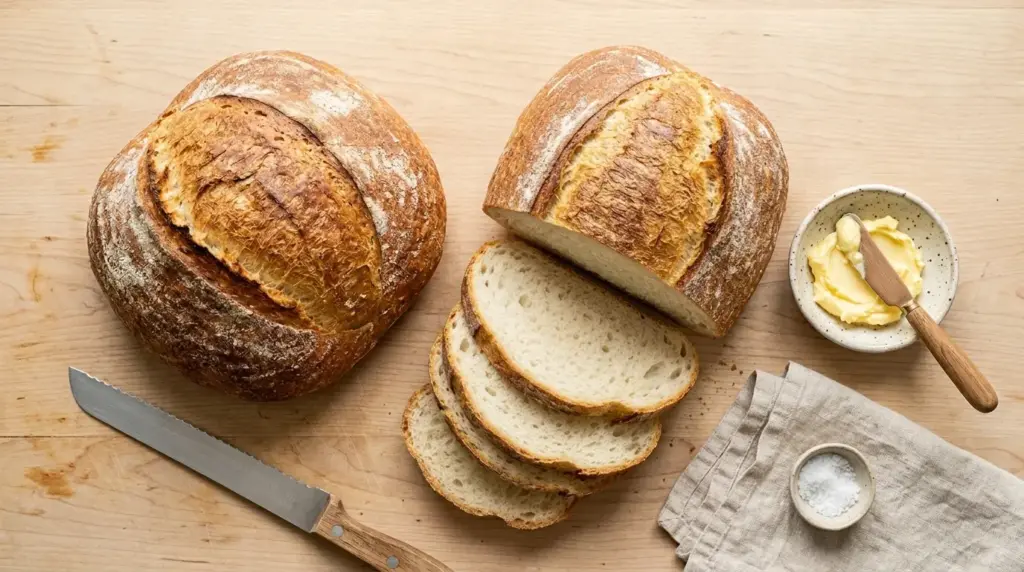
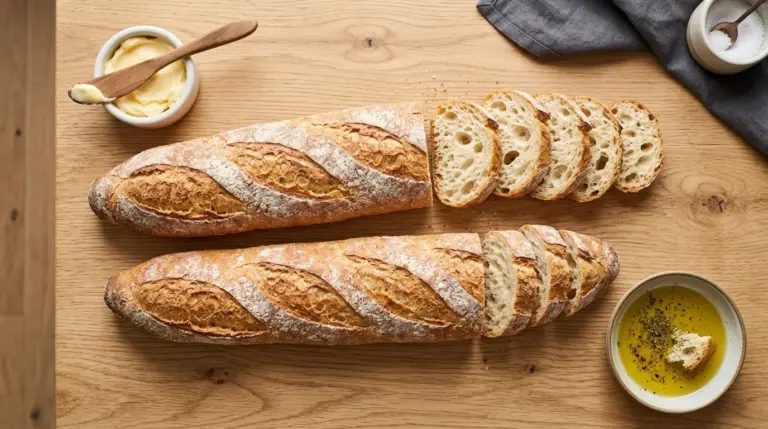
Making homemade white bread is one of the most rewarding things you can do in the kitchen. That soft, pillowy loaf that comes out of your oven smells absolutely incredible, and the taste is nothing like anything from a plastic bag on a store shelf. This white bread recipe uses a handful of pantry staples to create a classic sandwich loaf with a golden crust, a tender crumb, and just a touch of sweetness from a small amount of sugar.
What makes this recipe so reliable is the straightforward method. You bloom the yeast first, which takes just five minutes and tells you immediately whether it’s active before you invest time in kneading. The dough is soft but workable, the rise times are predictable, and the result is a beautifully domed loaf that slices cleanly for sandwiches, toast, or simply eating warm with butter.
This is the kind of recipe that feels impressive the first time you make it and then becomes a regular weekend ritual. Once you realize how easy it is to control exactly what goes into your bread, store-bought starts to feel like a downgrade.
If you love baking from scratch, you might also enjoy this No Knead Bread Recipe for those days when you want amazing homemade bread with even less hands-on effort.
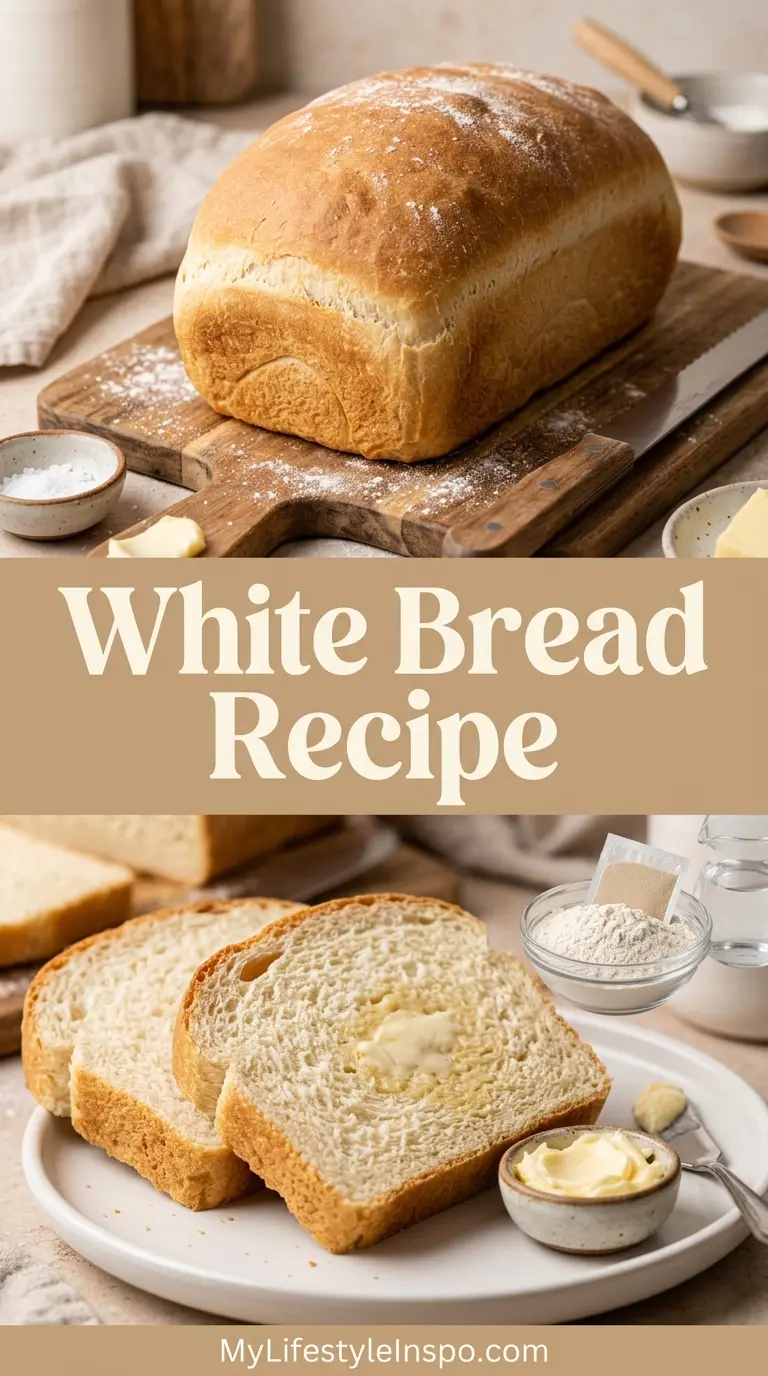
Why You’ll Love This White Bread Recipe
This recipe hits all the marks for a classic homemade sandwich loaf. It produces a bread that is soft in the middle, lightly golden on the outside, and sturdy enough to hold up to fillings without falling apart.
It also uses ingredients you almost certainly already have at home. No specialty flours, no starter, no overnight prep required.
The technique is beginner-friendly from start to finish. Even if you have never made yeast bread before, the step-by-step instructions in this post will guide you through every stage with confidence.
The recipe is also incredibly versatile. The same loaf that makes the perfect grilled cheese also makes a fantastic base for French toast, bread pudding, or avocado toast.
Here is a quick summary of why bakers come back to this recipe again and again:
- Soft, fluffy interior with a thin, golden crust
- Simple pantry ingredients with no specialty items required
- Beginner-friendly technique with clear, detailed steps
- Ready from start to finish in under 3 hours
- Makes two loaves, so you can freeze one for later
- Perfect for sandwiches, toast, French toast, and more
- No stand mixer required, though one certainly speeds things up
You might also love this Artisan Bread Recipe if you are looking for a chewier, crustier loaf with a rustic character.
Ingredients
The ingredient list for classic white bread is short and simple. Every item here plays a role in building flavor, structure, or texture, so pay attention to the notes below about why each one matters.
Bread flour gives you a slightly higher protein content than all-purpose flour, which means more gluten development and a better, chewier structure. If you only have all-purpose flour, it will still work, but the texture will be a little softer and less defined. The warm water temperature is critical: too cold and the yeast won’t activate, too hot and you’ll kill it. Aim for 105-115°F (40-46°C). The butter adds richness and keeps the crumb tender over time, which is why homemade bread stays softer longer than you might expect.
Here is what you need to make two standard loaves:
- 2 1/4 teaspoons (7g) active dry yeast (1 standard packet)
- 1 tablespoon (12g) granulated sugar, divided
- 1/2 cup (120ml) warm water (105-115°F / 40-46°C), for blooming yeast
- 1 1/2 cups (360ml) warm whole milk (105-115°F / 40-46°C)
- 2 tablespoons (30g) unsalted butter, melted and slightly cooled
- 1 tablespoon (18g) fine sea salt
- 6 cups (720g) bread flour, plus more for dusting
- Neutral oil or cooking spray, for greasing bowls and pans
Read Also: Sourdough Sandwich Bread Recipe
Kitchen Equipment Needed
You don’t need any fancy equipment to make this recipe. The basic tools below are all that stand between you and a perfect homemade loaf.
A stand mixer with a dough hook will make kneading significantly easier, but hand kneading works just as well if you are willing to put in about 10 minutes of effort. A reliable instant-read thermometer is extremely useful here, both for checking your water and milk temperature and for testing the internal doneness of the finished loaf.
Here is everything you’ll need:
- Stand mixer with dough hook or a large mixing bowl for hand kneading
- Instant-read thermometer
- Two 9×5 inch loaf pans
- Large mixing bowl (for the first rise)
- Plastic wrap or a damp clean kitchen towel
- Bench scraper or sharp knife
- Wire cooling rack
- Measuring cups and spoons
- Small bowl (for blooming the yeast)
For a comparison of other no-fuss homemade breads, check out this Dutch Oven Bread Recipe that requires only one pot and zero loaf pans.
Recommended Products for This Recipe
These are products chosen based on quality, performance, and how much they genuinely improve the bread-baking experience.
1. KitchenAid Stand Mixer with Dough Hook
A stand mixer with a dough hook takes all the effort out of kneading and ensures the dough is worked evenly every single time. It frees up your hands and allows you to focus on monitoring the dough texture rather than tiring out your arms. It is one of the most valuable investments for any home baker who makes yeast bread regularly.
2. Professional Instant-Read Kitchen Thermometer
Getting your water and milk to exactly the right temperature is one of the most important steps in any yeast bread recipe. A digital instant-read thermometer eliminates all guesswork and dramatically reduces the risk of a failed rise from overheated liquid. It is also essential for checking that your finished bread has reached 190-200°F (88-93°C) internally before you pull it out.
3. USA Pan 9×5 Inch Loaf Pan
USA Pan loaf pans have a corrugated surface and a non-stick coating that promotes even browning and makes the loaves release cleanly every time. They are heavier and more durable than budget pans and distribute heat much more evenly, which means you get consistent results without hot spots or uneven crust coloring.
4. Cambro Commercial-Grade Dough Rising Bucket
A clear, wide dough rising bucket lets you easily see how much the dough has grown during the first proof. The straight sides make it simple to track the exact volume and know with confidence when the dough has truly doubled. It is more reliable than a regular mixing bowl and becomes a tool you’ll reach for every time you bake bread.
5. Bench Scraper
A metal bench scraper is invaluable for dividing dough cleanly, lifting it off the counter, and folding it during shaping. It is one of those tools that seems unnecessary until you use it, and then you wonder how you ever made bread without one.
Another great bread to try alongside this recipe is this Brioche Recipe, which uses a similar enriched dough method but results in a richer, butterier, more decadent loaf.
Step-by-Step Instructions
Step 1: Bloom the Yeast
- Pour 1/2 cup (120ml) of warm water into a small bowl. The water should feel comfortably warm on your wrist, not hot. Use your thermometer to confirm it is between 105-115°F (40-46°C).
- Add 1 teaspoon of the granulated sugar to the warm water and stir briefly to dissolve.
- Sprinkle the 2 1/4 teaspoons of active dry yeast over the surface of the water. Do not stir yet.
- Let the mixture sit undisturbed for 5-10 minutes. You are looking for a foamy, bubbly top that smells like fresh bread. This tells you the yeast is alive and active.
- If the mixture does not foam after 10 minutes, your yeast may be dead or your water was too hot or too cold. Discard and start with fresh yeast and water before proceeding.
Step 2: Mix the Wet Ingredients
- In the bowl of your stand mixer (or a large mixing bowl if kneading by hand), combine the warm whole milk, the melted and slightly cooled unsalted butter, and the remaining granulated sugar.
- Stir gently to combine. The mixture should be warm, not steaming. Use your thermometer again to confirm it is around 100-110°F (38-43°C) before adding the yeast.
- Pour the foamy yeast mixture into the milk mixture and stir briefly to combine everything together.
Step 3: Add the Flour and Salt
- Add the fine sea salt to the liquid mixture and stir once more to distribute it evenly.
- Add 3 cups (360g) of the bread flour to the bowl and stir with a wooden spoon or rubber spatula until a shaggy dough forms.
- Add another 2 1/2 cups (300g) of flour and continue stirring until the dough begins to come together into a rough, slightly sticky mass.
- Reserve the remaining 1/2 cup (60g) of flour for kneading adjustments. You may not need all of it.
Step 4: Knead the Dough
- If using a stand mixer: Attach the dough hook and knead on medium-low speed (speed 2 on most KitchenAid models) for 8-10 minutes. Add the reserved flour one tablespoon at a time if the dough is sticking to the sides of the bowl.
- If kneading by hand: Turn the shaggy dough out onto a lightly floured surface. Push the dough away from you with the heel of your hand, fold it back toward you, rotate 90 degrees, and repeat. Continue for 10-12 minutes, adding small amounts of flour as needed.
- The dough is properly kneaded when it is smooth, slightly tacky but not sticky, and springs back slowly when you press a finger into it. It should form a clean ball without tearing.
- Perform the “windowpane test”: stretch a small piece of dough between your fingers. If it stretches thin enough to see light through without tearing, the gluten is well developed and you are done kneading.
Step 5: First Rise (Bulk Fermentation)
- Lightly oil a large clean bowl with neutral oil or cooking spray. Place the kneaded dough ball into the bowl and turn it once so the top is lightly coated.
- Cover the bowl tightly with plastic wrap or a damp kitchen towel. Place it somewhere warm, around 75-80°F (24-27°C). A turned-off oven with just the oven light on is a reliable proofing environment.
- Let the dough rise until it has doubled in size, approximately 1 to 1.5 hours depending on the warmth of your kitchen.
- Do not rush this stage. The slower and more complete the first rise, the better the flavor and structure of the finished bread.
Step 6: Shape the Loaves
- Lightly grease two 9×5 inch loaf pans with butter or cooking spray. Set them aside.
- Gently punch down the risen dough to release the gas bubbles. Turn it out onto a lightly floured surface.
- Using a bench scraper or sharp knife, divide the dough into two equal portions. Each portion should weigh approximately the same; use a kitchen scale if you want precision.
- Work with one portion at a time. Flatten the dough piece into a rough rectangle, about as wide as your loaf pan.
- Roll the rectangle tightly toward you, as if you were rolling up a sleeping bag. Pinch the seam and the two ends firmly to seal.
- Place the shaped loaf seam-side down into one of the prepared pans. Repeat with the second portion.
Step 7: Second Rise (Proof)
- Cover each pan loosely with lightly oiled plastic wrap or a clean kitchen towel. Return the pans to your warm proofing spot.
- Let the loaves rise until the dough has crowned about 1 inch (2.5cm) above the rim of the pans, approximately 45 minutes to 1 hour. The dough should look puffy and pillowy.
- While the loaves are proofing, preheat your oven to 375°F (190°C). Place the oven rack in the center position.
- Do not let the loaves overproof. Overproofed dough will collapse in the oven or produce a dense, gummy crumb. If you press the dough gently with a floured finger and the indentation springs back slowly but not all the way, it is ready.
Step 8: Bake the Bread
- Carefully remove the plastic wrap from the pans without deflating the dough.
- Optional: Brush the tops of the loaves lightly with a little melted butter or a wash of 1 beaten egg mixed with 1 tablespoon of water for a shinier crust.
- Place the pans in the preheated oven and bake for 28-32 minutes, until the tops are deep golden brown.
- To check for doneness, tip one loaf out of the pan and tap the bottom. It should sound hollow. Alternatively, insert an instant-read thermometer into the center of the loaf. The internal temperature should read 190-200°F (88-93°C).
- If the tops are browning too fast before the inside is done, tent the pans loosely with aluminum foil for the last 10 minutes of baking.
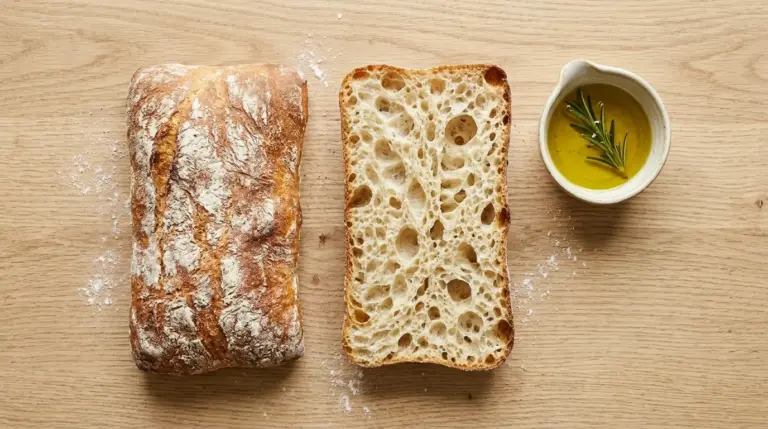
Step 9: Cool Completely Before Slicing
- Remove the loaves from the oven and tip them out of the pans immediately onto a wire cooling rack.
- Resist the urge to slice right away. The interior of freshly baked bread is still setting as it cools, and cutting too soon produces a gummy, doughy texture.
- Let the loaves cool for at least 45 minutes to 1 hour before slicing. An hour and a half gives you truly clean, beautiful slices.
This Classic French Toast Recipe is absolutely wonderful when made with day-old slices from this homemade white bread.
Tips for Success
Even a simple white bread recipe has a few points where beginners tend to run into trouble. These tips address the most common issues and help you get a perfect loaf every single time.
The single biggest variable in any bread recipe is your environment. A cold kitchen means a much slower rise, and a very warm kitchen can make the dough over-ferment. Adjusting your proofing location is the most effective way to control the process.
Here are the most important tips to keep in mind:
- Check your yeast freshness before you begin. Active dry yeast has a shelf life, and dead yeast means no rise. If your yeast does not foam during blooming, replace it before you continue.
- Measure flour by weight, not volume. Flour is easily compacted in its bag, and a packed cup can weigh significantly more than an accurate scoop. A kitchen scale gives you perfectly consistent results every time.
- Do not add all the flour at once. Add the reserved flour gradually during kneading so you can stop as soon as the dough is smooth and tacky, not stiff and dry. Too much flour produces a dense, heavy loaf.
- Do not rush the rises. Both the first and second rises build flavor and structure. Bread that has been properly fermented has a much more complex, satisfying taste than bread that was rushed through the process.
- Cool the bread fully before slicing. This is non-negotiable for a clean crumb. The interior needs time to finish cooking off the steam and set up.
- Use the windowpane test to check kneading. It is the most reliable way to confirm you have built enough gluten without guessing.
- Brush with melted butter right when the loaves come out of the oven. This softens the crust and adds a gorgeous sheen and rich flavor.
Another beginner-friendly baking project you will love is this Beer Bread Recipe, which requires zero yeast work and comes together in under an hour.
Serving Suggestions
Freshly baked white bread is one of those foods that works beautifully in almost every setting. Serve it warm from the oven with a generous smear of Honey Butter and a sprinkle of flaky sea salt for a simple, unforgettable treat.
This loaf shines as the base for a classic grilled cheese sandwich, stacked BLTs, or simple egg salad. Its soft, even crumb makes it ideal for school lunch sandwiches or hearty club stacks with turkey and avocado.
Here are more ways to enjoy your homemade white bread:
- Slice thickly and use for Easy French Toast with maple syrup and berries
- Cube it and bake into a cozy Savory Bread Pudding
- Toast and top with ripe avocado, a poached egg, and chili flakes
- Serve alongside a bowl of creamy tomato soup for classic comfort
- Use for open-faced bruschetta toasts with fresh tomatoes and basil
- Slice thin and layer with butter and jam for a simple afternoon snack
- Use slightly stale slices for an irresistible Bread Pudding
Variations to Try
The basic white bread recipe is a wonderful starting point, but a few simple tweaks can open up a whole world of flavors and textures. Once you feel comfortable with the original, experimenting becomes one of the most enjoyable parts of home baking.
All of these variations use the same dough base and technique. The changes are small but meaningful, and each one produces a noticeably different result.
Here are some ideas to try once you have mastered the classic loaf:
- Honey White Bread: Replace the granulated sugar with 2 tablespoons of honey for a subtler sweetness and a softer crust that stays moist longer.
- Milk Bread Loaf: Replace all the water (including the blooming water) with warm whole milk for an ultra-soft, pillowy loaf inspired by Japanese-style milk bread.
- Herb and Garlic White Bread: Knead in 2 tablespoons of finely chopped fresh rosemary and 3 minced garlic cloves during the last minute of kneading for a savory, fragrant loaf.
- Seeded White Bread: Brush the shaped loaves with egg wash and roll them in sesame seeds, poppy seeds, or a mix of both before the second rise.
- Cinnamon Swirl Bread: Roll the shaped rectangle with softened butter, 1/4 cup of sugar, and 2 teaspoons of cinnamon before rolling it up. This makes a stunning breakfast loaf.
- Gluten-Free Adaptation: For a gluten-free option, explore this Gluten-Free Dairy-Free Bread Recipe which uses alternative flours designed for bread baking.
If you love soft, buttery bread in roll form, this Soft Dinner Rolls Recipe uses many of the same principles and is perfect for holiday tables and weeknight dinners alike.
Storage and Reheating
Homemade white bread lacks the preservatives found in commercial loaves, so it has a naturally shorter shelf life. That said, with proper storage it stays fresh and delicious for several days, and it freezes exceptionally well.
The key to keeping homemade bread soft is to store it cut-side down on a cutting board, or wrapped in a clean kitchen towel or beeswax wrap rather than sealed in plastic. Plastic traps moisture and leads to a gummy crust. A bread box is the traditional and most effective solution.
Here is how to store and reheat your white bread:
- Room temperature: Wrap cooled loaves in a clean kitchen towel or store in a bread box for up to 3 days. Avoid the refrigerator, which actually accelerates staling in bread.
- Freezing whole loaves: Wrap the fully cooled loaf tightly in plastic wrap, then in a layer of aluminum foil. Freeze for up to 3 months. Thaw at room temperature overnight still wrapped.
- Freezing sliced bread: Slice the loaf completely and freeze the slices in a zip-top freezer bag. You can pull individual slices as needed and toast them directly from frozen.
- Reheating whole loaves: Unwrap the thawed or day-old loaf and warm it in a 325°F (160°C) oven for 10-15 minutes to refresh the crust and crumb beautifully.
- Reheating slices: Toast directly in a toaster from room temperature, or pop a frozen slice straight into the toaster on a slightly lower setting.
Read Also: Challah Recipe
Nutritional Facts
The following nutritional information is an estimate per serving, based on one slice of white bread (approximately 1/12th of one loaf, or about 55g). Actual values may vary depending on exact ingredients used and slice thickness.
| Nutrient | Per Slice (approx.) |
|---|---|
| Calories | 155 kcal |
| Total Fat | 2.5g |
| Saturated Fat | 1.3g |
| Cholesterol | 6mg |
| Sodium | 310mg |
| Total Carbohydrates | 28g |
| Dietary Fiber | 1g |
| Total Sugars | 2g |
| Protein | 5g |
| Iron | 1.8mg |
| Calcium | 35mg |
These values reflect the basic white bread recipe made with bread flour, whole milk, and butter. Using all-purpose flour or low-fat milk will alter the fat, protein, and calorie content slightly.
Another bread worth exploring for its distinctive flavor profile is this Irish Soda Bread Recipe, a no-yeast quick bread that is dense, slightly tangy, and wonderfully hearty.
Health Benefits of Key Ingredients
While white bread is not typically thought of as a “health food,” the key ingredients in this recipe do contribute meaningful nutrients to your diet. Homemade bread also gives you complete control over what goes into every slice, which is a significant advantage over highly processed commercial loaves.
Here is a closer look at the nutritional value of the main ingredients:
Bread Flour (Wheat): Whole and enriched wheat flours are a source of B vitamins including niacin, thiamine, and folate, all of which are important for energy metabolism and red blood cell production. Bread flour also contributes plant-based protein and iron.
Whole Milk: Milk adds calcium, vitamin D, potassium, and high-quality protein to every slice. These nutrients support bone health, muscle function, and immune resilience. Whole milk also contains fat-soluble vitamins A and D.
Unsalted Butter: Used in moderate amounts, butter supplies fat-soluble vitamins A, D, E, and K2. The short and medium-chain fatty acids in butter are more easily metabolized than many other dietary fats.
Yeast: Active dry yeast is a natural source of B vitamins, including B1, B2, B3, and folate. It also provides a small amount of protein, zinc, and selenium, which play roles in immune function and antioxidant defense.
Here is a summary of key benefits by ingredient:
- Bread flour: B vitamins, iron, plant-based protein, and complex carbohydrates for sustained energy
- Whole milk: Calcium, vitamin D, potassium, and complete protein for bone and muscle support
- Butter: Fat-soluble vitamins A, D, E, and K2 in small, meaningful amounts
- Active dry yeast: B vitamins, zinc, selenium, and natural probiotic activity during fermentation
- Eggs (in egg wash): Optional but contribute additional protein, B12, and choline if used
For a naturally sweetened, enriched bread that shares several of these nutritional highlights, try this Brioche French Toast Recipe made with thick brioche slices.
Frequently Asked Questions
1. Can I use all-purpose flour instead of bread flour?
Yes, you can substitute all-purpose flour in a 1:1 ratio. The bread will still turn out well, but the texture will be slightly softer and less chewy because all-purpose flour has a lower protein content (around 10-11%) compared to bread flour (around 12-13%). The loaf will be a little more cake-like in the crumb. If you can find bread flour, it is worth using for the best sandwich texture.
2. Why didn’t my bread rise?
The most common culprits are dead or expired yeast, water that was too hot (above 120°F / 49°C kills yeast) or too cold (below 100°F / 38°C won’t activate it properly), and a kitchen that is too cold for proofing. Always bloom your yeast first and confirm it is foamy before moving forward. If your yeast does not foam, your bread will not rise and you will have wasted all your ingredients.
3. Why is my bread dense and heavy?
Dense bread is almost always caused by one of three things: under-kneading (not enough gluten development), too much flour added during kneading (which makes the dough stiff), or an incomplete first or second rise. Make sure the dough passes the windowpane test before you move on, add flour sparingly, and give the dough the full time it needs to rise until truly doubled.
4. Can I make this recipe with a bread machine?
Absolutely. Add the ingredients to the bread machine pan in the order your machine recommends (typically liquids first, then dry ingredients, yeast last). Use the “white bread” or “basic” cycle. The result will be slightly different in shape and crust texture than an oven-baked loaf, but the flavor and crumb will be very similar.
5. Can I halve this recipe to make just one loaf?
Yes. Simply divide every ingredient by two and use one 9×5 inch loaf pan. The rise times remain the same, though your dough mass will be smaller. The baking time may be slightly shorter, so start checking at around 25 minutes. Use the hollow-tap test and internal temperature to confirm doneness.
For another classic homemade bread that is wonderfully different in texture and character, check out this Rosemary Focaccia Recipe with its irresistible olive oil-crisped crust.
Final Thoughts
Making a white bread recipe from scratch is one of those kitchen experiences that never loses its magic. Pulling a pair of golden, perfectly domed loaves out of the oven feels genuinely satisfying every single time, no matter how many times you do it.
This recipe is built for real life. It uses simple ingredients, forgives small mistakes, and produces results that are genuinely better than anything you will find in a store.
Give it a try this weekend. Once you taste your own homemade white bread, warm from the oven with a little butter melting into the crust, you will never want to go back.
If you make this recipe, leave a comment below and let me know how it turned out. Did you try any of the variations? Share your experience and any tips you discovered along the way.
Recommended:
- Artisan Bread Recipe
- Beer Bread Recipe
- No Knead Bread Recipe
- Dutch Oven Bread Recipe
- Monkey Bread Recipe
- Pull Apart Garlic Bread Recipe
- Air Fryer Garlic Bread Recipe
- Sweet Dinner Rolls Recipe
- Dinner Rolls Recipe
- Chocolate Chip Bread Recipe
- Blackberry Bread Recipe
- Fresh Milled Flour Bread Recipe
