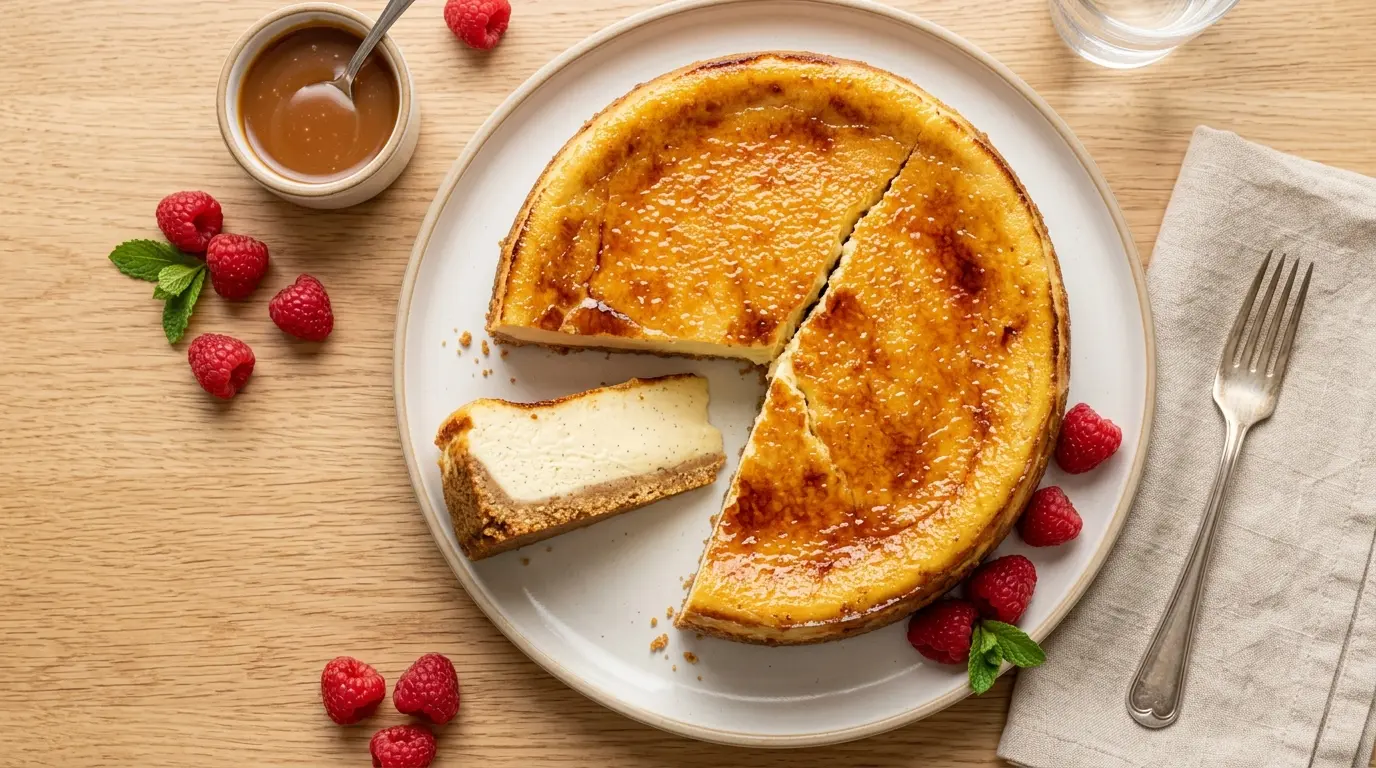
If you have ever been torn between making a classic cheesecake and a silky French creme brulee, this Creme Brulee Cheesecake Recipe is the answer to that dilemma.
It brings together the rich, creamy depth of a baked New York-style cheesecake and the iconic caramelized sugar shell of creme brulee, all sitting on a buttery graham cracker crust.
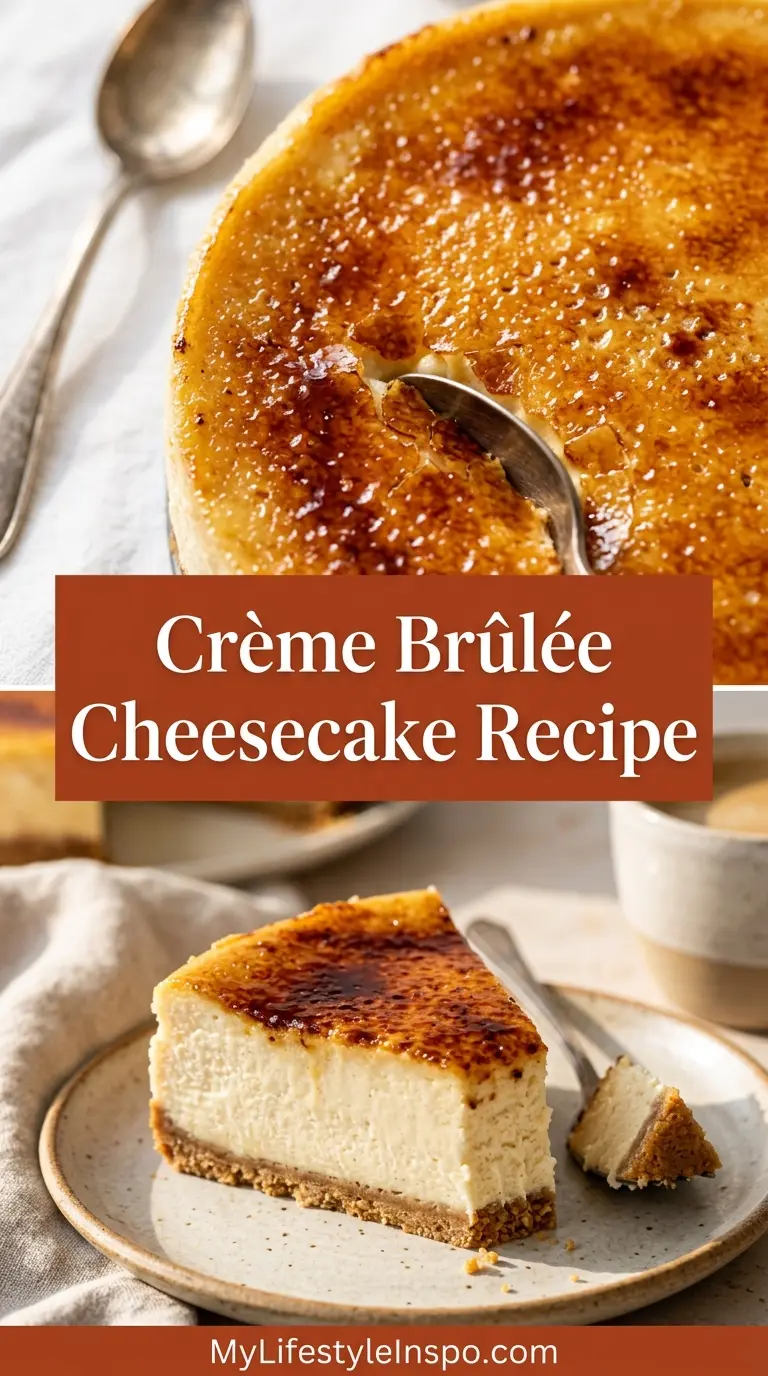
The result is a dessert that looks absolutely stunning, tastes even better, and gives you that satisfying crack when you tap the top with a spoon.
The vanilla-forward filling is dense, smooth, and custardy, borrowing its soft texture from classic creme brulee technique. When you torch a thin layer of granulated sugar on top just before serving, it transforms into a glassy, amber-colored crust that shatters beautifully with every slice.
This is the kind of dessert that earns gasps at the table, and it is surprisingly achievable at home with a few key steps.
If you love classic creme brulee on its own, you might also want to check out this Easy Creme Brulee Recipe for a standalone version of the French custard.
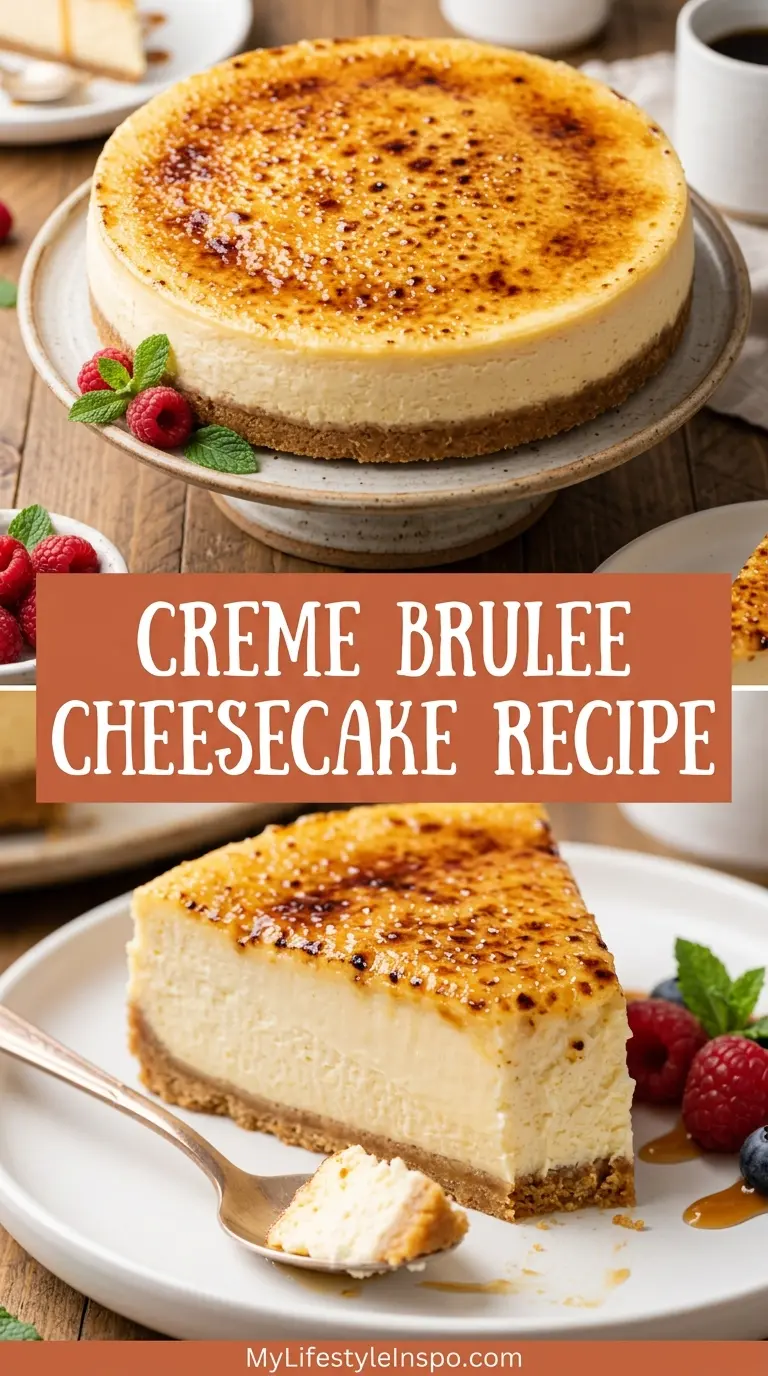
Why You’ll Love This Creme Brulee Cheesecake Recipe
This dessert truly delivers on every front.
The filling is smooth and dense, with a custardy softness that sets it apart from a standard cheesecake. That comes from using heavy cream in the batter, which loosens the texture just enough to mimic the silkiness of creme brulee.
The graham cracker crust adds a subtle buttery crunch that contrasts beautifully with the creamy interior. You do not need an elaborate cookie base for this to taste incredible.
The torched sugar topping is the showstopper. It adds drama, texture, and a slight bittersweet note that balances the richness of the cream cheese filling perfectly.
It is make-ahead friendly. You bake the cheesecake the day before, refrigerate it overnight, and torch the sugar topping just before serving. That means zero stress on the day you plan to serve it.
It also holds up well at the table. Unlike custard-based desserts that can weep or collapse, this cheesecake stays firm and slices cleanly.
- Two iconic desserts in one showstopper slice
- Creamy, custardy filling that melts on your tongue
- Glassy, crackling caramelized sugar topping
- Buttery graham cracker crust for texture contrast
- Perfectly make-ahead for parties and holidays
- Impressive presentation with surprisingly manageable steps
You might also enjoy: New York Cheesecake Recipe
Ingredients
Here is everything you need to pull off this beautiful dessert. Room-temperature cream cheese is non-negotiable here; cold cream cheese creates lumps in the batter that are impossible to fully smooth out.
- For the Crust:
- 1½ cups (150g) graham cracker crumbs (about 10 full graham cracker sheets)
- 3 tablespoons (38g) granulated sugar
- 5 tablespoons (70g) unsalted butter, melted
- For the Cheesecake Filling:
- 24 oz (680g) full-fat cream cheese, room temperature (3 blocks of 8 oz each)
- 1 cup (200g) granulated sugar
- 3 large eggs, room temperature
- 2 teaspoons pure vanilla extract
- 1 teaspoon vanilla bean paste (optional but highly recommended for deeper flavor and visible specks)
- ¾ cup (180ml) heavy cream, room temperature
- 1 tablespoon cornstarch
- ¼ teaspoon fine salt
- For the Brulee Topping:
- 3-4 tablespoons granulated sugar (for torching)
Read Also: Salted Caramel Cheesecake Recipe
Kitchen Equipment Needed
Having the right tools makes this recipe go much more smoothly. The kitchen torch is the one item most home bakers do not already own, and it is absolutely essential for achieving the signature caramelized topping.
- 9-inch (23cm) springform pan
- Stand mixer or hand mixer
- Large mixing bowls
- Kitchen torch (culinary torch)
- Large roasting pan (for the water bath)
- Aluminum foil (heavy duty, for wrapping the springform pan)
- Rubber spatula
- Measuring cups and spoons
- Food processor or zip-lock bag and rolling pin (for crushing crackers)
- Wire cooling rack
- Offset spatula (optional, for smoothing the top)
For a lighter spin on cheesecake, take a look at this Low Calorie Cheesecake Recipe.
Recommended Products for This Recipe
These are products that genuinely make a difference in how this cheesecake turns out, chosen for quality and performance.
1. Nielsen-Massey Madagascar Bourbon Pure Vanilla Bean Paste
Vanilla is the dominant flavor in this cheesecake, which means the quality of your vanilla matters. Nielsen-Massey’s vanilla bean paste delivers intense, complex flavor with gorgeous black specks throughout the filling. It elevates this dessert from good to truly exceptional.
2. Ateco or Joule Culinary Kitchen Torch
The brûlée topping is the entire point of this dessert, and a high-quality kitchen torch gives you consistent, even caramelization without hot spots or scorching. A good torch also lets you work quickly, which means the sugar melts smoothly and evenly.
3. Fat Daddio’s 9-Inch Springform Pan
A reliable springform pan with a tight seal is critical for water bath baking. Fat Daddio’s anodized aluminum pans heat evenly and have a secure latch that minimizes the risk of water seeping into your crust, which is one of the most common cheesecake disasters.
4. Domino Extra Fine Granulated Sugar
For the brûlée top, finer sugar melts and caramelizes more evenly and quickly under the torch. Domino’s extra fine granulated sugar is a great choice for getting that smooth, glassy amber shell without any unmelted granules.
Another incredible baked cheesecake variation to try: Basque Cheesecake Recipe
Step-by-Step Instructions
1. Prepare Your Pan and Oven
- Preheat your oven to 325°F (163°C). Make sure the rack is in the center position.
- Tear off two large sheets of heavy-duty aluminum foil (about 18 inches each). Place the springform pan in the center of one sheet and wrap the foil tightly up the sides, crimping it at the top. Repeat with the second sheet. This double layer prevents any water from the water bath from seeping into the pan.
- Lightly grease the inside of the springform pan with softened butter or non-stick spray. Set aside.
2. Make the Graham Cracker Crust
- Add graham cracker sheets to a food processor and pulse until you have fine, even crumbs. If you do not have a food processor, place the crackers in a sealed zip-lock bag and crush them firmly with a rolling pin until no large pieces remain.
- In a medium bowl, combine the graham cracker crumbs and 3 tablespoons of granulated sugar. Stir to mix.
- Pour the 5 tablespoons of melted butter over the crumb mixture and stir until every crumb is moistened and the mixture resembles wet sand.
- Pour the crust mixture into the prepared springform pan. Use the flat bottom of a glass or measuring cup to press it down firmly and evenly across the base. Make sure the layer is compact so it holds together when sliced.
- Bake the crust in the preheated oven for 8-10 minutes, until it is just lightly golden and fragrant. Remove and allow it to cool completely before adding the filling.
3. Beat the Cream Cheese
- Place the room-temperature cream cheese blocks in the bowl of your stand mixer fitted with the paddle attachment (or use a large bowl and a hand mixer).
- Beat on medium speed for 2-3 minutes until the cream cheese is completely smooth and fluffy, with no lumps. Stop and scrape down the sides and bottom of the bowl with a rubber spatula at least once during this process.
- This step is critical. Any lumps you leave in at this stage will stay in the finished cheesecake, so take your time here.
4. Add Sugar and Flavorings
- With the mixer on low, gradually add the 1 cup of granulated sugar to the cream cheese. Once combined, increase to medium and beat for another 1-2 minutes until the mixture is light and creamy.
- Add the pure vanilla extract and vanilla bean paste (if using). Mix briefly to combine, scraping the bowl as needed.
5. Add the Eggs
- Add the eggs to the batter one at a time, mixing on low speed after each addition just until combined. Do not overmix at this stage. Overmixing after the eggs are added incorporates too much air, which causes cheesecake to puff during baking and then crack as it cools.
- Stop the mixer and scrape down the sides and bottom of the bowl after each egg to ensure everything is evenly incorporated.
6. Add Heavy Cream, Cornstarch, and Salt
- With the mixer on the lowest speed, slowly pour in the heavy cream. Mix just until it disappears into the batter.
- Add the 1 tablespoon of cornstarch and ¼ teaspoon of fine salt. Mix briefly on low until combined.
- The batter should be smooth, thick, and pourable. Do not mix on high speed at any point during this step.
7. Pour the Filling and Prepare the Water Bath
- Pour the cheesecake filling over the cooled crust in the springform pan. Use an offset spatula or the back of a spoon to spread it into an even layer and smooth the top as much as possible.
- Gently tap the pan on the counter a few times to release any large air bubbles.
- Set the foil-wrapped springform pan inside a large roasting pan. Place the roasting pan in the oven, then carefully pour hot water into the roasting pan until it comes about 1 inch (2.5cm) up the sides of the springform pan. Be careful not to splash water onto the cheesecake.
8. Bake the Cheesecake
- Bake at 325°F (163°C) for 55-65 minutes. The cheesecake is done when the edges are set and the center still has a slight wobble, like gelatin. It should not look liquid, but it should not look completely firm either. The center will continue to firm up as it cools.
- Turn off the oven and crack the oven door open slightly (you can prop it with a wooden spoon). Allow the cheesecake to sit in the turned-off oven for 1 hour. This gradual cooling prevents cracking.
9. Cool and Refrigerate
- Remove the cheesecake from the water bath and unwrap the foil. Place it on a wire rack and allow it to cool to room temperature, about 1 more hour.
- Once at room temperature, loosely cover the pan with plastic wrap and refrigerate for at least 6 hours, but overnight is best. This chilling time is what gives the filling its final dense, custardy texture.
10. Torch the Brûlée Topping
- When you are ready to serve, remove the cheesecake from the refrigerator. Run a thin knife around the edges of the pan, then carefully release and remove the springform ring.
- Transfer the cheesecake to a heatproof surface or plate.
- Sprinkle an even, thin layer of granulated sugar (about 1.5-2 tablespoons) across the entire surface of the cheesecake. Tilt the pan to distribute it evenly.
- Using your kitchen torch, hold the flame about 2-3 inches from the surface and move it in slow, circular motions. Watch the sugar melt and turn from white to golden to amber. Stop torching before it turns dark brown, as it will continue to darken slightly from residual heat.
- Allow the caramelized top to sit for 1-2 minutes so it hardens into a glass-like shell. Then slice and serve immediately so the top stays crisp.
Read Also: Churro Cheesecake Recipe
Tips for Success
A few key habits will take this cheesecake from good to flawless every single time. Paying attention to temperature, mixing technique, and cooling makes all the difference.
- Use room-temperature ingredients. Cold cream cheese creates lumps; cold eggs cause the batter to seize. Pull everything from the fridge at least 1 hour before you begin.
- Do not overmix after adding the eggs. Mix on low speed and stop as soon as each egg is incorporated. Excess air is the leading cause of cracking.
- Use a proper water bath. The steam from the water bath keeps the oven humid, which prevents the surface from drying out and cracking. Do not skip it.
- Double-wrap your foil. A single layer of foil is not enough to keep water out. Use two or even three sheets, and make sure they overlap and seal well at the top.
- Torch just before serving. The caramelized topping softens and loses its crunch within 20-30 minutes. For the best texture contrast, torch the sugar right before you bring it to the table.
- Allow full overnight chilling. A cheesecake that has chilled for only a few hours is softer and harder to slice cleanly. Overnight chilling is what gives it that perfect dense, creamy texture.
- Use a hot, clean knife for slicing. Run your knife under hot water, wipe it dry, and slice. Repeat between each cut for clean, beautiful slices.
This technique also works beautifully for the Biscoff Cheesecake Recipe, another incredible baked cheesecake worth trying.
Serving Suggestions
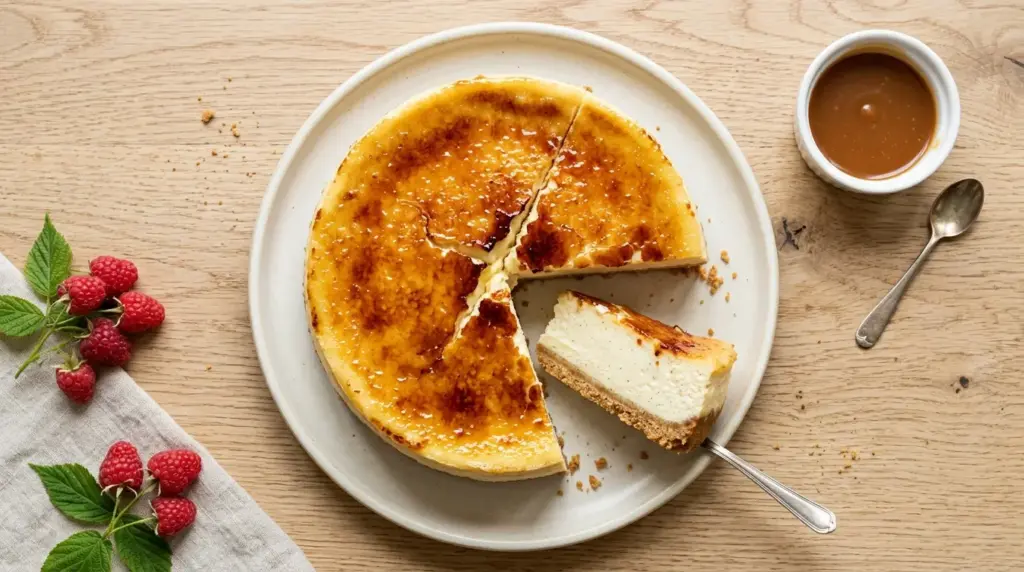
This cheesecake is stunning on its own, but a few accompaniments can make it feel even more special.
A scoop of Vanilla Bean Ice Cream alongside a slice is one of the best pairings. The cold, milky ice cream plays off the caramelized top beautifully.
- Fresh berries (strawberries, raspberries, or blueberries) add a bright, tart counterpoint to the richness of the filling
- A drizzle of caramel sauce deepens the caramel notes and makes each slice look bakery-worthy
- Lightly sweetened whipped cream on the side adds a delicate creaminess without overpowering the brulee top
- A small garnish of fresh mint leaves adds a pop of color for an elegant presentation
- Dusted powdered sugar around the plate adds a refined, restaurant-style finish
Variations to Try
Once you have mastered the base recipe, these spins are fun to explore. Each one adds a different flavor twist while keeping the signature brulee topping.
- Lemon Creme Brulee Cheesecake: Add 2 tablespoons of fresh lemon zest and 1 tablespoon of lemon juice to the filling. Bright and refreshing, this pairs beautifully with a lemon wafer crust.
- Chocolate Creme Brulee Cheesecake: Melt 4 oz of dark chocolate and fold it into the cheesecake batter before pouring it over the crust. Rich and intense.
- Gingersnap Crust Version: Swap the graham cracker crumbs for crushed gingersnap cookies for a spiced, slightly peppery crust that complements the vanilla beautifully.
- Brown Sugar Brûlée Top: Use light brown sugar instead of white granulated sugar for a deeper, molasses-tinged caramel flavor on top.
- Espresso Creme Brulee Cheesecake: Dissolve 1 tablespoon of instant espresso powder in the heavy cream before adding it to the batter. It adds a subtle coffee undertone that complements the caramelized sugar perfectly.
For a no-bake option, check out the No Bake Cheesecake Recipe for an easier version without the oven.
Storage and Reheating
Proper storage keeps this cheesecake fresh and delicious for several days. The key is to keep the brulee top separate from the refrigerator’s moisture.
- Refrigerator: Store the cheesecake (without the brulee topping) covered loosely with plastic wrap in the refrigerator for up to 5 days. Torch fresh sugar on top each time you serve it for the best texture.
- If already torched: A slice with a torched top is best eaten the same day. The caramelized sugar will soften and become sticky after a few hours in the fridge due to moisture.
- Freezer: You can freeze the baked, cooled cheesecake (without the sugar topping) for up to 2 months. Wrap it tightly in two layers of plastic wrap and one layer of foil.
- Thawing: Move the frozen cheesecake to the refrigerator and allow it to thaw overnight. Do not rush-thaw at room temperature, as this can cause condensation and weaken the texture.
- Reheating: Cheesecake is served cold or at room temperature; do not microwave it. Simply torch the sugar topping fresh before serving once thawed.
Also worth saving for later: Oreo Cheesecake Recipe
Nutritional Facts
The following values are approximate, based on 12 equal servings from a 9-inch cheesecake.
| Nutrient | Amount per Serving |
|---|---|
| Calories | 430 kcal |
| Total Fat | 31g |
| Saturated Fat | 18g |
| Cholesterol | 140mg |
| Sodium | 280mg |
| Total Carbohydrates | 33g |
| Sugars | 26g |
| Protein | 7g |
These values are estimates and may vary based on exact brands and portion sizes.
If you love cheesecake but want a lighter option, the Protein Cheesecake Recipe is a great alternative with a better macro profile.
Health Benefits of Key Ingredients
While this is certainly an indulgent dessert, a few key ingredients do bring some genuine nutritional value to the table.
It is worth knowing what you are eating and appreciating the small benefits hidden in even the richest recipes.
- Cream Cheese: Contains calcium and phosphorus, which support bone health. Choosing full-fat cream cheese also means it is lower in additives and thickeners than reduced-fat versions.
- Eggs: A powerhouse of nutrition, eggs provide complete protein, choline for brain health, and fat-soluble vitamins A, D, E, and K. The yolks specifically contribute to the custard-like texture of this cheesecake.
- Vanilla: Beyond its incredible flavor, vanilla contains small amounts of antioxidants and has been studied for its potential anti-inflammatory properties.
- Heavy Cream: Provides fat-soluble vitamins and conjugated linoleic acid (CLA), which has been associated with various health benefits in moderate amounts.
- Graham Crackers: The crust provides a small amount of whole grain fiber, depending on the brand you choose.
For a diet-specific version, the Keto Cheesecake Recipe swaps out the sugar and crust for low-carb alternatives.
Frequently Asked Questions
1. Can I make this cheesecake without a water bath?
You can, but the results are noticeably different. A water bath creates gentle, even heat and humid oven conditions that help the cheesecake set slowly without cracking or drying out. Without it, the surface is more likely to crack and the texture can be slightly grainy around the edges. If you absolutely want to skip it, bake at a lower temperature (300°F/150°C) and place a separate pan of hot water on the rack below the cheesecake.
2. Why did my cheesecake crack?
The most common causes are overmixing the batter (which adds too much air), opening the oven door during baking (which causes a sudden temperature drop), or cooling too quickly. To fix a cracked top, simply add a slightly thicker layer of sugar before torching. The caramelized shell will hide any surface imperfections beautifully.
3. Can I use a different crust instead of graham crackers?
Absolutely. Crushed Oreo cookies, Biscoff cookies, digestive biscuits, or gingersnap cookies all work wonderfully. Keep the same ratio of crumbs to butter (roughly 3 parts crumbs to 1 part butter by weight). If using a sweeter cookie like Oreos, you can reduce or omit the added sugar in the crust.
4. What if I do not own a kitchen torch?
You can use your oven’s broiler as an alternative. Sprinkle the sugar on top of the chilled cheesecake and place it on the top rack under a hot broiler for 2-4 minutes, watching it very closely. The results are slightly less precise than a torch, but it works. Keep the oven door slightly ajar and do not walk away, as the sugar can go from perfect to burnt in seconds.
5. How far in advance can I make this?
The cheesecake itself (without the brulee topping) can be made up to 3 days in advance and stored in the refrigerator covered. Add the sugar and torch the top only when you are ready to serve. This makes it an ideal make-ahead dessert for dinner parties, holidays, and special occasions.
For a mini version perfect for individual servings, the Mini Cheesecake Recipe is a fantastic option to explore.

Creme Brulee Cheesecake

Equipment
- 9-inch springform pan
- Stand mixer or hand mixer
- Large mixing bowls
- Kitchen torch - Essential for caramelizing sugar topping
- Large roasting pan - For water bath
- Heavy-duty aluminum foil - For wrapping springform pan
- Rubber spatula
- Measuring cups and spoons
- Food processor or zip-lock bag and rolling pin - For crushing crackers
- Wire cooling rack
- Offset spatula - Optional, for smoothing the top
Ingredients
For the Crust
- 1½ cups graham cracker crumbs - 150g, about 10 full graham cracker sheets
- 3 tablespoons granulated sugar - 38g
- 5 tablespoons unsalted butter - 70g, melted
For the Cheesecake Filling
- 24 oz full-fat cream cheese - 680g, 3 blocks of 8 oz each, room temperature
- 1 cup granulated sugar - 200g
- 3 large eggs - room temperature
- 2 teaspoons pure vanilla extract
- 1 teaspoon vanilla bean paste - Optional but highly recommended for deeper flavor and visible specks
- ¾ cup heavy cream - 180ml, room temperature
- 1 tablespoon cornstarch
- ¼ teaspoon fine salt
For the Brulee Topping
- granulated sugar - 3-4 tablespoons for torching
Instructions
- Preheat oven to 325°F (163°C). Double-wrap springform pan with heavy-duty foil. Grease pan interior.
- Pulse graham crackers until fine. Combine crumbs with sugar and melted butter. Press into pan and bake 8-10 minutes. Cool completely.
- Beat room-temperature cream cheese until smooth and fluffy, scraping down bowl.
- Gradually add sugar, then vanilla extract and paste. Mix until light and creamy.
- Add eggs one at a time on low speed, mixing just until combined. Do not overmix.
- Slowly pour in heavy cream on lowest speed. Add cornstarch and salt, mix briefly until combined.
- Pour filling over cooled crust. Tap pan to release air bubbles. Place in roasting pan and add hot water bath.
- Bake 55-65 minutes until edges set and center has slight wobble. Turn off oven and cool inside 1 hour with door cracked.
- Remove from water bath, unwrap, and cool on wire rack to room temperature. Refrigerate at least 6 hours or overnight.
- Remove cheesecake from pan. Sprinkle even layer of sugar on top. Torch until melted and amber. Let harden 1-2 minutes before serving.
Notes
- Use room-temperature ingredients: Cold cream cheese creates lumps; cold eggs cause the batter to seize. Pull everything from the fridge at least 1 hour before you begin.
- Do not overmix after adding the eggs: Mix on low speed and stop as soon as each egg is incorporated. Excess air is the leading cause of cracking.
- Use a proper water bath: The steam from the water bath keeps the oven humid, which prevents the surface from drying out and cracking. Do not skip it.
- Double-wrap your foil: A single layer of foil is not enough to keep water out. Use two or even three sheets, and make sure they overlap and seal well at the top.
- Torch just before serving: The caramelized topping softens and loses its crunch within 20-30 minutes. For the best texture contrast, torch the sugar right before you bring it to the table.
- Allow full overnight chilling: A cheesecake that has chilled for only a few hours is softer and harder to slice cleanly. Overnight chilling is what gives it that perfect dense, creamy texture.
- Use a hot, clean knife for slicing: Run your knife under hot water, wipe it dry, and slice. Repeat between each cut for clean, beautiful slices.
- Crust variations: Swap graham crackers for crushed Oreo cookies, Biscoff cookies, digestive biscuits, or gingersnap cookies. Use the same ratio of crumbs to butter.
- Make-ahead friendly: The cheesecake itself (without the brulee topping) can be made up to 3 days in advance and stored in the refrigerator covered. Add the sugar and torch only when ready to serve.
- Refrigerator storage: Store the cheesecake (without the brulee topping) covered loosely with plastic wrap for up to 5 days. Torch fresh sugar on top each time you serve it for the best texture.
Final Thoughts
This Creme Brulee Cheesecake Recipe is the kind of dessert that feels luxurious but is genuinely achievable in any home kitchen.
Once you experience that first crack of the caramelized sugar shell giving way to the dense, vanilla-scented cream cheese filling beneath, you will understand why this combination is so special.
It is perfect for birthdays, holidays, dinner parties, or simply a weekend when you feel like doing something extraordinary.
Give this recipe a try, and when you do, come back and share your experience in the comments below. It genuinely makes my day to hear how it turned out for you, and your photos and tips help other readers too!
Recommended:
- Strawberry Cheesecake Recipe
- Lemon Cheesecake Recipe
- Chocolate Cheesecake Recipe
- Raspberry Cheesecake Recipe
- Blueberry Cheesecake Recipe
- Turtle Cheesecake Recipe
- Pumpkin Cheesecake Recipe
- Key Lime Cheesecake Recipe
- Lemon Meringue Cheesecake Recipe
- Best Cheesecake Recipe