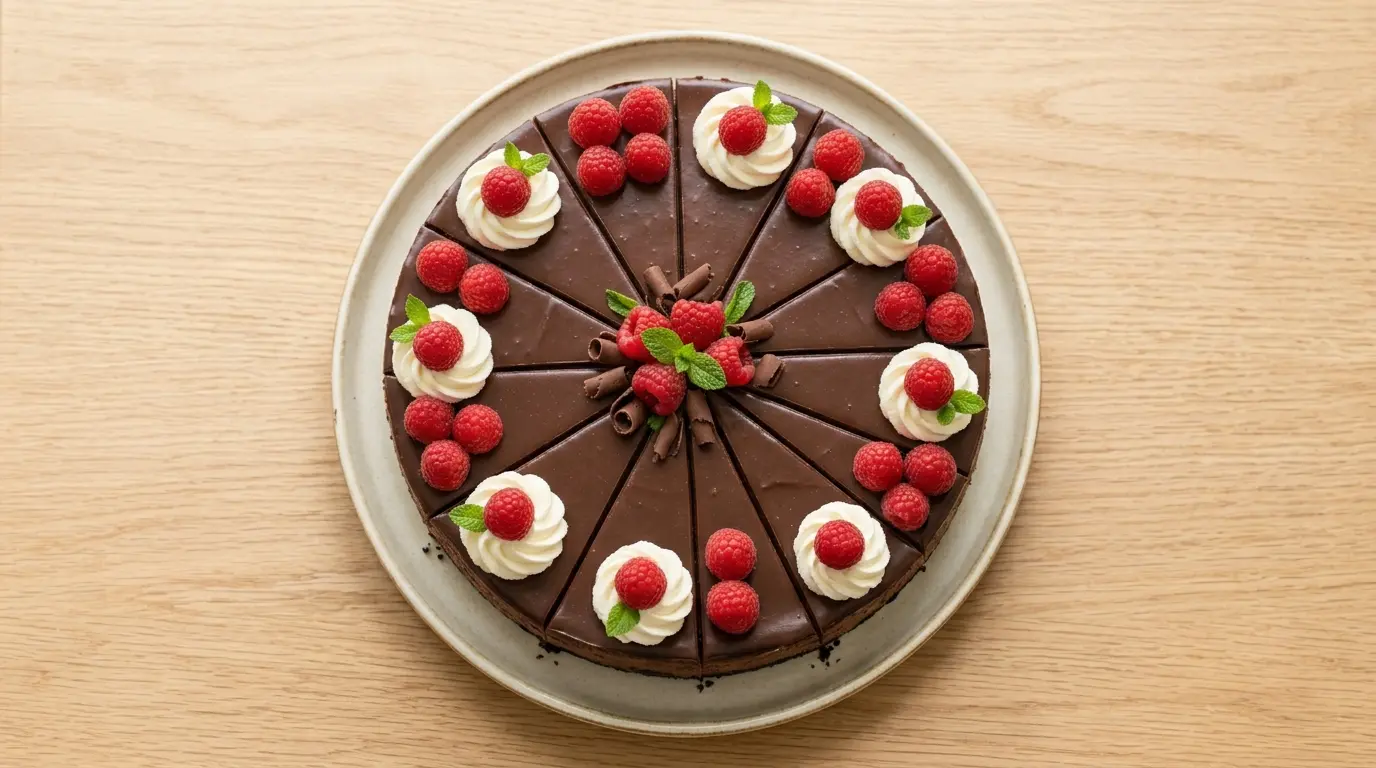
If you’ve been looking for the perfect chocolate cheesecake recipe, your search ends here. This is the kind of dessert that stops people mid-conversation at the dinner table, the one everyone asks you to bring to every gathering.
This cheesecake is built on three layers of pure chocolate indulgence: a crisp, buttery Oreo cookie crust, a dense and velvety chocolate cream cheese filling made with real melted chocolate, and a silky chocolate ganache poured right over the top.
What makes this version stand out is the use of actual melted semi-sweet chocolate in the filling. Cocoa powder alone gives a dusty, muted result. Real chocolate gives you that deep, fudgy richness you’d find in a bakery-style cheesecake.
It bakes in a water bath for an even, crack-free finish, then chills overnight to set into something truly spectacular. Whether you’re making this for a birthday, a holiday, or simply because you deserve it, this recipe delivers every single time.
You might also enjoy this No Bake Cheesecake if you’re looking for a fuss-free chocolate dessert option.
Why You’ll Love This Chocolate Cheesecake Recipe
This is not just any chocolate dessert. It is a full-on chocolate experience.
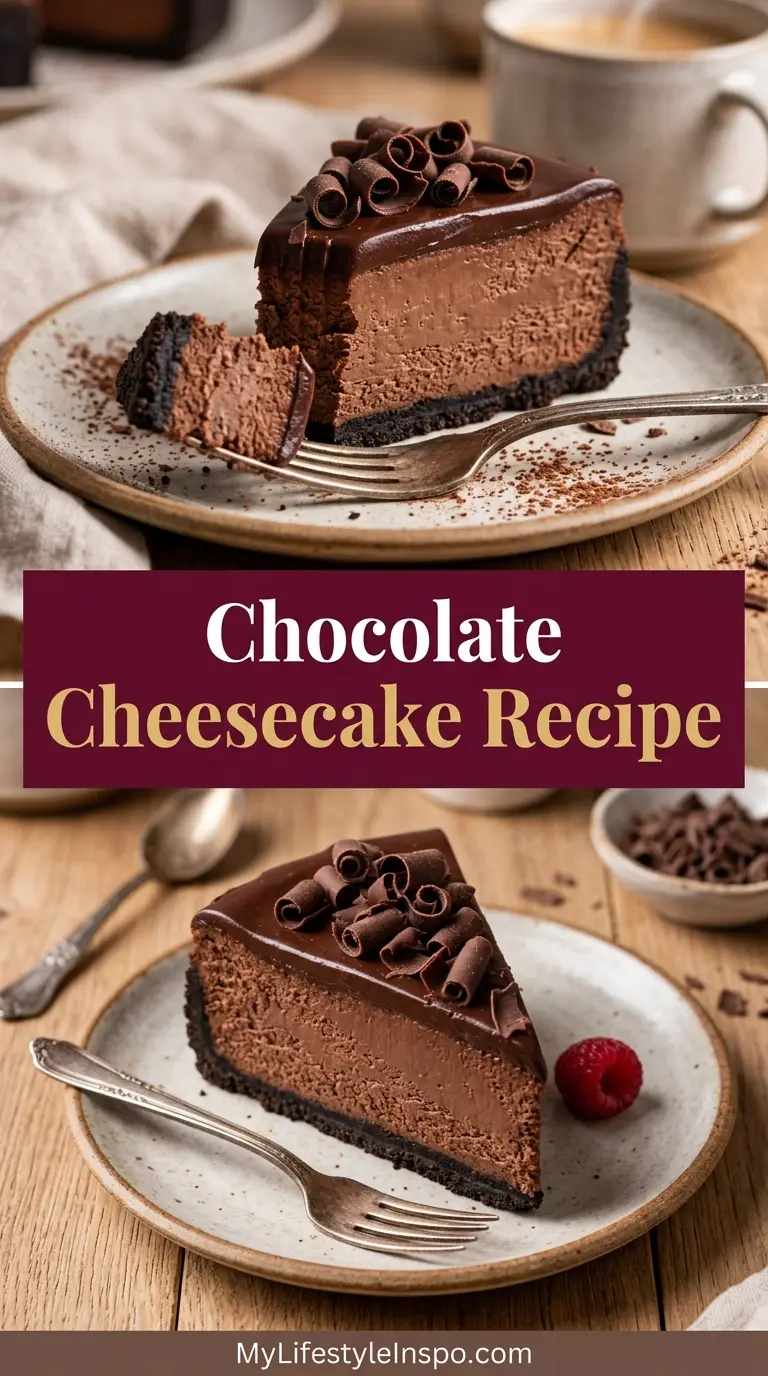
The filling is thick and mousse-like, thanks to the combination of melted semi-sweet chocolate, full-fat cream cheese, and sour cream. The sour cream adds just enough tang to balance out all that richness without pulling focus from the chocolate.
The Oreo crust is a perfect match here. Its slightly bitter cocoa note complements the sweeter filling better than a standard graham cracker base ever could.
The ganache on top sets into a glossy, truffle-like layer. It adds another dimension of chocolate without being overpowering, and it makes the finished cheesecake look absolutely stunning when sliced.
Here is what makes this recipe one you will come back to again and again:
- Deep, genuine chocolate flavor from real melted semi-sweet chocolate in the batter
- A crack-free finish from the gentle heat of a water bath
- Creamy, dense texture that slices cleanly and holds its shape beautifully
- Only 30 minutes of active prep time before the oven does all the work
- Stays fresh and delicious for up to 5 days in the refrigerator
- Freezes perfectly, making it ideal for making ahead
Read Also: Oreo Cheesecake Recipe
Ingredients
This recipe uses straightforward ingredients, but quality matters here. Use the best chocolate you can find for the filling and ganache. A full-fat, block-style cream cheese (not the spreadable kind in tubs) gives you the best structure and creaminess.
For the Oreo Crust:
- 24 Oreo cookies (about 2 cups / 240g of crumbs, filling included)
- 5 tablespoons (70g) unsalted butter, melted
For the Chocolate Cheesecake Filling:
- 10 oz (280g) semi-sweet chocolate, finely chopped (from baking bars, not chips)
- 24 oz (680g) full-fat cream cheese, at room temperature
- 1 cup (200g) granulated sugar
- 3 tablespoons unsweetened cocoa powder
- 1 cup (240g) full-fat sour cream, at room temperature
- 3 large eggs, at room temperature
- 2 teaspoons pure vanilla extract
- 1/4 teaspoon fine salt
For the Chocolate Ganache Topping:
- 6 oz (170g) semi-sweet chocolate, finely chopped
- 3/4 cup (180ml) heavy cream
Optional Garnishes:
- Whipped cream
- Chocolate shavings or curls
- Fresh raspberries or strawberries
This recipe pairs beautifully with a scoop of Vanilla Bean Ice Cream for a truly indulgent dessert plate.
Kitchen Equipment Needed
Having the right tools makes the process much easier and helps you get a professional result at home. The most important item on this list is a good springform pan. Without it, removing the cheesecake cleanly is nearly impossible.
- 9-inch springform pan
- Stand mixer or electric hand mixer
- Large roasting pan (for the water bath)
- Food processor or zip-lock bag and rolling pin (for Oreo crumbs)
- Double boiler or microwave-safe bowl (for melting chocolate)
- Digital kitchen scale (highly recommended for accuracy)
- Large mixing bowls
- Rubber spatula
- Measuring cups and spoons
- Aluminum foil (wide, heavy-duty)
- Offset spatula or butter knife (for smoothing the top)
- Wire cooling rack
Read Also: Best Cheesecake Recipe
Recommended Products for This Recipe
These are products chosen based on quality and real performance in this recipe. They are the kinds of tools and ingredients that make a noticeable difference in your final result.
1. Ghirardelli 60% Cacao Bittersweet Chocolate Baking Bar
The quality of your chocolate is the single biggest factor in how your cheesecake tastes. Ghirardelli’s baking bars melt smoothly and have a deep, well-balanced cocoa flavor that holds up beautifully in a rich cheesecake filling.
2. Cuisinart 9-Inch Springform Pan
A quality springform pan with a tight, leak-free seal is essential for water bath baking. This one has a non-stick coating that releases cleanly and a secure latch that won’t let water seep in.
3. KitchenAid Artisan Stand Mixer
A stand mixer takes all the effort out of beating the cream cheese to perfect smoothness. Getting lump-free batter is easier and more consistent with a stand mixer than with a hand mixer.
4. OXO Good Grips Digital Kitchen Scale
Measuring by weight instead of volume gives you a more precise and consistent result every time. This is especially important for the chocolate and cream cheese, where a little too much or too little can affect the texture.
You might also enjoy: Chocolate Ganache Recipe
Step-by-Step Instructions
Step 1: Prepare Your Pan and Preheat the Oven
- Preheat your oven to 325°F (163°C).
- Place a rack in the center of the oven.
- Cut two large sheets of heavy-duty aluminum foil and wrap them around the outside of your springform pan, pressing the foil up the sides as high as it will go. This creates a waterproof barrier to protect the crust during the water bath. Use two layers to be safe.
- Lightly grease the inside bottom and sides of the springform pan with butter or non-stick spray.
Step 2: Make the Oreo Crust
- Place all 24 Oreo cookies (filling and all) into a food processor and pulse until you have fine, even crumbs with no large chunks remaining. You should have about 2 cups (240g) of crumbs.
- If you don’t have a food processor, seal the cookies in a large zip-lock bag and crush them with a rolling pin until finely ground.
- Pour the crumbs into a medium bowl and add the 5 tablespoons (70g) of melted butter.
- Stir until all the crumbs are evenly moistened and the mixture looks like wet sand.
- Transfer the crumb mixture to your prepared springform pan.
- Using the bottom of a flat measuring cup or glass, press the crumbs firmly and evenly across the bottom and about 1 inch up the sides of the pan. Press firmly so the crust holds together when sliced.
- Bake the crust for 8 minutes, then remove and let it cool while you prepare the filling. Leave the oven on.
Step 3: Melt the Chocolate
- Place the 10 oz (280g) of finely chopped semi-sweet chocolate into a microwave-safe bowl.
- Microwave in 30-second bursts, stirring well between each interval, until the chocolate is fully melted and smooth. This usually takes about 2 to 2.5 minutes total.
- Alternatively, melt the chocolate using a double boiler: set a heatproof bowl over a saucepan of barely simmering water and stir the chocolate until melted.
- Set the melted chocolate aside to cool to room temperature, about 10 to 15 minutes. You want it fluid but not hot. Adding hot chocolate to the cream cheese batter can cause it to seize or create lumps.
Step 4: Make the Cheesecake Filling
- In the bowl of a stand mixer fitted with the paddle attachment (or using an electric hand mixer), beat the 24 oz (680g) of room-temperature cream cheese on medium speed for about 2 minutes until completely smooth and no lumps remain. Scrape down the sides and bottom of the bowl.
- Add the 1 cup (200g) of granulated sugar and beat on medium speed for another 2 minutes until fully incorporated and the mixture is light and fluffy.
- Add the 3 tablespoons of cocoa powder and the 1/4 teaspoon of salt. Mix on low speed until just combined.
- Add the 1 cup (240g) of room-temperature sour cream and the 2 teaspoons of vanilla extract. Mix on low until smooth, scraping down the bowl as needed.
- Add the cooled melted chocolate and mix on low speed until fully combined and the batter is uniformly dark brown.
- Add the 3 eggs one at a time, mixing on low speed after each addition just until the egg disappears into the batter. Do not over-mix after adding the eggs. Over-mixing incorporates too much air, which can cause cracking and a spongy texture.
- Give the batter a final fold with a rubber spatula to make sure everything is evenly combined from the bottom of the bowl.
Step 5: Fill the Pan and Set Up the Water Bath
- Pour the chocolate cheesecake filling over the cooled Oreo crust.
- Use an offset spatula or the back of a spoon to smooth the top into an even layer.
- Place the foil-wrapped springform pan into your large roasting pan.
- Boil a kettle or pot of water. Carefully pour the boiling water into the roasting pan around the springform pan until the water reaches about 1 inch (2.5cm) up the sides of the springform. Do not let any water splash into the cheesecake.
- The steam and gentle, even heat from the water bath help the cheesecake cook slowly and evenly, preventing the top from cracking and keeping the texture ultra-creamy.
Step 6: Bake the Cheesecake
- Carefully transfer the roasting pan with the cheesecake inside to the center rack of the preheated 325°F (163°C) oven.
- Bake for 60 to 70 minutes. The cheesecake is done when the edges are set and the center has a slight wobble, similar to Jell-O, when you gently shake the pan. The center will finish setting as it cools.
- Do not open the oven during the first 45 minutes of baking.
- Turn off the oven when the bake time is up. Leave the cheesecake in the oven with the door cracked open about 1 inch for 1 hour. This gradual cooling prevents sudden temperature changes that can cause cracking.
Step 7: Cool Completely Before Refrigerating
- After 1 hour in the oven, remove the cheesecake and let it cool on a wire rack at room temperature for another 1 to 2 hours until it reaches room temperature.
- Once the cheesecake is at room temperature, cover it loosely with plastic wrap and refrigerate for at least 6 hours, ideally overnight. The cheesecake needs this time to fully set into its dense, creamy texture.
Step 8: Make the Chocolate Ganache
- Once the cheesecake is fully chilled and set, make the ganache.
- Place the 6 oz (170g) of finely chopped semi-sweet chocolate into a medium heatproof bowl.
- Heat the 3/4 cup (180ml) of heavy cream in a small saucepan over medium heat just until it begins to steam and small bubbles appear around the edges. Do not let it boil.
- Pour the hot cream over the chopped chocolate and let it sit undisturbed for 2 to 3 minutes.
- Stir gently with a rubber spatula from the center outward until the ganache is completely smooth and glossy.
- Let the ganache cool for about 10 minutes until it thickens slightly but is still pourable.
Step 9: Top the Cheesecake and Finish
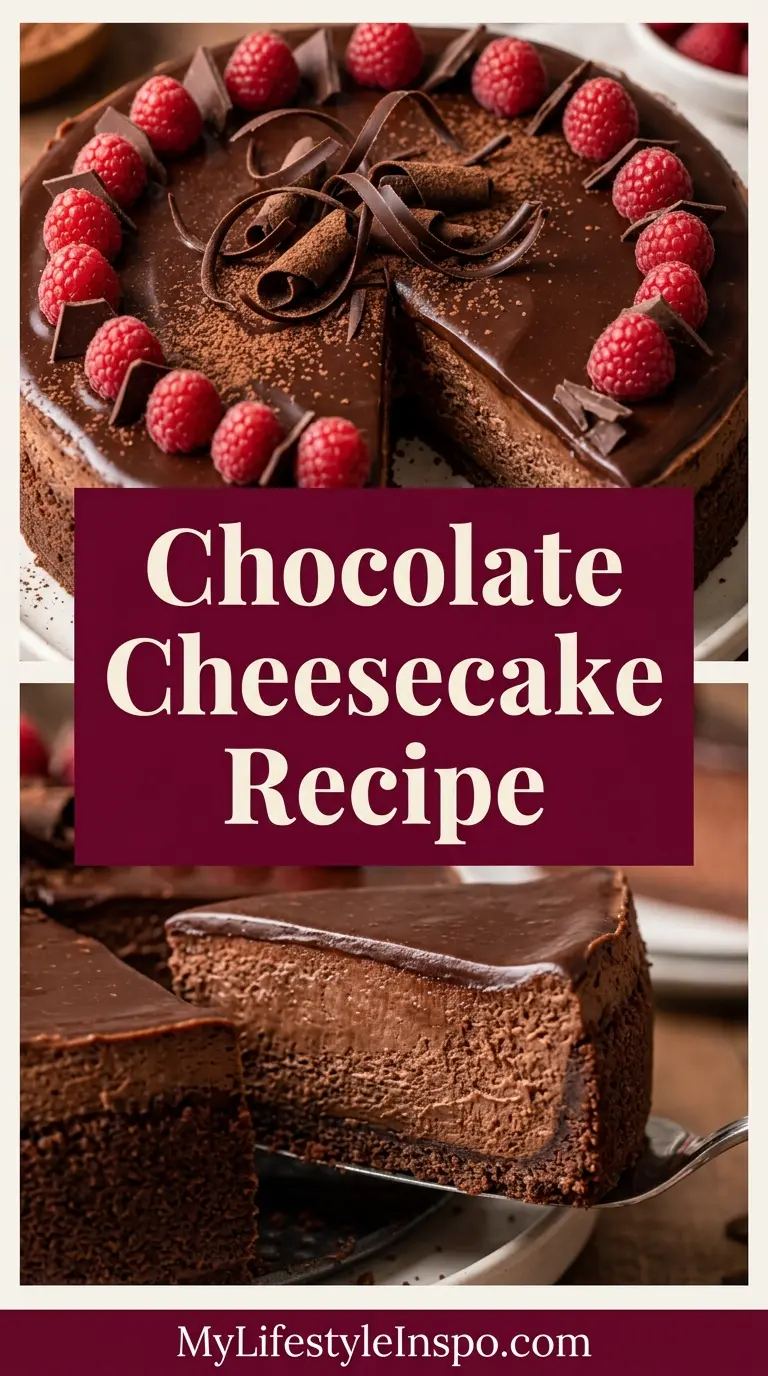
- Remove the chilled cheesecake from the springform pan: run a thin knife or offset spatula around the inside edge of the pan before unlatching it. Gently release the springform latch and lift off the ring.
- Place the cheesecake (still on the pan base) on a serving plate or cake stand.
- Pour the slightly cooled ganache over the top of the cheesecake. Use an offset spatula to gently spread it to the edges, allowing a little to drip over the sides if desired.
- Return the cheesecake to the refrigerator for 20 to 30 minutes to let the ganache set.
- Decorate with whipped cream rosettes, chocolate shavings, or fresh berries before serving.
Read Also: Chocolate Cake Recipe
Tips for Success
Cheesecake has a reputation for being difficult, but following a few key principles makes all the difference. Most cheesecake problems come down to temperature and mixing, so keep those two things in check and you will have beautiful results.
- Use room-temperature ingredients. Cold cream cheese and eggs do not mix smoothly and can leave lumps in the batter. Take everything out of the refrigerator at least 1 to 2 hours before you start.
- Don’t over-mix after adding eggs. Once the eggs go in, mix on low and stop as soon as they’re incorporated. Over-beating adds air bubbles that cause puffing and cracking.
- Let the chocolate cool before adding it. Hot chocolate added to cream cheese can scramble the eggs or cause the batter to seize. Wait until it’s just barely warm to the touch.
- Double-wrap the springform pan with foil. A small leak can ruin the crust. Use two generous layers of wide heavy-duty foil.
- Use boiling water, not hot tap water. Boiling water maintains temperature in the oven better and creates more consistent steam throughout the bake.
- Don’t skip the overnight chill. Slicing too early gives you a soft, under-set filling. An overnight rest in the refrigerator is what transforms the texture from loose to perfectly dense and creamy.
- Run a knife around the edges before releasing the springform. This prevents the sides from pulling and cracking as the cheesecake is unmolded.
Another favorite: Chocolate Pudding Recipe
Serving Suggestions
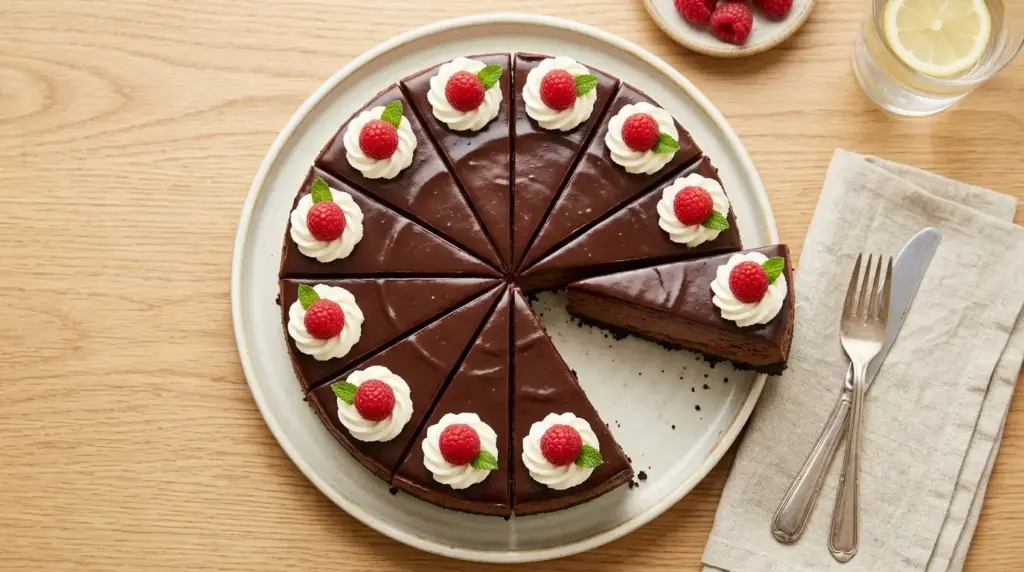
This chocolate cheesecake is rich and satisfying on its own, but a few thoughtful additions can turn each slice into a full dessert moment.
A dollop of lightly sweetened whipped cream alongside a slice cuts through the richness beautifully without competing with the chocolate. Fresh raspberries or strawberries add a bright, tart contrast that makes the chocolate flavor pop even more. A drizzle of warm Caramel Sauce over the ganache takes things in a decadent, salted-caramel direction that is absolutely worth trying.
Here are some ideas for serving and pairing this cheesecake:
- Serve with a scoop of vanilla or coffee ice cream for an over-the-top dessert
- Pair with fresh raspberries, strawberries, or cherries for a fruit-forward contrast
- Add a light dusting of powdered sugar and a few chocolate curls for an elegant finish
- Serve alongside hot coffee, espresso, or a rich hot chocolate for a true chocolate lover’s experience
- Drizzle individual slices with warm chocolate sauce or raspberry sauce just before serving
This cheesecake makes an excellent centerpiece for celebrations, dinner parties, or holiday dessert tables. It looks impressive but is straightforward enough for anyone who follows the steps carefully.
You might also enjoy: Chocolate Smoothie Recipe
Variations to Try
Once you have mastered the base recipe, it is easy to adapt it in some fun and delicious ways. The classic version is always a crowd-pleaser, but these variations give you options for different occasions, flavors, and dietary preferences.
- Mocha Chocolate Cheesecake: Add 1 tablespoon of instant espresso powder to the filling along with the cocoa powder. The coffee deepens and enhances the chocolate flavor without making the cheesecake taste like coffee.
- Mint Chocolate Cheesecake: Swap the vanilla extract for 1 teaspoon of peppermint extract. Garnish with crushed peppermint candies or mint leaves.
- Chocolate Raspberry Swirl Cheesecake: Drop spoonfuls of seedless raspberry jam over the filling before baking and swirl with a toothpick for a gorgeous ribbon effect.
- Peanut Butter Chocolate Cheesecake: Swirl 1/2 cup of creamy peanut butter into the filling before pouring it into the crust. The result is a rich, Reese’s-inspired cheesecake.
- No-Bake Version: Use 1 cup of heavy cream whipped to stiff peaks folded into the chocolate cream cheese mixture in place of the eggs. Pour over the chilled crust and refrigerate for 6 hours.
- Individual Mini Cheesecakes: Use a muffin tin lined with cupcake liners. Reduce the bake time to 18 to 22 minutes. Perfect for parties and much easier to serve.
Read Also: Pumpkin Pie Cheesecake Recipe
Storage and Reheating
Chocolate cheesecake stores exceptionally well, making it an ideal make-ahead dessert. Proper storage keeps the texture and flavor at their best for several days.
- Refrigerator: Cover the cheesecake loosely with plastic wrap or store individual slices in an airtight container. It keeps well in the refrigerator for up to 5 days. The flavors actually deepen and improve after the first 24 hours.
- Freezer (whole cheesecake): Freeze the ganache-topped cheesecake uncovered for 2 hours until the ganache is solid. Then wrap tightly in a double layer of plastic wrap followed by a layer of foil. Freeze for up to 3 months.
- Freezer (individual slices): Wrap each slice individually in plastic wrap, then place in a zip-lock freezer bag. Freeze for up to 3 months.
- Thawing: Transfer frozen cheesecake or slices to the refrigerator the night before serving. Let them thaw overnight, ideally for 6 to 8 hours.
- Reheating: Chocolate cheesecake is served cold or at room temperature. No reheating is needed or recommended, as warming can break down the texture. If you prefer a softer, slightly warmer slice, let it sit at room temperature for 20 to 30 minutes before serving.
This cheesecake pairs beautifully with: Fresh Strawberry Sauce Recipe
Nutritional Facts
The following values are per slice based on 12 servings. Exact values will vary depending on specific brands and any additional toppings.
| Nutrient | Amount Per Serving |
|---|---|
| Calories | ~520 kcal |
| Total Fat | 37g |
| Saturated Fat | 21g |
| Cholesterol | 135mg |
| Sodium | 280mg |
| Total Carbohydrates | 42g |
| Dietary Fiber | 2g |
| Total Sugars | 30g |
| Protein | 8g |
| Calcium | 90mg |
| Iron | 3mg |
These estimates are based on the base recipe without optional garnishes. Using reduced-fat cream cheese or a lighter sour cream will lower the calorie and fat content.
Read Also: Low Calorie Cheesecake Recipe
Health Benefits of Key Ingredients
This is an indulgent dessert, and it should be enjoyed as such. That said, several of the key ingredients bring some genuine nutritional value along with all that deliciousness.
Dark and semi-sweet chocolate is rich in flavonoids, a group of plant-based antioxidants that have been studied for their potential to support heart health and improve circulation. Choosing a higher-percentage chocolate (60% cacao or more) means you get more of these beneficial compounds per serving.
Here are some notable nutritional highlights from the key ingredients in this recipe:
- Semi-sweet chocolate: Contains flavonoids and antioxidants, as well as iron, magnesium, and zinc from the cacao
- Cream cheese: Provides calcium for bone health and a moderate amount of protein per serving
- Eggs: A complete protein source that also delivers vitamins A, D, B12, and choline, which supports brain function
- Cocoa powder: A concentrated source of antioxidants and a natural mood booster due to its phenylethylamine content
- Sour cream: Contributes probiotics and calcium, and adds a subtle tang that balances the sweetness of the cheesecake
This cheesecake pairs wonderfully with: Raspberry Cheesecake Recipe
Frequently Asked Questions
1. Do I really need a water bath for this chocolate cheesecake?
A water bath is strongly recommended for the best results. It creates gentle, humid heat that prevents the outside of the cheesecake from cooking faster than the center, which is what causes cracks and uneven texture. That said, some bakers skip it and reduce the oven temperature to 300°F (150°C) instead, which also slows the bake and reduces cracking risk.
2. Can I use chocolate chips instead of chopped chocolate bars?
Baking bars are strongly preferred for this recipe. Chocolate chips contain stabilizers that prevent them from melting smoothly, and the resulting texture in the batter can be slightly grainy. If you only have chips available, use them, but expect a slightly less silky result.
3. Why did my cheesecake crack on top?
The most common causes of cracks are over-mixing (which incorporates too much air), opening the oven door during baking, cooling too quickly, or skipping the water bath. The good news is that the ganache topping covers any cracks completely, so a crack on top is purely cosmetic and does not affect the taste at all.
4. How far in advance can I make this cheesecake?
This cheesecake is actually better when made a day ahead because the texture firms up and the chocolate flavor deepens overnight in the refrigerator. You can make it up to 3 days in advance and keep it covered in the fridge, or freeze it for up to 3 months as described in the storage section above.
5. Can I make this gluten-free?
Yes. Use gluten-free Oreo-style cookies for the crust and make sure your baking chocolate and cocoa powder are certified gluten-free. All other ingredients in this recipe are naturally gluten-free. The texture and flavor remain virtually identical to the original.
Read Also: Gluten Free Cheesecake Recipe
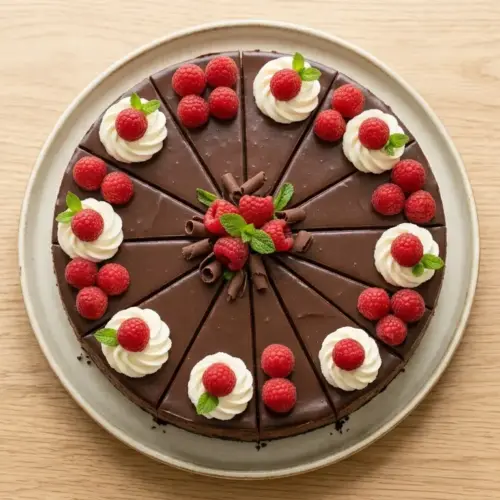
Ultimate Chocolate Cheesecake

Equipment
- 9-inch springform pan
- Stand mixer or electric hand mixer
- Large roasting pan - for water bath
- Food processor - or zip-lock bag and rolling pin for Oreo crumbs
- Double boiler or microwave-safe bowl - for melting chocolate
- Digital kitchen scale - highly recommended for accuracy
- Large mixing bowls
- Rubber spatula
- Measuring cups and spoons
- Aluminum foil - wide, heavy-duty
- Offset spatula or butter knife - for smoothing the top
- Wire cooling rack
Ingredients
- 24 cookies Oreo cookies - about 2 cups or 240g of crumbs, filling included
- 5 tablespoons unsalted butter - 70g, melted
- 10 oz semi-sweet chocolate - 280g, finely chopped (from baking bars, not chips)
- 24 oz full-fat cream cheese - 680g, at room temperature (block-style, not spreadable)
- 1 cup granulated sugar - 200g
- 3 tablespoons unsweetened cocoa powder
- 1 cup full-fat sour cream - 240g, at room temperature
- 3 large eggs - at room temperature
- 2 teaspoons pure vanilla extract
- 1/4 teaspoon fine salt
- 6 oz semi-sweet chocolate - 170g, finely chopped (for ganache)
- 3/4 cup heavy cream - 180ml (for ganache)
- Whipped cream - for garnish (optional)
- Chocolate shavings or curls - for garnish (optional)
- Fresh raspberries or strawberries - for garnish (optional)
Instructions
- Preheat oven to 325°F (163°C). Wrap the outside of a 9-inch springform pan with two layers of heavy-duty foil. Grease the inside lightly.
- Pulse 24 Oreo cookies in a food processor until fine crumbs form. Mix with 5 tablespoons melted butter, then press firmly into the bottom and 1 inch up the sides of the pan. Bake for 8 minutes and cool.
- Melt 10 oz semi-sweet chocolate in a microwave in 30-second bursts, stirring between each, until smooth. Set aside to cool to room temperature for 10-15 minutes.
- Beat 24 oz room-temperature cream cheese in a stand mixer on medium speed for 2 minutes until smooth. Add 1 cup sugar and beat for 2 more minutes until light and fluffy.
- Add 3 tablespoons cocoa powder and 1/4 teaspoon salt, mixing on low until combined. Add 1 cup sour cream and 2 teaspoons vanilla, mixing until smooth. Fold in the cooled melted chocolate.
- Add eggs one at a time, mixing on low after each addition just until incorporated. Do not over-mix. Fold the batter with a rubber spatula to ensure everything is evenly combined.
- Pour the filling over the cooled crust and smooth the top. Place the foil-wrapped pan in a large roasting pan and pour boiling water into the roasting pan to reach 1 inch up the sides of the springform pan.
- Bake for 60-70 minutes until the edges are set and the center has a slight wobble. Turn off the oven and leave the cheesecake inside with the door cracked open for 1 hour.
- Remove the cheesecake from the oven and cool on a wire rack for 1-2 hours until it reaches room temperature. Cover loosely with plastic wrap and refrigerate for at least 6 hours, ideally overnight.
- Place 6 oz semi-sweet chocolate in a heatproof bowl. Heat 3/4 cup heavy cream until steaming, pour over the chocolate, and let sit for 2-3 minutes. Stir until smooth and glossy. Cool for 10 minutes until slightly thickened.
- Run a knife around the inside edge of the pan, then release the springform. Place the cheesecake on a serving plate. Pour the ganache over the top and spread to the edges. Refrigerate for 20-30 minutes to set the ganache.
- Decorate with whipped cream, chocolate shavings, or fresh berries before serving. Slice with a clean, sharp knife wiped between cuts for perfect slices.
Notes
- Room temperature ingredients are essential: Take cream cheese, eggs, and sour cream out of the refrigerator at least 1-2 hours before starting to ensure a smooth, lump-free batter.
- Don’t over-mix after adding eggs: Mix on low speed and stop as soon as each egg disappears into the batter. Over-mixing incorporates too much air, which can cause cracking and a spongy texture.
- Cool the melted chocolate: Allow the melted chocolate to cool to just barely warm before adding to the cream cheese mixture. Hot chocolate can scramble the eggs or cause the batter to seize.
- Double-wrap with foil: Use two generous layers of wide heavy-duty foil around the springform pan to prevent any water from seeping in during the water bath, which would ruin the crust.
- Use boiling water: Always use boiling water (not hot tap water) for the water bath to maintain temperature and create consistent steam throughout the bake.
- Don’t skip the overnight chill: An overnight rest in the refrigerator is what transforms the texture from loose to perfectly dense and creamy. Slicing too early will result in a soft, under-set filling.
- Run a knife around the edges: Before releasing the springform pan, run a thin knife or offset spatula around the inside edge to prevent the sides from pulling and cracking as the cheesecake is unmolded.
- Variation ideas: For a mocha version, add 1 tablespoon instant espresso powder with the cocoa powder. For mint chocolate, swap vanilla extract for 1 teaspoon peppermint extract. For a raspberry swirl, drop spoonfuls of seedless raspberry jam over the filling and swirl before baking.
- Storage: Refrigerate covered for up to 5 days. Freeze the whole cheesecake or individual slices for up to 3 months. Thaw overnight in the refrigerator before serving.
- Gluten-free option: Use gluten-free Oreo-style cookies for the crust and ensure the baking chocolate and cocoa powder are certified gluten-free.
Final Thoughts
This chocolate cheesecake recipe is the one to make when you want to genuinely impress someone or simply treat yourself to something extraordinary.
Every component works together, from the snappy Oreo crust to the thick, truffle-like filling to the glossy ganache crown. It is a dessert that looks like it came from a fancy restaurant but is completely achievable in a home kitchen.
Take your time with it. Let the ingredients come to room temperature, resist the urge to over-mix, and be patient during the cooling and chilling steps. That patience pays off in a cheesecake with a texture so silky and a flavor so deeply chocolatey that it will become the most requested dessert in your repertoire.
Give this chocolate cheesecake recipe a try and let us know how it turns out. Leave a comment below with your questions or share how you made it your own. We would love to see it!
Recommended:
- Baked Cheesecake Recipe
- New York Cheesecake Recipe
- Strawberry Cheesecake Recipe
- Blueberry Cheesecake Recipe
- Lemon Cheesecake Recipe
- Mini Cheesecake Recipe
- Keto Cheesecake Recipe
- Vegan Cheesecake Recipe
- Philadelphia Cheesecake Recipe
- Chocolate Cake Recipe



