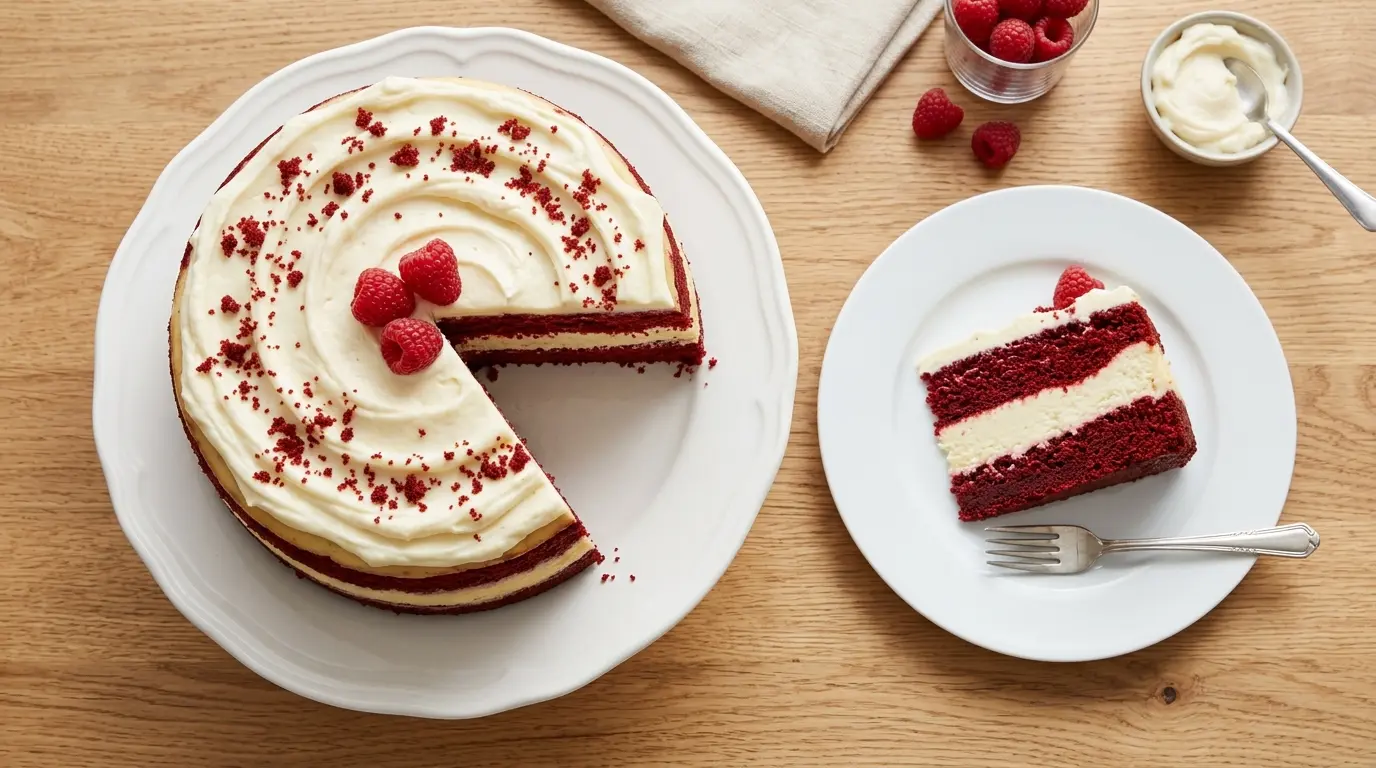
If you’ve been searching for a dessert that genuinely stops people in their tracks, this red velvet cheesecake recipe is exactly what you need. Inspired by the iconic Cheesecake Factory version that fans have been raving about for years, this homemade showstopper layers moist, cocoa-kissed red velvet cake with a silky, tangy cheesecake filling, all coated in a luscious cream cheese frosting.
What makes this version special is the science behind each component. The buttermilk and white vinegar in the red velvet layers react with the natural cocoa powder, creating that signature velvety crumb and subtle tang. The cheesecake filling gets its richness from full-fat cream cheese combined with sour cream and heavy cream, giving it a dense-but-dreamy texture that holds up beautifully when sliced.
Yes, it takes some patience. But every single step is completely beginner-friendly, and the result is a dessert people will talk about long after the last slice is gone.
For a simpler twist on cheesecake, you might also love this Philadelphia Cheesecake that uses just a handful of ingredients.
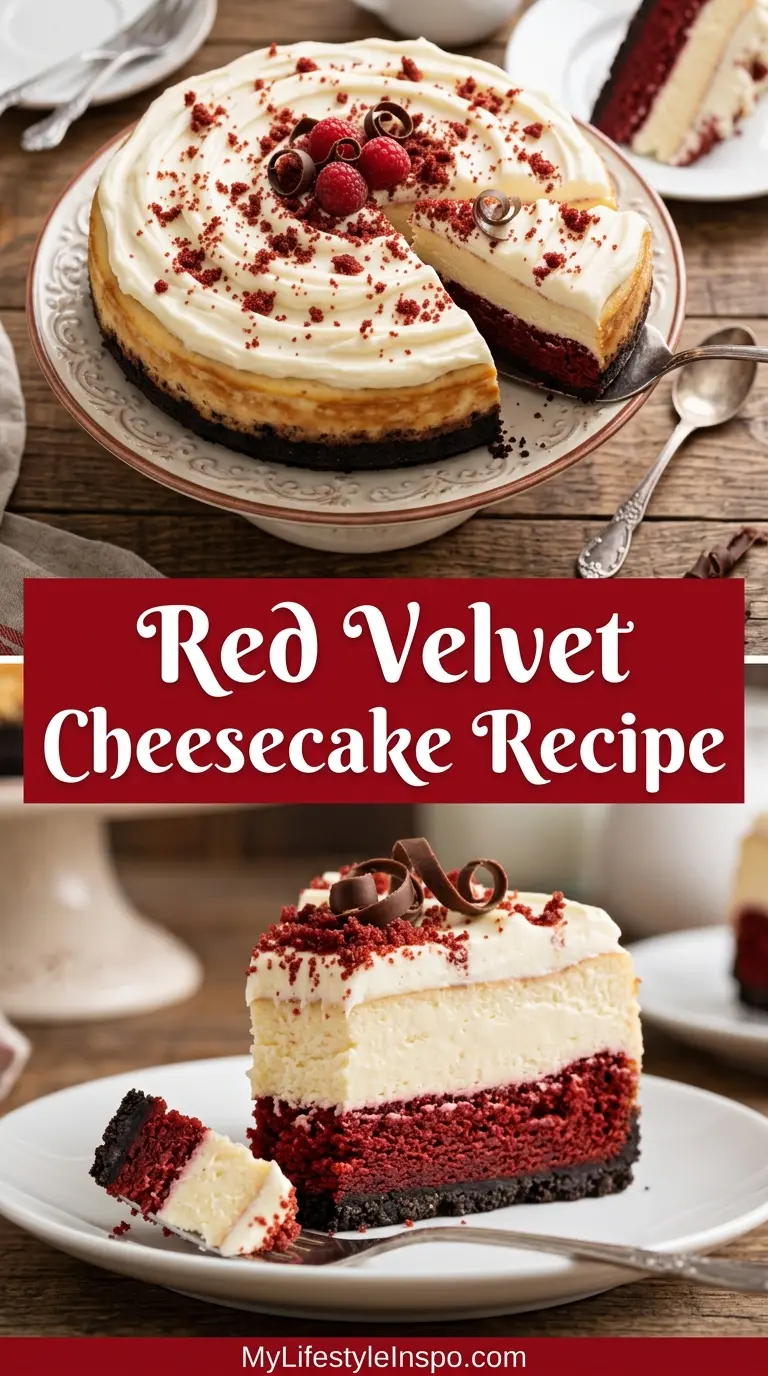
Why You’ll Love This Red Velvet Cheesecake Recipe
This dessert is truly a two-for-one: you get the deep cocoa flavor of red velvet cake AND the creamy richness of cheesecake in every single bite.
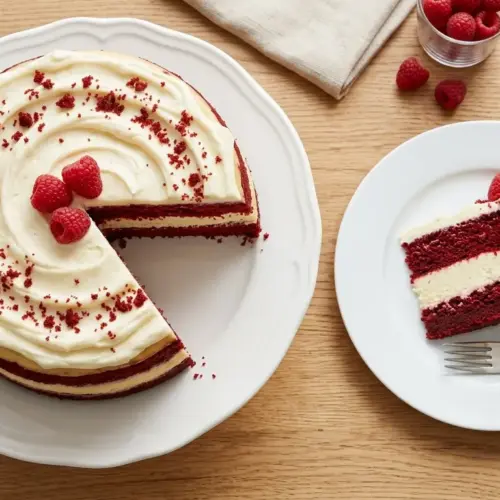
The striking red and white layers make it one of the most visually impressive desserts you can make at home. It looks bakery-level without requiring any professional skills.
The cream cheese frosting ties everything together. It mirrors the tanginess in both the cheesecake filling and the red velvet layers, keeping the flavor cohesive from the first bite to the last.
It’s incredibly make-ahead friendly. You can bake the cake layers and the cheesecake the day before, then assemble and frost on the day you serve it.
Here’s a quick summary of why this recipe wins every time:
- The cocoa and buttermilk combination creates a tender, moist crumb that doesn’t dry out even after refrigeration
- The cheesecake layer is baked in a water bath for a crack-free, silky finish
- Cream cheese frosting adds tang and richness without being overly sweet
- The red and white layers create a jaw-dropping visual that requires zero decorating skills
- The recipe scales beautifully for parties and holiday tables
Another crowd-pleaser you might want to try is this gorgeous Strawberry Cheesecake for your next gathering.
Ingredients
You’ll need ingredients for three components: the red velvet cake layers, the cheesecake filling, and the cream cheese frosting. Most items are standard pantry staples with the exception of red food coloring, which you can find in any grocery store baking aisle.
For the Red Velvet Cake Layers:
- 2 1/2 cups (315g) all-purpose flour
- 2 tablespoons (15g) natural unsweetened cocoa powder
- 1 teaspoon baking soda
- 1/2 teaspoon salt
- 1 1/2 cups (300g) granulated sugar
- 1/2 cup (115g) unsalted butter, softened to room temperature
- 1/2 cup (120ml) neutral vegetable oil (canola or sunflower)
- 2 large eggs, room temperature
- 1 cup (240ml) buttermilk, room temperature
- 1 teaspoon white vinegar
- 2 teaspoons pure vanilla extract
- 2 tablespoons (30ml) red gel food coloring
For the Cheesecake Filling:
- 24 oz (680g) full-fat cream cheese, softened to room temperature
- 1 cup (200g) granulated sugar
- 3 tablespoons (24g) all-purpose flour
- 1/4 teaspoon salt
- 1/2 cup (120ml) sour cream, room temperature
- 1/2 cup (120ml) heavy whipping cream
- 1 teaspoon pure vanilla extract
- 3 large eggs, room temperature
For the Cream Cheese Frosting:
- 16 oz (450g) full-fat cream cheese, softened to room temperature
- 1 cup (225g) unsalted butter, softened to room temperature
- 4 cups (480g) powdered sugar, sifted
- 2 teaspoons pure vanilla extract
- 2-3 tablespoons heavy cream (to adjust consistency)
- Pinch of salt
For the finishing touch, this recipe pairs beautifully with a classic Cream Cheese Frosting if you’d like extra tips on nailing that perfect texture.
Kitchen Equipment Needed
Having the right tools makes this recipe significantly easier, especially for the cheesecake layer. A springform pan is non-negotiable here because it allows you to release the cheesecake cleanly without destroying the edges.
- Two 9-inch (23cm) round cake pans
- One 9-inch springform pan
- Stand mixer or hand electric mixer
- Large roasting pan (for the water bath)
- Parchment paper rounds
- Offset spatula for frosting
- Serrated knife for leveling cake layers
- Cooling rack
- Aluminum foil (heavy-duty, for wrapping the springform pan)
- Rubber spatulas
- Digital kitchen scale (recommended for accuracy)
- Mixing bowls (at least 3)
- Measuring cups and spoons
Read Also: Baked Cheesecake Recipe
Recommended Products for This Recipe
These are hand-picked products based on quality and performance that will make a genuine difference in how your red velvet cheesecake turns out.
1. Fat Daddio’s 9-Inch Springform Pan
A high-quality springform pan with a leakproof base is the single most important piece of equipment for this recipe. Cheap pans tend to buckle or leak during the water bath, ruining the cheesecake. Fat Daddio’s aluminum springform pans conduct heat evenly and the latch is tight enough to prevent any water seeping in when wrapped in foil.
2. AmeriColor Soft Gel Paste Red Food Coloring
Gel food coloring gives you a far more vibrant, true red than liquid coloring, and you need far less of it. AmeriColor’s gel paste is the go-to choice for food bloggers and professional bakers because the color is concentrated and doesn’t affect the texture of your batter the way liquid colorings can.
3. KitchenAid 5-Quart Stand Mixer
Beating cream cheese to silky smooth perfection is what a stand mixer was made for. It frees up your hands, ensures consistent speed, and prevents over-mixing once you add the eggs (which is a common cause of cheesecake cracking). This is an investment that will serve you across hundreds of recipes.
4. OXO Good Grips Offset Spatula
Frosting a multi-layer cake with an offset spatula versus a regular knife is a completely different experience. The angled blade lets you smooth the cream cheese frosting flat without your knuckles dragging through the cake surface. A small and large offset spatula together will handle both the filling between layers and the exterior frosting.
5. Wilton Parchment Paper Rounds
Pre-cut parchment rounds in the exact size of your cake pans eliminate the guesswork of cutting parchment from a roll. Both the cake layers and the cheesecake layer benefit enormously from parchment liners, making removal flawless every single time.
Another recipe that benefits from the same baking setup: Chocolate Cheesecake.
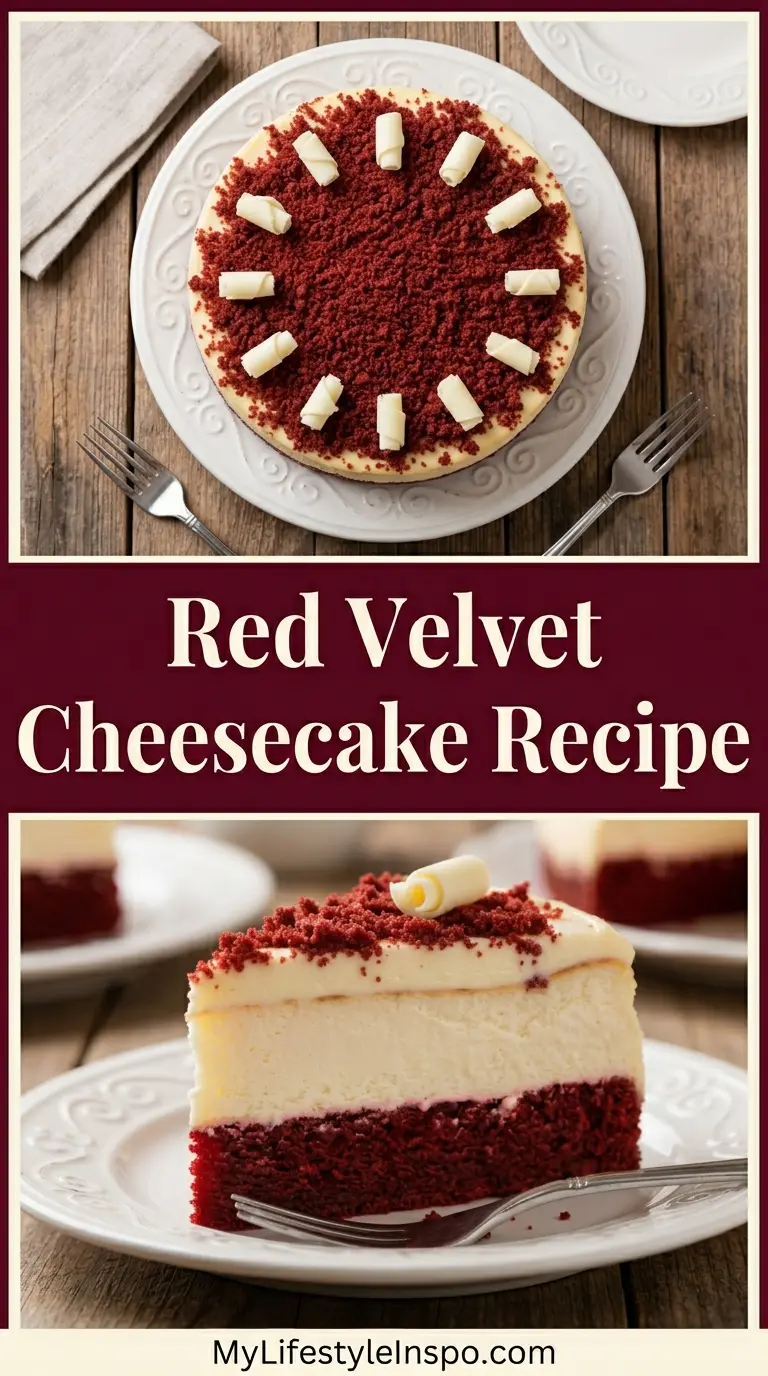
Step-by-Step Instructions
Step 1: Make the Cheesecake Layer (Day Before Recommended)
Starting with the cheesecake gives it time to cool completely and firm up in the refrigerator, making assembly much easier.
- Preheat your oven to 325°F (165°C).
- Line the bottom of your 9-inch springform pan with a round of parchment paper and spray the sides lightly with non-stick cooking spray.
- Wrap the outside of the springform pan tightly in two layers of heavy-duty aluminum foil, covering the bottom and sides completely. This prevents water from the bath from seeping into the cheesecake.
- In your stand mixer fitted with the paddle attachment, beat the 24 oz softened cream cheese on medium speed for 2-3 minutes until it is completely smooth and no lumps remain. Scrape down the sides of the bowl frequently.
- Add the 1 cup granulated sugar, 3 tablespoons flour, and 1/4 teaspoon salt to the cream cheese. Beat on medium-low speed for another 2 minutes until fully combined and creamy.
- Scrape down the bowl, then add the 1/2 cup sour cream, 1/2 cup heavy cream, and 1 teaspoon vanilla extract. Mix on low speed until just incorporated.
- Add the 3 eggs one at a time, beating on low speed for about 15-20 seconds after each addition. Do not over-mix at this stage; over-beating eggs incorporates too much air and can cause cracking.
- Pour the cheesecake batter into the prepared springform pan and smooth the top with an offset spatula.
- Place the foil-wrapped springform pan into a large roasting pan. Fill the roasting pan with hot water until it reaches about halfway up the sides of the springform pan. This water bath (bain-marie) creates a gentle, even heat that prevents the top of the cheesecake from cracking.
- Carefully transfer the roasting pan to the oven and bake for 55-65 minutes. The cheesecake is done when the edges are set but the center still has a slight jiggle, similar to Jell-O. It will continue to set as it cools.
- Turn off the oven, crack the oven door open about 1 inch, and let the cheesecake cool in the oven for 1 hour. This gradual cooling further prevents cracking.
- Remove the cheesecake from the water bath, discard the foil, and let it cool completely on a wire rack for another hour at room temperature.
- Cover with plastic wrap and refrigerate for at least 6 hours, or overnight.
Step 2: Make the Red Velvet Cake Layers
- Preheat your oven to 350°F (175°C). Grease two 9-inch round cake pans and line the bottoms with parchment paper rounds.
- In a medium bowl, whisk together the 2 1/2 cups all-purpose flour, 2 tablespoons cocoa powder, 1 teaspoon baking soda, and 1/2 teaspoon salt. Set this dry mixture aside.
- In the bowl of your stand mixer fitted with the paddle attachment, beat the 1/2 cup softened butter and 1 1/2 cups granulated sugar on medium-high speed for 3-4 minutes until the mixture is light and fluffy. Proper creaming here is essential for a tender crumb.
- With the mixer running on medium speed, add the 1/2 cup vegetable oil in a slow, steady stream. Beat for another minute until combined.
- Add the 2 room-temperature eggs one at a time, beating well after each addition. Scrape down the sides of the bowl between additions.
- Add the 2 teaspoons vanilla extract and the 2 tablespoons red gel food coloring. Mix on low until the color is evenly distributed. The batter will turn a deep red.
- In a small bowl or measuring cup, stir together the 1 cup buttermilk and 1 teaspoon white vinegar.
- With the mixer on low speed, add the dry flour mixture in three additions, alternating with the buttermilk mixture in two additions (start and end with the flour). Begin with one-third of the flour, then half the buttermilk mixture, then another third of the flour, then the remaining buttermilk, then the final third of flour. Mix only until just combined after each addition. Over-mixing at this stage will develop the gluten and result in a tough, dense cake.
- Divide the batter evenly between the two prepared cake pans, using a kitchen scale for accuracy if you have one. Smooth the tops with a spatula.
- Bake for 28-33 minutes, or until a toothpick inserted into the center comes out clean and the edges of the cakes are just beginning to pull away from the sides of the pan.
- Allow the cakes to cool in the pans on a wire rack for 15 minutes, then carefully turn them out onto the cooling rack to cool completely, at least 1-2 hours.
Step 3: Make the Cream Cheese Frosting
- In the bowl of your stand mixer fitted with the paddle attachment, beat the 16 oz softened cream cheese on medium speed for 2 minutes until completely smooth and fluffy.
- Add the 1 cup softened butter and beat on medium-high speed for another 2-3 minutes, scraping down the bowl as needed, until the mixture is pale, light, and very smooth.
- Reduce the speed to low and add the 4 cups sifted powdered sugar one cup at a time, mixing briefly between additions to avoid a sugar cloud.
- Add the 2 teaspoons vanilla extract and a pinch of salt. Increase speed to medium-high and beat for 2 minutes until the frosting is fluffy and smooth.
- If the frosting seems too thick to spread easily, add heavy cream one tablespoon at a time until it reaches a smooth, spreadable consistency. If it seems too soft, refrigerate for 15-20 minutes to firm up slightly before using.
Step 4: Level the Cake Layers
- Once both red velvet cake layers are completely cool, use a long serrated knife to trim any domed tops so both layers are flat and even. Slice carefully using a gentle sawing motion, rotating the cake as you go. Flat layers are key to a stable stacked cake.
- Reserve the cake trimmings. You can crumble them and use them as a garnish on top of the finished cheesecake.
Step 5: Assemble the Cake
- Remove the cheesecake from the refrigerator. Run a thin knife or an offset spatula carefully around the inner edge of the springform pan before unlatching. Gently remove the outer ring of the springform pan.
- Slide a large offset spatula or a thin cutting board carefully under the cheesecake and lift it off the springform base and parchment paper.
- Place one leveled red velvet cake layer on your serving plate or cake board, cut-side up.
- Spread a thin layer of cream cheese frosting (about 1/2 cup) evenly over the top of this first cake layer using an offset spatula.
- Carefully lift the cheesecake and place it centered on top of the frosted red velvet layer. The cheesecake layer should align perfectly with the cake layers.
- Spread another 1/2 cup of cream cheese frosting over the top of the cheesecake layer.
- Place the second red velvet cake layer on top, cut-side down, so the flat bottom faces up. This gives you the smoothest possible top surface for frosting.
Step 6: Frost and Finish the Cake
- Apply a thin, even crumb coat (a thin initial layer of frosting) all over the outside of the assembled cake to seal in any loose crumbs. Use an offset spatula and bench scraper to spread it as smoothly as possible.
- Refrigerate the crumb-coated cake for 20-30 minutes until the frosting is firm to the touch.
- Remove from the refrigerator and apply the final, generous layer of cream cheese frosting to the top and sides of the cake. Use an offset spatula for the top and a bench scraper held perpendicular to the sides to achieve a smooth, clean finish.
- If you reserved the red velvet cake trimmings, crumble them finely and press them gently along the bottom edge of the cake, or scatter them over the top as a garnish. The bright red crumbs against the white frosting create a stunning visual contrast.
- Refrigerate the finished cake for at least 1 hour before slicing to ensure clean, sharp cuts.
- Slice with a sharp knife, wiping the blade clean between each cut for picture-perfect slices.
You might also enjoy this Raspberry Cheesecake if you love layered, frosted cheesecake cakes.
Tips for Success
Small details make a big difference with a recipe this layered. Following these tips will set you up for a picture-perfect result the very first time you make it.
- Room temperature is everything. Both the cream cheese for the filling and the butter for the frosting must be fully softened to room temperature before you start. Cold cream cheese will not beat smooth and you’ll end up with lumpy filling no matter how long you mix it.
- Do not skip the water bath. It creates a humid, gentle heat environment that prevents cracking and keeps the cheesecake texture silky rather than rubbery.
- Use gel food coloring, not liquid. Gel coloring is far more concentrated and gives a vivid, true red. Liquid food coloring can alter the moisture balance in the batter and you’d need a large quantity to achieve the same color depth.
- The jiggle test works. When you gently shake the roasting pan, the outer two-thirds of the cheesecake should be set while the center jiggles like soft Jell-O. If the whole thing sloshes, it needs more time.
- Cool the cheesecake gradually. Going from a hot oven directly to cold air causes cracking. The oven-door step is not optional.
- Chill before assembling. Trying to assemble a warm cheesecake with warm cake layers is a recipe for a sliding, crumbling mess. Everything needs to be completely cold.
- Sift the powdered sugar. Lumps in the frosting are difficult to smooth out once the sugar is mixed in. A 30-second sift saves a lot of frustration.
Read Also: New York Cheesecake Recipe
Serving Suggestions
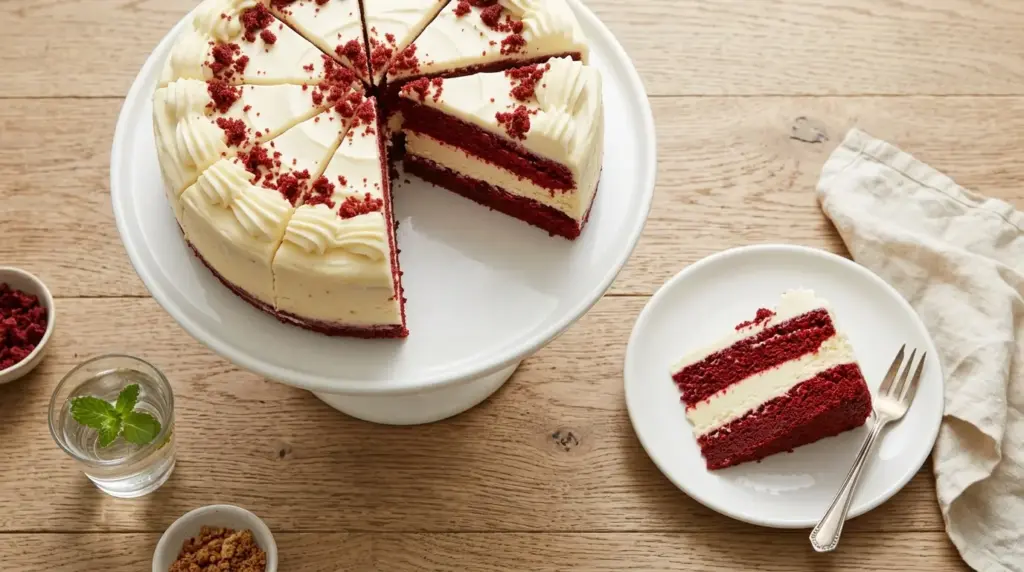
This red velvet cheesecake is a natural showpiece for celebrations, holidays, and dinner parties. It’s rich and satisfying, so modest slices go a long way.
Serve slices chilled straight from the refrigerator. The cream cheese frosting holds its shape better when cold, and the layers stay cleanly separated for an impressive presentation on the plate.
Here are some great ideas for rounding out the dessert spread:
- A scoop of Vanilla Bean Ice Cream alongside a slice for a beautiful hot-cold contrast
- A drizzle of Chocolate Ganache over the top just before serving for extra decadence
- Fresh raspberries or strawberries scattered on the plate as a bright, tart counterpoint to the rich frosting
- A dusting of finely crumbled red velvet cake trimmings over each individual plate for a bakery-style finish
- A side of Fresh Strawberry Sauce for guests who want an extra fruity element
For a complete holiday dessert table, this cake pairs well with a light Lemon Curd for guests who prefer something a little less rich.
Variations to Try
Once you’ve made the classic version, there are plenty of fun ways to put a personal spin on this recipe. All the variations below work with the same core technique.
- Oreo Crust Base: Instead of stacking on a cake layer, press a buttered Oreo crumb crust into the bottom of the springform pan before adding the cheesecake filling. This creates a simpler, single-component version that’s closer to a classic baked cheesecake.
- Pumpkin Spice Twist: Swap 1/2 cup of the sour cream in the cheesecake layer for 1/2 cup of pure pumpkin puree and add 1 teaspoon of pumpkin pie spice for a stunning fall variation.
- White Chocolate Cheesecake Filling: Melt 4 oz of quality white chocolate and fold it into the cheesecake batter just before adding the eggs for a subtly sweeter, richer filling.
- Mini Version: Divide the red velvet cake batter among cupcake tins and use a 6-inch springform pan to make a smaller cheesecake. The assembly method is the same but serves fewer people.
- No-Bake Cheesecake Layer: Replace the baked cheesecake filling with a stabilized No Bake Cheesecake filling for a lighter texture that skips the water bath entirely.
- Chocolate Ganache Drip: Pour a thin, slightly cooled chocolate ganache over the top of the finished frosted cake and let it drip naturally down the sides for a dramatic bakery-style finish.
Another variation worth bookmarking is this Blueberry Cheesecake if you love fruit-forward flavors.
Storage and Reheating
This cheesecake cake stores exceptionally well and actually tastes better on day two once the flavors have had time to fully meld together in the refrigerator.
- Refrigerator: Store the finished cake covered loosely with plastic wrap or a cake dome in the refrigerator for up to 5 days. Slices can also be stored in an airtight container.
- Freezer: This cake freezes beautifully. You can freeze the entire assembled cake or individual slices. Wrap slices tightly in plastic wrap, then place them in a zip-lock freezer bag. Freeze for up to 3 months.
- Freezing components separately: If you want to make this well in advance, the red velvet cake layers can be baked, cooled, wrapped in plastic wrap, and frozen for up to 2 months. The cheesecake layer can also be frozen unassembled for up to 1 month.
- Thawing: Thaw frozen slices overnight in the refrigerator. Avoid thawing at room temperature as the cream cheese frosting can soften too quickly and become greasy.
- Reheating: This dessert is served cold and does not require reheating. If a slice has come to room temperature, simply refrigerate it for 15-20 minutes to firm it back up before serving.
Read Also: Keto Cheesecake Recipe
Nutritional Facts
Per serving (based on 12 slices):
| Nutrient | Amount per Serving |
|---|---|
| Calories | 720 kcal |
| Total Fat | 44g |
| Saturated Fat | 26g |
| Cholesterol | 175mg |
| Sodium | 390mg |
| Total Carbohydrates | 74g |
| Dietary Fiber | 1g |
| Total Sugars | 56g |
| Protein | 9g |
| Calcium | 120mg |
| Iron | 2mg |
Nutritional values are estimates and will vary based on specific ingredients and brands used.
Another cheesecake option with a lighter nutritional profile is this Low Calorie Cheesecake.
Health Benefits of Key Ingredients
While this is undeniably an indulgent dessert, a few of its key ingredients do bring some genuine nutritional value to the table.
This isn’t a health food by any measure, but enjoying it in reasonable portions as part of a balanced lifestyle is perfectly fine.
- Cream cheese: Provides calcium and phosphorus, which support bone health. The fat content in cream cheese also contributes to satiety, meaning a smaller portion tends to feel satisfying.
- Eggs: Each egg in this recipe contributes high-quality complete protein, along with vitamins D, B12, and choline, which is critical for brain health and liver function.
- Cocoa powder: Natural unsweetened cocoa powder contains flavonoids, a class of plant-based antioxidants. Research suggests these compounds may support cardiovascular health when consumed in moderate amounts.
- Buttermilk: Despite its name, buttermilk is actually lower in fat than regular whole milk. It contains beneficial probiotics and lactic acid that contribute to the tenderness of the red velvet cake layers.
- Sour cream: Like buttermilk, sour cream contains live cultures and provides calcium, phosphorus, and riboflavin (vitamin B2).
For a version of cheesecake designed with health goals in mind, check out this Protein Cheesecake.
Frequently Asked Questions
1. Can I make the components of this cake ahead of time?
Absolutely, and it’s actually the recommended approach. The cheesecake layer should be made at least a day ahead and refrigerated overnight to firm up properly. The red velvet cake layers can be baked 1-2 days ahead and stored at room temperature wrapped tightly in plastic wrap. The cream cheese frosting can be made up to 3 days ahead and refrigerated in an airtight container. When you’re ready to assemble, let the frosting come to room temperature for about 30 minutes and re-whip it briefly before using.
2. Why did my cheesecake crack?
The most common causes of cracking are over-mixing after the eggs are added (which incorporates air), skipping the water bath, or cooling the cheesecake too quickly by moving it from a hot oven to a cold counter. A few cracks are easy to hide with frosting, so don’t stress too much. To prevent them, always use a water bath and allow the cheesecake to cool gradually inside the turned-off oven with the door cracked.
3. Can I use a box mix for the red velvet cake layers?
Yes, you can. A quality red velvet box mix will work here and saves time. Prepare it according to the package instructions and divide it between two 9-inch cake pans. The only thing to be aware of is that box mixes can produce a slightly lighter, fluffier crumb than the from-scratch version. Both work well in this assembly, so use whichever you prefer.
4. How do I get clean slices when cutting this cake?
The key is to always slice this cake when it’s cold straight from the refrigerator. Use a long, sharp knife and warm it briefly by running it under hot water and wiping it dry before each cut. Wipe the blade clean between each slice using a damp cloth. This removes the cream cheese frosting and prevents it from dragging and smearing through the beautiful red layers.
5. Can I make this recipe gluten-free?
Yes, with some modifications. Substitute the all-purpose flour in both the cake layers and the cheesecake filling with a 1:1 gluten-free baking flour blend that contains xanthan gum (such as Bob’s Red Mill 1-to-1 Baking Flour). The texture will be slightly different but very close to the original. For more guidance, check out this Gluten Free Cheesecake.
Red Velvet Cheesecake

Equipment
- 9-inch springform pan - Leakproof base recommended
- Two 9-inch round cake pans
- Stand mixer with paddle attachment - Or hand electric mixer
- Large roasting pan - For water bath
- Parchment Paper Rounds
- Offset spatula
- Serrated knife - For leveling cake layers
- Cooling rack
- Heavy-duty aluminum foil - For wrapping springform pan
- Rubber Spatulas
- Mixing bowls - At least 3
- Measuring cups and spoons
- Digital kitchen scale - Optional but recommended for accuracy
Ingredients
- 2 1/2 cups all-purpose flour - 315g
- 2 tablespoons natural unsweetened cocoa powder - 15g
- 1 teaspoon baking soda
- 1/2 teaspoon salt
- 1 1/2 cups granulated sugar - 300g
- 1/2 cup unsalted butter - 115g, softened to room temperature
- 1/2 cup neutral vegetable oil - 120ml, canola or sunflower
- 2 large eggs - room temperature
- 1 cup buttermilk - 240ml, room temperature
- 1 teaspoon white vinegar
- 2 teaspoons pure vanilla extract
- 2 tablespoons red gel food coloring - 30ml
For the Cheesecake Filling
- 24 oz full-fat cream cheese - 680g, softened to room temperature
- 1 cup granulated sugar - 200g
- 3 tablespoons all-purpose flour - 24g
- 1/4 teaspoon salt
- 1/2 cup sour cream - 120ml, room temperature
- 1/2 cup heavy whipping cream - 120ml
- 1 teaspoon pure vanilla extract
- 3 large eggs - room temperature
For the Cream Cheese Frosting
- 16 oz full-fat cream cheese - 450g, softened to room temperature
- 1 cup unsalted butter - 225g, softened to room temperature
- 4 cups powdered sugar - 480g, sifted
- 2 teaspoons pure vanilla extract
- 2-3 tablespoons heavy cream - to adjust consistency
- salt - pinch
Instructions
- Preheat oven to 325°F (165°C). Line a 9-inch springform pan with parchment paper, spray with non-stick spray, and wrap tightly in two layers of heavy-duty aluminum foil.
- Beat 24 oz softened cream cheese until smooth. Add 1 cup sugar, 3 tbsp flour, and 1/4 tsp salt, mixing until combined. Add sour cream, heavy cream, and vanilla, then add eggs one at a time, mixing just until incorporated.
- Pour batter into the springform pan and place in a roasting pan. Fill with hot water halfway up the sides and bake for 55-65 minutes until edges are set but center still jiggles slightly. Turn off oven, crack door, and cool for 1 hour. Refrigerate for at least 6 hours or overnight.
- Preheat oven to 350°F (175°C). Grease two 9-inch round cake pans and line with parchment paper. Whisk together flour, cocoa powder, baking soda, and salt.
- Beat butter and sugar until light and fluffy. Add oil, then eggs one at a time. Mix in vanilla and red food coloring. Stir buttermilk and vinegar together. Alternately add dry ingredients and buttermilk mixture, starting and ending with flour.
- Divide batter between prepared pans and bake for 28-33 minutes until a toothpick comes out clean. Cool in pans for 15 minutes, then turn out onto a wire rack to cool completely.
- Beat 16 oz cream cheese until smooth. Add butter and beat until light and fluffy. Gradually add sifted powdered sugar, then vanilla and salt. Add heavy cream as needed for spreadable consistency.
- Level the cooled red velvet cake layers by trimming any domed tops with a serrated knife. Reserve cake trimmings for garnish.
- Release the cheesecake from the springform pan. Place one leveled red velvet layer on a serving plate. Spread with 1/2 cup of frosting. Place the cheesecake on top, then spread with another 1/2 cup of frosting. Top with the second red velvet layer, cut-side down.
- Apply a thin crumb coat all over the cake and refrigerate for 20-30 minutes. Finish with the remaining frosting, smoothing the top and sides. Garnish with crumbled cake trimmings if desired. Refrigerate for at least 1 hour before slicing.
Notes
- Room temperature is everything: Both the cream cheese for the filling and the butter for the frosting must be fully softened to room temperature before you start to avoid lumpy filling.
- Do not skip the water bath: It creates a humid, gentle heat environment that prevents cracking and keeps the cheesecake texture silky rather than rubbery.
- Use gel food coloring, not liquid: Gel coloring is far more concentrated and gives a vivid, true red without altering the batter’s moisture balance.
- The jiggle test works: When you gently shake the roasting pan, the outer two-thirds of the cheesecake should be set while the center jiggles like soft Jell-O.
- Cool the cheesecake gradually: Going from a hot oven directly to cold air causes cracking. The oven-door step is not optional.
- Chill before assembling: Trying to assemble a warm cheesecake with warm cake layers is a recipe for a sliding, crumbling mess. Everything needs to be completely cold.
- Sift the powdered sugar: Lumps in the frosting are difficult to smooth out once the sugar is mixed in. A 30-second sift saves a lot of frustration.
- Make ahead friendly: The cheesecake layer can be made a day ahead, and the cake layers can be baked 1-2 days ahead. The frosting can be made up to 3 days ahead and refrigerated.
- For clean slices: Always slice this cake when it’s cold straight from the refrigerator. Use a sharp knife, warmed under hot water and wiped dry between each cut.
- Storage: Store covered in the refrigerator for up to 5 days. For longer storage, freeze slices wrapped in plastic wrap and placed in a freezer bag for up to 3 months.
Final Thoughts
This red velvet cheesecake recipe is one of those desserts that makes people genuinely gasp when you bring it to the table. The layers are dramatic, the flavors are perfectly balanced, and the cream cheese frosting ties it all together into something that feels both elegant and deeply comforting.
It takes a bit of planning across two days, but each step is straightforward and completely manageable even if you’ve never made a cheesecake before. The water bath might feel intimidating the first time, but it’s the secret to that silky, crack-free filling that makes this dessert unforgettable.
Give it a try for your next birthday, holiday gathering, or any occasion that deserves a little extra magic. Drop a comment below and let me know how it turned out. Share a photo if you’re proud of those gorgeous layers, because you should be!
Recommended:
- Chocolate Cheesecake
- Pumpkin Pie Cheesecake
- Key Lime Cheesecake
- Lemon Meringue Cheesecake
- Basque Cheesecake
- Oreo Cheesecake
- Mini Cheesecake
- Cheesecake Ice Cream Cake
- Red Velvet Cake
- Cream Cheese Frosting


