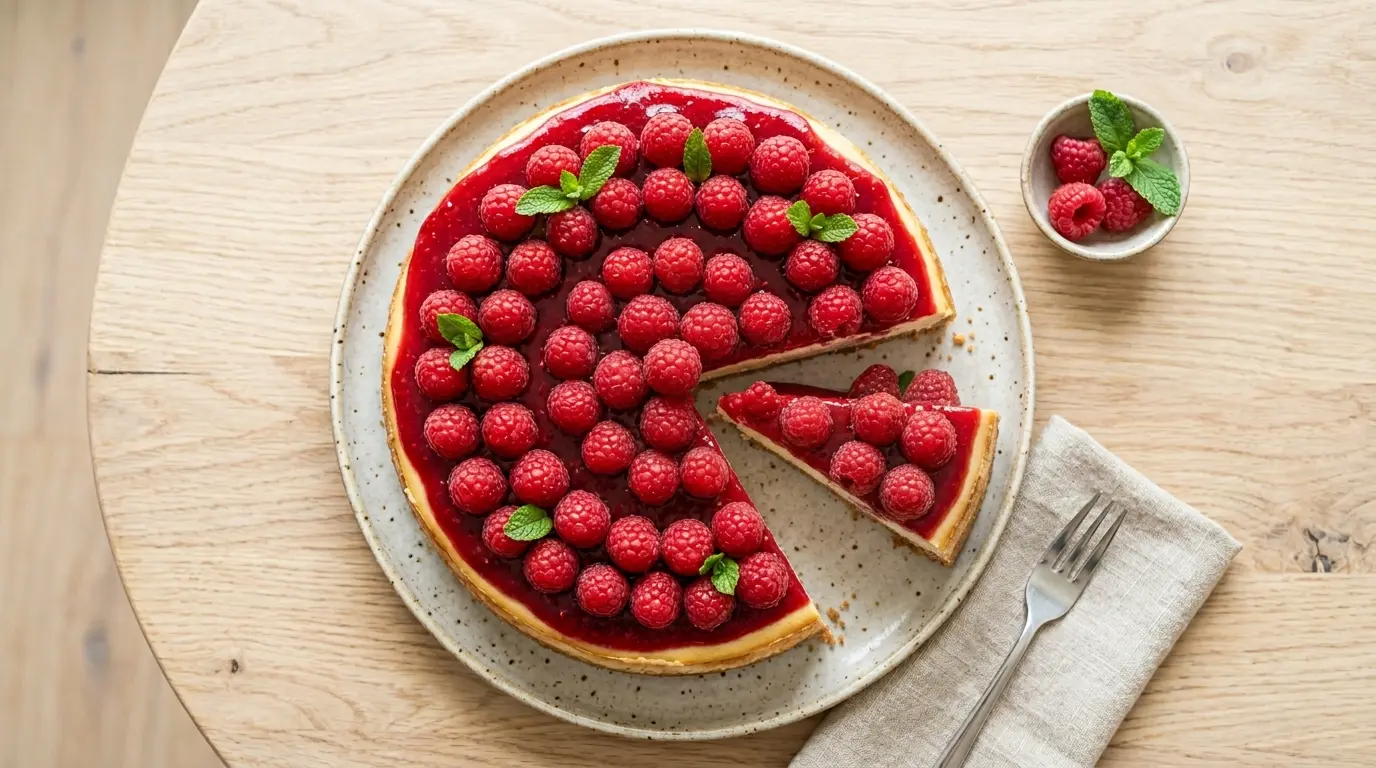
If you have been searching for the perfect raspberry cheesecake recipe, your search ends here.
This classic baked cheesecake combines a buttery graham cracker crust, a silky-smooth cream cheese filling, and a vibrant raspberry topping that is as gorgeous as it is delicious. The contrast between the rich, slightly tangy filling and the bright, sweet-tart raspberries is what makes this dessert truly unforgettable.
This is the kind of dessert that earns serious compliments. Bring it to a dinner party, serve it at a birthday celebration, or make it just because you deserve something special — people will ask for the recipe every single time.
The secret to a smooth, crack-free cheesecake lies in a few key techniques: room-temperature ingredients, gentle mixing to avoid incorporating too much air, and a slow, even cool-down. Once you learn these tricks, you will never look at cheesecake the same way again.
This recipe walks you through every step in detail, so even if it is your first time making a baked cheesecake, you will have the confidence to pull it off beautifully.
If you love fruity cheesecakes, you might also enjoy this Strawberry Cheesecake for another stunning option.
Why You’ll Love This Raspberry Cheesecake Recipe
This dessert has everything you want in a showstopper: it looks stunning, tastes incredible, and is surprisingly straightforward to make once you know the steps.
The raspberry topping does double duty here — it adds a pop of jewel-bright color and a fresh, fruity flavor that cuts beautifully through the richness of the cream cheese filling.
The graham cracker crust gives every slice a satisfying buttery crunch at the base, balancing the smooth filling above it.
Unlike store-bought cheesecake, this homemade version uses real, simple ingredients you can trust — no artificial thickeners or mystery stabilizers.
It is also a wonderful make-ahead dessert. You can bake it the day before, refrigerate overnight, and it will be perfectly set and ready to slice when you need it.
Here is why this recipe stands out:
- Rich, creamy filling made from full-fat cream cheese, eggs, sour cream, and vanilla for depth of flavor
- Buttery graham cracker crust that holds together perfectly and adds a golden, crispy base
- Fresh raspberry topping that is bright, glossy, and naturally flavored with just three ingredients
- Detailed, beginner-friendly instructions so every step is clear and achievable
- No water bath required when you follow the slow cooling method outlined in this recipe
- Make-ahead friendly so it is perfect for entertaining or meal prepping dessert
You might also love this Blueberry Cheesecake Recipe if you enjoy berry-topped cheesecakes.
Ingredients
Getting your ingredients right is the most important step before you even turn on the oven. For the creamiest filling, always use full-fat cream cheese and bring everything to room temperature before mixing. Cold ingredients do not blend as smoothly and can leave lumps in the batter.
For the Graham Cracker Crust:
- 2 cups (200g) graham cracker crumbs (about 14 full sheets)
- 3 tablespoons (38g) granulated sugar
- 6 tablespoons (85g) unsalted butter, melted
For the Cream Cheese Filling:
- 32 oz (900g) full-fat cream cheese, softened to room temperature
- 1 cup (200g) granulated sugar
- 3 large eggs, room temperature
- 1 cup (240g) full-fat sour cream, room temperature
- 2 teaspoons pure vanilla extract
- 2 tablespoons (16g) cornstarch
- 1 tablespoon fresh lemon juice
For the Raspberry Topping:
- 2 cups (250g) fresh or frozen raspberries, divided
- 3 tablespoons (38g) granulated sugar
- 1 tablespoon fresh lemon juice
- 1 tablespoon cornstarch mixed with 2 tablespoons cold water
- 1 cup (125g) fresh raspberries for garnish
Another fruity dessert worth bookmarking: Lemon Cheesecake Recipe.
Kitchen Equipment Needed
Having the right tools on hand makes this recipe much easier to execute. The most critical piece of equipment is a good quality springform pan, which allows you to release the cheesecake cleanly without damaging the sides.
- 9-inch springform pan — essential for releasing the cheesecake cleanly
- Stand mixer or hand mixer — for beating the cream cheese to a smooth, lump-free consistency
- Large mixing bowls
- Rubber spatula
- Measuring cups and spoons
- Food processor or zip-lock bag with rolling pin — for crushing graham crackers
- Small saucepan — for the raspberry topping
- Fine mesh strainer — for straining raspberry seeds from the sauce (optional)
- Heavy-duty aluminum foil — for wrapping the pan base to catch any leaks
- Offset spatula — for smoothing the filling surface
- Cooling rack
- Sharp knife for slicing
Read Also: New York Cheesecake Recipe
Recommended Products for This Recipe
These are products chosen for quality and performance that will genuinely make a difference in how your cheesecake turns out.
1. Fat Daddio’s ProSeries Springform Pan
A high-quality springform pan with a secure latch and leak-proof base is the single most important tool in this recipe. Fat Daddio’s ProSeries pan distributes heat evenly for consistent baking. The non-anodized surface prevents over-browning on the crust and sides.
2. Philadelphia Original Cream Cheese Blocks
The best cheesecakes are made with Philadelphia cream cheese blocks, not the spreadable tub variety. The block form has a firmer texture that whips up smoother and gives the filling more structural integrity. It is the gold-standard choice for baked cheesecakes.
3. KitchenAid Hand Mixer with Beater Attachments
Overbeating the cheesecake batter introduces too much air, which causes cracks. A hand mixer with variable speeds lets you control the mixing process carefully. The KitchenAid hand mixer offers smooth power control and easy clean-up.
4. Nielsen-Massey Pure Vanilla Extract
The quality of your vanilla extract has a real impact on the final flavor of this cheesecake. Nielsen-Massey uses cold extraction to preserve natural vanillin flavor compounds, making it far more aromatic and flavorful than imitation vanilla. A small bottle goes a long way.
5. OXO Good Grips Fine Mesh Strainer
Straining your raspberry sauce removes the seeds and creates a silky, glossy topping. The OXO Good Grips strainer has a wide bowl, a stable frame, and fine mesh that catches every seed without clogging. It is useful for sauces, stocks, and more.
Read Also: Best Cheesecake Recipe
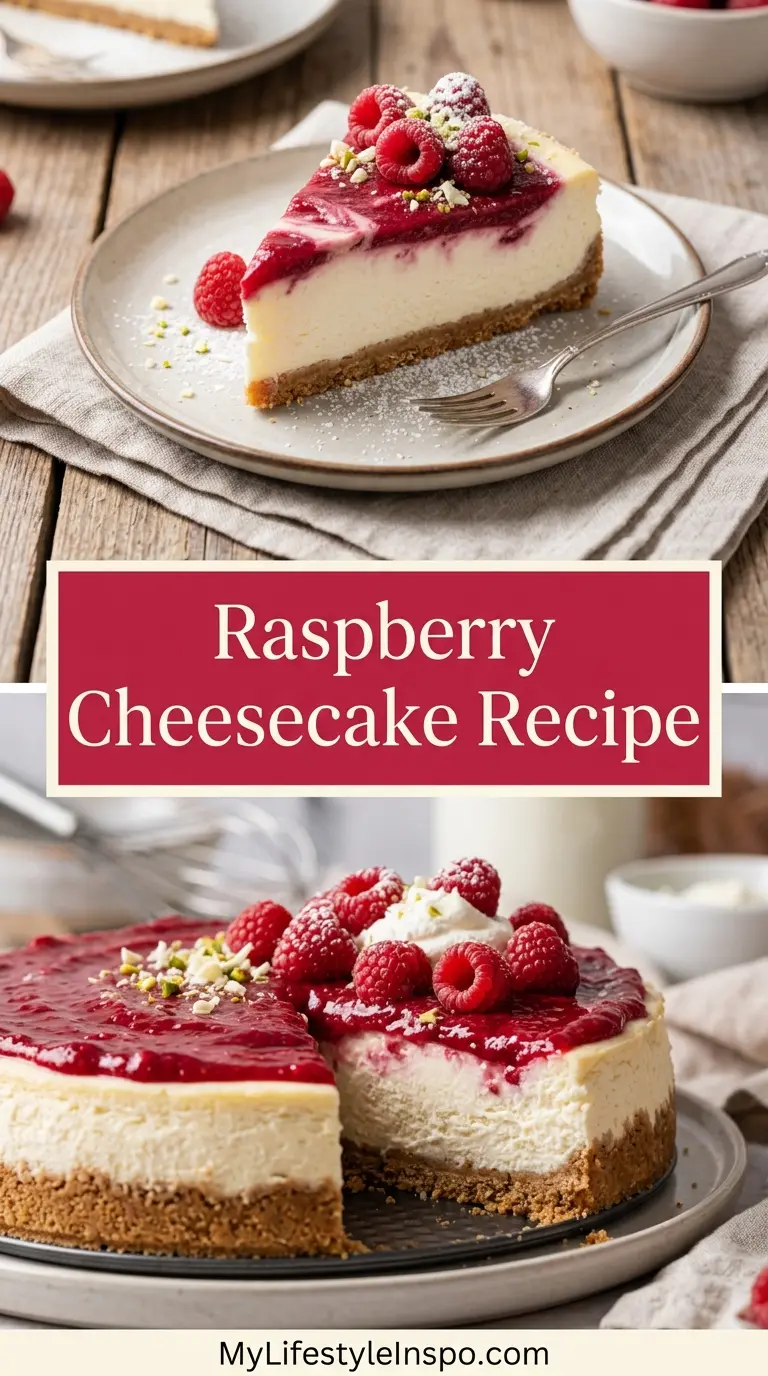
Step-by-Step Instructions
Step 1: Prepare Your Pan and Preheat the Oven
- Preheat your oven to 325°F (163°C). A lower oven temperature is key for a smooth, crack-free cheesecake, as intense heat can cause the eggs in the batter to puff up and split the surface.
- Lightly grease the inside bottom and sides of your 9-inch springform pan with softened butter or a neutral cooking spray.
- Tear off a large sheet of heavy-duty aluminum foil and wrap it tightly around the outside bottom and halfway up the sides of the pan. This creates a seal to catch any butter drips from the crust during baking.
- Set the wrapped pan aside on your counter.
Step 2: Make the Graham Cracker Crust
- If you are starting with whole graham cracker sheets, place them in a zip-lock bag and use a rolling pin to crush them into fine crumbs. Alternatively, pulse them in a food processor until they resemble fine, sandy crumbs. You need 2 cups (200g) of crumbs total.
- In a medium bowl, combine the 2 cups (200g) graham cracker crumbs and 3 tablespoons (38g) granulated sugar. Stir together with a fork until evenly mixed.
- Pour in 6 tablespoons (85g) melted unsalted butter and stir until all the crumbs are moistened and the mixture resembles wet sand. When you press a small amount between your fingers, it should hold together without crumbling apart.
- Transfer the crumb mixture to your prepared springform pan and press it firmly and evenly across the bottom and about 1 inch (2.5cm) up the sides. Use the flat base of a measuring cup or a glass to press it tightly — a compact crust will not crumble when sliced.
- Bake the crust in the preheated oven for 10 minutes, until it is lightly golden and fragrant. Remove from the oven and allow it to cool on a wire rack while you prepare the filling.
Step 3: Bring Filling Ingredients to Room Temperature
- If you have not already done so, remove your cream cheese, eggs, and sour cream from the refrigerator at least 1 to 2 hours before mixing. This is a non-negotiable step for a lump-free filling.
- Cold cream cheese does not blend smoothly, no matter how long you mix it, and cold eggs can cause the batter to seize slightly. Room-temperature ingredients come together in seconds and produce a silkier, more uniform batter.
- Unwrap each block of cream cheese and cut it into large chunks for easier mixing.
Step 4: Make the Cream Cheese Filling
- In a large mixing bowl, beat the 32 oz (900g) room-temperature cream cheese on medium speed with a hand mixer or stand mixer for about 2 minutes, until it is completely smooth and fluffy. Scrape down the sides and bottom of the bowl with a rubber spatula at least once during this process.
- Add the 1 cup (200g) granulated sugar and 2 tablespoons (16g) cornstarch to the cream cheese. Beat on medium-low speed until fully combined, about 1 minute. The cornstarch helps stabilize the filling and reduces cracking.
- Add the 1 cup (240g) room-temperature sour cream, 2 teaspoons vanilla extract, and 1 tablespoon fresh lemon juice. Mix on low speed until just incorporated. Do not over-mix at this stage.
- Add the 3 room-temperature eggs one at a time, beating on low speed after each addition until just combined. Stop mixing as soon as each egg disappears into the batter. Over-beating eggs into cheesecake batter introduces air bubbles, which expand during baking and cause cracks on the surface.
- Use the rubber spatula to give the batter a few final folds by hand, scraping the very bottom of the bowl to make sure everything is evenly combined.
Step 5: Pour the Filling and Bake
- Pour the cream cheese filling over the cooled graham cracker crust and spread it into an even layer using an offset spatula. Gently tap the pan on the counter two or three times to release any large air bubbles just below the surface.
- Place the filled pan in the center of your preheated 325°F (163°C) oven. Bake for 55 to 65 minutes, until the edges of the cheesecake are set and puffed slightly but the center still has a gentle, jello-like wobble when you nudge the pan. The center should not look liquid or sloshy — it should move as one piece, like a barely-set custard.
- Do not open the oven door during the first 45 minutes of baking, as the sudden temperature drop can cause the cheesecake to crack.
Step 6: Cool the Cheesecake Slowly
- Once the baking time is complete, turn the oven off completely but leave the cheesecake inside with the oven door closed for 1 full hour. This gradual cool-down prevents the filling from shrinking too fast, which is the main cause of cracks.
- After 1 hour inside the oven, crack the oven door open slightly and leave the cheesecake for another 30 minutes.
- Remove the cheesecake from the oven and run a thin knife or offset spatula gently around the inner edge of the pan to release the sides. This prevents the filling from sticking to the pan as it cools and contracting, which would cause cracks.
- Let the cheesecake cool completely at room temperature for at least 1 to 2 hours before refrigerating.
- Cover loosely with plastic wrap and refrigerate for at least 6 hours, or ideally overnight. The cheesecake will firm up beautifully and the flavors will deepen as it chills.
Step 7: Make the Raspberry Topping
- In a small saucepan, combine 1.5 cups (190g) of the fresh or frozen raspberries, 3 tablespoons (38g) granulated sugar, and 1 tablespoon fresh lemon juice. Stir to combine.
- Cook over medium heat, stirring occasionally, until the raspberries break down completely and release their juices, about 5 to 7 minutes. The mixture will bubble and turn deep red.
- In a small bowl, mix together the 1 tablespoon cornstarch and 2 tablespoons cold water until smooth. Pour this slurry into the hot raspberry mixture while stirring constantly.
- Continue cooking for another 1 to 2 minutes until the sauce thickens to a glossy, jam-like consistency. Remove from heat.
- Optional: Pour the sauce through a fine mesh strainer to remove all seeds, pressing the solids through with a spoon for a perfectly smooth topping. This step takes about 2 minutes and makes a big difference in the finished appearance.
- Allow the raspberry sauce to cool to room temperature, then stir in the remaining 0.5 cup (60g) of fresh whole raspberries.
- Refrigerate the topping until you are ready to serve the cheesecake. Do not add it to the cheesecake more than 1 to 2 hours before serving, as the moisture can soften the top of the filling.
Step 8: Assemble and Serve
- When you are ready to serve, carefully unlatch and remove the outer ring of the springform pan. Use a thin spatula to slide the cheesecake onto a cake stand or serving plate, or simply leave it on the metal base.
- Spoon the raspberry topping evenly over the surface of the chilled cheesecake, spreading it gently with the back of a spoon. Leave a small border around the edges if you prefer a cleaner look.
- Arrange the 1 cup (125g) of fresh raspberries over the topping for garnish.
- Dip a large sharp knife in hot water, wipe it dry, and slice the cheesecake into clean portions. Repeat the dipping and wiping between each slice for neat, clean cuts.
This technique also works beautifully for this No Bake Cheesecake Recipe.
Tips for Success
Small adjustments make a big difference in cheesecake baking. Follow these tips to avoid the most common mistakes and get the best possible result.
- Always use room-temperature ingredients. Cold cream cheese is the number-one cause of lumpy cheesecake batter. Letting it sit out for at least 1 to 2 hours makes all the difference.
- Do not skip the cornstarch. Adding just 2 tablespoons of cornstarch to the filling helps it set firmly without becoming dense, and it reduces the likelihood of cracks.
- Mix on low speed once the eggs go in. The goal is to incorporate the eggs without whipping air into the batter. Excess air causes the cheesecake to puff up in the oven, then collapse and crack as it cools.
- Do not overbake. The center should still wobble slightly when the cheesecake comes out of the oven. It will continue to set as it cools in the oven and refrigerator.
- Cool gradually. The slow oven cool-down is just as important as the baking itself. Rushing the cooling process by moving the cheesecake to the counter too soon causes cracking.
- Refrigerate overnight if possible. A fully chilled cheesecake slices much more cleanly and has a better, firmer texture than one that has only cooled for a few hours.
- Run the knife around the edge right after baking. This single step prevents the filling from clinging to the pan sides as it contracts, which is a major cause of surface cracks.
Another beautiful make-ahead dessert to try: Mini Cheesecake Recipe.
Serving Suggestions
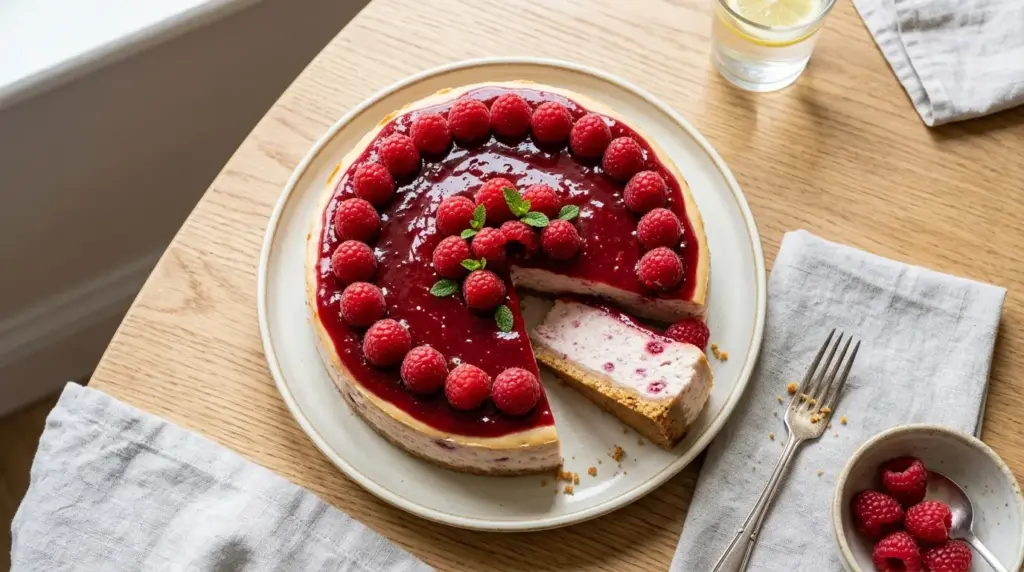
This raspberry cheesecake is stunning on its own, but a few thoughtful accompaniments can take it to the next level.
A dollop of freshly whipped cream alongside each slice adds an airy, light contrast to the dense, rich filling. A light dusting of powdered sugar over the top gives it a bakery-finished look without any extra effort.
Here are some ideas for serving and pairing:
- Whipped cream — A generous swirl on each slice softens the richness and adds a beautiful presentation
- Fresh mint leaves — Tucked into the raspberry topping, they add color and a fresh aroma that complements the berries
- Vanilla Bean Ice Cream — A scoop alongside a chilled slice makes this dessert feel genuinely luxurious
- Chocolate drizzle — A thin drizzle of melted dark or white chocolate over the raspberry topping adds an elegant finishing touch
- Raspberry Smoothie — Serve alongside for a full raspberry-themed dessert experience
- Coffee or espresso — The bitterness of a good espresso cuts through the sweetness and richness of cheesecake beautifully
- A glass of sparkling rosé — The bubbles and mild fruitiness pair wonderfully with the tart raspberry topping
For a beautiful plated dessert pairing: Fruit Tart Recipe
Variations to Try
Once you have mastered the base recipe, it is fun to experiment with different flavors and toppings. The cream cheese filling itself is incredibly versatile and works with many variations.
Here are some popular and delicious twists to try:
- Raspberry swirl cheesecake: Before baking, spoon dollops of raspberry sauce over the filling and use a skewer or toothpick to swirl it through in a marble pattern. This creates a beautiful marbled effect inside the baked cheesecake.
- White chocolate raspberry cheesecake: Melt 4 oz (113g) of good-quality white chocolate and stir it into the filling before pouring. White chocolate and raspberries are a classic pairing that adds extra richness.
- No-bake raspberry cheesecake: For a no-bake version, replace the eggs with heavy whipping cream beaten to stiff peaks, folded into the cream cheese mixture. Set in the refrigerator for at least 6 hours.
- Oreo crust raspberry cheesecake: Swap the graham cracker crust for crushed Oreo cookies combined with melted butter. The dark chocolatey base makes the pink raspberry topping look even more vibrant.
- Lemon raspberry cheesecake: Add 1 tablespoon of lemon zest to the filling for a brighter, more citrusy flavor that enhances the tartness of the raspberries.
- Mini raspberry cheesecakes: Divide the crust and filling among a 12-cup muffin tin lined with paper cups. Reduce baking time to 18 to 22 minutes.
You might also enjoy: Philadelphia No Bake Cheesecake Recipe
Storage and Reheating
Cheesecake stores exceptionally well, making it an ideal make-ahead dessert for busy schedules and entertaining.
Follow these guidelines to keep your cheesecake fresh and delicious:
- Refrigerator storage: Cover the cheesecake loosely with plastic wrap or store individual slices in an airtight container. It keeps well in the refrigerator for up to 5 days. The raspberry topping is best added no more than 1 to 2 hours before serving to prevent it from softening the top of the filling.
- Freezer storage (without topping): Freeze the fully cooled, un-topped cheesecake by wrapping it tightly in plastic wrap, then in a layer of aluminum foil. It will keep in the freezer for up to 2 months. Thaw overnight in the refrigerator before serving.
- Freezing individual slices: Slice the cheesecake and place pieces on a parchment-lined baking sheet. Freeze until solid (about 2 hours), then wrap each slice individually and store in a zip-lock freezer bag. This makes it easy to pull out single portions as needed.
- Reheating: Cheesecake is best served cold or at room temperature. Do not microwave it, as heat causes the filling to weep moisture and the texture to become unpleasantly soft.
- Raspberry topping: Store any leftover raspberry topping separately in an airtight jar in the refrigerator for up to 4 days.
Read Also: Baked Cheesecake Recipe
Nutritional Facts
The following values are approximate and based on one slice of cheesecake cut into 12 equal portions, with raspberry topping, using the ingredients listed in this recipe. Exact values may vary depending on specific brands and portion sizes.
| Nutrient | Per Serving (1 slice) |
|---|---|
| Calories | 485 kcal |
| Total Fat | 34g |
| Saturated Fat | 20g |
| Cholesterol | 145mg |
| Sodium | 320mg |
| Total Carbohydrates | 38g |
| Dietary Fiber | 2g |
| Sugars | 28g |
| Protein | 8g |
| Calcium | 120mg |
| Vitamin C | 6mg |
For a lighter option with fewer calories, see the Low Calorie Cheesecake Recipe.
Health Benefits of Key Ingredients
While this is an indulgent dessert, the core ingredients do offer some genuine nutritional value worth knowing about.
Enjoying treats made with whole, real ingredients is always a better choice than processed alternatives loaded with artificial additives.
- Raspberries are packed with antioxidants, particularly anthocyanins and ellagic acid, which have been studied for their anti-inflammatory properties. They are also a good source of Vitamin C, manganese, and dietary fiber, which supports gut health.
- Eggs provide high-quality complete protein and are rich in choline, which supports brain health and liver function. The fat-soluble vitamins in eggs, including Vitamins A, D, E, and K, are better absorbed alongside the fat in cream cheese.
- Cream cheese contributes calcium, phosphorus, and fat-soluble vitamins. Using full-fat cream cheese rather than reduced-fat versions gives better texture and keeps you satisfied longer.
- Lemon juice adds more than bright flavor to this recipe. It provides Vitamin C and acts as a natural preservative, helping maintain the color and freshness of the raspberry topping.
- Graham crackers provide a modest amount of whole grain fiber in the crust, along with a satisfying crunch that rounds out the nutritional and textural profile of the dessert.
For a high-protein twist on the classic, try the Protein Cheesecake Recipe.
Frequently Asked Questions
1. Why did my cheesecake crack on top?
Cracks in cheesecake are almost always caused by one of three things: overmixing the batter (especially after adding eggs), baking at too high a temperature, or cooling the cheesecake too quickly.
To prevent cracking, mix on low speed once the eggs are added, bake at 325°F (163°C), and follow the slow oven cool-down method described in Step 6. Running a knife around the pan edge right after baking also helps prevent cracks from forming as the filling contracts.
2. Can I use frozen raspberries instead of fresh?
Absolutely. Frozen raspberries work just as well as fresh in the topping, and they are available year-round at a lower cost.
Thaw them before using and drain any excess liquid, then proceed with the sauce recipe as written. For the garnish on top, fresh raspberries are recommended since they hold their shape much better than thawed frozen ones.
3. Do I need a water bath to make this cheesecake?
This recipe does not require a water bath when you follow the slow oven cooling method described here.
The key is keeping the oven temperature at 325°F (163°C) and leaving the cheesecake inside the turned-off oven for 1 hour after baking. This gentle, gradual temperature drop mimics what a water bath does, without the hassle of wrapping your pan in layers of foil to prevent leaks.
4. How do I know when the cheesecake is done baking?
A properly baked cheesecake will have set edges and a gently jiggly center.
When you nudge the pan, the outer 2 to 3 inches should look completely firm, while the very center should wobble slightly as one connected piece, similar to a soft-set gelatin. If the entire surface is still liquid, it needs more time. If it looks completely firm with no movement, it may be slightly overbaked, though it will still taste great.
5. Can I make this cheesecake a day in advance?
Yes, and in fact it is strongly recommended. The cheesecake needs at least 6 hours of refrigeration time to set properly, and it actually tastes better after an overnight rest in the fridge.
Make the cheesecake the day before you need it, refrigerate overnight without the topping, and add the raspberry topping within 1 to 2 hours of serving. This produces the cleanest slices and the best overall texture.
Read Also: Gluten Free Cheesecake Recipe
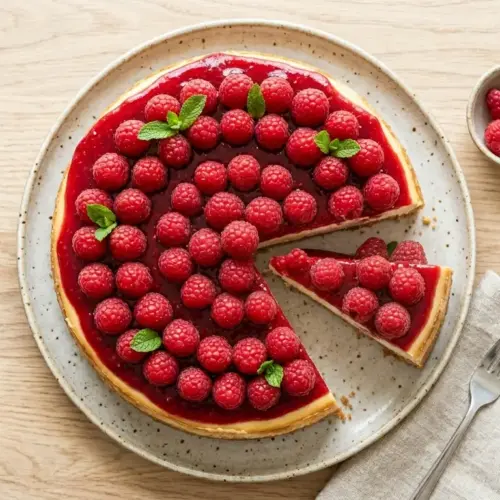
Raspberry Cheesecake

Equipment
- 9-inch springform pan - essential for releasing the cheesecake cleanly
- Stand mixer or hand mixer - for beating the cream cheese to a smooth consistency
- Large mixing bowls
- Rubber spatula
- Measuring cups and spoons
- Food processor or zip-lock bag with rolling pin - for crushing graham crackers
- Small saucepan - for the raspberry topping
- Fine-mesh strainer - for straining raspberry seeds from the sauce (optional)
- Heavy-duty aluminum foil - for wrapping the pan base to catch any leaks
- Offset spatula - for smoothing the filling surface
- Cooling rack
- Sharp knife - for slicing
Ingredients
- 2 cups graham cracker crumbs - 200g, about 14 full sheets
- 3 tablespoons granulated sugar - 38g
- 6 tablespoons unsalted butter - 85g, melted
For the Cream Cheese Filling
- 32 oz full-fat cream cheese - 900g, softened to room temperature
- 1 cup granulated sugar - 200g
- 3 large eggs - room temperature
- 1 cup full-fat sour cream - 240g, room temperature
- 2 teaspoons pure vanilla extract
- 2 tablespoons cornstarch - 16g
- 1 tablespoon fresh lemon juice
For the Raspberry Topping
- 2 cups raspberries - 250g, fresh or frozen, divided
- 3 tablespoons granulated sugar - 38g
- 1 tablespoon fresh lemon juice
- 1 tablespoon cornstarch - mixed with 2 tablespoons cold water
- 1 cup fresh raspberries - 125g, for garnish
Instructions
- Preheat oven to 325°F (163°C). Lightly grease the bottom and sides of a 9-inch springform pan. Wrap the outside with heavy-duty aluminum foil to catch any drips.
- In a medium bowl, combine 2 cups graham cracker crumbs and 3 tablespoons sugar. Stir in 6 tablespoons melted butter until the mixture resembles wet sand. Press firmly into the bottom and 1 inch up the sides of the pan.
- Bake the crust for 10 minutes until lightly golden. Remove and let cool on a wire rack while preparing the filling.
- In a large bowl, beat the softened cream cheese on medium speed for 2 minutes until smooth. Add sugar and cornstarch and beat until combined.
- Add sour cream, vanilla extract, and lemon juice. Mix on low speed until just incorporated. Add eggs one at a time, beating on low after each addition until just combined. Fold gently with a spatula.
- Pour filling over the cooled crust and spread evenly. Tap the pan on the counter to release air bubbles. Bake for 55 to 65 minutes until edges are set and the center has a gentle wobble.
- Turn the oven off and leave the cheesecake inside with the door closed for 1 hour. Then crack the door open for 30 minutes. Remove and run a knife around the edge to release the sides.
- Let cool completely at room temperature for 1-2 hours. Cover and refrigerate for at least 6 hours or overnight.
- In a small saucepan, combine 1.5 cups raspberries, 3 tablespoons sugar, and 1 tablespoon lemon juice. Cook over medium heat until raspberries break down, about 5-7 minutes.
- Stir in the cornstarch slurry and cook for 1-2 minutes until thickened. Strain through a fine mesh strainer to remove seeds, if desired. Cool to room temperature, then stir in remaining raspberries.
- Remove the springform ring. Spoon the raspberry topping over the chilled cheesecake and spread gently. Garnish with fresh raspberries.
Notes
- Room temperature ingredients: Let cream cheese, eggs, and sour cream sit out for 1-2 hours before mixing to ensure a smooth, lump-free filling.
- Do not overmix: Mix on low speed once the eggs are added to avoid incorporating air, which can cause cracks.
- Don’t overbake: The center should still wobble slightly when the cheesecake comes out of the oven; it will continue to set as it cools.
- Cool gradually: The slow cool-down in the turned-off oven is crucial for preventing cracks.
- Release the sides: Run a thin knife around the edge right after baking to prevent the filling from sticking and cracking as it contracts.
- Make ahead: This cheesecake tastes even better after an overnight rest in the refrigerator. Add the topping within 1-2 hours of serving.
- Frozen raspberries: Work well in the topping; thaw and drain before using. Use fresh raspberries for the garnish.
- Storage: Store covered in the refrigerator for up to 5 days (without topping) or freeze for up to 2 months.
- No water bath needed: The slow cooling method mimics a water bath without the extra fuss.
Final Thoughts
This raspberry cheesecake recipe is one of those desserts that genuinely impresses every single time it hits the table.
The combination of the buttery graham cracker crust, the silky cream cheese filling, and the bright, tangy raspberry topping creates a balance of flavors that is hard to beat.
Once you try making it at home, you will realize that a bakery-quality cheesecake is completely within reach, no special skills required.
Give this recipe a try for your next special occasion and see the reactions for yourself. If you make it, leave a comment below with how it turned out or share a photo — I would love to see your beautiful creations!
Recommended:
- Oreo Cheesecake Recipe
- Pumpkin Cheesecake Recipe
- Philadelphia Cheesecake Recipe
- Keto Cheesecake Recipe
- Vegan Cheesecake Recipe
- Japanese Cheesecake Recipe
- Churro Cheesecake Recipe
- Basque Cheesecake Recipe
- Sugar Free Cheesecake Recipe
- Cheesecake Ice Cream Cake Recipe



