I’ve always had a soft spot for cheesecake, but when you top it with fresh, juicy blueberries, it becomes something truly magical.
This blueberry cheesecake recipe is one I’ve perfected over the years, and it never fails to impress at family gatherings and dinner parties. The creamy, tangy filling paired with the sweet-tart blueberry topping creates a dessert that’s both elegant and comforting.
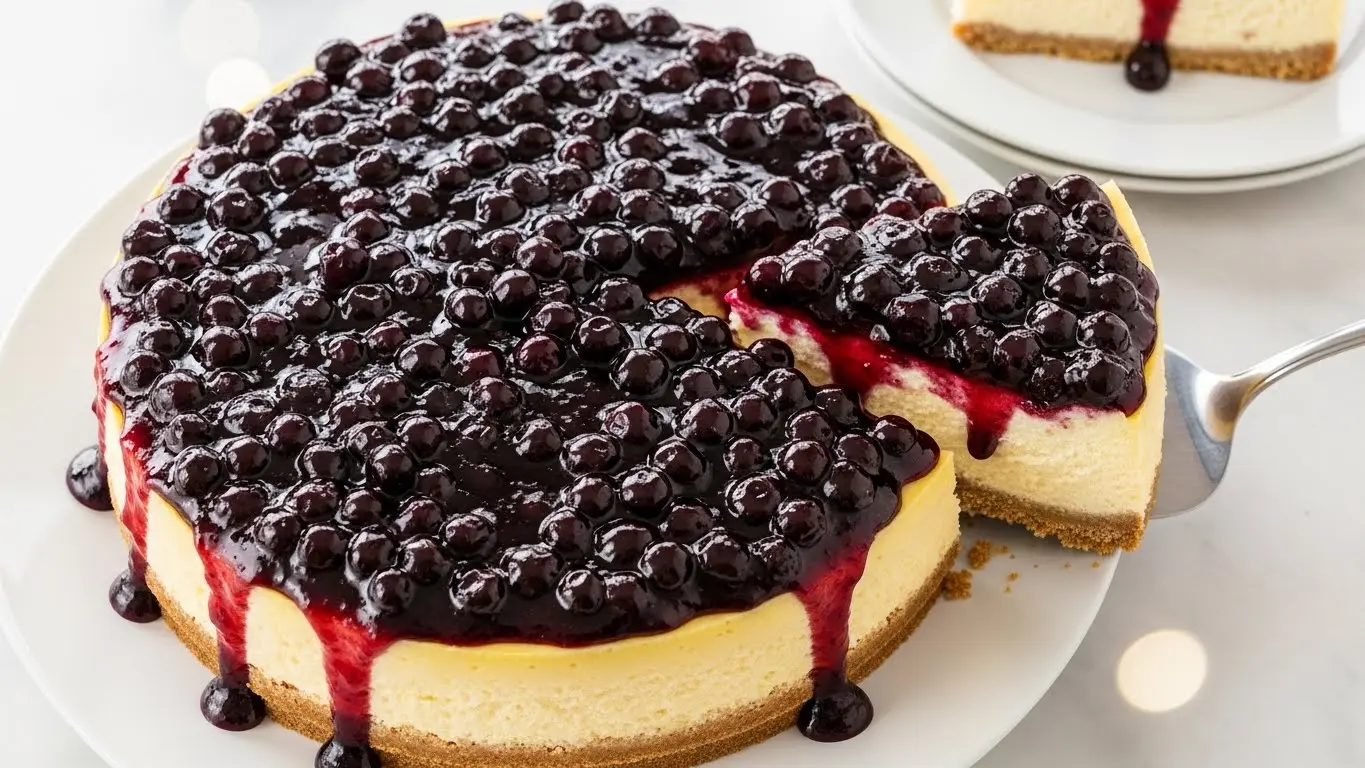
The best part? It’s surprisingly simple to make, even if you’ve never attempted a cheesecake before. The buttery graham cracker crust provides the perfect foundation, while the smooth cream cheese filling bakes up beautifully every time. Top it all off with a luscious blueberry compote, and you’ve got a showstopper that tastes like it came from a fancy bakery.
Why You’ll Love This Blueberry Cheesecake Recipe
This cheesecake has become my go-to dessert for good reason. The combination of creamy filling and fruity topping hits all the right notes, and the texture is absolutely divine.
I love how versatile it is too—you can make it ahead for stress-free entertaining, and it actually tastes better after chilling overnight. Here’s what makes this recipe stand out:
- Perfectly creamy texture: The cream cheese filling is ultra-smooth and melts in your mouth
- Not overly sweet: The tanginess of the cream cheese balances beautifully with the sweet blueberries
- Impressive presentation: It looks like you spent hours in the kitchen, but the process is straightforward
- Make-ahead friendly: Prepare it a day or two before your event for maximum convenience
- Fresh blueberry topping: Using real blueberries instead of canned pie filling makes all the difference
- Customizable: Easy to adapt with different berries or flavor variations
My strawberry cheesecake recipe uses a similar technique, but this blueberry version has a special place in my heart.
Ingredients
The beauty of this recipe is that it uses simple, accessible ingredients that you can find at any grocery store. Fresh cream cheese is essential for that signature creamy texture.
I always use full-fat cream cheese—don’t even think about using the low-fat version unless you want a grainy, disappointing result.
For the Crust:
- 2 cups graham cracker crumbs (about 16 full crackers)
- ¼ cup granulated sugar
- ½ cup unsalted butter, melted
For the Filling:
- 32 oz (4 packages) cream cheese, softened to room temperature
- 1¼ cups granulated sugar
- 1 cup sour cream, room temperature
- 1 tablespoon pure vanilla extract
- 4 large eggs, room temperature
- 3 tablespoons all-purpose flour
For the Blueberry Topping:
- 3 cups fresh or frozen blueberries
- ½ cup granulated sugar
- 2 tablespoons cornstarch
- 2 tablespoons lemon juice
- ¼ cup water
- 1 teaspoon lemon zest
Kitchen Equipment Needed
Having the right tools makes all the difference when baking a cheesecake. You don’t need anything fancy, but a few key pieces of equipment will ensure your cheesecake turns out perfectly every time.
I learned the hard way that using a springform pan with a loose bottom can lead to leaks, so investing in a quality one is worth it.
- 9-inch springform pan
- Electric mixer (hand mixer or stand mixer)
- Large mixing bowls
- Measuring cups and spoons
- Rubber spatula
- Medium saucepan
- Aluminum foil (for water bath)
- Large roasting pan (for water bath)
- Wire cooling rack
Recommended Products for This Recipe
After making this cheesecake countless times, I’ve found a few products that truly elevate the results and make the process easier. These are my tried-and-true recommendations that I reach for every time.
1. Wilton Excelle Elite Springform Pan
This is hands-down the best springform pan I’ve ever used. The non-stick coating releases the cheesecake flawlessly, and the tight seal prevents any water from seeping in during the water bath. I’ve had mine for years and it still looks brand new.
2. Philadelphia Cream Cheese
I’ve tried different brands, and Philadelphia consistently gives me the smoothest, creamiest results. The quality really shines through in the final product, creating that luxurious texture everyone loves.
3. Nielsen-Massey Pure Vanilla Extract
This vanilla extract is pure magic in baked goods. The rich, complex flavor it adds to the cheesecake filling is noticeable—it’s not harsh or artificial like cheaper extracts. A little goes a long way.
4. KitchenAid Stand Mixer
While you can definitely make this with a hand mixer, a stand mixer makes the job effortless. It ensures the cream cheese gets perfectly smooth without overbeating, and your arms won’t get tired.
Step-by-Step Instructions
Making this cheesecake is easier than you might think. Just follow these detailed steps, and you’ll have a bakery-quality dessert that’ll make everyone think you’re a professional pastry chef.
The key is patience—don’t rush the baking or cooling process.
1. Prepare Your Pan and Preheat the Oven
- Preheat your oven to 325°F (163°C)
- Wrap the outside of your 9-inch springform pan with two layers of heavy-duty aluminum foil, making sure to cover the bottom and sides completely to prevent water from seeping in during the water bath
- Lightly grease the inside of the pan with butter or non-stick spray
- Set aside while you prepare the crust
2. Make the Graham Cracker Crust
- In a medium bowl, combine the graham cracker crumbs and ¼ cup sugar, stirring until evenly mixed
- Pour in the melted butter and stir with a fork until the mixture resembles wet sand and holds together when pressed
- Transfer the mixture to your prepared springform pan
- Press the crumbs firmly and evenly into the bottom of the pan, using the bottom of a measuring cup or glass to create a compact, even layer
- Extend the crust slightly up the sides (about ½ inch) for a nice edge
- Bake the crust for 10 minutes, then remove and let it cool while you prepare the filling
3. Prepare the Cream Cheese Filling
- In a large mixing bowl, beat the softened cream cheese on medium speed for 2-3 minutes until completely smooth and fluffy, scraping down the sides of the bowl as needed
- Add the 1¼ cups sugar and beat for another 2 minutes until well incorporated and creamy
- Mix in the sour cream and vanilla extract, beating on low speed just until combined
- Add the flour and mix briefly until incorporated—this helps stabilize the cheesecake
- Add the eggs one at a time, beating on low speed after each addition just until the yellow disappears (overmixing can incorporate too much air and cause cracks)
- Scrape down the bowl between additions to ensure everything is evenly mixed
- Give the batter a final gentle stir with a rubber spatula to catch any unmixed bits at the bottom
Another favorite: New York Cheesecake Recipe
4. Assemble and Prepare for Baking
- Pour the filling over the cooled crust, using a spatula to spread it evenly to the edges
- Gently tap the pan on the counter 2-3 times to release any air bubbles trapped in the batter
- Place the wrapped springform pan inside a large roasting pan
- Carefully pour hot water into the roasting pan until it reaches about halfway up the sides of the springform pan—this water bath ensures gentle, even baking and helps prevent cracks
5. Bake the Cheesecake
- Carefully transfer the roasting pan with the cheesecake to the preheated oven
- Bake for 70-80 minutes, or until the edges are set but the center still has a slight jiggle (about 3 inches in diameter) when you gently shake the pan
- The cheesecake will continue cooking as it cools, so don’t worry if it seems slightly underdone in the middle
- Turn off the oven and crack the oven door open about 4 inches
- Let the cheesecake sit in the cooling oven for 1 hour—this gradual temperature change helps prevent cracking
6. Cool the Cheesecake Completely
- After the hour in the oven, remove the cheesecake from the water bath and remove the foil
- Run a thin knife around the edge of the pan to loosen the cheesecake from the sides
- Let it cool on a wire rack at room temperature for another hour
- Once cooled to room temperature, cover the pan loosely with plastic wrap
- Refrigerate for at least 6 hours, but preferably overnight, to allow the cheesecake to set completely and the flavors to develop
7. Make the Blueberry Topping
- In a medium saucepan, combine the blueberries, ½ cup sugar, and water
- Cook over medium heat, stirring occasionally, until the blueberries start to break down and release their juices (about 5-7 minutes)
- In a small bowl, whisk together the cornstarch and lemon juice until smooth
- Pour the cornstarch mixture into the blueberry mixture, stirring constantly
- Continue cooking for 2-3 minutes until the mixture thickens to a syrupy consistency
- Remove from heat and stir in the lemon zest
- Let the topping cool to room temperature, then refrigerate until ready to use
8. Top and Serve
- Once the cheesecake is completely chilled and set, carefully release and remove the sides of the springform pan
- Transfer the cheesecake to a serving plate using a large spatula or by sliding it off the pan bottom
- Spoon the cooled blueberry topping over the entire surface of the cheesecake, allowing some to drip down the sides for a beautiful presentation
- Slice with a sharp knife, wiping the blade clean between each cut for neat slices
- Serve chilled and enjoy the creamy perfection
Tips for Success
I’ve made this cheesecake dozens of times, and I’ve learned a few tricks that guarantee success every single time. These tips will help you avoid common pitfalls and achieve that perfect, crack-free top.
The most important thing is patience—rushing any step can compromise your results.
- Room temperature ingredients are crucial: Take your cream cheese, eggs, and sour cream out of the fridge at least 1-2 hours before baking—cold ingredients don’t blend smoothly and can create lumps
- Don’t overbeat the batter: Mix just until combined, especially after adding the eggs, to prevent incorporating too much air that can cause cracks and a puffy texture
- Use a water bath: This creates a humid baking environment that prevents the top from drying out and cracking
- Test for doneness correctly: The center should still jiggle slightly—it will firm up as it cools
- Cool gradually: Sudden temperature changes cause cracks, so let it cool slowly in the oven with the door cracked, then at room temperature before refrigerating
- Chill thoroughly: Don’t skip the overnight chill—the cheesecake needs this time to set properly and develop its full flavor
- Prevent sticking: Run a knife around the edge while the cheesecake is still slightly warm to prevent it from sticking to the pan as it shrinks during cooling
You might also enjoy: No Bake Cheesecake Recipe
Serving Suggestions
This blueberry cheesecake is stunning on its own, but there are so many delicious ways to serve it. I love getting creative with presentation, especially when entertaining guests.
A dollop of freshly whipped cream adds an extra layer of indulgence that’s hard to resist. Here are my favorite serving ideas:
- With whipped cream: A generous swirl of homemade whipped cream on each slice adds lightness
- Fresh berries: Arrange extra fresh blueberries, strawberries, or raspberries around each slice
- Mint garnish: A small sprig of fresh mint adds a pop of color and a hint of freshness
- Caramel drizzle: For extra decadence, drizzle some caramel sauce over the top
- With coffee: Serve alongside a strong espresso or cappuccino for a café-style dessert experience
- Ice cream pairing: A small scoop of vanilla ice cream alongside your slice creates a delightful contrast in temperatures
Variations to Try
Once you’ve mastered this classic version, the possibilities are endless. I love experimenting with different flavors and toppings to keep things interesting.
Each variation brings its own unique twist while maintaining that beloved creamy cheesecake base.
- Mixed berry topping: Combine blueberries with strawberries, raspberries, and blackberries for a colorful medley
- Lemon blueberry: Add 2 tablespoons of lemon zest to the filling and increase the lemon in the topping for a brighter, more citrusy flavor
- Chocolate swirl: Swirl ½ cup melted dark chocolate through the filling before baking
- Oreo crust: Replace the graham cracker crust with crushed Oreo cookies (cream and all) for a chocolate twist
- White chocolate: Fold 4 oz of melted white chocolate into the filling for extra richness
- Blueberry swirl: Reserve half the blueberry topping and swirl it through the filling before baking for a marbled effect
Read Also: Mini Cheesecake Recipe
Storage and Reheating
Proper storage is key to maintaining your cheesecake’s perfect texture and flavor. I’ve found that this cheesecake actually gets better after a day or two in the fridge.
The flavors meld together beautifully, and the texture becomes even creamier.
- Refrigerator storage: Cover the cheesecake tightly with plastic wrap or store in an airtight container for up to 5 days
- Freezing instructions: Wrap individual slices or the whole cheesecake (without topping) tightly in plastic wrap, then aluminum foil—it will keep frozen for up to 3 months
- Thawing: Transfer frozen cheesecake to the refrigerator and let it thaw slowly overnight for best results
- Topping storage: Store leftover blueberry topping separately in an airtight container in the refrigerator for up to 1 week
- Serving from frozen: For a semi-frozen treat similar to ice cream cake, serve the cheesecake after just 30 minutes out of the freezer
- Avoid room temperature: Never leave cheesecake at room temperature for more than 2 hours to prevent food safety issues
Nutritional Facts
Per slice (based on 12 slices):
- Calories: 425
- Total Fat: 28g
- Saturated Fat: 16g
- Cholesterol: 145mg
- Sodium: 320mg
- Total Carbohydrates: 38g
- Dietary Fiber: 1g
- Sugars: 29g
- Protein: 7g
Note: Nutritional values are approximate and may vary based on specific ingredients used.
Another favorite: Pumpkin Cheesecake Recipe
Health Benefits of Key Ingredients
While cheesecake is definitely an indulgence, some of the ingredients do offer nutritional benefits. I always feel a bit better about dessert when I know it contains some good stuff too.
Blueberries are little nutritional powerhouses that add more than just flavor.
- Blueberries: Packed with antioxidants, particularly anthocyanins, which may support heart health and brain function—they’re also high in vitamin C and fiber
- Cream cheese: Provides calcium for strong bones and teeth, plus protein for muscle maintenance
- Eggs: Excellent source of high-quality protein and contain essential vitamins like B12 and D
- Lemon: Rich in vitamin C and adds brightness while potentially aiding digestion
- Sour cream: Contains probiotics that support gut health and provides calcium
Frequently Asked Questions
1. Why did my cheesecake crack on top?
Cracks usually happen from overmixing, overbaking, or cooling too quickly. The batter incorporates too much air when overbeaten, which expands during baking and creates cracks as it collapses.
To prevent this, mix gently (especially after adding eggs), use a water bath, and cool gradually by turning off the oven and leaving the door cracked for an hour before removing the cheesecake.
2. Can I use frozen blueberries instead of fresh?
Absolutely—frozen blueberries work beautifully in the topping. Don’t thaw them before cooking; just add them directly to the saucepan and cook a bit longer since they’ll release more liquid.
You might need to cook the topping an extra 2-3 minutes to reach the right consistency, but the flavor will be just as delicious as with fresh berries.
3. How do I know when my cheesecake is done baking?
The edges should be set and slightly puffed, while the center should still have a 3-inch diameter area that jiggles like jello when you gently shake the pan. It might seem underdone, but it will continue to cook and firm up as it cools.
An instant-read thermometer should register 150°F in the center—it will reach 160°F during the resting period.
Read Also: Oreo Cheesecake Recipe
4. Can I make this cheesecake without a water bath?
You can, but I don’t recommend it if you want that smooth, crack-free top. The water bath creates a humid environment that prevents the surface from drying out and cracking.
If you skip it, your cheesecake might crack and have a drier texture, though it will still taste delicious—just consider it a more rustic presentation.
5. How far in advance can I make this cheesecake?
This is one of the best make-ahead desserts—you can prepare it up to 3 days before serving. The flavor actually improves as it sits, making it perfect for party planning.
I recommend adding the blueberry topping the day you plan to serve it for the freshest presentation, though you can make the topping up to 2 days ahead and store it separately.
Final Thoughts
This blueberry cheesecake recipe has been my reliable showstopper for years, and I hope it becomes one of your favorites too. The combination of that buttery crust, silky smooth filling, and vibrant blueberry topping creates a dessert that’s truly irresistible.
Once you master this technique, you’ll find yourself making cheesecake for every special occasion. Give this recipe a try and watch it disappear—I’d love to hear how it turns out for you, so drop a comment below and let me know if you made any fun variations!
Recommended:
- Best Cheesecake Recipe
- Japanese Cheesecake Recipe
- Churro Cheesecake Recipe
- Banana Cream Pie Recipe
- Key Lime Pie Recipe
- Lemon Meringue Pie Recipe
- Boston Cream Pie Recipe
- Fruit Tart Recipe
- Blueberry Pie Recipe
- Pumpkin Roll Recipe


