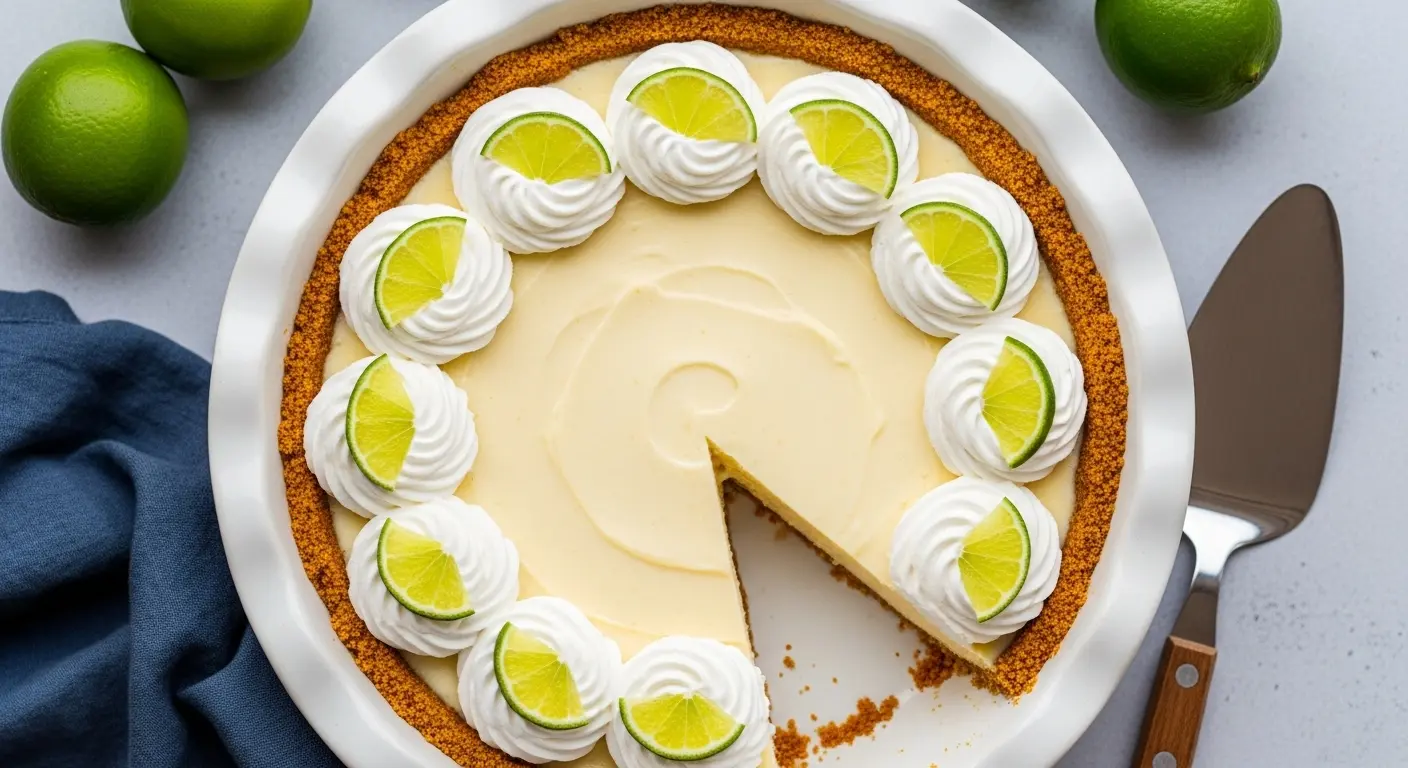
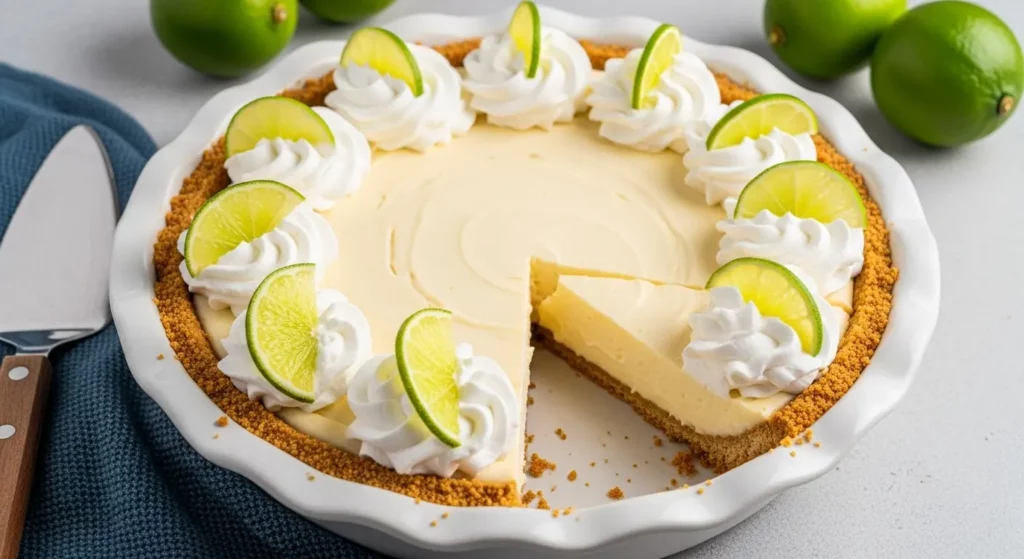
If you’ve ever tasted a slice of authentic key lime pie, you know exactly why this dessert has become a beloved classic. The perfect balance of tart lime and sweet cream, all nestled in a buttery graham cracker crust, makes every bite absolutely unforgettable.
I grew up in Florida, where key lime pie isn’t just a dessert—it’s practically a religion. My grandmother used to make this recipe every Sunday, and the entire house would fill with the bright, citrusy aroma that instantly transported you to a tropical paradise.
What makes a truly great key lime pie recipe stand out is its simplicity. You don’t need fancy ingredients or complicated techniques. Just quality limes, a few pantry staples, and about 30 minutes of your time.
The signature yellow-green color comes from the egg yolks mixed with the lime juice, creating that distinctive hue that authentic key lime pie is known for. Some recipes use food coloring, but we’re keeping it natural and traditional here.
This dessert hits all the right notes—creamy, tangy, slightly sweet, and incredibly refreshing. It’s the kind of pie that disappears at potlucks and has everyone asking for the recipe.
Another favorite: Boston Cream Pie Recipe
Why You’ll Love This Key Lime Pie Recipe
This key lime pie strikes the perfect balance between effort and reward. You’ll have a stunning, restaurant-quality dessert with minimal work and maximum flavor.
The beauty of this recipe lies in its versatility and foolproof nature. Even if you’ve never made a pie before, you’ll nail this one on your first try.
Here’s what makes this recipe special:
- Authentic flavor: Real key lime juice creates that signature tartness that bottled juice just can’t match
- No-fuss preparation: The filling comes together in minutes with just a bowl and whisk
- Make-ahead friendly: This pie actually tastes better after chilling overnight
- Perfect texture: Creamy, smooth filling that slices beautifully without being too dense
- Impressive presentation: That gorgeous pale yellow color and graham cracker crust look bakery-perfect
- Crowd-pleaser: Appeals to both citrus lovers and dessert enthusiasts alike
Ingredients
Getting the right ingredients makes all the difference in this key lime pie recipe. Fresh key limes are ideal, but regular Persian limes work beautifully too if key limes aren’t available in your area.
- For the crust:
- 1½ cups graham cracker crumbs (about 10 full crackers)
- ⅓ cup granulated sugar
- 6 tablespoons unsalted butter, melted
- For the filling:
- 4 large egg yolks
- 1 (14-ounce) can sweetened condensed milk
- ½ cup fresh key lime juice (from about 12-15 key limes, or 4-5 regular limes)
- 1 tablespoon key lime zest
- For the topping:
- 1 cup heavy whipping cream
- 2 tablespoons powdered sugar
- ½ teaspoon vanilla extract
- Lime slices for garnish (optional)
Kitchen Equipment Needed
Having the right tools makes this recipe come together smoothly. You probably already have most of these in your kitchen.
- 9-inch pie pan (glass or ceramic works best)
- Mixing bowls (medium and large)
- Whisk
- Citrus juicer or reamer
- Microplane or zester
- Measuring cups and spoons
- Electric hand mixer or stand mixer (for whipped cream)
- Rubber spatula
- Plastic wrap
Recommended Products for This Recipe
After making this key lime pie countless times, I’ve found a few products that really elevate the final result and make the process easier.
1. Nellie & Joe’s Famous Key West Lime Juice
If you can’t find fresh key limes, this is hands down the best bottled alternative. It captures that authentic Florida Keys flavor without the hassle of juicing dozens of tiny limes. The taste is remarkably close to fresh-squeezed.
2. OXO Good Grips Citrus Juicer
This makes juicing limes so much easier and more efficient. The built-in strainer catches seeds and pulp, and the comfortable grip means your hands won’t cramp even when juicing multiple limes. I use mine at least twice a week.
3. Pyrex Glass Pie Plate
A quality glass pie pan distributes heat evenly, preventing soggy bottoms and ensuring your crust bakes to golden perfection. This one is durable, oven-safe, and lets you see exactly how your crust is browning.
4. Microplane Premium Zester
The difference between mediocre and exceptional key lime pie often comes down to the zest. This zester creates feathery-light zest that distributes evenly throughout the filling, adding incredible aromatic oils without any bitter white pith.
You might also enjoy: Tres Leches Cake Recipe
Step-by-Step Instructions
Follow these detailed steps to create the perfect key lime pie. Taking your time with each step ensures the best texture and flavor.
1. Prepare the Graham Cracker Crust
- Preheat your oven to 350°F (175°C)
- In a medium bowl, combine the graham cracker crumbs and granulated sugar, mixing thoroughly with a fork
- Pour in the melted butter and stir until the mixture resembles wet sand—every crumb should be moistened
- Press the mixture firmly into the bottom and up the sides of your 9-inch pie pan, using the bottom of a measuring cup to create an even, compact layer
- Bake the crust for 10 minutes until it’s lightly golden and fragrant
- Remove from the oven and let it cool on a wire rack while you prepare the filling
- Keep the oven on at 350°F for baking the filled pie
2. Make the Key Lime Filling
- In a large mixing bowl, whisk the egg yolks for about 1 minute until they’re slightly thickened and pale yellow
- Add the sweetened condensed milk and whisk vigorously for 2-3 minutes until the mixture is completely smooth and well combined
- Pour in the fresh key lime juice gradually while whisking constantly—you’ll notice the mixture start to thicken immediately from the acid reacting with the condensed milk
- Add the lime zest and whisk for another 30 seconds to distribute it evenly throughout the filling
- The filling should be thick, creamy, and pale yellow-green in color with visible flecks of zest
3. Bake the Pie
- Pour the lime filling into the cooled graham cracker crust, using a rubber spatula to scrape every bit from the bowl
- Gently tap the pie pan on the counter 2-3 times to release any air bubbles
- Smooth the top with the back of a spoon or offset spatula for an even surface
- Bake for 15-17 minutes—the filling should be set around the edges but still have a slight jiggle in the center when you gently shake the pan
- Don’t overbake, as the filling will continue to set as it cools
- Remove from the oven and let the pie cool on a wire rack for 30 minutes at room temperature
4. Chill the Pie
- Once the pie has cooled to room temperature, cover it loosely with plastic wrap, making sure the wrap doesn’t touch the surface of the filling
- Refrigerate for at least 4 hours, though overnight is even better for the flavors to fully develop and the texture to become perfectly creamy
- The pie should be completely chilled and firm before adding the whipped cream topping
5. Prepare the Whipped Cream Topping
- About 30 minutes before serving, place your mixing bowl and beaters in the freezer to chill
- In the chilled bowl, combine the heavy whipping cream, powdered sugar, and vanilla extract
- Beat on medium speed for about 30 seconds, then increase to high speed
- Whip for 2-3 minutes until stiff peaks form—the cream should hold its shape when you lift the beaters
- Don’t overbeat, or you’ll end up with butter instead of whipped cream
6. Finish and Serve
- Spread or pipe the whipped cream over the chilled pie, covering the entire surface or leaving the center exposed for a rustic look
- Garnish with thin lime slices, extra lime zest, or leave it simple
- Slice with a sharp knife, wiping the blade clean between cuts for neat slices
- Serve immediately and watch it disappear
Read Also: Apple Pie Biscuits Recipe
Tips for Success
These tips will help you avoid common pitfalls and create the most delicious key lime pie possible. Pay special attention to the lime juice measurement for the best results.
- Use fresh lime juice whenever possible: Bottled juice works in a pinch, but fresh juice creates a brighter, more complex flavor that really shines in this simple dessert
- Don’t skip the zest: The aromatic oils in lime zest add incredible depth and fragrance that juice alone can’t provide
- Room temperature eggs work best: They blend more smoothly with the condensed milk and create a silkier texture
- Avoid overbaking: The filling should still jiggle slightly in the center when you remove it from the oven—it will firm up completely as it chills
- Chill thoroughly: Patience is key here—a properly chilled pie slices cleanly and has the ideal creamy texture
- Press the crust firmly: A well-packed crust won’t crumble when you slice the pie and provides better structure
- Taste your limes first: Some limes are more tart than others, so adjust the amount slightly based on your preference
- Use full-fat condensed milk: Low-fat versions don’t set properly and create a runny filling
- Make the whipped cream fresh: Store-bought whipped topping doesn’t compare to homemade, and it only takes a few minutes
Serving Suggestions
This key lime pie pairs beautifully with various accompaniments and fits perfectly into any occasion. The refreshing citrus flavor makes it ideal for warm-weather gatherings.
Key lime pie is a natural choice for summer barbecues, beach parties, or any time you want a taste of the tropics. The bright, tangy flavor provides a perfect contrast to rich, heavy meals.
- Serve alongside Fruit Salad for a refreshing dessert spread
- Pair with strong coffee or espresso to balance the sweetness
- Add a scoop of vanilla ice cream for an extra-indulgent treat
- Drizzle with Caramel Sauce for a sweet-tart combination
- Garnish with fresh mint leaves for a pop of color and complementary flavor
- Serve with Cocktail Sauce on the side at seafood-themed dinners
- Top with toasted coconut flakes for tropical flair
- Accompany with sparkling wine or champagne for an elegant dessert course
This pairs beautifully with my Peach Cobbler Recipe for a delightful dessert buffet.
Variations to Try
Once you’ve mastered the classic version, these variations will keep things interesting. Each one adds a unique twist while maintaining that signature key lime flavor.
- Chocolate key lime pie: Add ½ cup of mini chocolate chips to the graham cracker crust or drizzle melted dark chocolate over the finished pie
- Coconut lime pie: Replace half the graham crackers with crushed vanilla wafers and add ¼ cup of toasted coconut to the crust
- Meringue-topped: Skip the whipped cream and top with Italian meringue, then torch it for a dramatic presentation
- No-bake version: Use a no-bake crust and freeze the pie instead of baking it—perfect for hot summer days
- Key lime cheesecake pie: Add 8 ounces of softened cream cheese to the filling for a richer, tangier result
- Gingersnap crust: Swap the graham crackers for gingersnap cookies for a spicy-sweet base that complements the lime
- Mini pies: Divide the recipe among 12 muffin tins lined with crust for individual servings
- Vegan version: Use coconut cream and a vegan condensed milk alternative, plus an egg replacer in the filling
Storage and Reheating
Proper storage keeps your key lime pie fresh and delicious for days. The good news is that this pie actually improves with a day or two in the refrigerator.
- Refrigerator: Cover the pie tightly with plastic wrap or aluminum foil and store for up to 5 days—the flavors will continue to meld and deepen
- Freezing: Wrap the pie (without whipped cream topping) tightly in plastic wrap, then in aluminum foil, and freeze for up to 2 months
- Thawing: Move frozen pie to the refrigerator 24 hours before serving to thaw slowly and maintain the best texture
- Leftover slices: Wrap individual slices in plastic wrap and store in an airtight container for up to 4 days
- Whipped cream: Add fresh whipped cream just before serving if you’re storing the pie—it holds up better this way
- Avoid room temperature: Never leave the pie out for more than 2 hours, as the dairy-based filling can spoil
Read Also: Pear Cobbler Recipe
Nutritional Facts
Per serving (1 slice, based on 8 servings):
- Calories: 425
- Total Fat: 21g
- Saturated Fat: 12g
- Cholesterol: 145mg
- Sodium: 210mg
- Total Carbohydrates: 52g
- Dietary Fiber: 1g
- Sugars: 42g
- Protein: 7g
- Vitamin C: 8% DV
- Calcium: 15% DV
- Iron: 6% DV
Health Benefits of Key Ingredients
While key lime pie is definitely a treat, some of its ingredients do offer nutritional benefits. Moderation is key, but you can feel slightly better about enjoying this dessert.
Key limes pack a powerful punch of vitamin C and antioxidants that support immune function. The citric acid in limes may also aid in digestion and help your body absorb iron more efficiently.
- Key limes: Excellent source of vitamin C, which supports immune health, collagen production, and wound healing
- Eggs: Provide high-quality protein, vitamin D, and choline for brain health
- Milk products: Deliver calcium for strong bones and teeth, plus vitamin D and protein
- Graham crackers: Contain whole wheat flour, offering some fiber and B vitamins
- Lime zest: Contains beneficial plant compounds and essential oils with anti-inflammatory properties
Frequently Asked Questions
1. Can I use regular limes instead of key limes?
Absolutely, and most people won’t notice much difference. Regular Persian limes are larger and more readily available than key limes.
Use about 4-5 regular limes to get ½ cup of juice. The flavor will be slightly less complex but still delicious and authentically tart.
2. Why is my key lime pie runny?
The most common culprit is not chilling the pie long enough. The filling needs at least 4 hours (preferably overnight) to fully set in the refrigerator.
Underbaking can also cause this—make sure you bake until the edges are set but the center still jiggles slightly. The acid in the lime juice will continue to firm up the filling as it chills.
3. Do I have to bake the filling, or can I make it no-bake?
Traditional key lime pie is baked, which helps the proteins in the eggs set properly and creates that signature creamy texture. However, you can make a no-bake version by freezing the pie instead.
For food safety, if you’re concerned about raw eggs, the baked version is safer. The brief baking time is enough to make the eggs safe while maintaining the pie’s creamy texture.
4. Can I make this pie ahead of time?
Yes, this is actually an ideal make-ahead dessert. The pie needs at least 4 hours to chill anyway, so making it the day before is perfect.
I recommend adding the whipped cream topping just before serving for the best presentation. The pie itself will keep beautifully in the refrigerator for up to 3 days, covered tightly.
5. What’s the secret to getting clean slices?
The key is using a sharp knife and cleaning it between each cut. Dip your knife in hot water, wipe it completely dry, then make your cut.
Make sure the pie is thoroughly chilled—a warm or room temperature pie will be much harder to slice cleanly. Chilling overnight gives you the best results for neat, bakery-worthy slices.
I learned this technique while perfecting my Mug Cake Recipe.
Final Thoughts
There’s truly nothing quite like a perfectly made key lime pie to brighten your day. The combination of tangy citrus and sweet creaminess creates a dessert that’s both refreshing and indulgent.
This recipe has been a staple in my kitchen for years, and it never fails to impress. The best part is how simple it is—no fancy techniques or hard-to-find ingredients required, just straightforward baking that delivers spectacular results every single time.
Give this key lime pie recipe a try for your next gathering or family dinner. I’d love to hear how it turns out for you, so drop a comment below with your results or any creative variations you tried!
Recommended:
- Baklava Recipe
- Snickerdoodle Cookie Recipe
- Gingerbread Cookie Recipe
- Pumpkin Bar Recipe
- Toffee Recipe
- Cake Pop Recipe
- Muddy Buddy Recipe
- Chocolate Souffle Recipe
- Oatmeal Raisin Cookie Recipe
- No Bake Cookie Recipe


