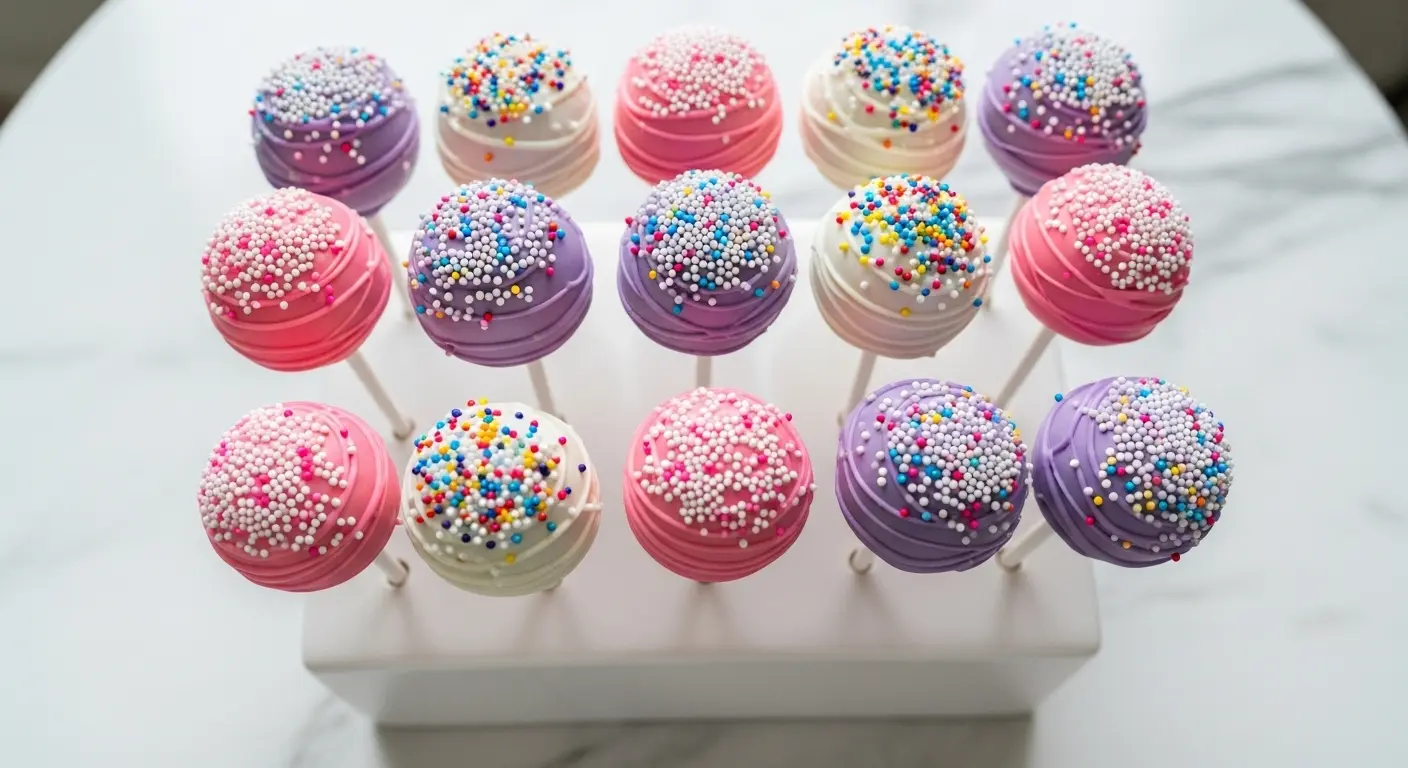
A great cake pop recipe is one of those kitchen projects that looks incredibly impressive but is far more approachable than it appears. These bite-sized, chocolate-coated treats on a stick have been a party staple for years, and for good reason. They’re portable, customizable, adorable on a dessert table, and made with ingredients you likely already have at home.
The classic version starts with a baked vanilla or chocolate cake, which gets crumbled and mixed with creamy frosting to form a moist, truffle-like dough. That mixture is shaped into balls, chilled, dipped in melted candy coating or chocolate, and decorated to your heart’s content.
The magic of cake pops is in that contrast: a soft, fudgy interior with a snappy chocolate shell on the outside.
Once you understand the basic method, you can take them in any flavor direction imaginable.
If you love bite-sized baked treats, you’ll also want to check out these Funnel Cake Bites for another fun crowd-pleaser.
Why You’ll Love This Cake Pop Recipe
These little treats check every box when it comes to crowd-pleasing desserts.
They’re endlessly versatile, beautiful on a dessert spread, and genuinely fun to make, especially with kids.
Here’s why this recipe is one you’ll come back to again and again:
- Perfect for parties and gifting. Cake pops are a showstopper at birthdays, baby showers, and holidays. They also package beautifully in cellophane bags as handmade gifts.
- Made with simple pantry ingredients. No specialty flour or exotic ingredients required. A box of cake mix works just fine, and we’ll walk you through the from-scratch version too.
- Completely customizable. Change the cake flavor, the coating color, and the decorations to match any theme or occasion.
- Great for feeding a crowd. One batch makes 40 to 50 pops, plenty for parties of all sizes.
- Kid-approved and kid-friendly to make. Little hands love rolling the dough balls and adding sprinkles. It’s a great kitchen activity.
- Make-ahead friendly. You can bake and crumble the cake a day or two in advance, then dip and decorate when ready.
You might also enjoy: Mug Cake Recipe
Ingredients
You only need a handful of components for this recipe, but the quality of each one matters. Using a good-quality chocolate or candy coating makes a big difference in the final snap and appearance of your cake pops.
Here’s what you’ll need:
For the Cake Base:
- 1 box (15.25 oz / 432g) vanilla or yellow cake mix, plus ingredients called for on the box (typically eggs, oil, and water)
- OR use a homemade 9×13-inch vanilla cake
For the Frosting Binder:
- 3 to 4 tablespoons (45 to 60ml) store-bought or homemade vanilla frosting (cream cheese frosting also works beautifully)
For the Coating:
- 2 cups (340g) white, milk, or dark chocolate candy melts or high-quality melting chocolate
For Decoration:
- Sprinkles, nonpareils, edible glitter, or finely crushed cookies
- Food coloring (oil-based, for use in candy melts)
Additional Supplies:
- 40 to 50 lollipop sticks (6-inch / 15cm)
- Styrofoam block or tall glass for holding pops upright while drying
Read Also: Easy Sugar Cookie Recipe
Kitchen Equipment Needed
You don’t need any highly specialized tools, but having the right setup makes the process smooth and efficient.
Here’s what to gather before you start:
- 9×13-inch (23x33cm) baking pan
- Stand mixer or hand mixer (for crumbling and mixing the cake)
- Large mixing bowl
- Cookie scoop (1.5 tablespoon / 22ml size for consistent balls)
- Baking sheet lined with parchment paper
- Microwave-safe bowl or double boiler for melting chocolate
- Deep narrow bowl or tall cup for dipping
- Lollipop sticks
- Styrofoam block or cake pop stand for drying
You might also enjoy: Hot Chocolate Bombs Recipe
Recommended Products for This Recipe
These are products I genuinely recommend based on quality, ease of use, and how much they improve your cake pop results.
1. Wilton Candy Melts Candy
Wilton’s candy melts are specifically formulated for dipping and coating, giving you a smooth, even shell that sets up with a satisfying snap. They come in a wide range of colors, so you can skip the food coloring step entirely. The consistency is far more forgiving than tempered chocolate, making them the top choice for beginners and experienced bakers alike.
2. OXO Good Grips Cookie Scoop
Consistent cake pop size is key to even chilling, even dipping, and a professional final look. The OXO 1.5 tablespoon cookie scoop portions the cake dough perfectly every time with a simple squeeze mechanism. It also helps speed up the rolling process significantly.
3. Cake Pop Stand or Styrofoam Display Block
Trying to balance wet cake pops against the side of a bowl leads to flat spots and smeared coatings. A dedicated cake pop stand or a simple styrofoam block holds every pop perfectly upright while the coating dries. This small investment makes a huge difference in your final presentation.
4. Paramount Crystals for Chocolate Thinning
If your melted chocolate or candy melts feel too thick for smooth dipping, paramount crystals are the professional solution. Just add a teaspoon at a time and the coating thins to a perfectly fluid consistency without affecting the flavor or set time.
Read Also: Best Chocolate Chip Cookies Recipe
Step-by-Step Instructions
Step 1: Bake and Fully Cool the Cake
- Preheat your oven to 350°F (175°C) and grease a 9×13-inch baking pan.
- Prepare your cake mix according to the box instructions, or use your favorite homemade vanilla cake batter.
- Pour the batter into the prepared pan and bake for 28 to 33 minutes, or until a toothpick inserted in the center comes out clean.
- Remove the cake from the oven and let it cool in the pan for 15 minutes, then transfer to a wire rack and cool completely. This step is critical: any warmth left in the cake will make the frosting melt and the dough too soft to shape.
Step 2: Crumble the Cake
- Once the cake is completely cool, break it into rough chunks and place them in a large mixing bowl.
- Using clean hands, a fork, or a stand mixer fitted with the paddle attachment, crumble the cake into fine, even crumbs. You want a texture like coarse, damp sand, with no large chunks remaining.
- Make sure there are no crispy edges in the crumbs, as these can create a rough texture. Trim and discard any hard edges from the cake before crumbling.
Step 3: Add Frosting and Mix the Dough
- Start by adding 3 tablespoons (45ml) of vanilla frosting to the cake crumbs.
- Mix with your hands or a spatula until the crumbs come together into a soft, pliable dough that holds its shape when pressed. Think of it like Play-Doh: moist enough to roll into a smooth ball, but not wet or sticky.
- If the mixture feels too dry or crumbly, add the remaining tablespoon of frosting and mix again. Resist the urge to add too much frosting, as an overly wet mixture will make cake pops that slide off the sticks and crack the coating when dipped.
Step 4: Roll the Cake Balls
- Line a large baking sheet with parchment paper.
- Using a 1.5 tablespoon cookie scoop, portion the dough and roll each portion between your palms into a smooth ball, approximately 1.25 inches (3cm) in diameter.
- Place each ball on the prepared baking sheet as you go.
- Once all balls are rolled, place the baking sheet in the freezer for 15 minutes, or the refrigerator for 30 to 45 minutes. The balls need to be firm but not frozen solid, as frozen cake pops can crack the warm coating when dipped.
Step 5: Melt the Candy Coating
- While the cake balls chill, place your candy melts or melting chocolate in a deep, microwave-safe bowl.
- Microwave in 30-second intervals, stirring well between each interval, until fully melted and smooth. This usually takes 2 to 3 intervals total.
- If the coating seems too thick for smooth dipping, add paramount crystals, a teaspoon of coconut oil, or a small amount of vegetable shortening, one teaspoon at a time, stirring until you reach a fluid, pourable consistency.
- Keep the coating warm throughout the dipping process. If it begins to thicken, microwave for 15 to 20 seconds and stir again.
Step 6: Attach the Lollipop Sticks
- Remove the chilled cake balls from the freezer or refrigerator.
- Dip the tip of each lollipop stick (about half an inch / 1.5cm) into the melted coating, then insert the stick into a cake ball, pushing it in about halfway through. Do not push it all the way through to the other side.
- The dipped coating acts as “glue” that anchors the stick to the cake ball. Let the pops sit for 1 to 2 minutes to set before dipping.
- Work quickly and repeat for all cake balls, returning them to the parchment-lined baking sheet as you go.
Step 7: Dip the Cake Pops
- Hold a cake pop by the stick and lower it straight down into the melted coating, submerging the entire ball.
- Do not swirl or stir the pop in the coating, as this can loosen it from the stick.
- Lift the pop straight out, then gently tap the stick against the edge of the bowl (or tap your wrist holding the stick) to encourage excess coating to drip off. Rotate the pop slowly as you tap to get an even coating.
- Add sprinkles or other decorations immediately, before the coating sets.
Step 8: Let the Pops Set Upright
- Immediately insert the finished pop into your styrofoam block or cake pop stand so it stands straight up.
- Avoid laying the pops on their sides, as this will create flat spots on the coating.
- Allow the coating to set completely at room temperature, which takes about 10 to 15 minutes per pop in a cool kitchen. You can speed this up by placing the styrofoam block in the refrigerator for 5 minutes.
- Once fully set, the coating should be smooth, shiny, and firm to the touch.
This recipe pairs beautifully alongside other party treats like these Bourbon Balls for an impressive dessert spread.
Tips for Success
Even with a straightforward process, cake pops have a few quirks that catch new bakers off guard. These tips will help you avoid the most common pitfalls.
Keep these in mind for a stress-free experience:
- Do not over-frost the dough. This is the most common mistake. Too much frosting leads to pops that crack, slide off sticks, or develop a greasy texture under the coating. Start with 3 tablespoons and add more only if needed.
- Don’t skip the chilling step. Firm, cold cake balls grip the stick better, dip more cleanly, and hold their round shape. Warm cake balls will crumble or slip into the coating.
- Keep the coating warm and fluid. Thick coating drags off chunks of the cake ball when you dip. Aim for the consistency of warm maple syrup.
- Work in small batches. Only remove 6 to 8 cake balls from the refrigerator at a time. They warm up quickly, and warm balls are harder to dip cleanly.
- Add stick adhesive before dipping. Always dip the stick in coating before inserting it into the ball. This is what keeps the pop from sliding off.
- Use a deep, narrow vessel for dipping. A tall, narrow cup or mug filled with melted coating lets you fully submerge the ball in one motion without tilting the pop awkwardly.
- Oil-based food coloring only. If you want to tint white candy melts, use oil-based food coloring. Water-based coloring will seize your chocolate and ruin the batch.
Another favorite: Sugar Cookies Recipe
Serving Suggestions
Cake pops are incredibly versatile when it comes to presentation and pairing.
Whether you’re building a full dessert table or sending guests home with a sweet treat, here are some ideas:
- On a dessert table alongside Classic Deviled Eggs, fruit trays, and Easy Nachos for a balanced party spread.
- Wrapped individually in clear cellophane bags tied with ribbon for party favors, baby shower gifts, or bake sale packaging.
- Standing in a vase or floral foam filled with decorative filler to create an edible centerpiece.
- Arranged on a tiered stand in coordinating colors for a cake-alternative birthday display.
- Paired with hot drinks like hot chocolate or coffee for a cozy winter treat.
- Themed for holidays by using red and green coating for Christmas, pastel colors for Easter, or orange and black for Halloween.
Read Also: Hot Chocolate Recipe
Variations to Try
Once you’ve mastered the classic vanilla cake pop, the flavor and decoration options are practically endless.
Here are some delicious variations worth exploring:
- Chocolate Cake Pops: Swap the vanilla cake for a chocolate cake base and use cream cheese or chocolate frosting as the binder. Coat in dark or milk chocolate for an intensely rich treat.
- Red Velvet Cake Pops: Use a red velvet cake and cream cheese frosting inside, then coat in white chocolate. The red crumb showing through any cracks looks stunning.
- Lemon Cake Pops: Use a lemon cake mix, add a teaspoon of lemon zest to the frosting, and coat in white chocolate with yellow sprinkles.
- Funfetti Cake Pops: Fold rainbow sprinkles directly into the cake crumb mixture before rolling for confetti-style pops that are endlessly festive.
- Pumpkin Spice Cake Pops: Use a spice cake base, add a tablespoon of pumpkin puree to the frosting, and coat in orange-tinted white chocolate. Perfect for fall.
- Oreo Cake Pops: Replace the baked cake entirely with crushed Oreo cookies mixed with cream cheese. No baking required, and the flavor is extraordinary.
- Strawberry Cake Pops: Use strawberry cake mix and strawberry frosting, then coat in pink candy melts for a bright, fruity version.
This technique works wonderfully for making Checkerboard Cake Recipe layers that can be crumbled into visually dramatic cake pops.
Storage and Reheating
Cake pops store well and can be made several days in advance, which makes them ideal for party planning.
Follow these guidelines to keep them fresh:
- Room temperature: Finished cake pops can be stored in an airtight container at room temperature for up to 3 days. Keep them away from direct sunlight or heat, which can melt the coating.
- Refrigerator: Store in an airtight container in the refrigerator for up to 1 week. Bring to room temperature before serving to prevent condensation on the coating.
- Freezer (uncoated): Rolled, uncoated cake balls can be frozen on a baking sheet, then transferred to a zip-top bag and frozen for up to 6 weeks. Thaw in the refrigerator overnight before dipping.
- Freezer (coated): Fully coated and decorated pops can be frozen for up to 3 months. Wrap each one individually in plastic wrap, then place in a zip-top bag. Thaw slowly in the refrigerator to prevent condensation and cracking.
- Reheating is not necessary for cake pops. Simply bring refrigerated pops to room temperature before serving for the best texture and flavor.
Another favorite: No Bake Cookie Recipe
Nutritional Facts
The following estimates are based on one standard-sized vanilla cake pop (approximately 1.25 inches / 3cm in diameter) coated in white candy melts.
| Nutrient | Amount Per Cake Pop |
|---|---|
| Calories | 120 kcal |
| Total Fat | 5g |
| Saturated Fat | 2.5g |
| Cholesterol | 10mg |
| Sodium | 95mg |
| Total Carbohydrates | 18g |
| Sugars | 13g |
| Protein | 1g |
Nutritional values are estimates and will vary depending on the cake flavor, amount of frosting used, and the type and amount of coating applied.
Read Also: Easy Chocolate Cake Recipe
Health Benefits of Key Ingredients
Cake pops are a treat, and there’s no pretending otherwise. That said, a few of the core ingredients do carry some nutritional value worth noting.
Here’s a look at what’s going on inside:
- Eggs (in the cake base) are a complete protein source and contribute choline, which supports brain health and liver function. Each egg also adds B vitamins, including B12 and riboflavin.
- Cocoa or chocolate coating contains flavonoids, plant-based compounds associated with improved cardiovascular health when consumed in moderation. Dark chocolate in particular has a higher cocoa content and lower sugar than milk chocolate coatings.
- Vanilla extract provides trace amounts of antioxidants and has been studied for mild anti-inflammatory properties. Pure vanilla also contributes a depth of flavor that allows you to use less added sugar overall.
- Portion control is built in. At roughly 120 calories per pop, cake pops naturally encourage mindful enjoyment. One or two satisfies a sweet craving far more effectively than a slice of cake.
- Coconut oil (used optionally to thin the coating) contains medium-chain triglycerides, a form of fat that is metabolized differently than long-chain fats and may provide a quick energy source.
Another favorite: Dirt Pudding Recipe
Frequently Asked Questions
1. Why do my cake pops crack after dipping?
Cracking usually happens when the cake balls are too cold when dipped in warm coating. The drastic temperature difference causes the coating to contract too quickly as it sets. To prevent this, let your cake balls rest at room temperature for 3 to 5 minutes after removing them from the freezer before dipping. You want them firm but not frozen solid.
2. Why do my cake pops fall off the stick?
This typically happens for one of two reasons. Either the stick wasn’t dipped in coating before inserting it (which acts as the adhesive), or the cake ball mixture was too wet and heavy to hold onto the stick. Make sure you dip the stick tip in coating first and let it set for a minute before dipping the full pop.
3. Can I use store-bought cake and frosting?
Absolutely. A box of cake mix baked according to package directions and 3 to 4 tablespoons of canned frosting works perfectly and is how many professional bakers make their cake pops. There is no need to bake from scratch if you prefer the convenience of pre-made products.
4. How do I get a smooth, bubble-free coating?
Tap the stick gently against the side of the bowl (or your wrist) after dipping to release air bubbles and encourage excess coating to drip off evenly. If your coating has developed bubbles during heating, let it cool slightly and stir before dipping. The coating should be fluid and warm but not so hot that it creates steam.
5. Can I make cake pops without a styrofoam block?
Yes. You can stand the finished pops upright in a tall glass or mug filled with rice, sugar, or dried beans. You can also use a heavy piece of cardboard with small holes poked through it. The goal is simply to keep the pop vertical while the coating sets so you avoid flat spots.
Read Also: Snickerdoodle Cookie Recipe
Final Thoughts
Making cake pops from scratch is one of those kitchen projects that feels like a true creative outlet. The process is straightforward once you know the key tricks, and the result is always something that makes people smile.
This cake pop recipe is endlessly adaptable, crowd-pleasing, and genuinely fun to put together. If you give it a try, I’d love to hear how it went. Drop a comment below with your favorite flavor combination or share a photo of your finished pops.
Recommended:
- Checkerboard Cake Recipe
- Moist Chocolate Cake Recipe
- Best Carrot Cake Recipe
- Classic Vanilla Cake Recipe
- Tres Leches Cake Recipe
- Pumpkin Roll Recipe
- Gingerbread Cookie Recipe
- Cut Out Sugar Cookie Recipe
- Fruit Tart Recipe
- Chewy Chocolate Chip Cookies Recipe


