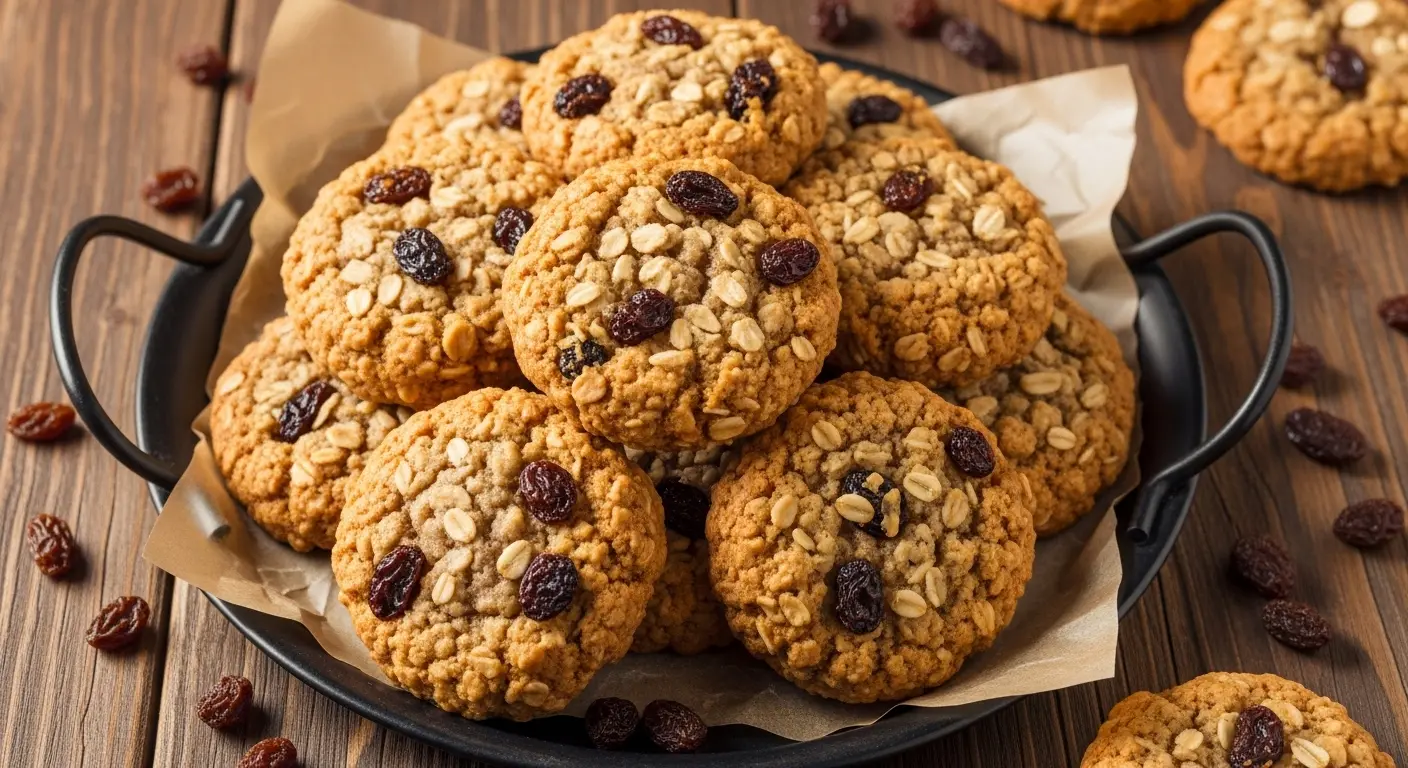
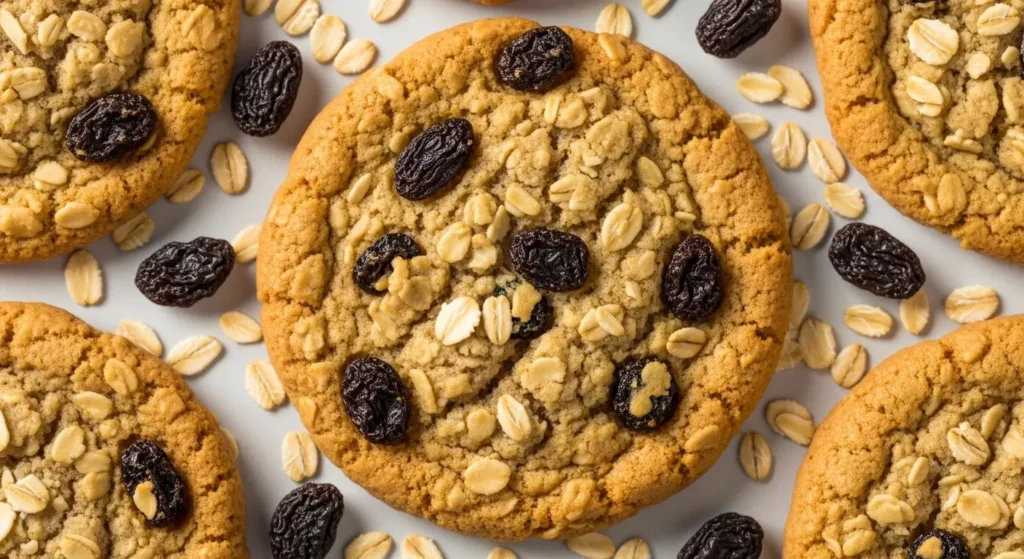
If you’ve ever pulled a warm, soft cookie from the oven and watched as the aroma of cinnamon and brown sugar filled your kitchen, you know that homemade treats hit differently. This oatmeal raisin cookie recipe delivers exactly that experience—chewy centers, slightly crisp edges, and pockets of sweet, plump raisins in every bite.
I’ve been baking these cookies for years, and they’ve become a staple in my household. My kids request them after school, my husband sneaks them with his morning coffee, and I’ve brought them to countless potlucks and bake sales.
The beauty of this recipe lies in its simplicity. You don’t need fancy equipment or hard-to-find ingredients. Everything comes together in about 30 minutes, and the results are always consistent.
These cookies strike the perfect balance between wholesome and indulgent. The hearty oats add texture and substance, while the raisins bring natural sweetness and a delightful chew.
Trust me when I say this recipe will become your new go-to. Once you taste the difference homemade makes, you’ll never reach for store-bought again.
For another classic cookie variation, check out my Oatmeal Cookie Recipe.
Why You’ll Love This Oatmeal Raisin Cookie Recipe
This oatmeal raisin cookie recipe has earned its place in my regular baking rotation for so many reasons. The combination of old-fashioned oats and plump raisins creates a cookie that’s both satisfying and surprisingly wholesome.
What sets this recipe apart is the texture. You get that beautiful contrast of chewy centers with just enough crispness around the edges to make each bite interesting.
The warm spices—cinnamon and a hint of nutmeg—elevate these cookies from ordinary to extraordinary. They fill your kitchen with that cozy, inviting scent that makes everyone come running.
Here’s why this recipe stands out:
- Perfectly chewy texture with slightly crisp edges that hold up well for days
- Simple ingredients you likely already have in your pantry
- Naturally sweetened with brown sugar and sweet raisins for depth of flavor
- Wholesome oats add fiber and make these cookies more filling than typical treats
- Freezer-friendly dough so you can bake fresh cookies anytime
- Versatile recipe that adapts well to dietary modifications and add-ins
- Quick prep time of just 15 minutes before baking
Another favorite from my kitchen: Easy Protein Pancakes Recipe
Ingredients
Gather these simple ingredients before you start baking. Most are pantry staples you probably already have on hand.
- 1 cup (2 sticks) unsalted butter, softened at room temperature
- 1 cup packed light brown sugar
- ½ cup granulated white sugar
- 2 large eggs, at room temperature
- 2 teaspoons pure vanilla extract
- 1½ cups all-purpose flour
- 1 teaspoon baking soda
- 1 teaspoon ground cinnamon
- ½ teaspoon salt
- ¼ teaspoon ground nutmeg
- 3 cups old-fashioned rolled oats
- 1½ cups raisins
Read Also: Banana Bread Recipe With Sour Cream
Kitchen Equipment Needed
Having the right tools makes baking these cookies easier and ensures consistent results every time.
- Stand mixer or hand mixer
- Large mixing bowl
- Medium mixing bowl
- Baking sheets (2-3 recommended)
- Silicone baking mats or parchment paper
- Cookie scoop (medium size, about 1.5 tablespoons)
- Wire cooling rack
- Measuring cups and spoons
- Rubber spatula
Recommended Products for This Recipe
Over the years, I’ve tested countless products to find what truly makes a difference in my baking. These are my personal favorites that consistently deliver excellent results.
1. KitchenAid Artisan Stand Mixer
A stand mixer transforms cookie baking from a workout into a breeze. The paddle attachment creams butter and sugar to perfection, incorporating just the right amount of air for fluffy, tender cookies. I’ve had mine for over a decade, and it’s still going strong.
2. Nordic Ware Aluminum Baking Sheets
These heavy-duty aluminum baking sheets conduct heat evenly, preventing hot spots that can burn the bottoms of your cookies. They don’t warp at high temperatures, and their light color helps cookies bake more uniformly than dark pans.
3. Bob’s Red Mill Old Fashioned Rolled Oats
Quality oats make a noticeable difference in these cookies. Bob’s Red Mill oats have the perfect thickness—not too thick like steel-cut, not too thin like quick oats. They create that ideal chewy texture with just enough bite.
4. OXO Good Grips Medium Cookie Scoop
Uniform cookies bake evenly and look professional. This cookie scoop releases dough cleanly every time and creates perfectly portioned cookies. It’s also comfortable to use when scooping multiple batches.
You might also enjoy: Easy Scone Recipe
Step-by-Step Instructions
1. Prepare Your Baking Setup
Getting organized before you start mixing ensures a smooth baking process and consistent results.
- Position your oven rack in the center of the oven for even heat distribution.
- Preheat your oven to 350°F (175°C) and allow it to fully heat for at least 15 minutes before baking.
- Line your baking sheets with silicone baking mats or parchment paper to prevent sticking and ensure easy cleanup.
- Take the butter and eggs out of the refrigerator about 30 minutes before you plan to start mixing so they reach room temperature.
- Measure out all your ingredients and set them within reach of your mixing station.
2. Combine the Dry Ingredients
Whisking the dry ingredients together ensures even distribution of leavening and spices throughout the cookies.
- Add the all-purpose flour to a medium-sized mixing bowl.
- Measure the baking soda and add it to the flour.
- Add the ground cinnamon, salt, and ground nutmeg to the bowl.
- Use a whisk to thoroughly combine all the dry ingredients, breaking up any lumps in the flour or brown sugar.
- Set this bowl aside while you prepare the wet ingredients.
3. Cream the Butter and Sugars
Proper creaming creates air pockets in the butter, resulting in lighter, more tender cookies.
- Place the softened butter in the bowl of your stand mixer fitted with the paddle attachment, or use a large bowl with a hand mixer.
- Add both the packed light brown sugar and granulated white sugar to the butter.
- Beat on medium speed for 3-4 minutes until the mixture becomes light and fluffy.
- Stop the mixer occasionally to scrape down the sides of the bowl with a rubber spatula, ensuring all the butter is incorporated.
- The mixture should appear pale in color and have increased noticeably in volume when properly creamed.
4. Add the Eggs and Vanilla
Adding eggs one at a time helps maintain the emulsion and creates a smoother batter.
- Crack one egg into the butter-sugar mixture with the mixer running on low speed.
- Beat for about 30 seconds until fully incorporated before adding the second egg.
- Add the second egg and beat for another 30 seconds.
- Pour in the pure vanilla extract and mix until combined.
- Scrape down the sides and bottom of the bowl to ensure everything is well mixed.
- The batter should look smooth and slightly glossy at this stage.
5. Incorporate the Dry Ingredients
Mixing the dry ingredients properly ensures tender cookies without overworking the dough.
- With the mixer on low speed, gradually add the flour mixture to the wet ingredients in three additions.
- Mix just until the flour is nearly incorporated after each addition—you should still see some streaks of flour.
- Stop the mixer as soon as you no longer see dry flour to avoid developing too much gluten, which can make cookies tough.
- Use a rubber spatula to scrape the bottom of the bowl and fold any remaining flour into the dough.
6. Add the Oats and Raisins
The oats and raisins are what make these cookies special, so fold them in gently to distribute evenly.
- Remove the bowl from the stand mixer if using one.
- Add the old-fashioned rolled oats to the dough.
- Add the raisins on top of the oats.
- Use a sturdy rubber spatula or wooden spoon to fold the oats and raisins into the dough.
- Continue folding until the oats and raisins are evenly distributed throughout—this usually takes about 20-30 folds.
- Make sure to scrape the bottom of the bowl to incorporate any dough that may have settled there.
7. Shape and Arrange the Cookies
Proper spacing and uniform sizing ensure your cookies bake evenly and look beautiful.
- Use a medium cookie scoop (about 1.5 tablespoons) to portion the dough, or use two spoons to create uniform balls.
- Roll each portion gently between your palms to form a smooth ball.
- Place the dough balls on your prepared baking sheets, leaving about 2 inches of space between each cookie to allow for spreading.
- Arrange no more than 12 cookies per standard-sized baking sheet.
- Gently press each ball down slightly with your palm or the bottom of a glass to flatten it to about ¾-inch thick.
- For thicker, chewier cookies, skip the flattening step and bake the dough balls as is.
8. Bake the Cookies
Watching the timing closely ensures perfectly chewy cookies with golden edges.
- Place one baking sheet at a time in the center of your preheated oven for most even baking.
- Bake for 10-12 minutes, or until the edges are golden brown but the centers still look slightly underdone.
- Rotate the baking sheet 180 degrees halfway through baking if your oven has hot spots.
- The cookies will appear puffy and slightly wet in the center when they come out—this is exactly what you want for a chewy texture.
- Do not overbake, as the cookies will continue to set as they cool on the pan.
9. Cool the Cookies Properly
Allowing the cookies to cool correctly helps them achieve the ideal texture.
- Remove the baking sheet from the oven and place it on a heat-safe surface.
- Let the cookies cool on the baking sheet for 5 minutes—this allows them to firm up enough to move without breaking.
- Use a thin spatula to carefully transfer the cookies to a wire cooling rack.
- Allow the cookies to cool completely on the rack, which takes about 15-20 minutes.
- Repeat the baking process with remaining dough, always using a cool baking sheet or allowing your sheet to cool between batches.
Another favorite: Classic Scone Recipe
Tips for Success
These tested tips will help you achieve bakery-quality cookies every single time.
- Use room temperature butter that’s soft enough to indent with your finger but not melty or greasy—this is crucial for proper creaming.
- Don’t substitute quick oats for old-fashioned rolled oats, as they’ll create a different, less desirable texture.
- Plump your raisins by soaking them in warm water for 10 minutes before baking if they seem dry, then pat them completely dry.
- Chill the dough for 30 minutes if it seems too soft—cold dough spreads less and creates thicker cookies.
- Use a kitchen scale for the most accurate measurements, especially for flour.
- Slightly underbake the cookies for the chewiest results—they’ll firm up as they cool.
- Rotate your pans halfway through baking for even browning.
- Let baking sheets cool between batches to prevent excessive spreading.
Read Also: Mug Cake Recipe
Serving Suggestions
These versatile cookies pair wonderfully with so many beverages and can be dressed up for special occasions.
A classic glass of cold milk is the traditional companion for oatmeal raisin cookies, and for good reason—the cool creaminess perfectly balances the warm spices and chewy texture. For adults, try serving these with a Pumpkin Spice Latte or a warm cup of chai tea.
Crumble these cookies over vanilla ice cream for an easy dessert, or sandwich two cookies together with cream cheese frosting for an indulgent treat. They also make wonderful gifts when packaged in clear cellophane bags tied with ribbon.
Here are more serving ideas to try:
- With coffee for a mid-morning or afternoon pick-me-up
- Warmed in the microwave for 10 seconds with a scoop of vanilla ice cream
- Crumbled over yogurt for a satisfying breakfast parfait
- Paired with hot apple cider during fall evenings
- As part of a dessert board alongside fresh fruit and chocolate
- Packaged as homemade gifts for holidays and special occasions
Variations to Try
Once you’ve mastered the basic recipe, experiment with these delicious variations to keep things interesting.
- Chocolate chip oatmeal raisin: Add ½ cup of semi-sweet chocolate chips along with the raisins.
- Cranberry orange: Replace raisins with dried cranberries and add 1 tablespoon of orange zest.
- Maple walnut: Substitute maple syrup for ¼ cup of the brown sugar and add 1 cup of chopped walnuts.
- Apple cinnamon: Add ½ cup of dried apple pieces and increase cinnamon to 1½ teaspoons.
- Gluten-free version: Use a 1:1 gluten-free flour blend and certified gluten-free oats.
- Vegan adaptation: Replace butter with vegan butter and use flax eggs (1 tablespoon ground flax + 3 tablespoons water per egg).
- Extra chewy: Add an extra egg yolk and reduce baking time by 1-2 minutes.
- Giant bakery-style: Use a large cookie scoop (3 tablespoons) and increase baking time to 14-16 minutes.
You might also enjoy: Cherry Cobbler Recipe With Cake Mix
Storage and Reheating
Proper storage keeps these cookies fresh and delicious for days.
- At room temperature: Store in an airtight container for up to 5 days. Add a slice of bread to the container to keep cookies soft.
- In the refrigerator: While not necessary, refrigerated cookies will last up to 10 days in an airtight container.
- In the freezer (baked cookies): Freeze in a single layer until solid, then transfer to a freezer bag. They’ll keep for up to 3 months.
- In the freezer (cookie dough): Scoop dough balls onto a baking sheet, freeze until solid, then transfer to a freezer bag. Bake from frozen, adding 2-3 minutes to baking time.
- To refresh day-old cookies: Microwave for 8-10 seconds for that fresh-from-the-oven warmth.
- To reheat frozen cookies: Let thaw at room temperature for 30 minutes, or microwave for 15-20 seconds.
Read Also: Easy Rice Krispie Treat Recipe
Nutritional Facts
Here’s the approximate nutritional information for one standard-sized oatmeal raisin cookie (based on a yield of 36 cookies):
- Calories: 135
- Total Fat: 5.5g
- Saturated Fat: 3.5g
- Cholesterol: 24mg
- Sodium: 75mg
- Total Carbohydrates: 20g
- Dietary Fiber: 1.5g
- Sugars: 11g
- Protein: 2g
- Iron: 4% DV
- Calcium: 2% DV
Nutritional values are estimates and may vary based on specific ingredients used and cookie size.
Another favorite from my kitchen: Gooey Rice Krispie Treat Recipe
Health Benefits of Key Ingredients
While these are certainly a treat, the key ingredients in oatmeal raisin cookies offer some surprising nutritional benefits.
Oats are nutritional powerhouses that have been linked to numerous health benefits. They contain a type of soluble fiber called beta-glucan, which has been shown to help lower cholesterol levels and support heart health. The fiber in oats also promotes healthy digestion and helps maintain steady blood sugar levels.
Raisins are nutrient-dense dried fruits packed with fiber, potassium, and iron. They contain natural antioxidants that can help protect cells from damage. The fiber in raisins supports digestive health, while the iron content helps prevent anemia.
Here are more benefits of these wholesome ingredients:
- Oats provide lasting energy thanks to their complex carbohydrates and fiber content
- Raisins offer natural sweetness with beneficial vitamins and minerals
- Cinnamon may help regulate blood sugar and provides anti-inflammatory properties
- Eggs contribute protein and essential B vitamins
- The fiber from oats and raisins supports healthy digestion and gut bacteria
Read Also: Honey Roasted Carrots Recipe
Frequently Asked Questions
1. Can I use quick oats instead of old-fashioned rolled oats?
While you can substitute quick oats in a pinch, the texture will be noticeably different. Quick oats are more finely cut, so they’ll create a softer, less chewy cookie without that characteristic hearty oat texture.
Old-fashioned rolled oats give these cookies their signature chew and visual appeal. If you only have quick oats, reduce the amount to 2¾ cups.
2. Why are my oatmeal raisin cookies flat?
Flat cookies typically result from butter that’s too warm, overmixing the dough, or an oven that’s not hot enough. Make sure your butter is softened but not melted—it should hold a thumbprint but not be greasy.
Also check that your baking soda is fresh (it loses potency after about 6 months of opening). Chilling the dough for 30 minutes before baking can also help prevent excessive spreading.
3. How do I keep my cookies chewy instead of crunchy?
The key to chewy cookies is slightly underbaking them. Remove the cookies from the oven when the edges are set and golden but the centers still look slightly underdone.
Using more brown sugar than white sugar also increases chewiness because brown sugar contains molasses, which adds moisture. Adding an extra egg yolk (just the yolk, no white) will also make cookies chewier.
4. Can I make this recipe without eggs?
Yes, you can make egg-free oatmeal raisin cookies using several substitutes. The most effective options are flax eggs (1 tablespoon ground flax mixed with 3 tablespoons water per egg, rested for 5 minutes) or commercial egg replacers.
Mashed banana (¼ cup per egg) or unsweetened applesauce also work but will add a slight fruity flavor. The texture may be slightly different, but the cookies will still be delicious.
5. How long do oatmeal raisin cookies stay fresh?
When stored properly in an airtight container at room temperature, these cookies stay fresh for about 5 days. The oats actually help them retain moisture longer than many other cookie types.
For longer storage, freeze the baked cookies for up to 3 months. They thaw quickly at room temperature and taste almost as good as freshly baked.
Another favorite: Peach Cobbler Recipe With Cake Mix
Final Thoughts
This oatmeal raisin cookie recipe has become a beloved staple in my kitchen, and I hope it becomes one in yours too. The combination of hearty oats, sweet raisins, and warm spices creates a cookie that’s both comforting and satisfying.
What I love most about this recipe is its reliability. Every batch turns out perfectly chewy with those beautiful golden edges.
The ingredients are simple and affordable, yet the results taste like something from a high-end bakery. Plus, the aroma that fills your kitchen while these bake is absolutely irresistible.
I encourage you to give this recipe a try this weekend. Bake a batch, pour yourself a glass of milk or a cup of coffee, and enjoy the simple pleasure of a homemade cookie.
If you make these oatmeal raisin cookies, I’d love to hear how they turned out! Leave a comment below and share your experience. Don’t forget to share this recipe with friends and family who appreciate a good, classic cookie.
Recommended:
- Banana Protein Pancakes Recipe
- Chocolate Protein Pancakes Recipe
- Rum Cake Recipe With Cake Mix
- Coconut Cake With Cream of Coconut Recipe
- Peanut Butter Rice Krispie Treat Recipe
- Cinnamon Rolls Frosting Recipe Without Cream Cheese
- Banana Nut Bread Recipe Without Flour
- Pudding Cake Recipe With Cake Mix
- 4 Ingredient Gluten Free Bread Recipe
- Banana Bread Recipe With Greek Yogurt


