I’m going to be completely honest with you: the first time I made a no bake cheesecake recipe, I was skeptical. How could something this simple possibly compete with a traditional baked cheesecake that takes hours in the oven?
But then I took that first bite, and everything changed. The texture was impossibly creamy, the flavor was rich and tangy, and best of all, I didn’t have to worry about cracks, water baths, or any of the usual cheesecake drama.
This dessert has become my secret weapon for last-minute gatherings and hot summer days when turning on the oven sounds like torture. You get all the decadence of a classic cheesecake with a fraction of the effort and time.
The beauty of this recipe lies in its simplicity. You’re basically mixing cream cheese with a few other ingredients, pouring it into a prepared crust, and letting the refrigerator do all the work while you go about your day.
I’ve made this countless times now, and it never fails to impress. Guests always assume I spent hours in the kitchen, and I just smile and accept the compliments without mentioning how ridiculously easy it was.
Why You’ll Love This No Bake Cheesecake Recipe
This dessert delivers everything you crave in a cheesecake without any of the stress. The filling is silky smooth, the graham cracker crust adds the perfect crunch, and you don’t need any special baking skills to pull it off.
I love that you can make this in the morning and have it ready for dinner, or even prepare it the night before a party. The hands-on time is minimal, which means you can focus on other things while your dessert chills to perfection.
Here’s what makes this recipe stand out:
- No oven required – Perfect for hot weather or when your oven is already occupied with other dishes
- Foolproof texture – No cracks, no sinking centers, no water bath needed
- Quick preparation – Only 15 minutes of active work before refrigeration
- Make-ahead friendly – Actually tastes better after chilling overnight
- Endlessly customizable – The base recipe works with countless flavor variations
- Impressive presentation – Looks like you spent hours making it
My best cheesecake recipe requires more time and precision, but this no-bake version delivers similar satisfaction with far less effort.
Ingredients
The ingredient list is refreshingly short, and you probably have most of these items in your kitchen already. I always use full-fat cream cheese and heavy cream because they create the richest, most luxurious texture.
- 2 cups graham cracker crumbs (about 16 whole crackers)
- 6 tablespoons unsalted butter, melted
- 3 tablespoons granulated sugar (for crust)
- 24 ounces (three 8-ounce packages) cream cheese, softened to room temperature
- 1 cup powdered sugar
- 1 tablespoon vanilla extract
- 2 tablespoons fresh lemon juice
- 1½ cups cold heavy whipping cream
- ¼ teaspoon salt
Kitchen Equipment Needed
Having the right tools makes this recipe even easier. I recommend using a 9-inch springform pan because it makes removing the cheesecake so much simpler, but a regular pie dish works too if that’s what you have.
- 9-inch springform pan
- Electric hand mixer or stand mixer
- Large mixing bowls
- Rubber spatula
- Measuring cups and spoons
- Food processor or rolling pin (for crushing graham crackers)
Recommended Products for This Recipe
After making this cheesecake dozens of times, I’ve found that certain products make a real difference in the final result. These are the items I reach for every single time.
1. Philadelphia Cream Cheese
The brand really does matter here. Philadelphia cream cheese has the perfect consistency and tangy flavor that makes this cheesecake taste professional. I’ve tried store brands, and they just don’t blend as smoothly or taste as rich.
2. Nordic Ware Leakproof Springform Pan
This springform pan changed my cheesecake game completely. The silicone gasket prevents any butter from leaking out during prep, and the non-stick coating releases the cheesecake perfectly every time. Mine has lasted for years and still looks brand new.
3. KitchenAid Hand Mixer
You need a powerful mixer to beat the cream cheese until it’s completely smooth and to whip the cream to stiff peaks. This KitchenAid hand mixer has enough power to handle thick cream cheese without burning out, and it’s so much easier to clean than a stand mixer.
4. Madagascar Vanilla Extract
Since there are so few ingredients in this recipe, quality really shows through. Pure Madagascar vanilla extract adds a depth of flavor that imitation vanilla just can’t match. A little goes a long way, and the difference is noticeable.
Step-by-Step Instructions
Follow these steps carefully, and you’ll have a perfect no-bake cheesecake every time. The key is making sure your cream cheese is properly softened and that you don’t skip any of the mixing steps.
1. Prepare the Pan and Make the Crust
- Line the bottom of your springform pan with parchment paper for easy removal later
- In a medium bowl, combine the graham cracker crumbs, melted butter, and 3 tablespoons of sugar
- Mix until the crumbs are evenly moistened and hold together when pressed
- Press the mixture firmly into the bottom of the pan, using the bottom of a measuring cup to pack it down evenly
- Extend the crust about 1 inch up the sides of the pan
- Place the pan in the refrigerator while you prepare the filling
2. Beat the Cream Cheese Base
- Make sure your cream cheese is at room temperature (this is crucial for a smooth filling)
- In a large mixing bowl, beat the cream cheese with an electric mixer on medium speed for 2-3 minutes
- The cream cheese should become light, fluffy, and completely smooth with no lumps
- Scrape down the sides and bottom of the bowl at least twice during mixing
- Add the powdered sugar and beat for another minute until fully incorporated
- Mix in the vanilla extract, lemon juice, and salt until combined
3. Whip the Heavy Cream
- In a separate clean, cold bowl, pour the cold heavy whipping cream
- Beat on medium-high speed until soft peaks form (about 2-3 minutes)
- Continue beating until stiff peaks form, but be careful not to over-whip or the cream will become grainy
- The cream should hold its shape when you lift the beaters and form peaks that stand straight up
4. Fold the Whipped Cream into the Cream Cheese
- Add about one-third of the whipped cream to the cream cheese mixture
- Use a rubber spatula to gently fold the cream into the mixture using a circular motion
- This initial folding lightens the cream cheese and makes it easier to incorporate the rest
- Add the remaining whipped cream and fold gently until no white streaks remain
- Be patient with this step – aggressive mixing will deflate the whipped cream and result in a dense cheesecake
5. Fill and Chill
- Remove the crust from the refrigerator
- Pour the filling into the prepared crust, spreading it evenly with a spatula
- Smooth the top with an offset spatula or the back of a spoon
- Tap the pan gently on the counter a few times to release any air bubbles
- Cover the pan tightly with plastic wrap, making sure the wrap doesn’t touch the surface
- Refrigerate for at least 6 hours, though overnight is even better for the best texture and flavor
6. Release and Serve
- When ready to serve, run a thin knife around the edge of the cheesecake
- Release the springform pan clasp slowly and carefully remove the outer ring
- If you lined the bottom with parchment paper, you can slide the cheesecake onto a serving plate
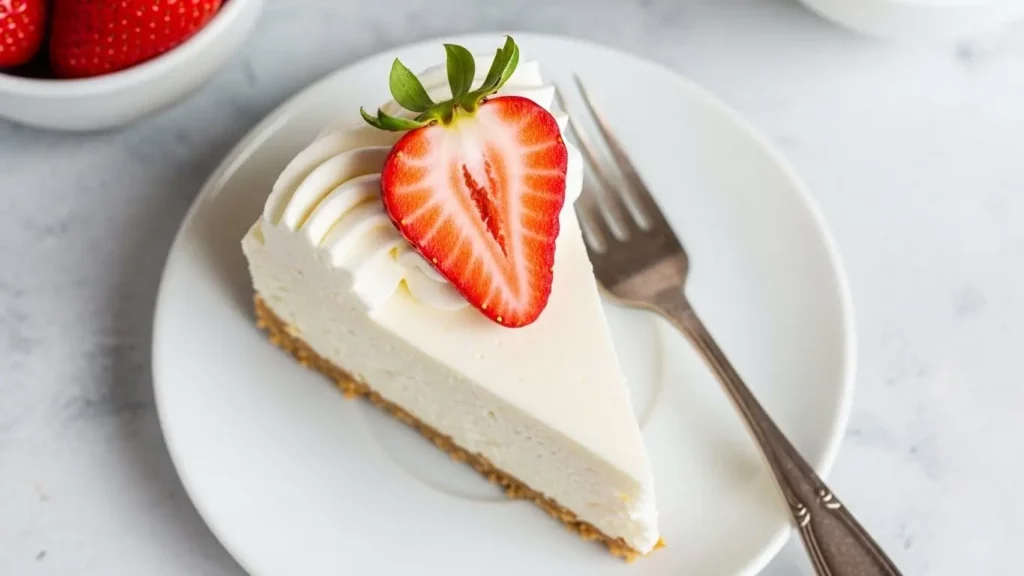
- Let the cheesecake sit at room temperature for 10-15 minutes before slicing for easier cutting
- Use a sharp knife dipped in hot water and wiped clean between each slice for clean cuts
You might also enjoy: Pumpkin Cheesecake Recipe
Tips for Success
These tips have saved me from many potential cheesecake disasters over the years. Follow them, and you’ll avoid the most common pitfalls that can ruin an otherwise perfect dessert.
- Room temperature cream cheese is non-negotiable – Cold cream cheese will leave lumps no matter how long you mix it. Let it sit out for at least an hour before starting.
- Don’t over-whip the heavy cream – Stop beating as soon as stiff peaks form. Over-whipped cream will separate and create a grainy texture in your cheesecake.
- Fold, don’t stir – When combining the whipped cream with the cream cheese, use gentle folding motions to preserve the airiness.
- Chill overnight if possible – The cheesecake is technically set after 6 hours, but overnight chilling allows the flavors to develop and the texture to become even creamier.
- Use a hot knife for clean slices – Dip your knife in hot water, wipe it dry, then make your cut. Clean and repeat between each slice.
Another favorite: Banana Cream Pie Recipe
Serving Suggestions
This cheesecake is delicious on its own, but adding toppings takes it to another level. I like to wait until just before serving to add any toppings so they stay fresh and don’t make the cheesecake soggy.
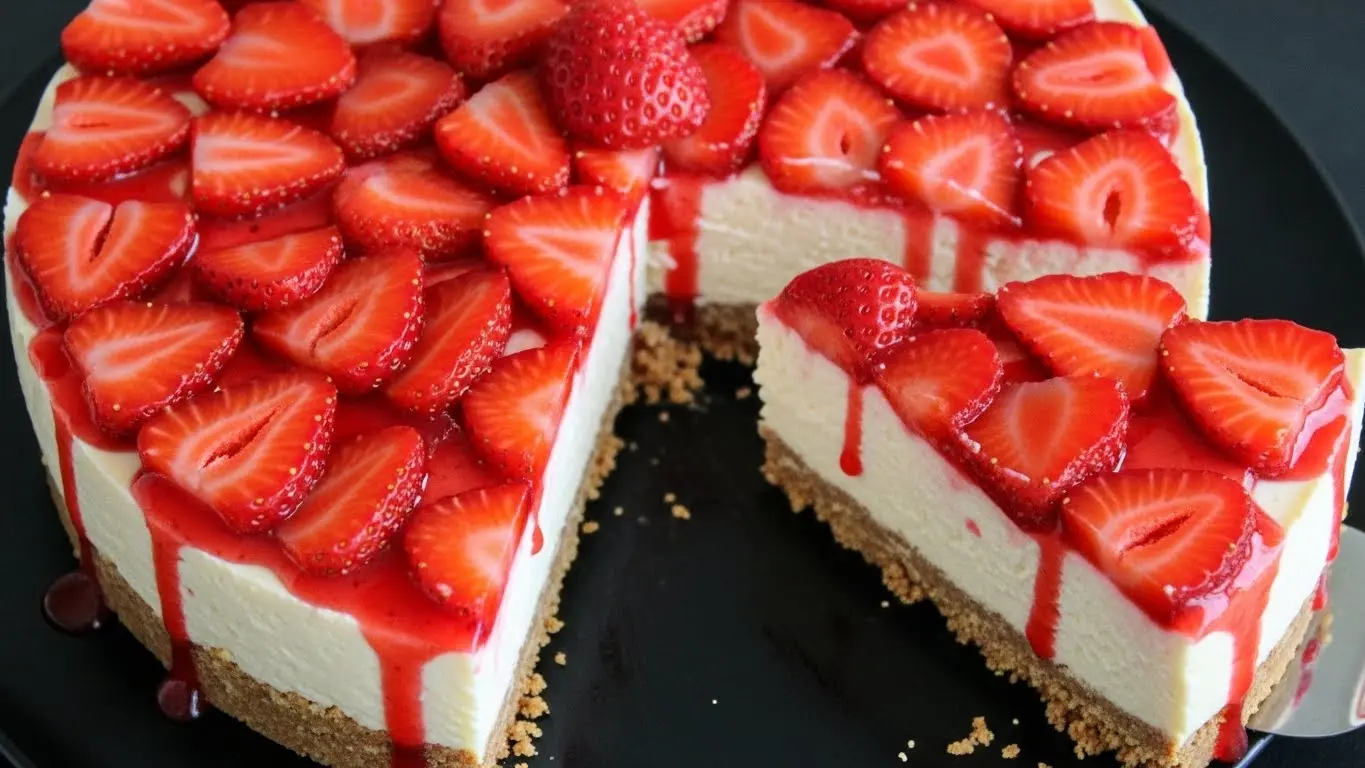
Fresh berries are my go-to topping because their tartness balances the richness of the cheesecake perfectly. A simple berry compote made with strawberries, blueberries, or raspberries adds both flavor and visual appeal.
Here are some topping ideas that work beautifully:
- Fresh strawberries – Sliced or whole, macerated with a bit of sugar
- Blueberry compote – Simmered fresh or frozen blueberries with sugar and lemon juice
- Chocolate ganache – Pour it over the top for a decadent touch
- Caramel drizzle – Store-bought or homemade caramel sauce adds a sweet, buttery note
- Whipped cream rosettes – Pipe fresh whipped cream around the edges for an elegant presentation
- Lemon curd – Adds a bright, tangy contrast to the creamy filling
- Cherry topping – Classic and always crowd-pleasing
- Crushed cookies – Oreos, graham crackers, or shortbread add extra crunch
Variations to Try
Once you’ve mastered the basic recipe, these variations will keep things interesting. I rotate through different flavors depending on the season and what I’m in the mood for.
- Chocolate no-bake cheesecake – Melt 8 ounces of semi-sweet chocolate and fold it into the cream cheese mixture before adding the whipped cream
- Strawberry swirl – Make a strawberry puree and swirl it through the filling before chilling
- Oreo cheesecake – Replace the graham cracker crust with crushed Oreos and fold mini Oreo pieces into the filling
- Peanut butter – Add ¾ cup of creamy peanut butter to the cream cheese mixture for a rich, nutty flavor
- Key lime – Replace the lemon juice with lime juice and add lime zest to the filling for a tropical twist
- Pumpkin spice – Mix in ¾ cup pumpkin puree and 1 teaspoon pumpkin pie spice for a fall-inspired dessert
- Lemon – Increase the lemon juice to ¼ cup and add 2 tablespoons of lemon zest for a bright, citrusy cheesecake
Read Also: Cherry Pie Recipe
Storage and Reheating
Proper storage keeps your cheesecake fresh and delicious for days. I always cover mine tightly because cheesecake absorbs odors from other foods in the refrigerator easily.
- Refrigerator storage – Cover the cheesecake tightly with plastic wrap or store it in an airtight container. It will keep for 5-7 days in the refrigerator.
- Freezing instructions – Freeze individual slices wrapped in plastic wrap and then aluminum foil for up to 2 months. Thaw overnight in the refrigerator before serving.
- Room temperature warning – Never leave the cheesecake at room temperature for more than 2 hours, as the cream cheese filling can spoil.
- Toppings – Add fresh toppings just before serving rather than storing the cheesecake with toppings already on it.
Nutritional Facts
Per serving (1 slice, based on 12 servings):
- Calories: 420
- Total Fat: 33g
- Saturated Fat: 20g
- Cholesterol: 95mg
- Sodium: 280mg
- Total Carbohydrates: 28g
- Dietary Fiber: 0g
- Sugars: 21g
- Protein: 6g
Note: Nutritional values are approximate and will vary based on specific ingredients used and portion sizes.
Health Benefits of Key Ingredients
While this is definitely an indulgent dessert, some of the ingredients do offer nutritional benefits. I’m not saying this is health food, but it’s nice to know you’re getting something beyond just deliciousness.
Cream cheese provides protein and calcium, which support bone health and muscle function. The full-fat version also contains vitamin A, which is important for eye health and immune function.
Additional benefits include:
- Graham crackers – Whole grain varieties provide some fiber and B vitamins
- Lemon juice – Contains vitamin C and antioxidants that support immune health
- Heavy cream – Provides fat-soluble vitamins like A, D, E, and K
- Eggs (in some variations) – Excellent source of high-quality protein and choline
This pairs beautifully with my Hot Chocolate Recipe for a complete dessert experience.
Frequently Asked Questions
1. Can I make this cheesecake without a springform pan?
Yes, you absolutely can use a regular pie dish or a 9-inch square baking pan instead. The cheesecake will taste just as good, though it will be slightly harder to remove clean slices. If using a regular pan, line it with parchment paper with overhanging edges so you can lift the entire cheesecake out before slicing.
2. How do I know when the cheesecake is fully set?
The cheesecake should be firm to the touch around the edges but still have a slight jiggle in the very center. After 6 hours of chilling, gently shake the pan – if the center moves like jello rather than liquid, it’s ready. For the firmest texture, chill overnight.
3. Why is my no-bake cheesecake grainy?
Graininess usually comes from three issues: cream cheese that wasn’t fully softened before mixing, over-whipped heavy cream, or powdered sugar that wasn’t fully incorporated. Make sure your cream cheese sits at room temperature for at least an hour and beat it until completely smooth before adding other ingredients.
4. Can I use low-fat cream cheese or whipped cream cheese?
I don’t recommend it for this recipe. Low-fat cream cheese contains more water and less fat, which results in a thinner, less creamy filling that may not set properly. Whipped cream cheese has air incorporated into it, which throws off the ratio and can make the cheesecake too soft.
5. How do I prevent the crust from getting soggy?
Press the crust firmly into the pan to compact it, which creates a barrier against moisture. You can also brush the crust with a thin layer of melted white chocolate before adding the filling, which creates a waterproof seal. Make sure the crust is completely chilled before adding the filling.
For a lighter option, try: Fruit Salad Recipe
Final Thoughts
This no bake cheesecake recipe has earned its place as one of my most-requested desserts, and for good reason. It delivers all the rich, creamy satisfaction of a traditional cheesecake without the stress, time, or technical skill that baking usually requires.
I love how forgiving this recipe is – even beginners can make it successfully on their first try. The texture is impossibly smooth, the flavor is perfectly balanced, and you can customize it with endless topping and flavor variations to suit any occasion.
Give this recipe a try for your next gathering, or just make it for yourself on a weekend afternoon. I’d love to hear how yours turns out, so drop a comment below and let me know what toppings you used or if you tried any of the flavor variations!
Recommended:
- Chocolate Pie Recipe
- Key Lime Pie Recipe
- Lemon Meringue Pie Recipe
- Sweet Potato Pie Recipe
- Peach Pie Recipe
- Blueberry Pie Recipe
- Boston Cream Pie Recipe
- Peanut Butter Pie Recipe
- Sugar Cookies Recipe
- Tres Leches Cake Recipe


